I still remember the day I decided to build a shed in my backyard, and my parents thought I was crazy. “It’s not as easy as treasure hunting at a flea market,” they said. But I was determined to uncover the hidden potential of our outdoor space. As a travel blogger, I’ve learned that the best stories often come from unexpected places, and I was about to embark on a journey to discover the secrets of how to build a shed. With my trusty polaroid camera in hand, I documented every step of the way, from planning to execution.
As I share my experience with you, I promise to give you the honest truth about what it takes to build a shed. No fancy jargon or complicated instructions, just straightforward advice from someone who’s been there. In this article, you’ll learn the essentials of shed building, from choosing the right materials to adding the final touches. My goal is to inspire you to take on this project with confidence, and to show you that with a little creativity, your shed can become a hidden gem in your backyard. So, let’s get started on this adventure together, and uncover the secrets of how to build a shed that will make your neighbors jealous!
Table of Contents
Guide Overview: What You'll Need
Total Time: 8 hours to 2 days
Estimated Cost: $500 – $2000
Difficulty Level: Intermediate / Hard
Tools Required
- Circular Saw (for cutting lumber)
- Drill (with screwdriver and drill bits)
- Tape Measure (for measuring and marking lumber)
- Level (for ensuring the shed is level)
- Hammer (for tapping screws and nails into place)
- Utility Knife (with extra blades)
- Wrench (for tightening bolts and nuts)
- Ladder (for reaching high areas)
Supplies & Materials
- 2-in x 4-in lumber (for framing)
- 2-in x 6-in lumber (for roofing and floor support)
- Plywood (for flooring and walls)
- Roofing felt (for waterproofing the roof)
- Asphalt shingles (for roofing)
- Exterior-grade pine (for trim and doors)
- Hinges (for doors)
- Nails (for framing and exterior finishing)
- Screws (for assembling the shed)
- Weatherproof glue (for sealing gaps and joints)
- Paint or stain (for finishing the exterior)
Step-by-Step Instructions
- 1. First, let’s start with the basics: gather all the necessary materials and tools for your shed-building adventure. This includes a tape measure, hammer, saw, drill, and all the lumber and roofing supplies you’ll need. I like to make a checklist to ensure I don’t forget anything, and I always find it helpful to double-check my measurements to avoid any mistakes.
- 2. Next, prepare the site where your shed will stand. This involves clearing the area of any debris, trees, or other obstacles. You’ll also want to level the ground to ensure your shed is stable and secure. I remember one time I was building a shed, and I didn’t level the ground properly – let’s just say it was a bit of a wobbly disaster.
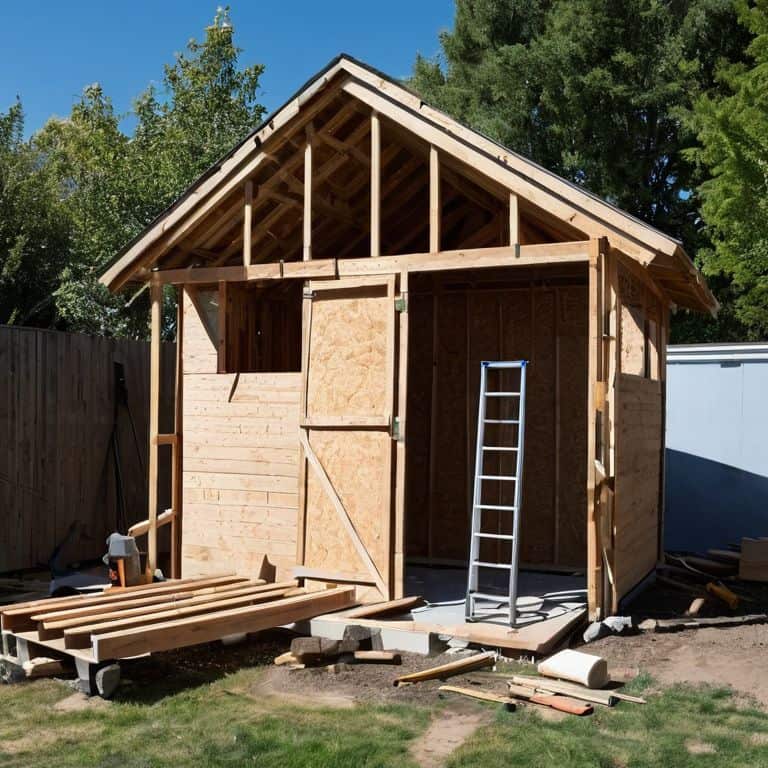
- 3. Now it’s time to lay the foundation of your shed. This typically involves creating a frame using lumber, and then adding a floor made of plywood or oriented strand board (OSB). Make sure to secure the frame to the ground using anchors or other hardware to prevent it from shifting or toppling over.
- 4. With the foundation in place, you can start building the walls of your shed. This involves constructing a series of panels using lumber and nails, and then assembling them to form the walls. Be sure to leave space for doors and windows, and consider adding any additional features you might want, such as a ramp or a loft.
- 5. Once the walls are up, it’s time to add the roof to your shed. This can be a bit tricky, so be sure to follow the manufacturer’s instructions for your specific roofing materials. I like to use asphalt shingles, which are easy to install and provide great protection against the elements.
- 6. Next, add the doors and windows to your shed. This involves hanging the doors using hinges and a latch, and installing the windows using a combination of nails and sealant. Make sure to weatherproof any gaps or openings to prevent leaks or drafts.
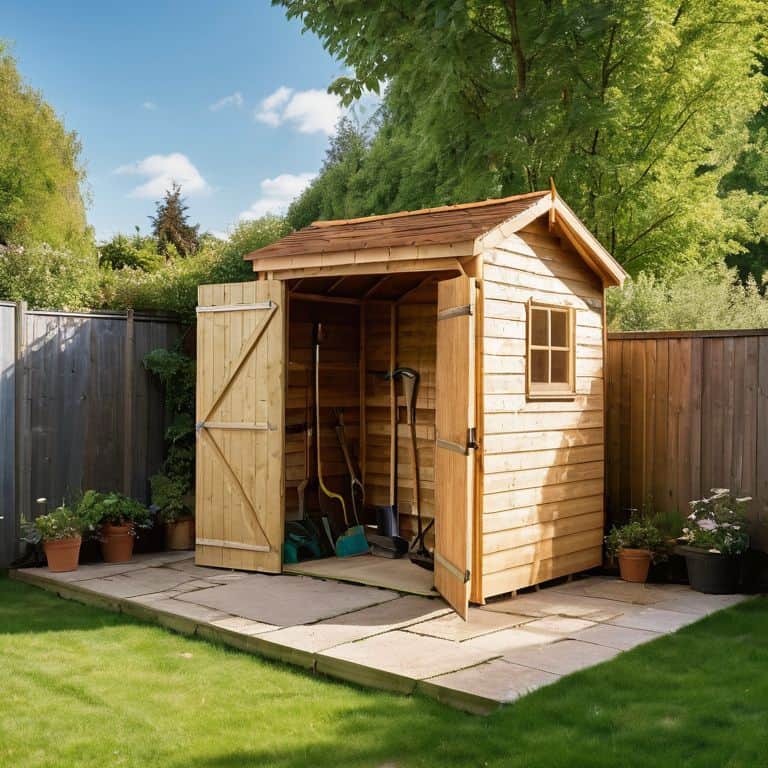
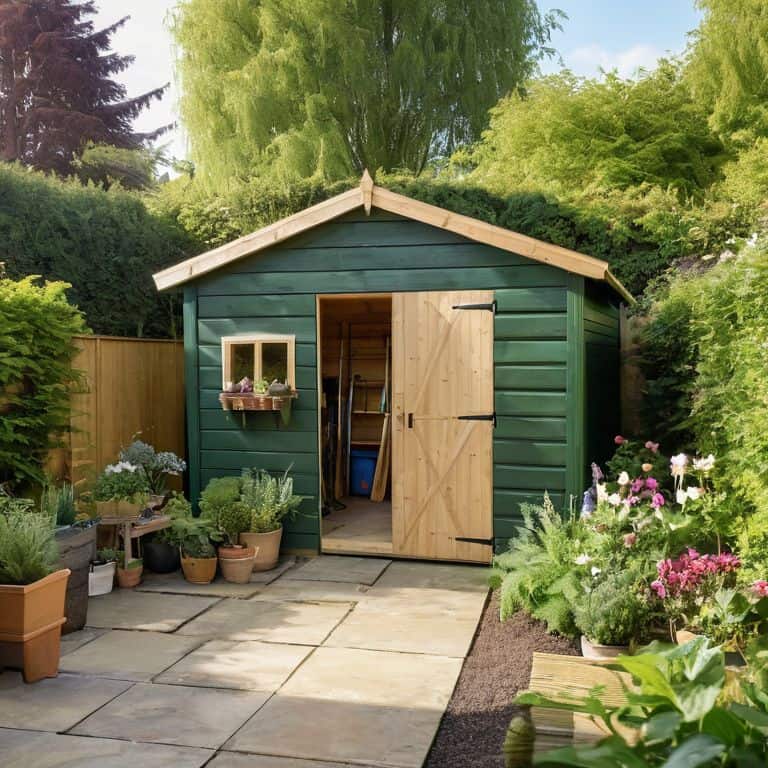
- 7. Finally, add any finishing touches to your shed, such as trim and molding, and paint or stain the exterior to protect it from the elements and give it a nice appearance. I like to add a few decorative touches, such as a wreath or a sign, to make my shed feel more like a cozy little retreat.
How to Build a Shed
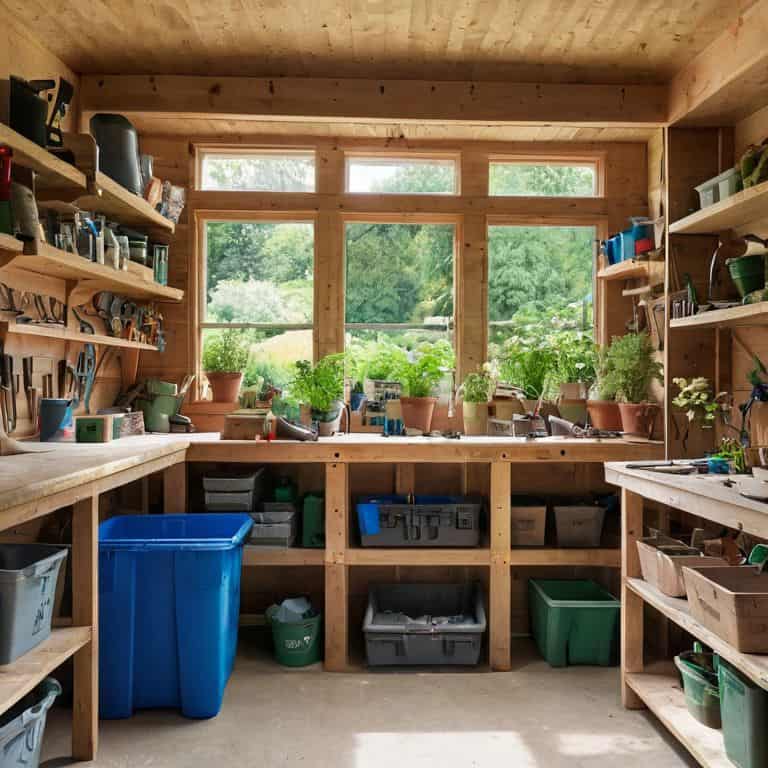
As I delve into the world of shed building, I’m reminded of my treasure hunting adventures at flea markets. I’ve discovered that a well-designed shed can be a treasure in itself, especially when it comes to shed organization systems. A cleverly planned shed can provide ample storage space, keeping your backyard clutter-free and making it easier to find what you need.
When it comes to shed design ideas, consider the slope of your land. Building a shed foundation on slope requires careful planning to ensure stability and safety. I’ve seen some creative solutions, such as using adjustable foundations or constructing a retaining wall, which can also add a unique touch to your shed’s design.
To add the final touches to your shed, consider diy shed roofing options. Not only can they be cost-effective, but they also offer a range of styles to suit your backyard aesthetic. From asphalt shingles to metal roofs, the choices are endless, and with a little creativity, you can create a shed that’s both functional and visually appealing.
Diy Shed Roofing Options
As I wandered through a flea market last summer, I stumbled upon an old, rusty roofing tile that sparked an idea for my own shed’s roof. I realized that the right roofing can make or break the overall aesthetic of your shed. When it comes to DIY shed roofing options, you have a few exciting choices. You could go for asphalt shingles, which are easy to install and relatively inexpensive, or maybe metal roofing, which offers a sleek, modern look and is remarkably durable.
I’ve seen some incredible examples of cedar shake roofing at local flea markets, which adds a warm, rustic touch to any shed. Whatever option you choose, remember to consider factors like weather resistance, maintenance, and of course, style. I’ve collected a few postcards from my travels with beautiful shed roofing designs – maybe one day I’ll feature them in a story about the perfect backyard hideaway.
Shed Design Ideas for Slopes
When it comes to building a shed on a slope, the design possibilities are endless. I’ve seen some amazing examples of slope-friendly sheds during my treasure hunting adventures at flea markets, where innovative builders have turned a potential obstacle into a unique feature. Consider using a pier-and-beam foundation or a sloping roof to complement the natural incline of your land. Not only will this create a visually appealing shed, but it will also help to prevent water from accumulating around the foundation.
As I flipped through my collection of postcards from various destinations, I found inspiration in the creative ways people have built sheds into hillsides. From modern, minimalist designs to cozy, rustic cabins, the key is to work with the natural terrain rather than against it. By doing so, you can create a shed that not only serves its purpose but also blends seamlessly into the surrounding landscape, becoming a charming hideaway that adds character to your outdoor space.
Hammering Out the Essentials: 5 Key Tips for Building Your Dream Shed
- Start with a solid foundation: Ensure your shed’s base is level and secure to prevent any future structural issues
- Measure twice, cut once: Double-check your measurements to avoid costly mistakes and wasted materials
- Choose the right materials: Consider durability, maintenance, and aesthetic appeal when selecting woods, roofs, and doors for your shed
- Consider the slope: If you’re building on uneven ground, think about incorporating a ramp or adjusting your design to accommodate the incline
- Add some personality: Don’t be afraid to get creative with your shed’s design – add some windows, a unique door, or a splash of color to make it truly yours
Unpacking the Essentials: 3 Key Takeaways for Your Dream Shed
Embracing the slope: Don’t let uneven terrain hold you back – with the right shed design ideas, you can turn a challenge into a unique feature that sets your backyard apart
Roofing revelations: From asphalt shingles to metal roofing, the right DIY shed roofing option can elevate your shed’s style and durability, ensuring it withstands the elements and remains a charming hideaway
Beyond the blueprint: Building a shed is not just about following instructions – it’s about infusing your personality into every beam and brick, so don’t be afraid to get creative and make your shed a reflection of your adventurous spirit
Building Wisdom
As I’ve learned from my treasure hunts and travels, building a shed is not just about hammering nails into wood, it’s about crafting a haven that reflects your story and adds a chapter to your home’s narrative.
Vera Kump
Reflecting on Your Shed-Building Journey
As we conclude our step-by-step guide on how to build a shed, let’s take a moment to reflect on the key takeaways. From choosing the perfect design for your slope to selecting the best DIY roofing options, each decision plays a crucial role in bringing your vision to life. Remember, the process of building a shed is not just about following instructions, but also about adding a personal touch to make it truly unique. Whether you’re a seasoned DIY enthusiast or a beginner, the sense of accomplishment you’ll feel when your shed is complete is unparalleled.
Now that you’ve embarked on this journey, I encourage you to think beyond the shed. Consider the endless possibilities it presents – a cozy reading nook, a workspace for your hobbies, or simply a serene spot to connect with nature. As you stand back to admire your handiwork, remember that the real magic happens in the moments you spend enjoying your new space, surrounded by the people and things you love. So go ahead, get creative, and make your shed a hidden gem that tells a story of its own.
Frequently Asked Questions
What are the most essential tools I need to have before starting to build a shed?
Oh, I’m so glad you’re excited to start building! Before we dive in, make sure you have the essentials: a trusty hammer, tape measure, level, and a saw. I like to think of them as my treasure-hunting tools, but instead of flea market finds, we’re uncovering a beautiful shed!
How do I ensure my shed is level and securely anchored to the ground?
To ensure your shed is level and securely anchored, I always say, “check those foundations.” Make sure your base is even and consider using anchor kits or concrete footings for extra stability. Trust me, it’s worth the extra effort to prevent any wonky walls or wobbly roofs – been there, done that, and got the polaroid to prove it!
What are some creative ways to repurpose or upcycle materials for building a unique and eco-friendly shed?
I just love giving old materials a new life. Flea market finds like vintage windows, reclaimed wood, and retro doors can add such character to your shed. You can also repurpose old pallets, containers, or even an old bus as a quirky shed. Get creative and think outside the box – or shed, in this case!


