I still remember the first time I tried to replace a wall outlet in my parents’ quaint bed-and-breakfast – it was a thrilling adventure, to say the least. The task seemed daunting, but I was determined to learn how to safely replace a wall outlet without calling in a professional. As I embarked on this journey, I realized that many people believe replacing a wall outlet is a complex, potentially dangerous task that’s best left to the experts. However, I’m here to tell you that with the right guidance, it’s actually a relatively straightforward process.
In this article, I’ll share my personal experience and provide you with practical, no-nonsense advice on how to safely replace a wall outlet. You’ll learn exactly what tools you need, how to prepare for the task, and the step-by-step process to get the job done efficiently. My goal is to empower you with the knowledge and confidence to tackle this project on your own, so you can enjoy the sense of accomplishment that comes with it. By the end of this guide, you’ll be well on your way to becoming a DIY expert, and who knows, maybe you’ll even discover a new passion for home improvement projects.
Table of Contents
Guide Overview: What You'll Need
Total Time: 30 minutes to 1 hour
Estimated Cost: $10 – $30
Difficulty Level: Easy / Intermediate
Tools Required
- Voltage Tester (for safety checks)
- Needle-Nose Pliers (for wire handling)
- Screwdriver (flathead and Phillips)
- Wire Strippers (for 14-gauge or 12-gauge wire)
- Utility Knife (with extra blades)
Supplies & Materials
- New Wall Outlet (15-amp or 20-amp, depending on the circuit)
- Wire Nuts (for connecting wires)
- Outlet Screws (for securing the outlet to the wall)
- Wall Plate (to cover the outlet)
Step-by-Step Instructions
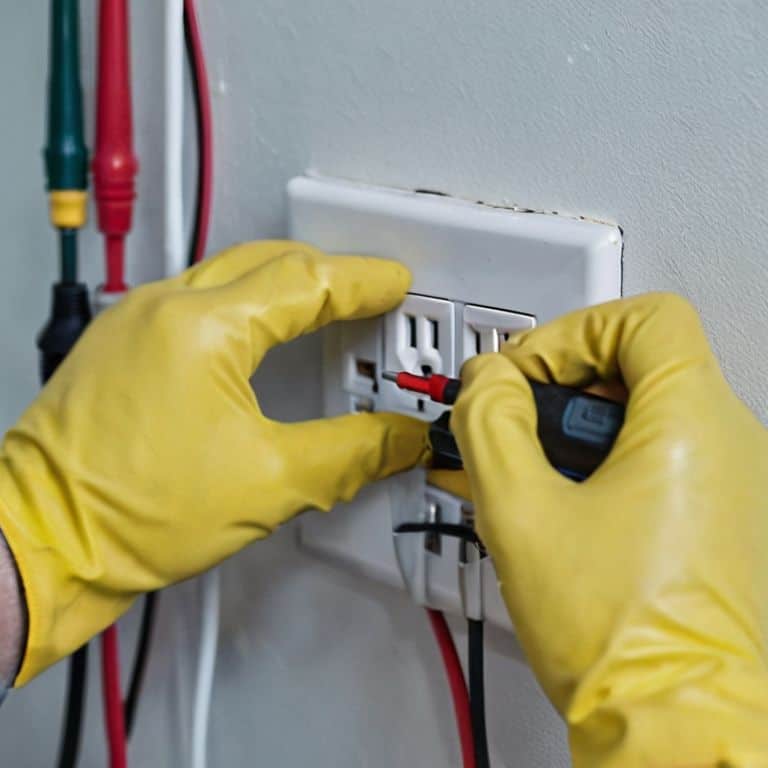
- 1. First, let’s get started with preparing the site for our outlet replacement adventure. This means switching off the power to the circuit at the main electrical panel – don’t worry, it’s easier than navigating a flea market on a busy Sunday. Make sure to verify the power is off using a non-contact voltage tester, a handy tool that’s become a trusted companion in my travels.
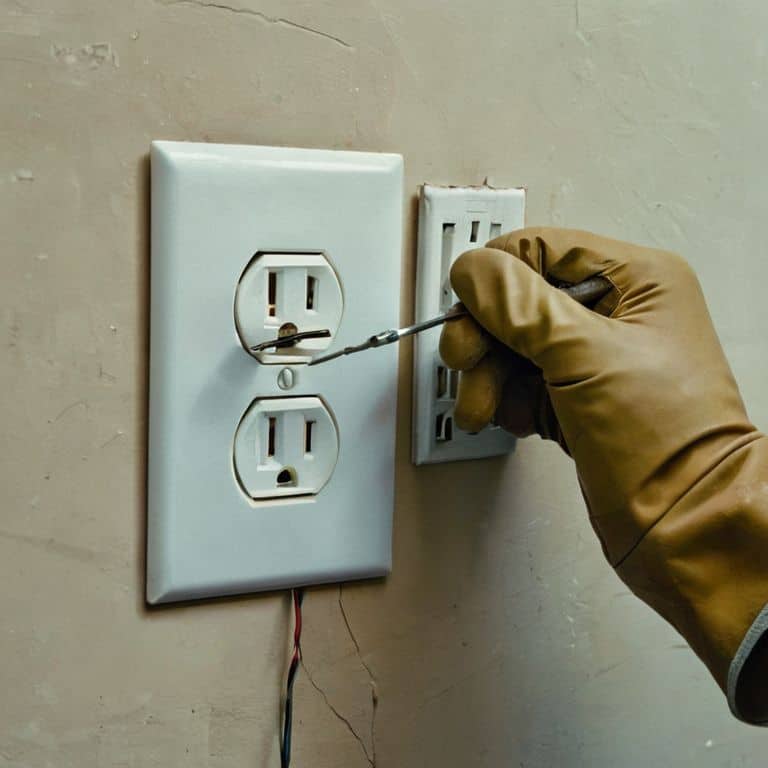
- 2. Next, we’ll need to remove the outlet cover plate to expose the outlet itself. This is similar to uncovering a hidden gem at a flea market – you never know what treasures you might find. Use a screwdriver to remove the screws holding the cover plate in place, and gently pull it away from the wall. As I always say, the devil is in the details, so take a moment to inspect the outlet and its surroundings.
- 3. Now, it’s time to disconnect the wires from the old outlet. This can be a bit like solving a puzzle, but don’t worry, I’ve got your back. Use a voltage tester to double-check there’s no power flowing through the wires, and then carefully pull the wires off the outlet’s terminals. You might need to use a pair of needle-nose pliers to grip the wires, especially if they’re stuck. As you work, remember to take your time and be patient – it’s all part of the journey.
- 4. With the wires disconnected, we can remove the old outlet from the wall. This is often the most satisfying part of the process, like finding that rare postcard at a market. Use a screwdriver to remove the screws holding the outlet in place, and then gently pull it out of the wall. As you handle the old outlet, be careful not to touch any of the internal components.
- 5. Next up, we’ll prepare the new outlet for installation. This involves removing any packaging and inspecting the outlet for any damage or defects. Take a moment to familiarize yourself with the outlet’s terminals and screws – it’s like getting to know a new travel companion. Make sure you understand how everything fits together before proceeding.
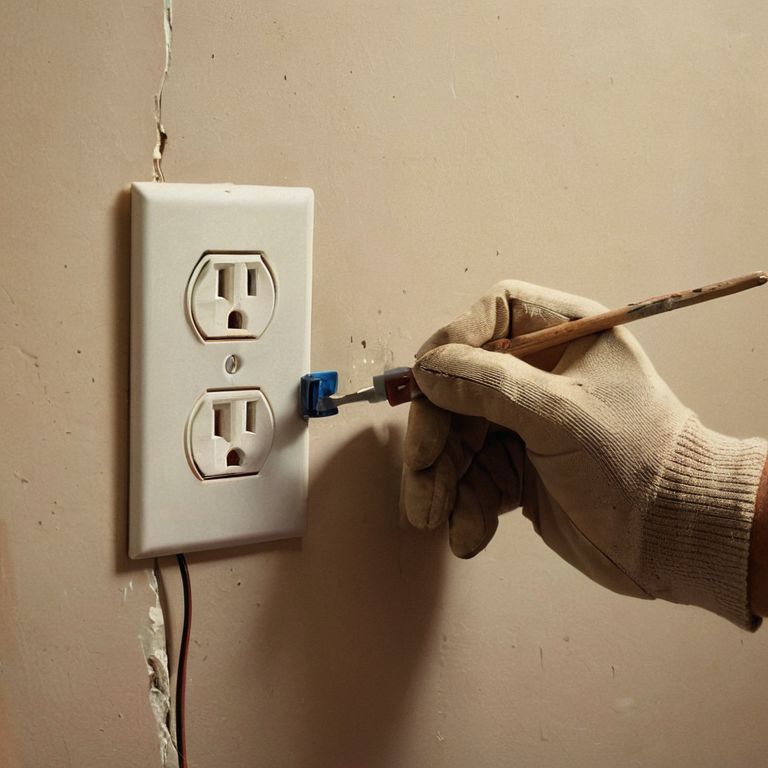
- 6. Now, it’s time to connect the wires to the new outlet. This is where things can get a bit tricky, but don’t worry, I’ve been in tougher spots than a crowded market on a Saturday. Use your needle-nose pliers to grip the wires, and then connect them to the corresponding terminals on the new outlet. Remember to double-check your connections to ensure everything is secure and in place.
- 7. With the wires connected, we can mount the new outlet in the wall. This is like finding the perfect spot to display your favorite treasure – it’s all about the placement. Use your screwdriver to secure the outlet in place, making sure it’s level and firmly attached to the wall. As you tighten the screws, be careful not to overtighten, which can damage the outlet or the wall.
Safely Replacing Outlets
As I delve into the world of DIY electrical projects, I’ve come to realize that replacing outdated outlets is just the beginning. It’s essential to understand the outlet wiring diagrams to ensure a smooth and safe replacement process. I recall a fascinating story I stumbled upon on a postcard from a quaint little town, where the locals would often gather to share tales of their DIY adventures. One such story that caught my attention was about a clever homeowner who used a single pole switch replacement to upgrade their outdated outlets.
When it comes to diy electrical safety tips, I always stress the importance of being mindful of the electrical outlet types you’re working with. From my treasure hunting escapades at flea markets, I’ve learned to appreciate the unique characteristics of each outlet, and how they can impact the replacement process. As a travel blogger, I’ve had the opportunity to explore various destinations, and I’ve noticed that wall outlet installation codes can vary greatly from one place to another.
In my experience, the key to a successful outlet replacement lies in replacing outdated outlets with a keen eye for detail. By understanding the electrical outlet types and outlet wiring diagrams, you’ll be well on your way to a safe and successful replacement. As I always say, the devil is in the details, and when it comes to DIY electrical projects, it’s crucial to be meticulous and thorough in your approach.
Deciphering Outlet Wiring Diagrams
Deciphering outlet wiring diagrams can seem like unraveling a treasure map, but don’t worry, I’m here to guide you through it. As a seasoned treasure hunter at flea markets, I’ve learned to spot the hidden patterns and clues. Similarly, when it comes to outlet wiring, it’s all about understanding the symbols and colors. The black wires are usually the hot wires, while the white wires are neutral, and the copper wires are your grounds. By recognizing these patterns, you’ll be able to navigate even the most complex wiring diagrams with ease.
As I always say, the key to success lies in the details. Take your time to study the diagram, and don’t be afraid to consult multiple sources. I like to think of it as collecting postcards from different destinations – each one offers a unique perspective, and together, they create a comprehensive picture. With practice, you’ll become proficient in deciphering outlet wiring diagrams, and safely replacing outlets will become a breeze.
Mastering Diy Electrical Safety Tips
As I delve into the world of DIY electrical safety, I’m reminded of my treasure hunting adventures at flea markets. Just as I carefully examine each vintage find, you should meticulously inspect your electrical tools and equipment. A frayed cord or a faulty wire can be a hidden danger, waiting to spark a catastrophe. By being mindful of these potential hazards, you’ll become a master of DIY electrical safety.
I’ve learned that staying safe is all about being prepared and aware. Keep a fire extinguisher nearby, and make sure you have a first aid kit on hand. It’s also essential to turn off the power to the circuit you’re working on – it’s like finding the secret map to a treasure, it’s a game-changer. By following these tips, you’ll be well on your way to becoming a DIY electrical safety expert, and your home will be a treasure trove of safe and functional spaces.
Plugging in the Essentials: 5 Key Tips for a Safe Outlet Replacement
- Shocking Truths: Always turn off the power to the outlet at the main electrical panel before starting the replacement process
- Wire Wizardry: Use a voltage tester to ensure there’s no electricity flowing to the outlet, and never trust a wiring diagram without double-checking it
- Safety Net: Invest in a non-contact voltage tester for those hard-to-reach areas, and keep a fire extinguisher nearby, just in case
- Outlet Origami: When removing the old outlet, take note of the wire colors and configurations to ensure a smooth and safe installation of the new one
- Spark of Genius: Don’t overload your new outlet with too many devices, and consider upgrading to a smart outlet for extra safety features and energy monitoring capabilities
Plugging into Success: 3 Key Takeaways
Always turn off the power to the outlet at the main electrical panel before starting the replacement process to avoid any electrical shocks or injuries
Understand and decipher the outlet wiring diagram to ensure correct connections and a safe replacement, just like uncovering the hidden patterns of a treasure map
Master DIY electrical safety tips, such as using voltage testers and following local electrical codes, to emerge victorious in your outlet replacement adventure and keep your home safe and sound
Spark of Wisdom
As I’ve learned from my treasure hunts and travels, replacing a wall outlet isn’t just about swapping wires, it’s about illuminating the path to a safer, brighter home – one spark at a time.
Vera Kump
Plugging into Success: A Job Well Done
As I reflect on our journey to safely replace a wall outlet, I want to emphasize the importance of mastering DIY electrical safety tips. We’ve deciphered outlet wiring diagrams, understood the necessity of turning off the power, and carefully followed each step to ensure a successful replacement. It’s been an adventure in itself, and I hope you’ve enjoyed the ride as much as I have. From safely replacing outlets to understanding the basics of electrical work, we’ve covered it all. Remember, the key to a successful DIY project is not just about following instructions, but also about being mindful of your surroundings and taking the necessary precautions.
As you plug in your first device into the newly replaced outlet, remember that this sense of accomplishment is just the beginning. The thrill of the unknown is what drives us to take on new challenges, and I hope this experience has inspired you to tackle more projects on your own. Whether it’s exploring the world of DIY home improvement or simply trying a new recipe, always keep in mind that the journey is just as important as the destination. So, go ahead, take on that next project, and who knows, you might just discover a new passion or talent. Happy building, and don’t forget to share your stories!
Frequently Asked Questions
What are the most common mistakes to avoid when replacing a wall outlet to ensure safety?
Oh, the thrill of outlet replacement! When swapping out those old sockets, beware of common pitfalls like incorrect wire connections, insufficient shutdown of power, and overlooking local electrical codes – it’s like navigating a treasure hunt, you’ve got to be mindful of the hidden traps to uncover the treasure of a job well done!
How do I know if I need to hire a professional electrician or can I replace the outlet myself?
If you’re unsure about tackling the outlet replacement yourself, ask: are you comfy with wiring diagrams and DIY electrical safety? If not, it’s best to call in a pro to avoid any shocks – literally! But if you’re feeling adventurous, I’ve got your back with some handy tips to help you decide.
What are some signs that I've successfully replaced the wall outlet and it's working properly?
The moment of truth! You’ve swapped out the outlet, and now it’s time to test your handiwork. Look for signs like a snug fit, no sparks or flickers, and a smooth flow of electricity to your devices. If your gadgets are humming along, and the outlet feels sturdy, you’ve likely done it right!