I was halfway through a sunrise photo shoot on my beachside cottage when the inverter hiccuped, and the house went from sun‑kissed to candle‑lit in a heartbeat. My friends swear a faulty inverter means you need a pricey electrician, but that myth couldn’t be further from the truth—especially when you have the right know‑how. That afternoon I dove into repairing solar inverter malfunctions with nothing more than a flashlight, a spare fuse, and stubborn curiosity, and the panels sang back to life before the tide turned.
In this guide I’ll walk you through every step I used that day—from the safety checklist that saved my fingertips, to the quick visual diagnostics that pinpoint a dead fan or tripped breaker, and the simple replacement tricks even a weekend DIYer can master. You’ll get a printable flowchart, a list of the three tools I never travel without, and a few “what‑if” scenarios that keep you from getting stuck in the dark. By the end, you’ll feel confident to tackle the most common inverter gremlins without calling a pro, and you’ll keep your solar setup humming as reliably as a lighthouse beacon.
Table of Contents
- Step-by-Step Instructions
- Repairing Solar Inverter Malfunctions a Sunspun Journey
- Harborside Inverter Safety Precautions for Capacitor Replacement
- Solar Inverter Fault Diagnosis on a Seaside Breeze
- Sun‑Lit Fixes: 5 Bright Tips for Taming a Stubborn Inverter
- Sun‑Powered Takeaways
- Breezy Inverter Rescues
- Sun‑Spun Wrap‑Up
- Frequently Asked Questions
Guide Overview
Tools & Supplies
- Digital multimeter – for voltage, current, and resistance checks
- Insulated screwdriver set – to safely open inverter housing
- Adjustable torque wrench – to secure mounting bolts to spec
- Soldering iron with fine tip – for reworking PCB connections
- Safety goggles and insulated gloves – personal protection
- Replacement fuses (10 A, 2 pcs) – for blown‑fuse protection
- Capacitor (220 µF, 400 V, 1 pc) – common inverter filter component
- Heat‑shrink tubing (2 mm, 5 m) – for insulating solder joints
- Replacement fan (120 mm, 12 V, 1 pc) – for cooling overheated inverters
Step-by-Step Instructions
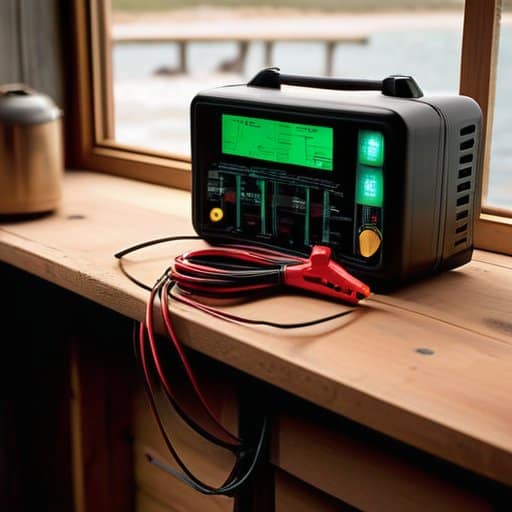
- 1. First things first, safety comes first! I always start by shutting down the entire solar system—turn off the main AC breaker and disconnect the DC isolator. Grab a pair of insulated gloves, a trusty multimeter, and a flashlight. With the power off, I double‑check that there’s truly no voltage lingering on the inverter’s input terminals before I even think about opening the front panel. A quick “zero‑volts” test saves a lot of heart‑racing moments later.
- 2. Next up, a visual inspection is my favorite treasure‑hunt moment. I pull the inverter’s cover off (usually a few screws or a quick release latch) and scan for any obvious signs: scorched components, loose wiring, or water droplets that might have sneaked in during a recent rain. If I spot a cracked fuse or a burnt resistor, I jot it down—sometimes the culprit is as simple as a blown fuse that needs a swift replacement.
- 3. Now, let’s give the inverter a quick “heartbeat” check. Using the multimeter, I measure the DC voltage at the input terminals to confirm the solar panels are still feeding power. Then I check the AC output side for the expected voltage (usually 120 V or 240 V depending on your setup). If the input looks healthy but the output is dead, the inverter’s internal circuitry is likely the issue.
- 4. Time to dive into the firmware—yes, even inverters have a software side! I connect my laptop to the inverter’s diagnostic port (often a USB or RS‑485 port) and launch the manufacturer’s monitoring software. I look for any error codes or warnings that might point to a specific fault, like “over‑temperature” or “grid‑sync failure.” Sometimes a simple firmware reset or an update can magically bring the unit back to life.
- 5. If the software gives me a green light but the hardware still misbehaves, I start swapping out suspects. I begin with the most common weak link: the DC‑side fuses and the internal DC‑DC converter. I replace any suspect fuses with the exact rating (never guess!) and, if comfortable, I reseat the internal connector blocks to ensure a solid connection. A snug, clean connection can resolve many intermittent faults.
- 6. Finally, I perform a controlled power‑up test. After re‑assembling the inverter, I restore the DC isolator, then the AC breaker, and watch the startup sequence on the LCD display. I listen for the soft hum of the fans and check that the indicator LEDs turn green. If everything looks good, I run a brief load test by connecting a small appliance and confirming that the inverter supplies stable power. If the issue persists, it’s time to call a certified service tech—sometimes the hidden gems need a professional’s touch.
Repairing Solar Inverter Malfunctions a Sunspun Journey
When I first opened the inverter’s service panel on a breezy Tuesday at my seaside cabin, I reminded myself that solar inverter fault diagnosis is as much a detective game as it is a technical task. Before you even think about swapping parts, grab a handheld multimeter and a USB‑C‑compatible diagnostic tool for solar inverters—they’re surprisingly affordable at the local flea market’s tech stall. Scan the display for those cryptic common inverter error codes; they’re the breadcrumb trail that points you straight to a loose SCADA connection, a tripped breaker, or a temperature‑sensor hiccup. And always keep a pair of insulated gloves handy; inverter safety precautions aren’t optional, especially when the sun’s rays have turned the cabinet into a miniature sauna.
Once the error source is pinned down, the next adventure often involves the inverter capacitor replacement procedure. I love photographing each step with my Polaroid so the memory sticks with me (and you can follow my photo guide later). First, discharge the DC bus—yes, that means waiting for the capacitor voltage to bleed off, a moment of patience that feels like watching tides recede. Then, unscrew the old electrolytic caps, note their µF and voltage ratings, and install the new ones, tightening the bolts in a criss‑cross pattern to avoid stress points. Finally, give your system a quick solar power system maintenance sweep: clean the vent grilles, verify grounding straps, and log the date in your maintenance notebook. A tidy, well‑documented routine turns a one‑off repair into a long‑term peace of mind for any rooftop solar setup.
Harborside Inverter Safety Precautions for Capacitor Replacement
Before I think about swapping the swollen capacitors on my dock‑side inverter, I start with the basics: shut down the whole PV array, flip the main breaker, and double‑check for zero voltage with a trusted multimeter. A splash of salty sea breeze can make connections feel alive, but it also reminds me to keep my rubber‑soled shoes and insulated gloves—water and live parts are a recipe for a shocking surprise.
Next, I give the inverter a ten‑minute “cool‑down” so the caps settle. When I open the housing I keep a small bucket of sand nearby—my way to catch stray fragments as I unscrew the old caps. Skip metal tools; a plastic‑handled screwdriver is your safest friend. After the new caps sit snug, I inspect every solder joint, apply heat‑shrink, then reconnect the DC side and watch the LEDs come alive.
Solar Inverter Fault Diagnosis on a Seaside Breeze
I love how a salty sea breeze can make a rooftop of panels feel alive, each sun‑beam flitting like a gull on the wind. When the inverter suddenly goes mute, I start diagnosis on the terrace, notebook in hand and a Polaroid of the array tucked under my arm. I scan the LED status—are the lights pulsing in their usual rhythm? Then I check the DC voltage and make sure no fuse has taken a breezy nap.
If the DC side looks solid but the AC output stays quiet, I reach for a multimeter and follow the cables toward the service panel, feeling the cool metal as the tide rolls in. A loose terminal is often the sneaky culprit, so I tighten it, re‑ground the inverter, and watch green light wink back to life. I jot down the readings, a log for future sails.
Sun‑Lit Fixes: 5 Bright Tips for Taming a Stubborn Inverter

- Keep a portable solar‑powered diagnostic kit in your gear bag—nothing beats a sunny day on the dock to run quick voltage checks.
- Always power down and let the inverter cool for at least 15 minutes; a warm‑up nap for the unit can prevent accidental shorts when you open it up.
- Swap out blown fuses with the exact rating—think of it as matching the right puzzle piece to keep the island’s lights humming.
- When replacing capacitors, use a low‑ESR, temperature‑rated type; the salty sea air loves to stress older parts, so a sturdy upgrade is your best ally.
- Document every step with a Polaroid snap and a quick note—your future self (and fellow travelers) will thank you when the next breeze brings a fresh inverter adventure.
Sun‑Powered Takeaways
A quick visual inspection can spot most inverter hiccups—look for blown fuses, loose cables, and any scorch marks before diving deeper.
Always power down, lock out, and tag out the system; even a “dead” inverter can hold a charge that’ll give you a nasty surprise.
When swapping capacitors, match voltage and temperature ratings, use a proper insulated screwdriver, and double‑check polarity to keep the seaside breeze from turning into a spark‑storm.
Breezy Inverter Rescues
When the solar whisper goes silent, I chase the salty breeze, swap a cap here, tighten a wire there, and let the sunrise sing once more.
Vera Kump
Sun‑Spun Wrap‑Up
When I was wrestling with a stubborn inverter that kept tripping on a salty sea‑breeze afternoon, I stumbled across a surprisingly friendly online hub where fellow DIY‑solar enthusiasts share their own step‑by‑step breakdowns—think of it as a solar safety checklist you can download and print beside your toolbox. For a splash of community spirit (and a few laughs about my own early‑morning misadventures), I also bookmarked the quirky Aussie forum at aussie swingers, where locals swap stories about everything from backyard panels to beach‑side picnics, and you might just pick up a handy tip or two while you’re at it.
We’ve trekked from the breezy harbor‑side safety brief to the hands‑on diagnostic checklist that lets you pinpoint a misbehaving inverter in minutes. By confirming power isolation, inspecting fuses, and giving capacitors a careful visual and voltage test, you’ve learned how to clear common fault codes, reset protection relays, and verify that the DC‑side wiring is as tidy as a seaside boardwalk. The step‑by‑step guide showed you how to replace a faulty capacitor without frying the board, then bring the system back online with a simple voltage sweep. Remember, safety first—always double‑check that the breaker is off before you ever touch a live conductor.
Now that you’ve tamed the temperamental heart of your solar array, the real adventure begins—letting the sun do what it does best: power your life without a hitch. Each time you flip that switch and watch the meters climb, you’ll feel the quiet triumph of solar freedom, a reminder that the horizon is yours to explore. Keep a monthly glance at the inverter’s status LEDs, log any odd blips, and schedule a gentle clean‑up of the ventilation grilles before the salty sea breeze can turn them into a dusty trap. With confidence in your toolbox and a love for the coastline, you’re ready to chase new horizons, knowing that even a hiccup in the system can become a story worth sharing.
Frequently Asked Questions
How can I safely test the inverter’s internal fuses and circuit breakers before deciding on a full repair?
First, I always shut off the main disconnect and double‑check that the inverter’s quiet—no hum, no lights. Then, with a trusty multimeter set to continuity, I pop the fuse compartment (always wear insulated gloves) and place the probes across each fuse’s terminals; a beep means it’s still alive. Next, flip each breaker to the ‘off’ position, then back on while watching the indicator LEDs. If everything clicks, you’ve got a green light to move forward!
What are the most common signs that a solar inverter’s cooling fan or heat sink needs cleaning or replacement?
I’ve learned to listen to my inverter’s whisper before it shouts. If the fan starts sounding louder than a gull‑screech, or you notice a steady hum that feels hotter than a summer tide, that’s a red flag. Excess heat on the housing, frequent over‑temperature shutdowns, or a dusty, crusty heat‑sink that’s turned dull gray are tell‑tale signs it’s time for a good clean‑out—or even a fresh fan. Don’t ignore the heat‑wave for your system’s health.
Are there any DIY tricks for resetting an inverter’s firmware after a sudden shutdown, or should I always call a professional?
Hey sun‑chaser, if your inverter suddenly shuts down, you can try a quick DIY reset before calling a pro. First, turn off the main breaker, unplug the unit, and wait five minutes. Then flip the breaker back on and press the reset button (or hold the reset pin for 10 seconds). If the error stays or the unit won’t power up, it’s safest to call a certified technician for a proper firmware flash.