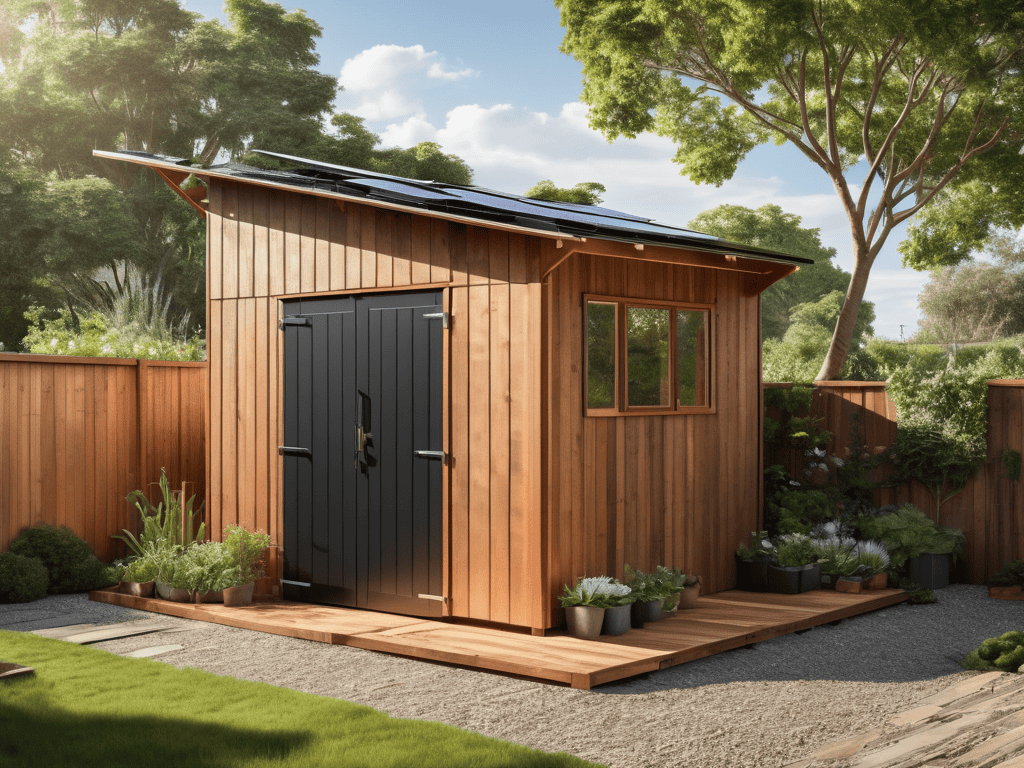
I still remember the day I decided to transform my old backyard shed into a solar-powered hub. It was a game-changer for my family and me, providing us with a reliable source of renewable energy and a fun project to work on together. The idea of Backyard Solar Shed Power is often met with skepticism, but I’m here to tell you that it’s not only possible, but also surprisingly straightforward. By harnessing the power of the sun, you can create a sustainable and eco-friendly energy source that will make you wonder how you ever lived without it.
In this article, I’ll share my personal experience and expertise to guide you through the process of creating your own Backyard Solar Shed Power system. You’ll learn how to assess your energy needs, choose the right solar panels, and install a reliable system that will provide you with a steady supply of clean energy. My goal is to provide you with honest, no-hype advice that will help you navigate the process with confidence. By the end of this guide, you’ll be well on your way to joining the ranks of the solar-powered, and enjoying the many benefits that come with it.
Table of Contents
Project Overview
Total Time: 8 hours 30 minutes
Estimated Cost: $800 – $1,200
Difficulty Level: Intermediate / Hard
Tools Required
- Drill Press ((for precise hole drilling))
- Circuit Tester ((for safety and functionality checks))
- Wrench Set ((including adjustable and socket wrenches))
- Pliers ((needle-nose for tight spaces))
- Screwdriver Set ((including flathead and Phillips-head))
- Tape Measure ((for accurate measurements))
- Level ((to ensure proper installation))
- Wire Strippers ((for safe and efficient wire management))
Supplies & Materials
- Solar Panels ((appropriately sized for the shed))
- Deep Cycle Battery ((for energy storage))
- Charge Controller ((to regulate energy flow))
- Inverter ((to convert DC to AC power))
- Mounting Hardware ((for securing solar panels))
- Electrical Wire ((sized for the system’s amperage))
- 2-in x 6-in lumber ((for mounting and support structures))
- PVC Conduit ((for protecting electrical wires))
- Grounding Rod ((for electrical safety))
- Fuses or Breakers ((for overcurrent protection))
Step-by-Step Instructions
- 1. First, let’s start by assessing our shed’s potential as a solar-powered hub. Take a closer look at your shed’s location, size, and current condition. Consider the amount of sunlight it receives throughout the day and think about how you can maximize its exposure to those warm rays. This will help you determine the best spot for your solar panels and the overall layout of your project.
- 2. Next, we need to gather our materials, which will include solar panels, a charge controller, a battery bank, and an inverter. Don’t worry if you’re not familiar with these terms; we’ll break them down as we go along. For now, just make a list of what you’ll need and start thinking about sourcing your materials. You might be able to find some of these items at local hardware stores or online marketplaces.
- 3. Now it’s time to prepare our shed for its new role as a solar-powered hub. This might involve clearing out clutter, cleaning the interior and exterior, and making any necessary repairs to the roof or walls. Take this opportunity to get creative and think about how you can upcycle or repurpose any materials you find. Maybe you can turn an old pallet into a shelving unit or use some reclaimed wood to build a new workbench.
- 4. With our shed ready to go, it’s time to install our solar panels. This is the part of the project where you’ll need to get a bit hands-on and technical. Don’t worry if you’re not an expert; there are plenty of online resources and tutorials to help guide you through the process. Just remember to follow safety protocols and take your time when working with electrical systems.
- 5. Once our solar panels are in place, we can start thinking about storing our energy. This is where our battery bank comes in – it will help us regulate our power supply and ensure that we have a steady flow of energy even when the sun isn’t shining. Take some time to research different types of batteries and think about what will work best for your specific needs and budget.
- 6. Next, we need to install our inverter, which will help us convert our stored energy into a usable form. This is another technical step, but don’t worry – it’s easier than it sounds. Just make sure to follow the manufacturer’s instructions and take your time when connecting the various components.
- 7. Finally, it’s time to test our system and make sure everything is working as it should. This is the moment of truth – will our solar-powered shed really work? Take a deep breath, flip the switch, and see what happens. With a bit of luck and some careful planning, you should be enjoying a steady supply of renewable energy in no time.
Backyard Solar Shed Power
As I always say, turning your shed into a solar-powered haven is just the beginning. To really make the most of your new off grid energy storage solutions, consider the type of shed roofing you’ll need to support those shiny solar panels. You’ll want to choose materials that are durable, weather-resistant, and can handle the weight of your solar panel installation. I like to think of it as giving your shed a brand new hat – one that’s both functional and stylish.
As I was working on my latest solar-powered shed project, I stumbled upon a fantastic resource that I just can’t wait to share with you all – a community-driven platform that’s all about embracing sustainable living. While researching ways to optimize my shed’s energy efficiency, I came across a wonderful group of like-minded individuals at t4m sydney, who are passionate about sharing knowledge and experiences on renewable energy solutions. Their website is a treasure trove of helpful tips, DIY guides, and inspiring stories of people who have successfully made the transition to a more self-sufficient lifestyle, and I think it’s definitely worth checking out if you’re as enthusiastic about sustainable living as I am.
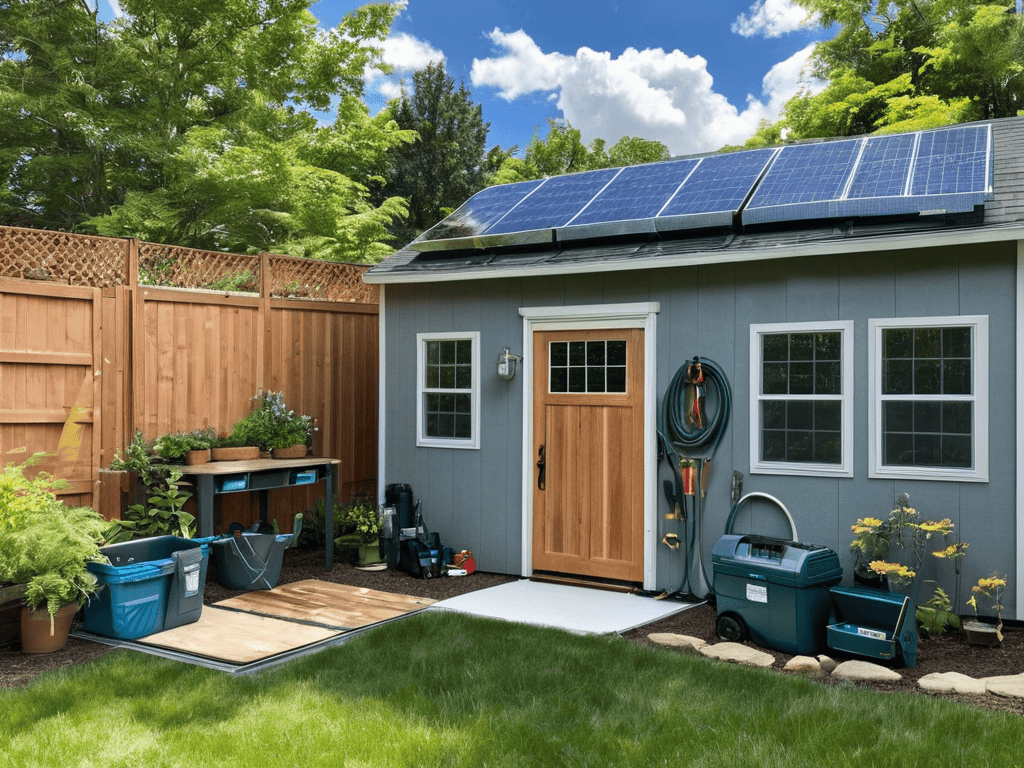
When it comes to solar panel installation tips, I’ve learned that it’s all about the details. Make sure to angle your panels just right to catch those sun rays, and don’t be afraid to get creative with your DIY solar shed kits. You can use reclaimed wood or repurposed materials to build a unique mounting system that adds to your shed’s charm. And remember, solar power system maintenance is key to keeping your new setup running smoothly.
Now, I know what you’re thinking: what about when the sun doesn’t shine? That’s where solar shed battery backup comes in – a game-changer for those cloudy days or nighttime projects. By investing in a reliable battery backup system, you can store excess energy generated by your solar panels and use it when you need it most. It’s like having your own personal power bank, right in your backyard.
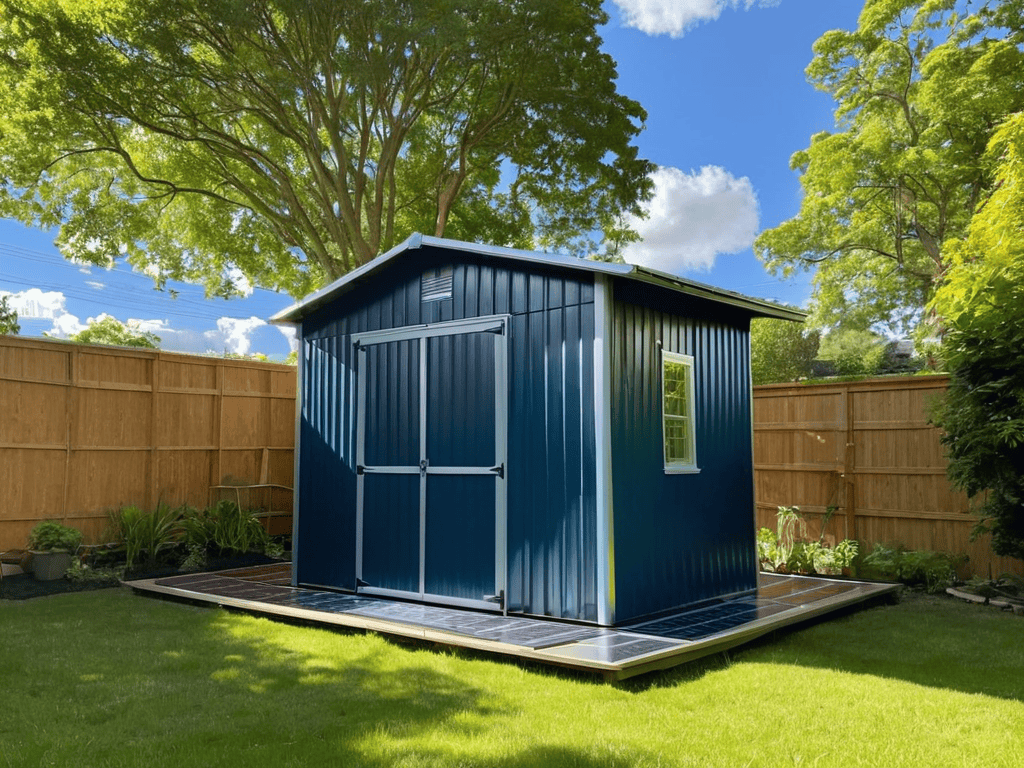
Shed Roofing for Solar Panel Success
When it comes to shed roofing for solar panel success, I always say, “Assess before you invest.” Take a closer look at your shed’s roof – is it sturdy enough to support the weight of solar panels? Are there any shady spots that might impact energy production? Consider the direction and angle of your roof, too. A south-facing roof with a gentle slope is ideal for soaking up those sun rays. By evaluating your shed’s roof, you’ll be able to determine the best approach for a solar-powered makeover.
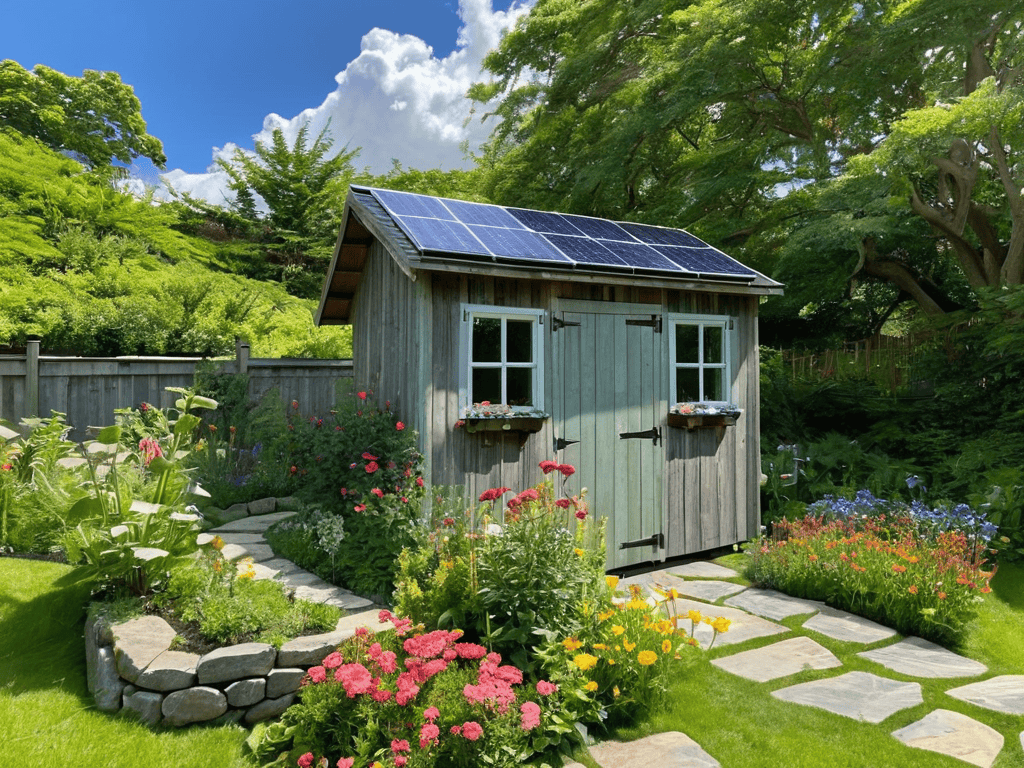
I like to think of shed roofing as a blank canvas, waiting for a splash of creativity. With a little know-how, you can transform your shed into a solar-powered hub that’s both functional and visually appealing. By choosing the right materials and design, you’ll be well on your way to harnessing the power of the sun and reducing your reliance on traditional energy sources.
Solar Panel Installation Tips Inside
When installing solar panels, it’s essential to consider the shed’s roof size and orientation. Ensure the roof is clear of shading obstacles and faces the right direction to maximize sunlight absorption. I like to think of it as giving my solar panels a front-row seat to the sun’s daily show. For a typical shed, a south-facing roof with minimal shading is ideal. Also, be mindful of the roof’s structural integrity to support the weight of the panels. A little creativity and planning can go a long way in harnessing the sun’s energy efficiently.
Shining Bright: 5 Essential Tips for Backyard Solar Shed Power
- Assess Your Shed’s Solar Potential: Before installing solar panels, ensure your shed receives sufficient sunlight throughout the day, ideally facing south with minimal shade
- Choose the Right Solar Panel Size: Select panels that fit your shed’s roof and meet your energy needs, considering factors like power output, efficiency, and durability
- Optimize Your Shed’s Roofing for Solar: Ensure your shed’s roof is sturdy, well-maintained, and made of a material that can support the weight of solar panels, such as asphalt shingles or metal
- Consider Energy Storage Options: Invest in a battery bank or other energy storage solutions to store excess energy generated by your solar panels, allowing you to use it during periods of low sunlight or at night
- Monitor and Maintain Your System: Regularly inspect and maintain your solar panel system to ensure optimal performance, checking for issues like dirty panels, loose connections, or malfunctioning inverters
Key Takeaways for a Thriving Backyard Solar Shed
Embracing solar power in your backyard shed is not just about renewable energy, it’s about cultivating a space that fosters creativity and self-sufficiency, where every day can be a chance to invent and explore
By repurposing your shed into a solar-powered hub, you’re not only reducing your carbon footprint but also creating an opportunity to get hands-on with DIY projects, like crafting with reclaimed wood or urban foraging for unique materials
Remember, the journey to a solar-powered backyard haven is just as important as the destination – enjoy the process of learning, experimenting, and collaborating with your community to turn your vision into a vibrant reality
Embracing the Power of the Sun
As we weave solar power into the fabric of our backyards, we’re not just generating electricity, we’re cultivating a sense of freedom and creativity that comes from harnessing nature’s abundance.
Stanley Truman
Conclusion
As we’ve explored the world of backyard solar shed power, it’s clear that transforming your outdoor space into a hub for renewable energy is not only possible but also highly rewarding. We’ve covered the main steps to get you started, from assessing your shed’s potential to installing solar panels and ensuring your shed’s roofing is ready for the upgrade. By following these guidelines and tips, you’re well on your way to harnessing the power of the sun and reducing your reliance on non-renewable energy sources.
So, as you embark on this journey to sustainable living, remember that every small step counts, and the journey itself is just as important as the destination. The process of creating your backyard solar shed power system is an opportunity to reconnect with nature, to express your creativity, and to contribute to a cleaner, greener future. Let’s embrace this chance to make a positive impact, one shed at a time, and inspire others to join us in this vibrant journey towards a more sustainable tomorrow.
Frequently Asked Questions
What are the most energy-efficient ways to use a solar-powered shed in my backyard?
Let’s harness that solar power to create a cozy backyard retreat. Consider using your shed as a home office, art studio, or garden workshop, and power it with energy-efficient LED lighting and appliances to minimize your carbon footprint.
How can I determine the best size and number of solar panels for my shed's roof?
To determine the best size and number of solar panels, consider your shed’s energy needs and roof space. Calculate your energy usage, then choose panels that fit your roof’s dimensions, ensuring a balance between power generation and visual appeal. I like to think of it as a fun puzzle, where every piece fits together to create a sustainable masterpiece!
Are there any special considerations I should keep in mind when installing solar panels on a shed with a metal roof?
When installing solar panels on a metal roof shed, consider the type of metal and its condition. Ensure the roof is rust-free and sturdy enough to support the panels’ weight. You may need specialized mounting hardware, so consult the manufacturer’s guidelines or a professional for a seamless installation that’s both safe and efficient.


