I still remember the summer I spent building a treehouse in my backyard with my grandfather. He taught me that with a little creativity and some reclaimed wood, we could turn a dull corner of our yard into a thriving workshop. That’s exactly what I want to help you do with this guide on how to build a shed. So many people think that building a shed is a daunting task that requires a lot of money and expertise, but I’m here to tell you that it’s easier than you think. With the right mindset and a few simple tools, you can create a beautiful and functional shed that reflects your unique style.
In this article, I’ll share my personal experience and practical advice on how to build a shed that’s not just functional, but also a reflection of your personality. I’ll walk you through the process of choosing the right materials, designing your shed, and bringing it all together. You’ll learn how to turn a pile of lumber into a cozy retreat or a productive workspace. My goal is to inspire you to think outside the box and unleash your creativity, so you can create a shed that’s truly one-of-a-kind. By the end of this guide, you’ll have the confidence and knowledge to build a shed that you’ll love and use for years to come.
Table of Contents
Guide Overview: What You'll Need
Total Time: 2 days
Estimated Cost: $500 – $2000
Difficulty Level: Intermediate
Tools Required
- Circular Saw (for cutting lumber)
- Drill (with screwdriver and drill bits)
- Tape Measure (for measuring and marking lumber)
- Level (for ensuring the shed is level)
- Hammer (for tapping screws and nails into place)
- Utility Knife (with extra blades)
- Ladder (for reaching high areas)
- Safety Glasses (for protecting your eyes from debris)
Supplies & Materials
- 2-in x 4-in lumber (for framing the shed)
- 2-in x 6-in lumber (for building the roof and door frame)
- Plywood (for the shed floor and walls)
- Roofing Felt (for protecting the roof from weather)
- Asphalt Shingles (for covering the roof)
- Exterior Grade Pine (for building the door and trim)
- Hinges (for attaching the door to the frame)
- Screws (for assembling the shed frame and walls)
- Nails (for attaching the roofing felt and shingles)
Step-by-Step Instructions
- 1. First, let’s start with the foundation of our shed – the site preparation. This is where the magic begins, and it’s essential to get it right. Clear the area where you want to build your shed, removing any debris, trees, or plants. I like to think of this step as wiping the slate clean, giving us a blank canvas to work with. Make sure the ground is level and compact, as this will ensure a sturdy base for your shed.
- 2. Next, we need to prepare the materials for our shed. This is where the fun begins, and we get to see our project take shape. Gather all the necessary materials, including lumber, nails, roofing material, and doors. I’m a big fan of repurposing materials, so consider using reclaimed wood or recycled materials to add a touch of uniqueness to your shed. Make a list and check it twice to ensure you have everything you need before moving on to the next step.
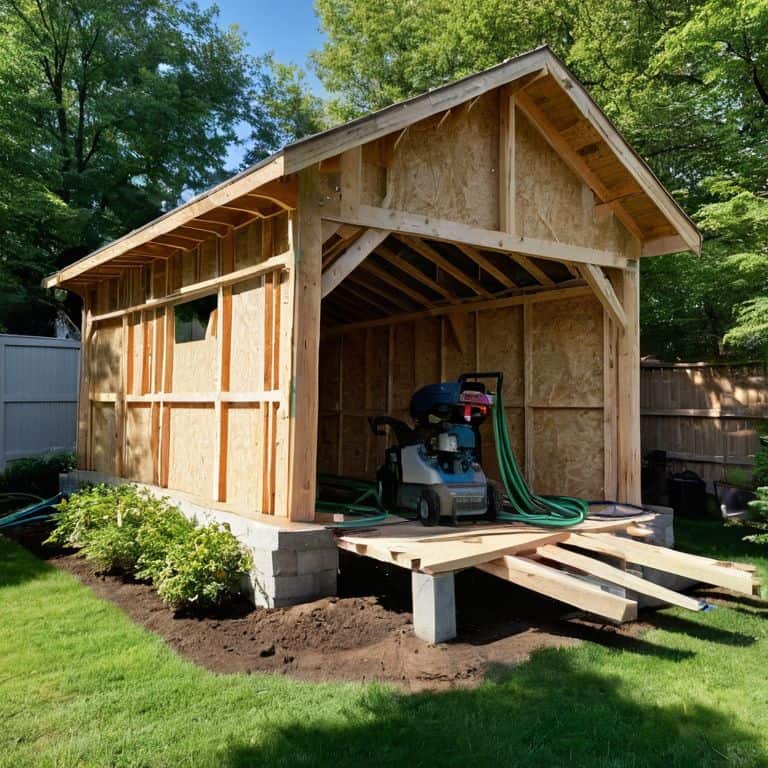
- 3. Now it’s time to lay the foundation of our shed. This typically involves creating a frame using lumber, which will provide the base for our walls and roof. Use a level to ensure the frame is perfectly horizontal, and then secure it to the ground using anchors or concrete. I like to think of this step as the skeleton of our shed, providing the structure and support for everything that comes next.
- 4. With our foundation in place, it’s time to start building the walls of our shed. This involves attaching the wall studs to the frame, followed by the exterior plywood or siding. Don’t forget to add windows and doors to provide natural light and access to your shed. I’m a big fan of getting creative with the design, so consider adding unique features like a skylight or a loft.
- 5. Once the walls are up, it’s time to focus on the roof. This is where things can get a bit tricky, so make sure to follow safety guidelines and use proper techniques. Choose a roofing material that suits your climate and style, such as asphalt shingles or corrugated metal. Install the roofing material, starting from the bottom and working your way up, to ensure a watertight seal.
- 6. Now that our shed is taking shape, it’s time to add the finishing touches. Install any doors and windows, and add a coat of paint or stain to protect the wood and enhance the appearance. I like to think of this step as adding the personality to our shed, making it a reflection of our unique style and character. Consider adding decorative elements, such as trim or molding, to give your shed a touch of elegance.
- 7. Finally, it’s time to bring our shed to life by adding the final details. Install any shelving or storage units, and add a ramp or steps to provide easy access. Consider adding a solar panel or a rainwater harvesting system to make your shed even more sustainable and self-sufficient. Take a step back and admire your hard work – you’ve just created a beautiful and functional shed that’s all your own!
Building a Shed Sanctuary
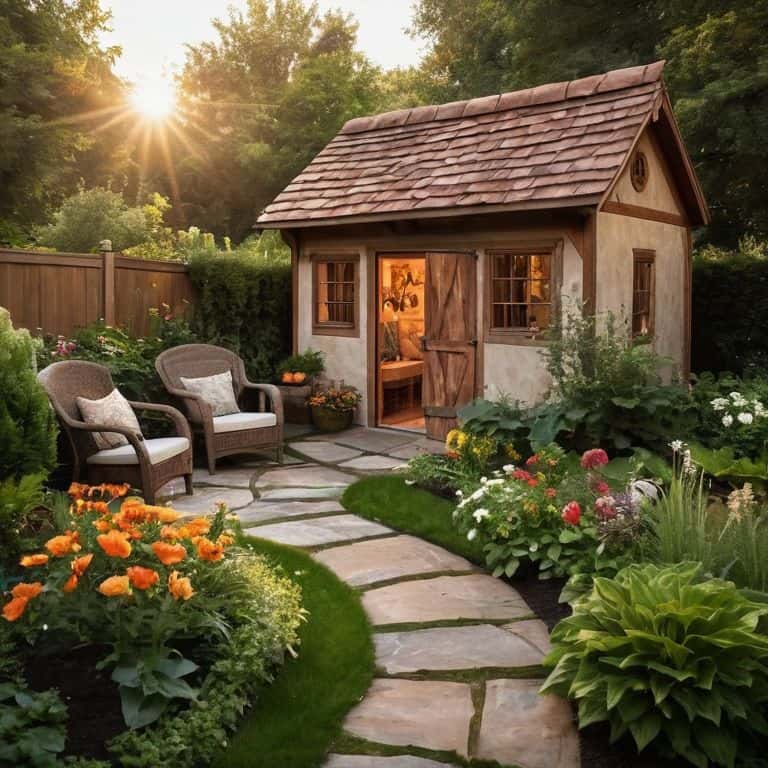
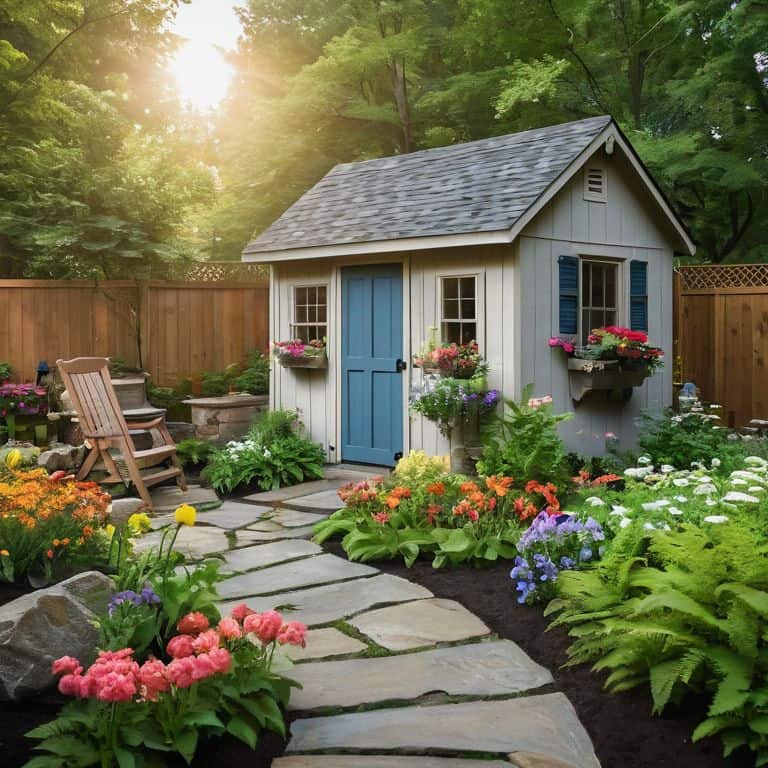
As we bring our shed to life, let’s focus on creating a serene oasis that not only serves its purpose but also becomes a haven for relaxation and creativity. When considering shed design ideas, think about the overall aesthetic you want to achieve – do you envision a rustic, countryside feel or a more modern, sleek look? This will help guide your decisions on materials, colors, and even the type of diy shed roofing options you choose.
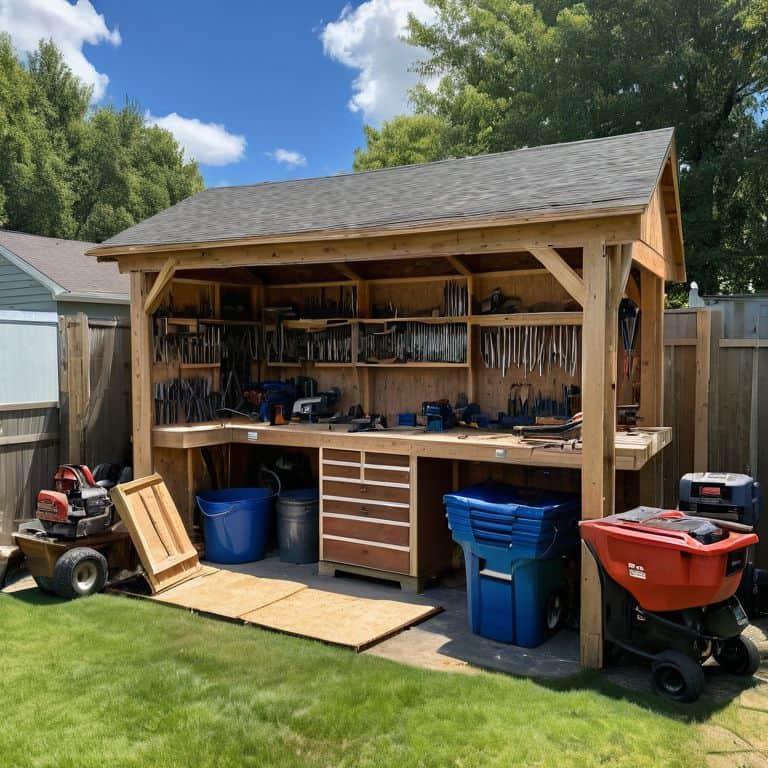
To ensure our shed remains a tranquil retreat, it’s essential to consider shed organization systems that keep clutter at bay. This might include installing shelves, hooks, or even a pegboard to keep tools and equipment within easy reach. For those with smaller yards, small shed plans for backyard spaces can be just as effective, providing a cozy nook for reading, writing, or simply enjoying nature.
As we put the finishing touches on our shed, don’t forget to pay attention to shed door installation tips to guarantee a smooth, secure entrance. By taking the time to carefully plan and execute each detail, we can create a shed that’s not only functional but also a beautiful addition to our outdoor space, blending seamlessly into the surrounding landscape while showcasing our personal style.
Diy Shed Roofing and Door Tips
As we bring our shed sanctuary to life, let’s not forget the crowning glory: the roof. I love repurposing old corrugated iron or salvaged asphalt shingles to create a unique, eco-friendly roof. For a more whimsical touch, consider adding a living roof with native plants and wildflowers. When it comes to doors, think beyond the ordinary – an old barn door or a reclaimed wooden gate can add character to your shed. You can also upcycle old hinges and knobs to create a one-of-a-kind entrance.
To add an extra layer of functionality, consider installing a transom window above the door to bring in natural light and ventilation. With a little creativity, your shed’s roof and door can become a beautiful blend of form and function, welcoming you to your very own backyard haven.
Shed Design Ideas for Sloped Yards
For those with sloped yards, don’t worry – we can turn that challenge into a charming feature. Consider a shed with a split-level design, where the upper level serves as a storage loft and the lower level as a workspace or potting area. Alternatively, you can opt for a shed with a sloping roof that mirrors the natural incline of your yard, creating a seamless blend with the surroundings. This design not only adds visual interest but also helps with water runoff and creates a unique opportunity for a green roof or a living wall.
I love seeing how a sloped yard can become a defining characteristic of a shed’s design, rather than a limitation. By embracing the natural terrain, you can create a shed that feels like it’s grown organically from the landscape, inviting you to explore and create within its walls.
Hammering Home the Essentials: 5 Key Tips for a Dream Shed
- Start with a solid foundation: Ensure your shed’s base is level and secure to prevent future structural issues
- Choose materials that tell a story: Reclaimed wood, recycled plastics, or sustainably sourced lumber can add character to your shed
- Let the light in: Incorporate windows, skylights, or solar tubes to create a bright and welcoming interior
- Get creative with storage: Maximize your shed’s potential with clever shelving, hooks, and compartments to keep your tools and treasures organized
- Blend in or stand out: Consider the aesthetic of your shed in relation to your yard and home – will it be a camouflaged hideaway or a vibrant statement piece?
Bringing Your DIY Shed to Life: 3 Key Takeaways
Embracing creativity in your shed design can transform a simple storage space into a functional sanctuary that reflects your personal style and complements your yard’s unique features
By incorporating reclaimed or sustainable materials and considering the specific challenges of your yard, such as slope or limited space, you can create a shed that not only serves its purpose but also enhances your outdoor living experience
Whether you’re looking to build a cozy reading nook, a workshop, or simply a place to store your gardening tools, the process of designing and building your own shed offers a rewarding opportunity to practice self-sufficiency and connect with the natural world around you
Building Wisdom
A shed is not just a structure, but a sanctuary born from scraps, a testament to the transformative power of imagination and elbow grease, where every beam and every brick tells a story of self-sufficiency and creative rebellion.
Stanley Truman
Embracing the Joy of DIY Shed Building
As we conclude our journey through the world of DIY shed building, let’s take a moment to reflect on the key takeaways. From planning and designing your shed to choosing the right materials and constructing it, we’ve covered it all. We’ve also explored how to turn your shed into a sanctuary that not only serves its purpose but also adds to the aesthetic of your yard. Whether you have a sloped yard or a flat one, we’ve discussed various design ideas and tips to make your shed stand out. By following these steps and tips, you’ll be well on your way to creating a functional and beautiful outdoor space.
As you embark on your own DIY shed building adventure, remember that it’s not just about the end result, but about the journey itself. The process of creating something with your own hands can be incredibly empowering, and it’s a great way to express your creativity and connect with nature. So don’t be afraid to get creative, experiment with new ideas, and make mistakes – they’re all part of the fun. With patience, persistence, and a willingness to learn, you can turn your backyard into a thriving oasis that reflects your unique style and personality.
Frequently Asked Questions
What are the most essential tools I'll need to have on hand to build a shed from scratch?
To build a shed from scratch, I always say, ‘keep it simple, yet clever!’ You’ll need a trusty tape measure, a level, a hammer, and a saw – I like to use a circular saw for big cuts and a handheld saw for finer details. Don’t forget a drill and some sturdy bits, and of course, a pencil to mark your masterpiece as you go!
How can I ensure my DIY shed is level and secure on a sloping yard without hiring a professional?
For a sloping yard, I recommend using adjustable foundation pads or helical piers to level your DIY shed. You can also create a simple deck or platform using reclaimed wood and concrete footings to stabilize the structure. Just remember to check your local building codes and consult with a friend or family member for an extra pair of hands – and eyes – to ensure everything is perfectly level and secure!
What are some creative ways to repurpose old or recycled materials in my shed's design and construction?
I love this question! Let’s think outside the box – or shed, in this case. Consider repurposing old pallets as shelving, transforming vintage windows into skylights, or even using reclaimed wood for the shed’s exterior. You can also upcycle old doors, gutters, or metal sheets to create a one-of-a-kind roof or wall feature. The possibilities are endless!


