I still remember the day I stumbled upon my first French cleat – it was like uncovering a secret ingredient for turning any wall into a treasure trove of storage. I was working on a project with a friend, trying to find a way to maximize the space in her tiny apartment, and we came across this brilliantly simple solution. As I delved deeper into the world of French cleats, I realized that they’re not just a tool, but a key to unlocking the full potential of any room. That’s why I’m excited to share with you a guide to using french cleats for storage, and show you how to transform your space into a functional masterpiece.
As you read through this article, you’ll get a behind-the-scenes look at how I use French cleats in my own projects, from creating custom shelving units to designing hidden storage compartments. I’ll share with you my favorite tips and tricks for getting the most out of this versatile tool, and provide you with practical advice on how to incorporate French cleats into your own DIY projects. Whether you’re a seasoned DIY enthusiast or just starting out, this guide will give you the confidence to take on any storage challenge that comes your way, and show you how to turn your space into a reflection of your unique style and creativity.
Table of Contents
Guide Overview: What You'll Need
Total Time: 2 hours 30 minutes
Estimated Cost: $50 – $100
Difficulty Level: Intermediate
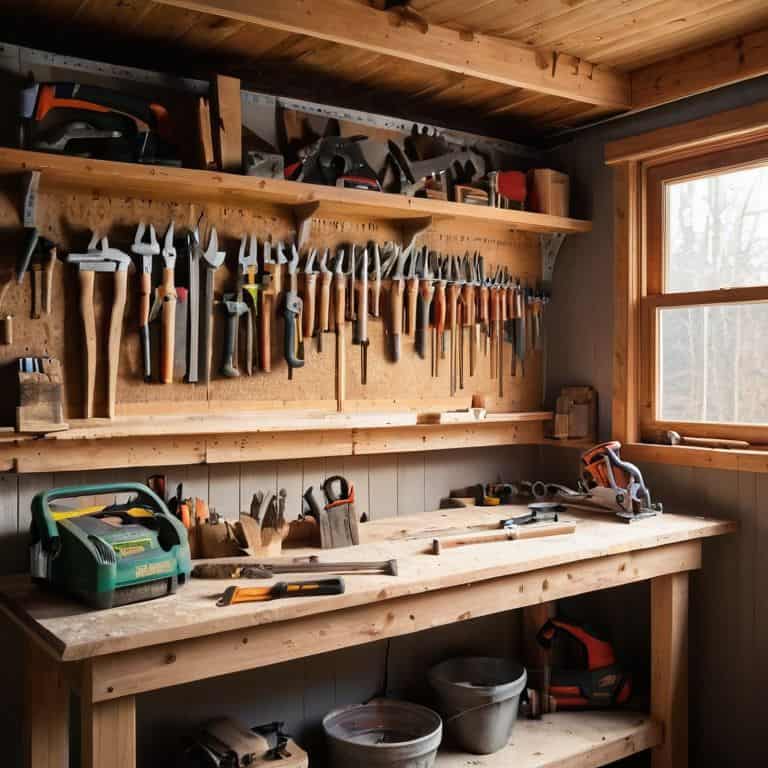
Tools Required
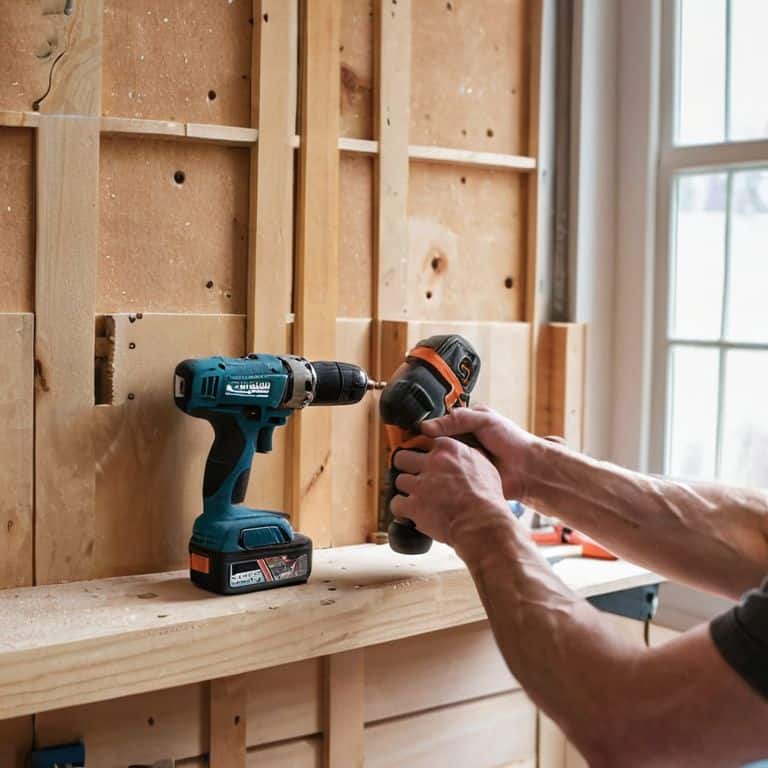
- Drill (with screwdriver and drill bits)
- Level (for ensuring proper installation)
- Measuring Tape (for accurate measurements)
- Pencil (for marking walls and lumber)
- Saw (for cutting 2-in x 4-in lumber)
- Stud Finder (for locating wall studs)
- Wrench (for tightening screws)
Supplies & Materials
- French Cleats (available in various sizes)
- 2-in x 4-in Lumber (for constructing shelves or supports)
- Screws (for securing cleats to walls and lumber to cleats)
- Wall Anchors (for added support in drywall or hollow walls)
- Wood Glue (for reinforcing lumber joints)
Step-by-Step Instructions
- 1. To start your French cleat storage journey, gather your materials, which should include the French cleats themselves, a drill, a level, and the items you wish to hang. I like to think of this step as preparing for a treasure hunt, where the treasure is the perfectly organized and clutter-free space you’re about to create.
- 2. Next, measure your wall and the items you plan to store. This is crucial because you want to ensure that your French cleats are spaced appropriately to hold your items securely and attractively. I find that using a mix of short and long cleats can add visual interest to your storage display.
- 3. Now, it’s time to mark your wall where you want to place your French cleats. Use a pencil to lightly mark the spot, and then double-check that your mark is level. This is where the magic happens, and your storage solution starts to take shape.
- 4. With your marks in place, drill pilot holes for your French cleats. Make sure the holes are not too large, as you want the screws to hold firmly in the wall. I’ve found that using a small drill bit can help prevent the drywall from tearing.
- 5. After drilling your pilot holes, screw the French cleats into place. Start with the bottom cleat and work your way up, ensuring each cleat is level and securely fastened. This step requires some patience and precision, but the end result is well worth the effort.
- 6. Once your French cleats are securely in place, you can start hanging your items. This is the fun part, where you get to see your storage solution come to life. I recommend starting with the heaviest items first and then adding the lighter ones, to ensure everything is balanced and visually appealing.
- 7. To add a touch of whimsy and personality to your storage display, consider mixing in some decorative items, like vintage hooks or handmade ceramic pieces. This will not only make your storage solution more interesting but also reflect your unique style and flair.
- 8. Finally, step back and admire your handiwork. Take pride in knowing that you’ve created a functional and beautiful storage solution using French cleats. Remember, the key to a successful DIY project is to have fun and be creative, so don’t be afraid to experiment and try new things.
A Guide to Using French Cleats
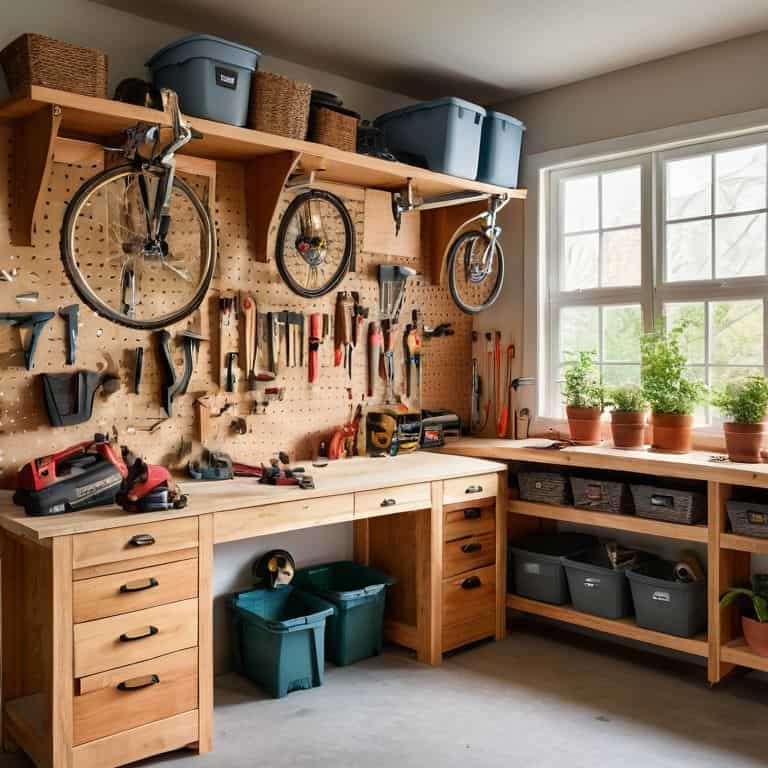
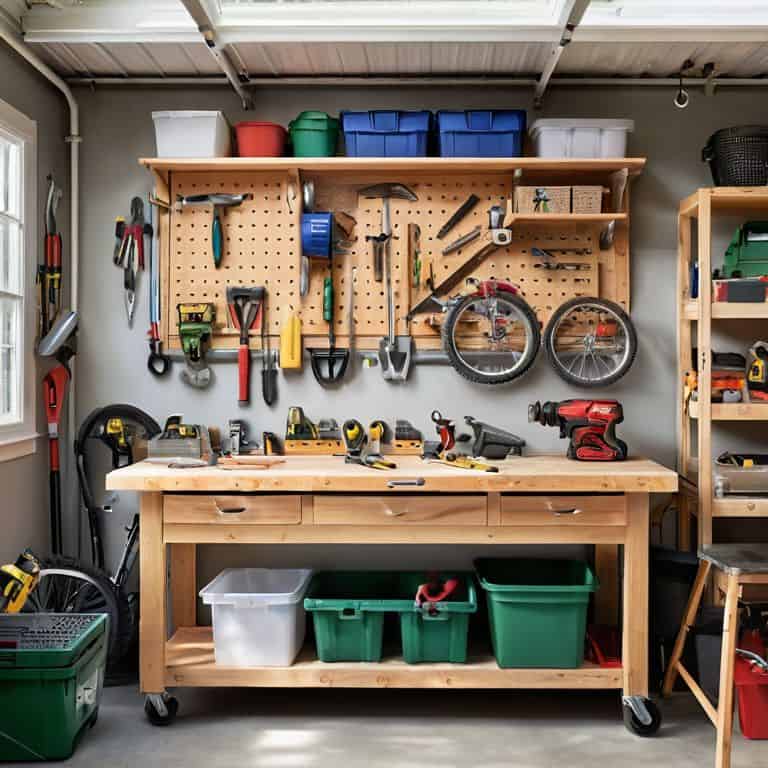
As I delve into the world of French cleats, I’m reminded of the countless customizable storage solutions I’ve created for my friends’ workshops. There’s something truly satisfying about designing a system that perfectly fits their unique needs. For instance, when it comes to hanging heavy tools, French cleats are an absolute game-changer. By strategically placing the cleats, you can create a sturdy and reliable storage system that keeps your tools within easy reach.
One of the most significant advantages of French cleats is their adjustable shelving capability. With French cleat brackets, you can easily add or remove shelves as needed, making it an ideal solution for maximizing garage storage. I’ve seen people use this system to store everything from bikes to gardening equipment, and it never ceases to amaze me how much space they can save. Whether you’re a DIY enthusiast or a professional contractor, French cleats offer a level of flexibility that’s hard to find in traditional storage systems.
For beginners looking to dive into DIY French cleat projects, I recommend starting with a small-scale system and gradually expanding it as you become more comfortable with the design process. Remember, the key to a successful French cleat system is to maximize garage storage with cleat systems that are tailored to your specific needs. By doing so, you’ll not only free up valuable space but also create a more organized and efficient workspace that inspires creativity and productivity.
Hanging Heavy Tools With French Cleats Easily
I just love using French cleats to hang my heavy tools – it’s like giving them their own little homes on the wall. By attaching the cleat to the wall and the corresponding bracket to the tool, I can easily slide them on and off, keeping my workspace clutter-free. This system is especially handy for bulky items like bikes, lawn mowers, or even my favorite vintage ladder. With French cleats, I can hang these heavy tools with ease, making the most of my garage’s vertical space and keeping the floor clear for more creative pursuits. It’s amazing how such a simple solution can make a big impact on my workshop’s organization and functionality.
Maximizing Garage Storage With Cleat Systems
Maximizing Garage Storage with Cleat Systems
I love how French cleats can breathe new life into my garage. By installing a cleat system, I can hang bikes, tools, and equipment, keeping the floor clear and making the space feel more spacious. It’s amazing how a few simple strips of wood and some brackets can transform a cluttered area into a functional workshop. I’ve even used them to create a makeshift pegboard for my gardening tools, making it easy to grab what I need when I’m heading out to tend to my urban garden.
Unlocking the Full Potential: 5 Essential Tips for Using French Cleats
- Start by assessing your space and identifying the items you want to store, then choose the right type of French cleat to match your needs – it’s all about creating a harmonious balance between form and function
- Consider the weight capacity of your French cleats and ensure they’re securely attached to the wall to avoid any accidents or damage, because safety always comes first in any DIY adventure
- Get creative with your French cleat placement – don’t be afraid to think outside the box and use them to create a functional masterpiece that reflects your unique style and personality
- Use a level to ensure your French cleats are perfectly aligned, and don’t hesitate to add a pop of color or decorative touch to give your storage system a bit of whimsy and charm
- Remember, the beauty of French cleats lies in their versatility, so don’t be afraid to experiment and try new things – whether it’s hanging bikes, tools, or even a collection of vintage planters, the possibilities are endless
Key Takeaways for a Clever Storage Solution
I’ve learned that with a little creativity, French cleats can be used to store everything from heavy tools to delicate accessories, making them an incredibly versatile addition to any space
By implementing a cleat system, you can maximize your garage storage and keep your belongings organized and within reach, which has been a total game-changer for my own urban foraging and crafting projects
Whether you’re a seasoned DIY enthusiast or just starting to dip your toes into the world of sustainable living, French cleats offer a simple yet effective way to transform your space and make the most of what you have, which is really at the heart of my mission to inspire creative self-sufficiency
Embracing the Art of Storage
As we weave French cleats into the fabric of our spaces, we’re not just organizing our belongings, we’re orchestrating a symphony of functionality and beauty, where every item tells a story of purpose and every wall becomes a canvas of possibility.
Stanley Truman
Embracing the Power of French Cleats
As we’ve explored throughout this guide, maximizing storage with French cleats is an art that combines functionality with creativity. From hanging heavy tools to creating a seamless garage storage system, the versatility of French cleats is undeniable. By following the step-by-step instructions and tips provided, you’re well on your way to transforming your space into a haven of organization and efficiency. Remember, the key to unlocking the full potential of French cleats lies in their adaptability and your imagination.
As you embark on your own French cleat projects, I encourage you to embrace the spirit of DIY innovation and view every challenge as an opportunity to create something truly unique. By doing so, you’ll not only be reducing waste and promoting sustainable living but also cultivating a sense of pride and accomplishment that comes from turning the ordinary into the extraordinary. So, go ahead, get creative, and watch your space transform into a masterpiece of functionality and beauty.
Frequently Asked Questions
What are some creative ways to use French cleats beyond just hanging tools and equipment?
I just love pushing the boundaries of what French cleats can do. Beyond tools, I’ve used them to create a floating pot rack in my kitchen, a display wall for my urban foraged treasures, and even a space-saving desk organizer for my crafting supplies. The possibilities are endless, and I’m excited to share more of my favorite unconventional uses with you!
How can I ensure that my French cleat system is securely installed and can hold heavy loads without damaging the wall?
To ensure your French cleat system is securely installed, I always say, ‘it’s all about the anchor!’ Use sturdy wall anchors that match your wall type, and screw them in at an angle to distribute the weight evenly. This will give you peace of mind when hanging heavy tools, and your walls will thank you!
Are there any specific types of French cleats that are better suited for certain types of items, such as bikes or storage bins?
I just love getting into the nitty-gritty of French cleat details. For bikes, I swear by heavy-duty cleats with a wide bracket, while for storage bins, slim cleats with adjustable hooks are a game-changer. And for those extra bulky items, like luggage or equipment, I recommend using reinforced cleats with a sturdy strap system – it’s all about matching the cleat to the task at hand!


