I still remember the day I decided to tackle the chaos in my garage – it was like a treasure hunt, except instead of treasures, I found old tools, dusty boxes, and a bunch of forgotten projects. As an automotive technician with a passion for restoring vintage bicycles, I knew I needed a space that would inspire creativity and productivity. That’s when I started exploring diy garage storage shelf ideas to turn my cluttered garage into a workshop paradise. I was amazed at how a few simple shelves and storage solutions could transform the entire space, making it easier to find what I need and get to work on my latest project.
In this article, I’ll share my favorite diy garage storage shelf ideas that will help you maximize your garage’s potential. You’ll learn how to create custom storage solutions that fit your specific needs, from simple shelving units to more complex cabinet systems. I’ll provide you with practical, no-nonsense advice on how to design, build, and install your own storage shelves, helping you to create a garage that’s both functional and inspiring. Whether you’re a seasoned DIY enthusiast or just starting out, my goal is to empower you with the knowledge and confidence to take on your own garage storage project and turn your space into a haven of creativity and innovation.
Table of Contents
Guide Overview: What You'll Need
Total Time: 4 hours 30 minutes
Estimated Cost: $100 – $250
Difficulty Level: Intermediate
Tools Required
- Circular Saw (for cutting lumber)
- Drill (with screwdriver and drill bits)
- Tape Measure (for measuring spaces)
- Level (for ensuring shelf is even)
- Wrench (for tightening bolts)
- Hammer (for tapping shelves into place)
Supplies & Materials
- 2-in x 4-in lumber (for shelf frame)
- 3/4-in plywood (for shelf boards)
- Wood screws (2 1/2 inches long)
- Wood glue (for extra stability)
- Sandpaper (for smoothing wood surfaces)
- Paint or stain (optional, for finishing)
Step-by-Step Instructions
- 1. First, gather your materials, which should include 2×4 lumber for the shelf frames, 3/4 inch plywood for the shelves, wood screws, a drill press, and a circular saw. I like to name my tools, so my circular saw is “Bertha” – she’s a real workhorse. Make sure you have all the necessary tools and materials before starting the project to avoid any last-minute trips to the hardware store.
- 2. Next, measure your garage space to determine the best location and size for your storage shelves. Consider the height of the shelves, the width, and the depth to ensure they fit comfortably in your garage and provide ample storage space. I always say, “Measure twice, cut once” – it’s a mantra that’s served me well over the years.
- 3. Now, design your shelf layout. Decide how many shelves you want, their size, and the spacing between them. You can use graph paper to sketch out your design and make any necessary adjustments before cutting your lumber. I like to think of this step as “mapping out the playground” – where will all the fun happen?
- 4. With your design in hand, start by cutting the lumber for the shelf frames. Use your circular saw (I’m looking at you, Bertha) to make precise cuts, and then use a drill press to create holes for the screws. Remember to always wear safety goggles and a dust mask when working with power tools – safety first.
- 5. Assemble the shelf frames using wood screws. This is where the project starts to take shape, and it’s exciting to see your garage storage solution come to life. Make sure the frames are square and the corners are secure – you don’t want any wobbly shelves.
- 6. Cut the plywood to size for the shelves, and then attach them to the frames using wood screws. I like to use a leveling tool to ensure the shelves are perfectly level – it’s all about the details. This step requires some patience, but the end result is well worth it.
- 7. Finally, install your shelves in the garage, making sure they are securely attached to the wall to prevent them from tipping over. You can use wall anchors or screws to achieve this. Stand back and admire your handiwork – you’ve just created a garage storage system that’s both functional and awesome. Now, go fill those shelves with all your workshop goodies.
Diy Garage Storage Shelf Ideas
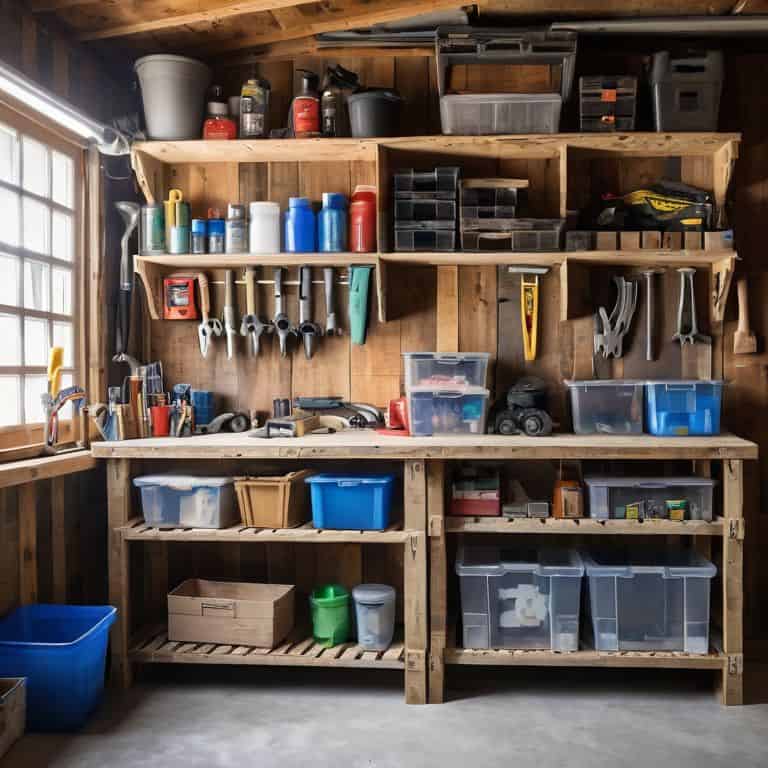
When it comes to garage shelving units on a budget, I’ve found that getting creative with materials is key. I like to scour local thrift stores and salvage yards for old pallets, crates, and lumber that can be repurposed into unique storage solutions. Not only does this approach save money, but it also adds a touch of character to your garage. Plus, it’s a great way to reduce waste and give old materials a new lease on life.
As you start building your custom garage storage solutions, keep in mind that it’s all about flexibility. Consider using adjustable shelves and modular components that can be easily rearranged as your needs change. This will help you maximizing garage storage space and ensure that your DIY project remains functional and efficient in the long run. I’ve also found that labeling each shelf and compartment helps maintain organization and makes it easier to find what you need when you need it.
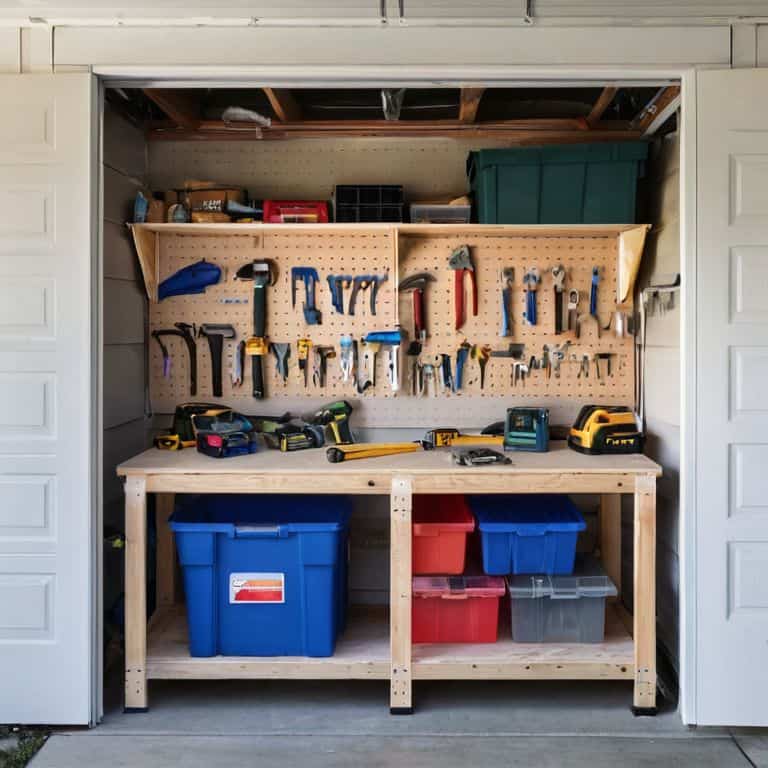
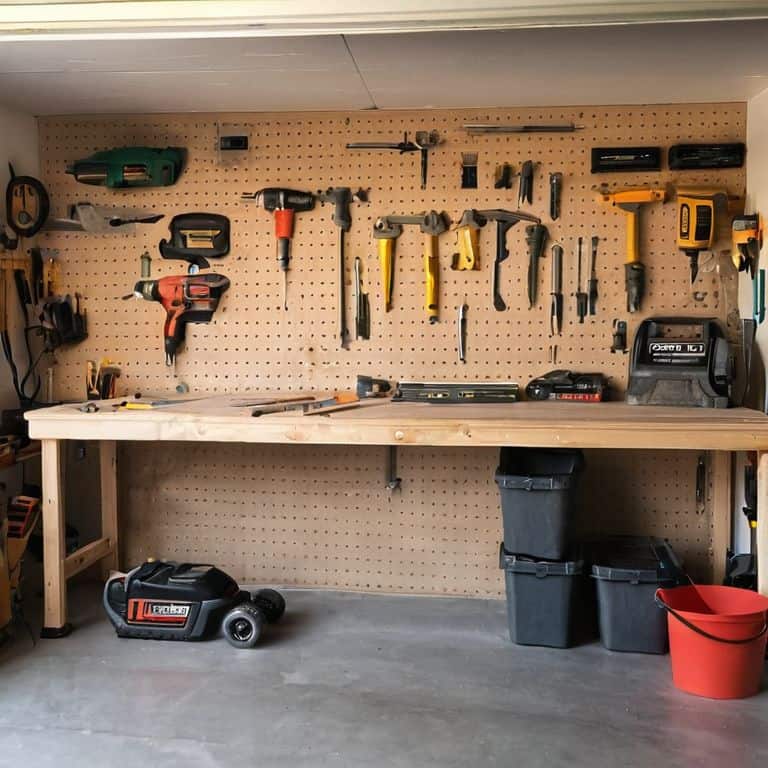
In my own garage, I’ve implemented a few garage organization tips and tricks that have made a huge difference. For example, I’ve installed a pegboard on one wall to hang frequently used tools, and I’ve built a building a garage workbench with built-in storage compartments for my most essential supplies. These small touches have helped me stay focused and productive, and I’m always looking for new ways to improve my workspace.
Custom Garage Storage Solutions
When it comes to custom garage storage solutions, I’m all about thinking outside the box – or in this case, the shelf. I’ve found that repurposing old materials, like reclaimed wood or vintage metal brackets, can add a touch of personality to your garage storage. For instance, I once turned an old bicycle rack into a storage unit for my tools, and it’s been a game-changer. My trusty sidekicks, “Tighty” the tape measure and “Spike” the level, helped me get the job done.
By getting creative with custom storage solutions, you can tailor your garage to fit your specific needs and hobbies. Whether you’re a car enthusiast, a woodworker, or a cyclist like me, a well-designed storage system can help you stay organized and focused on your projects. So don’t be afraid to experiment and come up with your own unique storage solutions – your garage (and your tools) will thank you!
Garage Shelving Units on a Budget
As a garage enthusiast on a budget, I’ve learned to get creative with shelving units. I’ve found that repurposing old pallets or crates can be a fantastic way to add storage without breaking the bank. My trusty tool, “Betsy the Band Saw,” helped me cut down a few pallets to create a custom shelving unit for my garage. It’s amazing how a little bit of ingenuity and some elbow grease can turn trash into treasure.
I’ve also experimented with using PVC pipes and fittings to build affordable shelving units. It’s a simple and versatile system that can be customized to fit any garage layout. With a few basic tools, like my “Pete the Pipe Cutter,” you can create a sturdy and functional shelving unit that will keep your garage organized and clutter-free.
5 Genius Hacks to Supercharge Your DIY Garage Storage Shelf Ideas
- Measure Twice, Build Once: Before you start hammering away, take the time to carefully measure your garage’s dimensions and the items you want to store – it’ll save you from a world of frustration and wasted materials
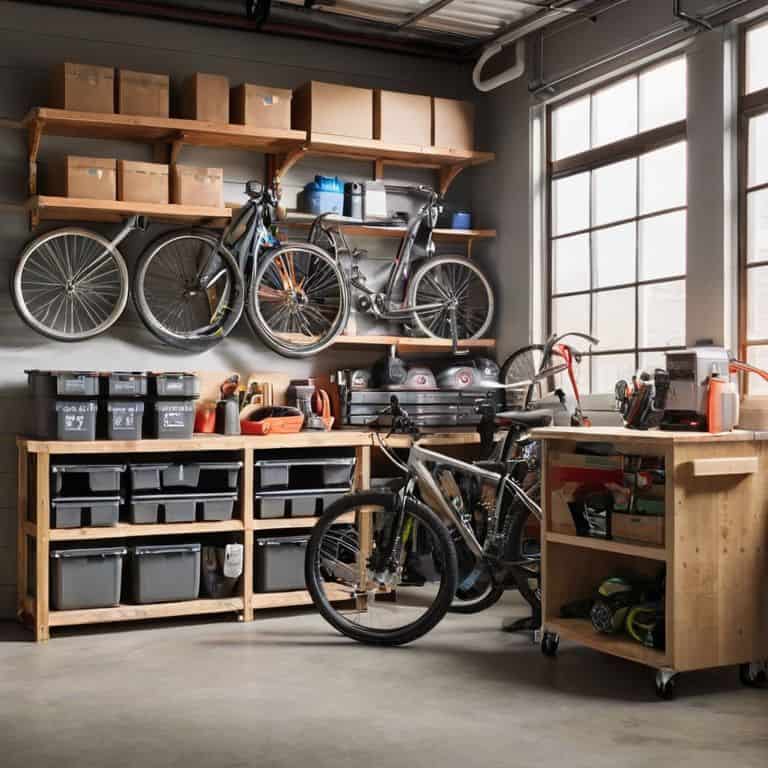
- Think Vertical, Not Just Horizontal: Don’t be afraid to go up, up, and away with your shelving units – the more vertical space you utilize, the more floor space you’ll free up for your next big project
- Choose the Right Materials for the Job: Whether you’re working with plywood, MDF, or reclaimed wood, make sure you’re selecting materials that fit your budget, skill level, and the overall aesthetic you’re aiming for
- Label It and Love It: A well-organized garage is a beautiful thing – take the extra step to label each shelf, bin, and container so you can quickly find what you need, even in the chaos of a busy workshop
- Flexibility is Key: Don’t be too hard on yourself if your initial design doesn’t quite work out – be prepared to adjust, adapt, and evolve your storage solutions as your needs and projects change over time
Key Takeaways to Supercharge Your Garage
By implementing clever DIY garage storage shelf ideas, you can transform your cluttered space into a functional workshop that sparks creativity and productivity
Customizing your garage storage solutions, whether through budget-friendly shelving units or bespoke designs, allows you to tailor your space to your unique needs and hobbies, such as restoring vintage bicycles
Remember, the key to unlocking your garage’s full potential lies in combining practicality with a dash of humor and personal flair, so don’t be afraid to get creative and make your garage a reflection of your personality
Unleashing Garage Potential
A well-built DIY garage storage shelf is more than just a place to store your tools, it’s a foundation for your next big project, a spark for your creativity, and a testament to the idea that with a little ingenuity, any garage can become a workshop wonderland.
John Beeler
Wrapping Up Your Garage Transformation
As we’ve explored the world of DIY garage storage shelf ideas, it’s clear that transforming your garage into a workshop paradise is within reach. From garage shelving units on a budget to custom storage solutions, the key is to find a balance between functionality and personal style. By applying the step-by-step instructions and tips shared in this guide, you’ll be well on your way to creating a space that sparks creativity and productivity. Remember, it’s all about finding the right blend of form and function to make your garage a haven for your projects and passions.
So, as you embark on your own garage transformation journey, keep in mind that the true power of DIY garage storage lies not just in the storage solutions themselves, but in the sense of accomplishment and pride that comes with creating something with your own hands. Whether you’re a seasoned tinkerer or just starting out, the thrill of bringing your vision to life is an incredible feeling – and one that will keep you coming back to your garage workshop time and time again, eager to take on the next project and see where your imagination takes you.
Frequently Asked Questions
What are the most space-efficient DIY garage storage shelf ideas for a small garage?
For a small garage, I swear by vertical storage and foldable shelves – they’re total game-changers. I like to use wall-mounted brackets and baskets to maximize space, and my trusty “Bertha” level ensures everything’s perfectly aligned. You can also repurpose old pallets or crates to create custom storage solutions that won’t break the bank.
How can I build custom garage storage shelves on a budget without sacrificing durability?
Ah, my friend, I’ve got just the trick! For custom garage storage on a budget, I swear by repurposing old pallets and 2x4s. My trusty ‘Betsy’ (that’s my circular saw) and I can whip up sturdy shelves in no time. Just add some weatherproof coating and you’re golden – durable, functional, and easy on the wallet!
What types of materials are best suited for building DIY garage storage shelves that can withstand heavy tool storage?
For heavy tool storage, I swear by sturdy materials like 3/4-inch plywood, 2×4 lumber, and steel brackets – my trusty “Bertha” impact wrench and “Sparky” level are always within reach when working with these heavy-duty materials.


