I still remember the day my grandfather and I built our first workbench from 2x4s in our small Midwestern town’s hardware store. It was a simple project, but it marked the beginning of my journey as a tinkerer and a maker. As I grew older, I realized that having a sturdy workbench is essential for any DIY enthusiast or professional. That’s why I’m excited to share with you a guide to building a simple workbench from 2x4s, a project that can transform your garage into a haven of creativity and innovation.
In this article, I’ll walk you through the process of building a simple workbench from 2x4s, sharing my personal experience and practical tips to ensure your project turns out successfully. You’ll learn how to choose the right materials, assemble the frame, and add a durable top. My goal is to provide you with honest, no-hype advice that will help you create a workbench that meets your needs and inspires you to take on new projects. By the end of this guide, you’ll be ready to start building your own workbench and unleash your inner tinkerer and maker.
Table of Contents
Guide Overview: What You'll Need
Total Time: 2 hours 30 minutes
Estimated Cost: $50 – $100
Difficulty Level: Intermediate
Tools Required
- Circular Saw (for cutting 2x4s)
- Drill (with screwdriver and drill bits)
- Tape Measure (for measuring and marking lumber)
- Square (for ensuring accurate corners)
- Clamp (for holding pieces together during assembly)
- Sandpaper (for smoothing out wood surfaces)
Supplies & Materials
- 2×4 Lumber (for the workbench frame and legs)
- 3/4 inch Plywood (for the workbench top)
- 2 1/4 inch Wood Screws (for assembling the frame)
- Wood Glue (for reinforcing joints)
- Finishing Nails (for attaching the plywood top)
Step-by-Step Instructions
- 1. First, gather all the necessary materials, including 2x4s for the frame, 3/4 inch plywood for the top, and some heavy-duty screws to hold everything together. Make sure you have a clear workspace, like my garage back in the Midwest, where I can spread out all my tools, including my trusty tape measure, Bertha, and my drill, Daisy.
- 2. Next, cut the 2x4s to the desired length for the legs and frame of your workbench. I like to use my _circular saw_, which I’ve named Charlie, to make precise cuts. Remember to always wear safety goggles and a dust mask when cutting wood, just like my grandpa taught me.
- 3. Now, assemble the frame of your workbench using the cut 2x4s and some 3-inch screws. Start by creating the legs and then attach the side rails and top supports. I find it helpful to use _clamps_ to hold everything in place while I screw it together, and I’ve named my clamps the “Twistin’ Trio” – Tommy, Terry, and Tim.
- 4. With the frame built, it’s time to add the top. Cut the 3/4 inch plywood to the desired size and attach it to the frame using some wood glue and 2-inch screws. Make sure the top is level and secure, as this will be the surface you’re working on. I like to think of this step as the “foundation” of my workbench, just like the foundation of my grandfather’s old hardware store.
- 5. Add some lower shelves or a cabinet to store your tools and supplies. This will help keep your workbench clutter-free and make it easier to find what you need when you need it. I’ve named my toolboxes the “Storage Squad” – Sally, Sam, and Alex – and they’re always ready to lend a hand.
- 6. Finally, add a vice to your workbench. This will give you a secure way to hold your projects in place while you work on them. I’ve got a _old-fashioned vice_ that I’ve restored, which I’ve named Vera, and she’s still as reliable as ever. With Vera’s help, I can tackle even the toughest projects in my garage.
- 7. Once you’ve completed these steps, take a step back and admire your handiwork. Your new workbench is ready to use, and you can start tackling all those projects you’ve been putting off. Just remember to always keep your workbench clean and organized, and you’ll be well on your way to becoming a master tinkerer like my grandpa.
A Guide to Building a Simple Workbench From 2x4s
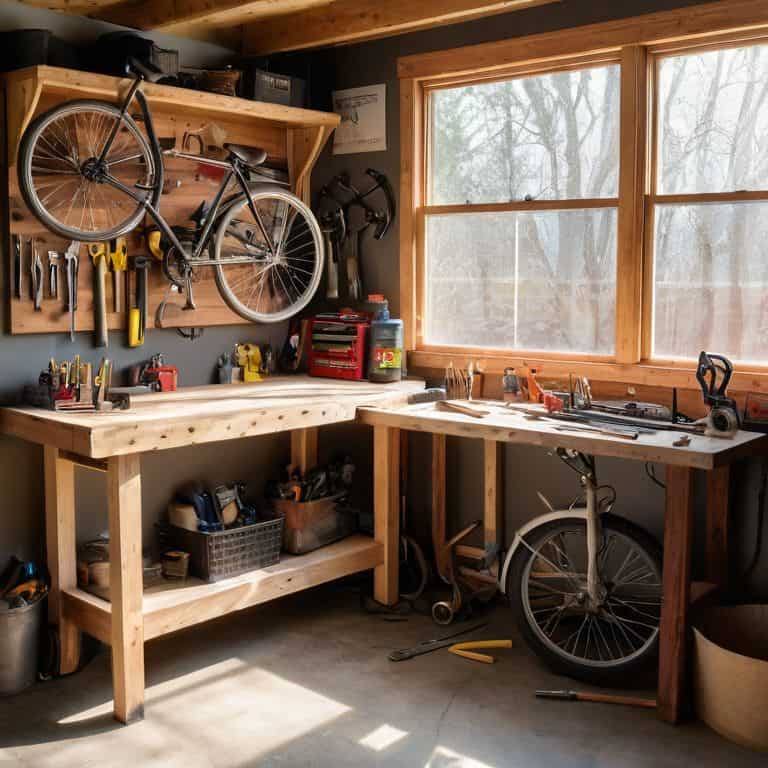
As I always say, building a workbench for small spaces requires some creative thinking. When I was restoring my vintage bicycle in my garage, I realized that having a sturdy workbench was crucial. I opted for a custom workbench design that would fit perfectly in my limited space. By doing so, I was able to maximize my workspace and get the job done efficiently.
When it comes to workbench plans with storage, I believe it’s essential to consider your specific needs. Do you need a lot of storage for your tools, or perhaps a vice for holding items in place? For my workbench, I chose to incorporate a few diy workbench ideas on a budget, such as using reclaimed wood for the top surface. Not only did this save me money, but it also added a unique touch to my workbench.
As you work on your workbench project, don’t forget to prioritize workbench safety tips and precautions. Always wear protective gear, and make sure your work area is well-ventilated. With a little patience and creativity, you can build a workbench that meets your needs and helps you complete your projects with ease. I’ve even started adding some custom workbench accessories to mine, such as a built-in tool holder, to make my workflow even smoother.
Diy Budget Workbench Ideas With Storage
Now that we’ve got our workbench up and running, let’s think about storage – my grandfather used to say, “A place for everything, and everything in its place.” I’ve found that adding some DIY storage solutions can be a game-changer. For instance, you can attach some wooden bins or hooks to the side of your workbench to keep your tools and supplies within easy reach.
I like to use old pallets or crates to create shelving units, it’s a great way to repurpose materials and add some character to your garage. My trusty “Bertha” – that’s what I call my reliable drill – and her friends, “Sparky” the tape measure and “Torquey” the wrench, all have their own designated spots, making it easier for me to find what I need when I need it.
Grandpas Tips for Small Space Workbenches
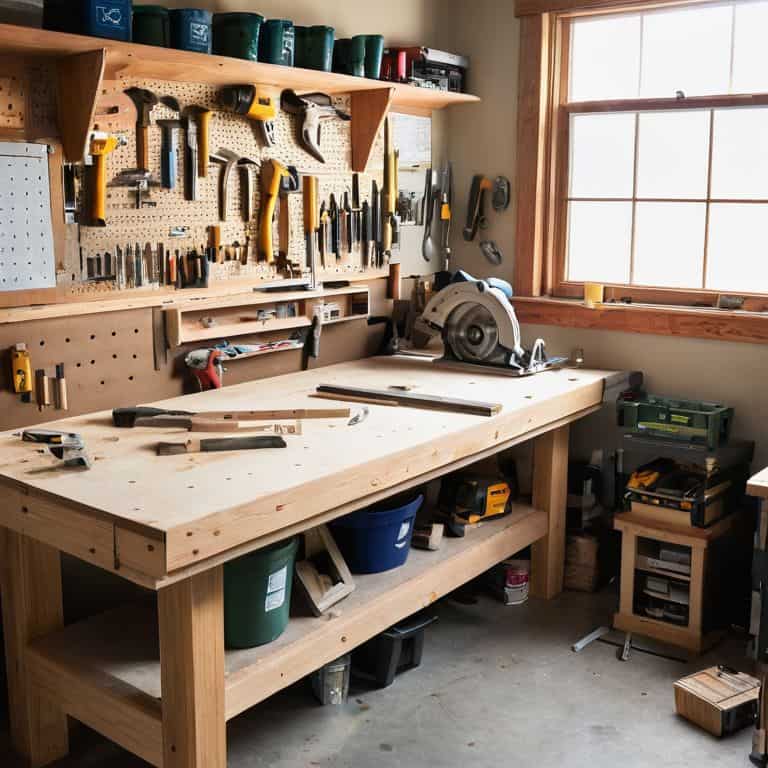
My grandfather, a master of maximizing space, always said, “A small garage doesn’t mean small ideas.” When it comes to small space workbenches, he taught me to think vertically. Consider adding a pegboard above your workbench for hanging tools, or install a fold-down vice to save on precious floor space.
For those tight spots, Grandpa’s trick was to use a wall-mounted foldable workbench. It’s perfect for small garages or shops, and it’s a project I’ve tackled myself with great success. With a little creativity, even the coziest of garages can become a fully functional workshop.
Hammering Out the Essentials: 5 Tips for Your 2×4 Workbench
- Measure Twice, Cut Once: Grandpa’s Golden Rule for Avoiding Costly Mistakes
- Choose Your 2x4s Wisely: Look for Straight, Untwisted Lumber to Ensure a Sturdy Base
- Build for Flexibility: Incorporate Vice Mounts and Tool Holders to Maximize Your Workbench’s Potential
- Safety First: Add a Lower Shelf for Heavy Tools and a Backsplash to Contain Your Workspace
- Add a Personal Touch: Name Your Tools and Organize Them with a Pegboard to Make Your Workbench Truly Unique
Key Takeaways for Your Dream Workbench
Remember, a workbench is the heart of your garage workshop, and building one from 2x4s is a simple yet effective way to unleash your creativity and get hands-on with your projects
Grandpa’s wisdom still holds true: even in small spaces, a well-designed workbench can be a game-changer, providing a dedicated area for tinkering, repairing, and creating
With a little ingenuity and some basic tools, you can create a functional workbench with storage that fits your budget and transforms your garage into a haven of innovation and fun, just like I did in my own Midwest shop
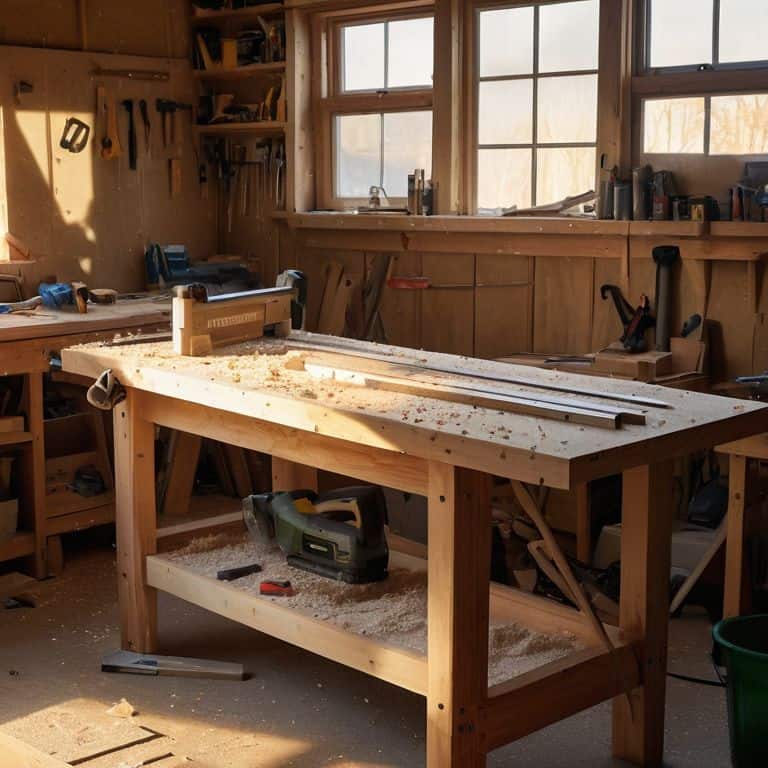
Building the Foundation
A simple workbench made from 2x4s is more than just a piece of furniture – it’s the spark that ignites a lifelong passion for tinkering, creating, and bringing ideas to life in your own garage workshop.
John Beeler
Bringing Your Garage to Life
With your new simple workbench built from 2x4s, you’ve taken the first step in transforming your garage into a space that’s not just functional, but also a reflection of your personality. Remember, Grandpa’s Tips and DIY Budget Workbench Ideas are all about making the most of the space you have, and having fun while doing it. Whether you’re restoring vintage bicycles like I am, or working on a completely different project, the key is to enjoy the process and be proud of what you create. Don’t be afraid to get creative and add your own personal touches to the workbench and the garage as a whole.
As you stand back and admire your handiwork, I hope you feel a sense of pride and accomplishment. Building a workbench from 2x4s is more than just a DIY project – it’s about embracing a hands-on lifestyle and unlocking the full potential of your garage. So, don’t stop here! Keep tinkering, keep inventing, and most importantly, keep having fun. Your garage is a playground waiting to happen, and with every new project, you’re one step closer to making it a space that truly reflects your imagination and creativity. Happy building, and I’ll see you in the garage!
Frequently Asked Questions
What are the essential tools I need to have in my garage to build a simple 2×4 workbench?
Ah, my friend, to build that killer 2×4 workbench, you’ll need the essentials: a trusty tape measure (I call mine ‘Sammy’), a circular saw (my ‘ Circular Cindy’), a drill press (aka ‘Drilly’), and some good ol’ fashioned wrenches (my ‘Wrenchy’ set). Don’t forget a level, or as I like to call it, ‘Larry the Leveler’!
How can I ensure my DIY workbench is sturdy and level for heavy projects?
For a rock-solid workbench, I always say, ‘it’s all about the legs, baby!’ Make sure they’re evenly spaced and securely attached. Use my trusty level, ‘Bertha,’ to double-check everything’s plumb. And don’t forget to add some extra support brackets – my grandfather used to call them ‘stability savers.’ Trust me, with these tips, your workbench will be sturdy enough for even the heaviest projects.
What are some creative ways to add storage and organization to my 2×4 workbench for maximum efficiency?
I’ve got a few tricks up my sleeve for adding storage to your 2×4 workbench. Consider adding a pegboard for hanging tools, or a shelf for storing bins and baskets. My personal favorite? A sliding drawer made from an old toolbox, like I named ‘Bertha’ in my own garage – it’s a game-changer for keeping small parts organized!