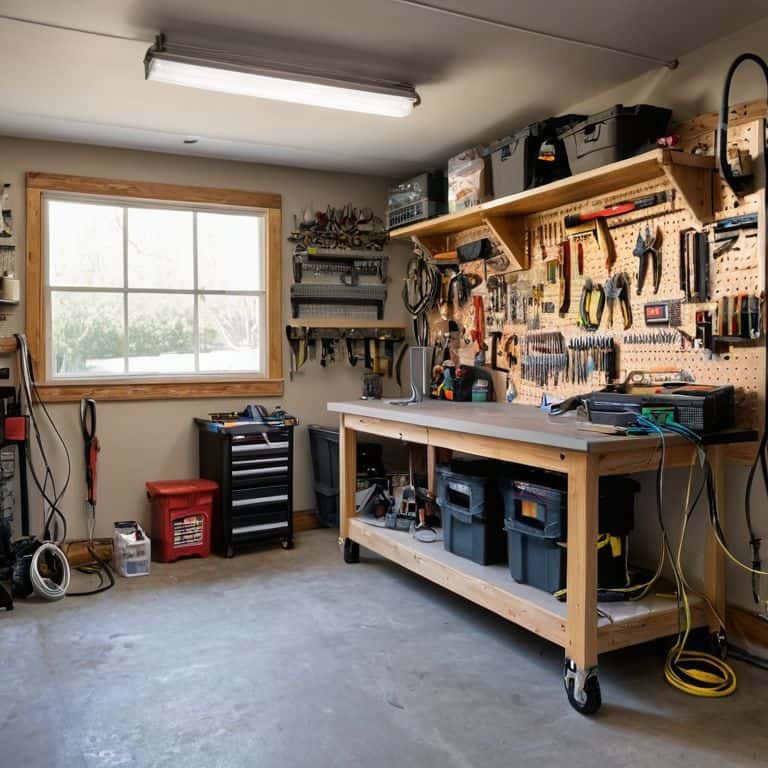
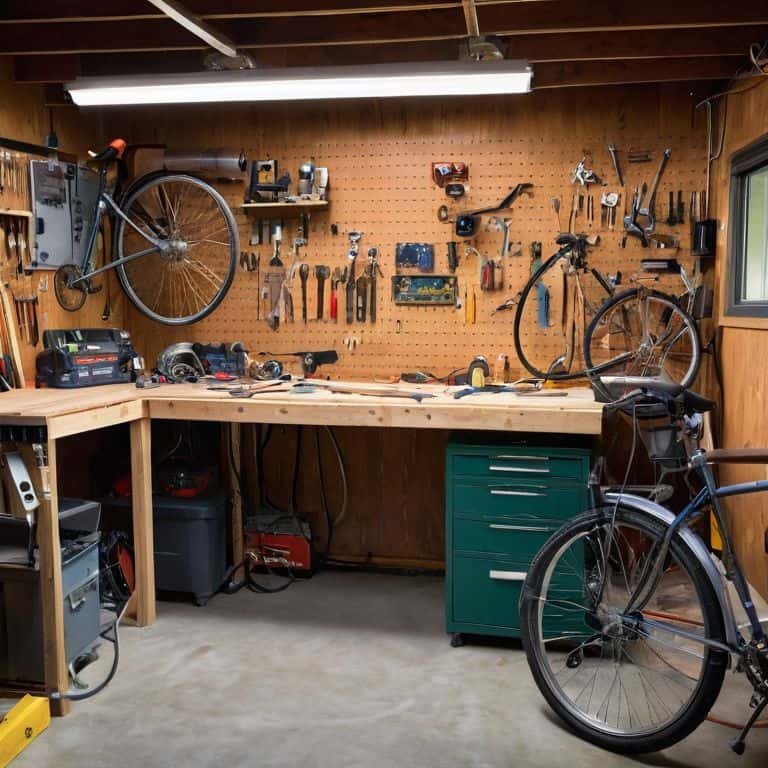
I still remember the day I tried to set up my vintage bicycle restoration workshop in my garage, only to realize I didn’t have enough outlets to power all my tools. It was a frustrating moment, but it led me to learn how to add more electrical outlets to your garage. The common myth is that it’s a complex, expensive process that requires hiring a professional. However, I’ve found that with the right guidance, it’s a project that can be tackled by anyone with basic DIY skills.
As I share my experience and knowledge with you, I promise to provide practical advice on how to add more outlets and make the most of your DIY haven. In this article, we’ll cover the step-by-step process of adding more electrical outlets to your garage, from planning to execution. You’ll learn how to assess your garage’s electrical needs, choose the right materials, and safely install new outlets. My goal is to empower you to transform your garage into a workshop that sparks creativity and innovation, just like mine has. So, let’s get started and unlock the full potential of your garage!
Table of Contents
Guide Overview: What You'll Need
Total Time: 4 hours 30 minutes
Estimated Cost: $50 – $100
Difficulty Level: Intermediate
Tools Required
- Drill (with screwdriver and drill bits)
- Wire Strippers
- Pliers (needle-nose)
- Screwdriver (flathead and Phillips)
- Level (laser or bubble)
- Fish Tape (for running wires)
- Voltage Tester
Supplies & Materials
- Electrical Outlets (15-amp or 20-amp)
- Romex Cable (12-gauge or 14-gauge)
- Wire Nuts
- Outlet Boxes (plastic or metal)
- Mounting Screws (1 inch or 1.5 inches)
- Drywall Anchors (if needed)
- Joint Compound (for patching drywall)
- Sandpaper (for smoothing drywall)
- 2-in x 4-in lumber (for supporting outlet boxes)
Step-by-Step Instructions
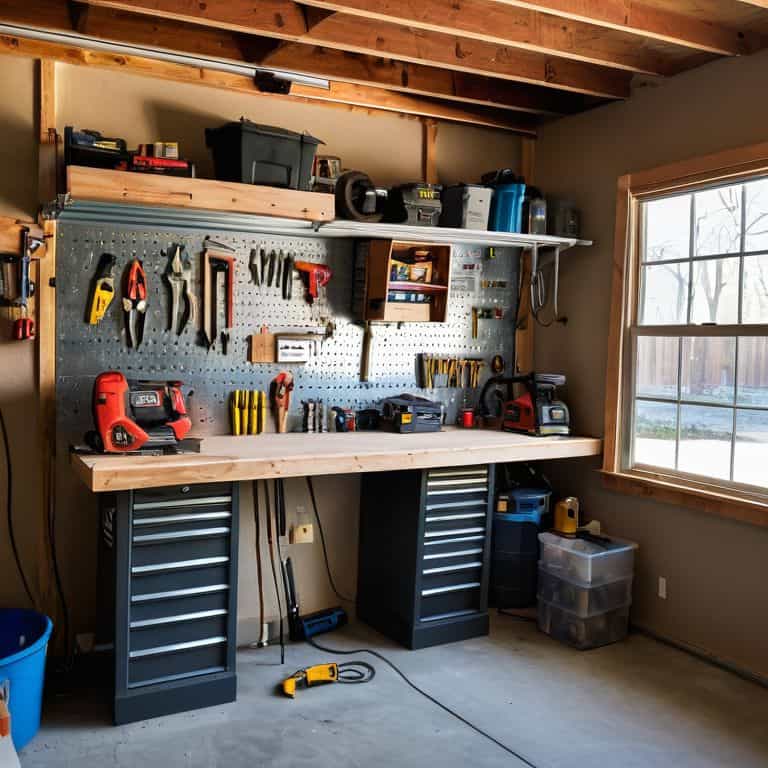
- 1. First, let’s get started by assessing the electrical needs of your garage. Take a walk around and note the locations where you’d like to add more outlets. Consider the areas where you’ll be working on projects, like your workbench or toolbox, and think about the types of tools and equipment you’ll be using. I like to use my trusty notebook, which I’ve named “Bertha,” to jot down my ideas and make a rough sketch of the layout.
- 2. Next, gather your tools and materials, including a wire stripper, pliers, screwdrivers, and the necessary electrical outlets and wiring. I’ve named my wire stripper “Sparky,” and it’s been a faithful companion in many a garage project. Make sure you have all the required materials before starting the job to avoid any last-minute trips to the hardware store.
- 3. Now, turn off the power to the garage at the main electrical panel. Verify that the power is off using a non-contact voltage tester, which I’ve dubbed “Volty.” This is a crucial safety step, so don’t skip it. Once you’ve confirmed the power is off, you can begin working on the electrical system.
- 4. Locate the nearest existing outlet or junction box, and identify the type of wiring used in your garage. You’ll need to match the gauge and type of wire to ensure a safe and reliable connection. My granddad used to say, “A good electrician is like a good detective – they can read the clues and solve the mystery.” In this case, the clues are the wires, and the mystery is how to get the power where you need it.
- 5. Run the new wiring from the existing outlet or junction box to the locations where you want to add more outlets. Use cable ties or wire clips to secure the wiring to the walls or ceiling, keeping it organized and out of the way. I’ve named my cable tie gun “Tina,” and she’s a real time-saver when it comes to keeping the wiring tidy.
- 6. Install the new outlets, making sure to follow the manufacturer’s instructions and local electrical codes. Use a level to ensure the outlets are straight, and secure them to the walls with screws. My level, which I’ve named “Linnie,” is an old friend that’s helped me hang many a straight picture and install many a level outlet.
- 7. Once the new outlets are installed, turn the power back on and test each outlet to ensure it’s working properly. Use a voltage tester to verify the voltage at each outlet, and make any necessary adjustments. This is the moment of truth – will your new outlets work as planned? With careful planning and execution, they should be humming along in no time, just like my trusty old bicycle, “Betsy,” after a good tune-up.
Garage Power Boost
As I’ve learned from my experience with restoring vintage bicycles, a garage electrical panel upgrade can be a game-changer for any DIY enthusiast. It’s amazing how much more you can accomplish with a reliable and efficient power supply. When planning your outlet installation, consider the layout of your garage and think about the types of projects you’ll be working on. This will help you determine the best placement for your new outlets.
Running electrical wire through walls can be a bit of a challenge, but with the right tools and some patience, it’s definitely doable. Just remember to always follow outlet installation codes and regulations to ensure your safety and the safety of others. If you’re not comfortable with the process, it’s always best to hire a licensed electrician who can get the job done quickly and efficiently.
In my own garage, I’ve found that adding outlets to unfinished areas has been a huge benefit. It’s allowed me to work on projects in a more flexible and efficient way. Don’t forget to consider garage GFCI outlet requirements when planning your installation, as these can be important for safety. With a little planning and creativity, you can turn your garage into a powerful workshop that inspires you to take on new projects and bring your ideas to life.
Running Wire Through Walls Like a Pro
Running wire through walls can seem daunting, but trust me, it’s a breeze once you’ve done it a few times. I recall my grandfather teaching me this trick in our old hardware store’s garage. He’d say, “John, it’s all about knowing your wire routes and having the right tools for the job.” I’ve named my trusty wire fish tape “Finley” – it’s been a lifesaver in tight spots. With Finley and a bit of patience, you’ll be running wire like a pro in no time.
To get started, map out your wire route, and don’t be afraid to get creative. Use a stud finder to avoid any, ahem, “stumbling blocks,” and make sure to label your wires as you go. It’s a simple step, but it’ll save you headaches down the line. Now, go ahead and channel your inner electrician – with a little practice, you’ll be wiring up your garage in no time, just like I do when I’m restoring my vintage bicycles.
Upgrading Electrical Panels With Ease
Upgrading your electrical panel is the next step in unleashing your garage’s full potential. I like to think of it as giving your workspace a brain transplant – suddenly, everything runs smoother and more efficiently. My trusty voltage tester, “Volty,” and I have worked on numerous panel upgrades, and I can confidently say it’s a game-changer. With a few extra slots for circuits, you’ll be free to add more outlets, lighting, and even a dedicated line for your favorite power tools.
I’ve named my circuit breaker “Bernie” – he’s a bit temperamental, but once you get to know him, he’s a breeze to work with. When upgrading your panel, remember to label each circuit clearly, so you can easily identify which one corresponds to which outlet or device. My grandfather used to say, “A well-labeled garage is a happy garage,” and I couldn’t agree more. With a little patience and the right tools, you’ll be enjoying a more powerful and organized workspace in no time.
Garage Outlet Hacks: 5 Tips to Supercharge Your Workspace
- Measure Twice, Drill Once: Plan your outlet placement carefully to avoid costly mistakes and ensure your garage workspace is both functional and safe
- Choose the Right Receptacle: Select outlets that fit your specific needs, whether it’s GFCI-protected, 20-amp, or USB-equipped, to keep your tools and devices powered up
- Play by the Code: Familiarize yourself with local electrical codes and regulations to avoid fines or, worse, a hazardous workspace – your safety is worth it
- Wiring Wisdom: Use the correct gauge wire for your outlets to prevent overheating and ensure reliable power distribution throughout your garage
- Label It Like You Mean It: Identify each outlet with its intended use to keep your workspace organized and make it easier to troubleshoot issues when they arise – trust me, it’s a game-changer
Key Takeaways to Supercharge Your Garage
By adding more electrical outlets, you’ll unlock your garage’s full potential, transforming it into a versatile workshop where creativity and innovation thrive
Upgrading your electrical panel and running wires through walls might seem daunting, but with the right approach, you can tackle these tasks with confidence and ease, just like I do when restoring my vintage bicycles
Remember, the goal is to make your garage a playground for your imagination, so don’t be afraid to get hands-on, experiment with new projects, and make the most of your newfound power and possibilities
Powering Up Your Garage
Adding more electrical outlets to your garage isn’t just about having more places to plug in your tools, it’s about unleashing the full potential of your workspace and bringing your most ambitious projects to life.
John Beeler
Unleashing Your Garage's Full Potential
As we wrap up this journey to add more electrical outlets to your garage, let’s take a moment to reflect on the progress we’ve made. From the initial steps of planning and preparation, to the garage power boost we achieved by upgrading electrical panels and running wire through walls like a pro, every step has brought us closer to transforming our garage into a haven of creativity and innovation. By following these practical, hands-on steps, you’ve not only increased the functionality of your garage but also opened up a world of possibilities for your DIY projects.
Now, as you stand in your newly empowered garage, surrounded by the hum of activity and the glow of freshly installed outlets, remember that the true magic happens when you unleash your imagination. Whether you’re restoring a vintage bicycle, like my trusty ’68 Schwinn, or bringing a new idea to life, your garage is now a playground where creativity knows no bounds. So go ahead, get tinkering, and let the spirit of innovation guide you – your next great project is just a spark away!
Frequently Asked Questions
What are the most common mistakes to avoid when adding new electrical outlets to my garage?
Don’t be a rookie like I was – avoid overloading circuits, neglecting GFCI protection, and sloppy wire management. Trust me, I’ve learned from my own mistakes restoring vintage bikes in my garage. Double-check your work, and don’t hesitate to consult a pro if unsure, just like my granddad taught me back in the day.
How do I determine the right number and placement of outlets for my specific garage workshop needs?
Determining the right number and placement of outlets is a breeze. I like to call it ‘outlet mapping.’ Consider the layout of your garage, where you’ll be working, and what tools you’ll be using. Think about grouping outlets near workbenches and tool stations. For me, it’s all about creating a workflow that saves time and reduces cord chaos – just like organizing my trusty toolbox, where every tool has a name!
Are there any special considerations or permits required for adding electrical outlets in a garage with a living space or apartment above it?
When adding outlets to a garage with living space above, it’s crucial to consider local building codes and permits. I always check with my town’s building department to ensure compliance, just like my grandfather taught me to do with our hardware store’s renovations. Safety first, and a quick call can save a world of hassle!