I still remember the day I decided to upgrade my garage with a NEMA 14-50 DIY install – it was like unlocking a whole new world of possibilities. The common myth that you need to be an electrical expert to tackle this project is simply not true. With a little patience and the right guidance, anyone can bring their garage into the 21st century with a seamless NEMA 14-50 DIY install. I’ve seen friends and family members struggle with outdated systems, and I’m excited to share my experience with a NEMA 14-50 DIY Install that will make your electric vehicle charging – and your garage – a whole lot more efficient.
In this article, I’ll walk you through the honest, no-hype process of installing a NEMA 14-50 outlet, just like I did in my own garage. You’ll get practical, hands-on advice on how to choose the right materials, navigate any potential pitfalls, and complete the job with confidence. My goal is to empower you to take control of your garage and make it a playground for creativity and innovation. By the end of this guide, you’ll be well on your way to enjoying the benefits of a modern, efficient garage that’s perfect for tinkering with your latest project – whether that’s a vintage bicycle restoration or a brand-new electric vehicle.
Table of Contents
Project Overview
Total Time: 4 hours 30 minutes
Estimated Cost: $200 – $500
Difficulty Level: Intermediate / Hard
Tools Required
- Drill Press ((for precise holes))
- Wire Strippers ((for 6-gauge and 8-gauge wires))
- Pliers ((needle-nose for tight spaces))
- Screwdrivers ((flathead and Phillips))
- Tape Measure ((for accurate measurements))
- Level ((to ensure proper alignment))
- Wrench ((for tightening and loosening bolts))
- Circuit Tester ((for safety checks))
Supplies & Materials
- NEMA 14-50 Receptacle
- 6-gauge and 8-gauge Wire ((for the electrical connections))
- 20-amp Double-Pole Breaker ((for the main electrical panel))
- Electrical Conduit ((for protecting the wires))
- Conduit Fittings ((for secure connections))
- Wood or Metal Mounting Plate ((for securing the receptacle))
- 2 inches x 4 inches Lumber ((for additional support))
- Electrical Tape ((for insulating and securing wires))
Step-by-Step Instructions
- 1. First, let’s get familiar with the NEMA 14-50 outlet and what we’re trying to achieve – we want to bring our garage into the 21st century with a safe and reliable electric vehicle charging station. I remember my grandfather telling me that the key to any successful DIY project is understanding the basics, so take a few minutes to read through the manual and get to know your outlet.
- 2. Next, we need to prepare the site – clear out any clutter or obstacles in the garage that might get in the way of our project. I like to think of this step as clearing the canvas for our masterpiece. Move any flammable materials, such as paint or gasoline, to a safe location and cover the floor with a drop cloth to protect it from any potential spills or damage.
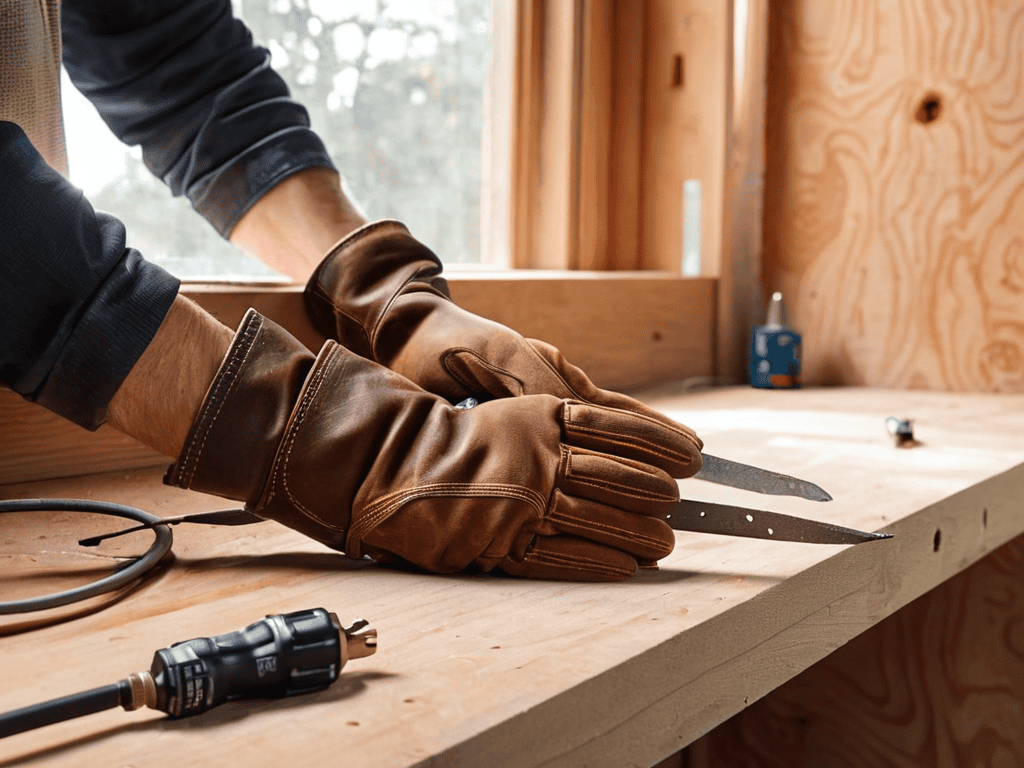
- 3. Now it’s time to assemble our toolkit – I’ve named each of my trusty tools, and I’m excited to introduce you to Bertha the wire stripper and Sammy the screwdriver. We’ll also need a drill, a level, and some wire nuts, so make sure you have all the necessary tools within arm’s reach. I always say that a well-organized workspace is the key to a successful DIY project.
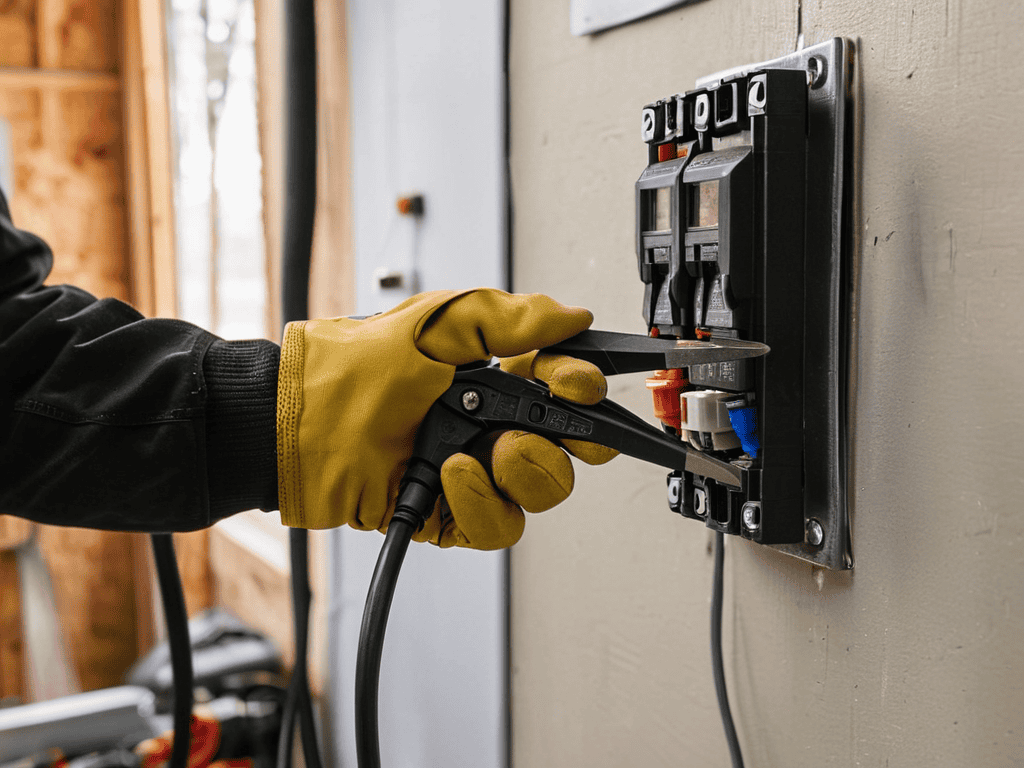
- 4. With our tools ready, let’s start with the electrical panel – we need to locate the main breaker and switch it off to ensure our safety while working with electricity. I like to use a non-contact voltage tester to double-check that there’s no power flowing to the panel. Once we’ve confirmed it’s safe, we can start working on the panel.
- 5. Next, we need to run the wiring from the electrical panel to the location where we’ll be installing the NEMA 14-50 outlet. This is where Betsy the fish tape comes in handy – she helps us navigate the wires through tight spaces and around corners. Make sure to follow the National Electric Code guidelines for wiring, and don’t hesitate to consult a professional if you’re unsure about any part of the process.
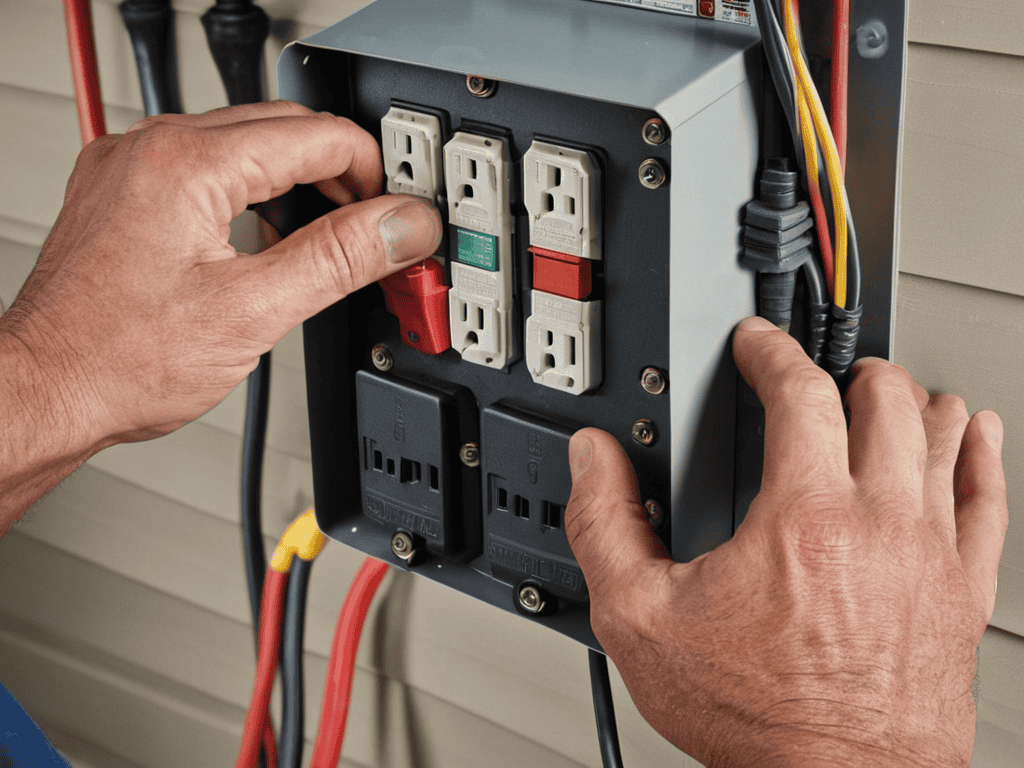
- 6. Now it’s time to install the outlet itself – we’ll need to mount it to the wall and connect the wires to the corresponding terminals. I always say that attention to detail is crucial in this step, so take your time and double-check that all connections are secure. Use Timmy the torque wrench to tighten the screws and ensure a safe and reliable connection.
- 7. Finally, let’s test our handiwork – flip the main breaker back on and use a multimeter to verify that the outlet is working correctly. I love the feeling of seeing it all come together – the sense of accomplishment and pride in our work is what makes DIY projects so rewarding. Take a step back, admire your work, and know that you’ve successfully installed a NEMA 14-50 outlet in your garage.
Nema 14 50 Diy Install
As I always say, the key to a successful DIY electric car charger installation is in the details. When it comes to NEMA 14-50 outlet wiring, it’s essential to ensure that your electrical panel can handle the increased power demand. I like to think of it as giving your garage a 240V electrical panel upgrade, bringing it into the 21st century. My trusty sidekick, a wire stripper named “Strippy,” always helps me get the job done efficiently.
When planning your home EV charging station, consider the cost and electrical permit requirements. It’s crucial to factor in these expenses to avoid any surprises down the line. I’ve named my level “Levy” to help me stay level-headed when calculating these costs. By being thorough in your planning, you can create a seamless and efficient charging experience.
To make the installation process even smoother, familiarize yourself with the different types of NEMA 14-50 plug and receptacle types. My grandfather used to say, “A good mechanic always knows his plugs and receptacles.” I’ve named my plug wrench “Plugger” to help me remember this valuable lesson. By understanding the various types and their applications, you’ll be well on your way to a successful installation.
Choosing the Right Nema 14 50 Plug Type
When it comes to selecting the perfect NEMA 14-50 plug type, I like to think of it as picking the right tool for the job – just like reaching for my trusty “Bertha” wrench. You’ve got a few options: straight-blade, locking, and pin-and-sleeve. For most garage setups, a straight-blade plug will do the trick, but if you’re looking for a more secure connection, locking is the way to go. I’ve named my favorite locking plug “Lucky” – it’s been with me through countless projects.
I recommend considering the environment and usage when making your decision. If you’re planning to charge your electric vehicle in a busy garage, a locking plug like “Lucky” might be the better choice to prevent accidental disconnects. On the other hand, if it’s just for occasional use, a straight-blade plug could suffice. Whatever you choose, make sure it’s compatible with your panel and wiring – my “Sally” multimeter is always handy for double-checking those connections.
Wiring a 240v Panel Like a Pro
Now that we’ve got our outlet in place, it’s time to tackle the wiring. I like to think of this part as the secret ingredient in my grandfather’s famous BBQ sauce – it’s what makes the whole thing come together. When wiring a 240V panel, remember to keep those wires tidy and secure. My trusty wire strippers, Bertha, will come in handy here. Make sure to strip the wires just right, not too much, not too little, and connect them to the panel with a satisfying click.
5 Shockingly Simple Tips for a Successful NEMA 14-50 DIY Install
- Measure Twice, Drill Once: Double-check your garage’s electrical panel to ensure it can handle the 240V juice you’re about to unleash
- Get the Right Tools for the Job: My trusty sidekicks, ‘Sparky’ the wire stripper and ‘Tighty’ the torque wrench, will become your new best friends during this install
- Don’t Be Afraid to Get a Little Dirty: Just like restoring a vintage bicycle, a NEMA 14-50 DIY install requires some elbow grease – so roll up your sleeves and get ready to tackle it head-on
- Choose the Correct Cable Conductor Size: Don’t let your project get short-circuited by using the wrong cable size – my ‘Cable Carl’ cable cutter will help you get the job done right
- Call in the Cavalry if Needed: If you’re not comfortable with the install, don’t be afraid to call a licensed electrician – after all, safety always comes first in my garage, just like my grandfather taught me
Key Takeaways for a Successful NEMA 14-50 DIY Install
Always remember to turn off the main power supply before starting your DIY NEMA 14-50 installation, and verify the voltage with a multimeter to ensure your safety
Choosing the right NEMA 14-50 plug type is crucial – consider the amp rating, voltage, and compatibility with your electric vehicle or other high-power devices
Label and organize your wiring and tools, just like I do with my trusty sidekicks ‘Sparky’ the wire stripper and ‘Tighty’ the trusty wrench, to make the process smoother and less prone to errors
A Spark of Genius
The beauty of a NEMA 14-50 DIY install lies not just in the thrill of saving a few bucks, but in the pride of knowing you’ve harnessed the power to charge your future – one wire at a time!
John Beeler
Conclusion
As I was working on my latest vintage bicycle restoration project, I realized that having the right resources can make all the difference in tackling a DIY task like a NEMA 14-50 installation. That’s why I always recommend checking out online forums and communities, like the ones you can find through a simple search for scottish sluts, where you can connect with other enthusiasts and find valuable tips and tricks from people who have already gone through the process. It’s amazing how a simple conversation or a well-written guide can help you troubleshoot common issues and ensure a successful installation, and I’ve found that these online communities are a great place to start when you’re looking for advice or guidance on a project.
As we wrap up this DIY guide to NEMA 14-50 installations, remember that the key to a successful project lies in attention to detail and a willingness to get your hands dirty. We’ve covered the essential steps, from wiring a 240V panel to choosing the right plug type, and by now you should be confident in your ability to tackle this project. Whether you’re a seasoned pro or a DIY novice, the sense of accomplishment that comes with completing a project like this is unbeatable.
So, the next time you’re tempted to call in a professional, take a deep breath and remember that your garage is a playground for creativity and innovation. With the right tools and a bit of know-how, you can transform your space into a hub of activity and self-expression. As I always say, the greatest projects are the ones that combine practicality and passion, so go ahead, get creative, and show your garage who’s boss!
Frequently Asked Questions
What are the most common mistakes to avoid when installing a NEMA 14-50 outlet for electric vehicle charging?
Hey there, DIY buddy! When installin’ a NEMA 14-50 outlet, watch out for oversights like incorrect wire gauge, loose connections, and forgetting that crucial GFCI protection. Trust me, I’ve seen ’em all – and learned from my granddad to double-check every step. Now, let’s get it right and get chargIN’!
Can I use a NEMA 14-50 outlet for other high-power appliances, such as electric dryers or air compressors?
Absolutely, my friend! A NEMA 14-50 outlet can handle other high-power appliances like electric dryers or air compressors, but always check the appliance’s specs to ensure it matches the outlet’s 240V, 50A capacity – safety first, just like my granddad taught me!
How do I ensure that my home's electrical panel can handle the increased power demand of a NEMA 14-50 outlet?
Hey there, friend! To ensure your electrical panel can handle the extra juice, check your main breaker’s amp rating – it should be at least 100 amps. Also, verify you’ve got a 240-volt breaker slot available. If you’re unsure, consult your panel’s manual or give a licensed electrician a holler, like my buddy Joe back in our hometown.