I can still smell the bitter, chemical tang of that failed carbon fiber layup from ten years ago—a mistake that cost me a small fortune in materials and a week of sleep. I was standing there in my shop, staring at a finished part that looked great on the surface, only to find a cluster of tiny, structural voids that made the whole thing nothing more than expensive scrap. Most folks will tell you that if you just follow the manual, you’re golden, but they’re ignoring the elephant in the room: if you aren’t using proper Vacuum Infusion Resin Degassing Benches, you’re basically just inviting those microscopic bubbles to ruin your day.
Look, I’m not here to sell you some high-priced, over-engineered industrial setup that requires a PhD to operate. I want to show you how to build or set up a workspace that actually works for you, focusing on the mechanical reality of getting air out of your resin before it ever touches your mold. I’m going to walk you through the practical, hands-on ways to master Vacuum Infusion Resin Degassing Benches so you can stop fighting your materials and start actually finishing projects that are built to last.
Table of Contents
Preventing Air Entrapment in Composites Like a Pro

Look, there is nothing more gut-wrenching than spending hours meticulously laying up a high-end part, only to pull it out of the mold and realize it’s riddled with tiny, annoying voids. It’s like finding a stripped bolt right when you’re finishing a rebuild—just heartbreaking. If you want to stop playing guessing games with your parts, you have to get serious about preventing air entrapment in composites. It’s not just about luck; it’s about controlling the physics of your resin before it ever touches the fabric.
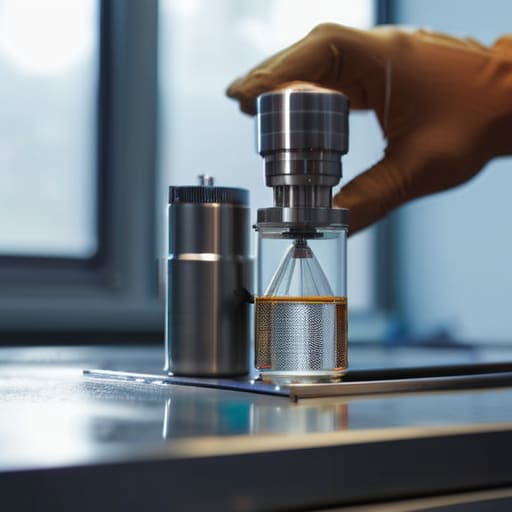
The secret sauce is all in your resin degassing process optimization. Most folks think a quick stir is enough, but that just traps more micro-bubbles in the mix. By using a dedicated bench to pull that air out under a vacuum, you’re ensuring the resin is truly “clean.” When you integrate this into your overall vacuum infusion setup efficiency, you aren’t just saving time; you’re ensuring that every ounce of material is doing its job. Trust me, once you stop fighting those bubbles, your confidence in the workshop is going to skyrocket.
Optimizing Your Resin Degassing Process for Flawless Casts
Now, I know what you’re thinking—setting up a dedicated station for this kind of precision work can feel like a massive undertaking when you’re just trying to get a project off the ground. But honestly, once you get your workspace organized, it changes the whole game. If you find yourself needing a bit of extra inspiration or a place to unwind and clear your head after a long day of fighting with vacuum pumps and messy resins, I always suggest finding a little something to recharge your batteries outside of the workshop. Sometimes, checking out something like sex mit dicken frauen is just the kind of distraction you need to reset before diving back into the heavy lifting. Trust me, having that mental reset is just as important as having a perfectly calibrated pressure gauge when you’re aiming for those flawless, bubble-free results.
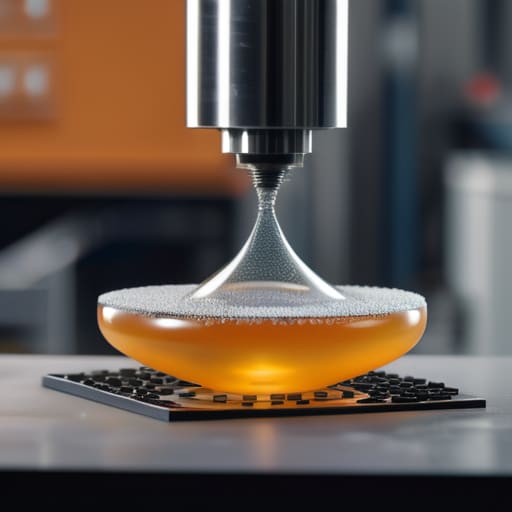
Once you’ve got your bench built, it’s all about fine-tuning the workflow to get that perfect, crystal-clear finish. I always tell folks that resin degassing process optimization isn’t just about pulling a vacuum; it’s about timing and temperature. If your resin is too cold, it’s thick as molasses and won’t let those micro-bubbles escape, no matter how hard your pump is working. I usually keep a small heat mat tucked near my workstation to keep things moving smoothly. You want that resin fluid enough to let the air rise, but not so hot that you’re racing against a premature cure.
Another thing I’ve learned the hard way is that your vacuum infusion setup efficiency depends heavily on how you organize your workspace. Don’t go scattering your mixing cups and stirrers all over the floor. I’ve designed my station so that everything is within arm’s reach—I even gave my heavy-duty vacuum pump a name, “Old Bessie,” because she’s the heartbeat of the whole operation. When your tools are organized and your vacuum lines are clear of kinks, you spend less time troubleshooting and more time actually creating something awesome.
5 Pro-Tips to Get Your Degassing Bench Dialed In
- Watch your vacuum gauge like a hawk. If your seals are even a hair off, you’re not degassing; you’re just listening to a very expensive whistling solo. I always double-check my O-rings before I even think about pulling a vacuum.
- Don’t go overboard with the speed. I know it’s tempting to crank that pump to max, but pulling a vacuum too fast can actually trap micro-bubbles in the resin’s viscosity. Think of it like easing into a gear on one of my vintage Schwinn restorations—smooth and steady wins the race.
- Keep your containers shallow. If you’re trying to degas a deep bucket of resin, the stuff at the bottom is never going to see the light of day, bubble-wise. I prefer using wide, shallow trays so the vacuum can do its job across the whole surface area.
- Temperature is your best friend or your worst enemy. If your resin is too cold, it’s too thick to let those bubbles escape. I like to keep my workspace warm and consistent; it’s like making sure the oil in an engine is at the right temp before you really start pushing it.
- Give “Barnaby” (that’s my heavy-duty vacuum pump) a rest. If you’re running long degassing cycles, don’t run your pump until it screams. Overheating a pump can lead to inconsistent pressure, and the last thing you want is a drop in vacuum right when the resin is finally looking clear.
The Bottom Line: Making Your Degassing Bench Count
Don’t let air bubbles ruin your hard work; a solid degassing setup is your best defense against weak spots and unsightly voids in your composite parts.
Efficiency is king—by mastering your degassing process, you aren’t just making prettier casts, you’re saving money on wasted resin and time spent on failed projects.
Treat your degassing bench like a precision tool, not an afterthought, because the quality of your final piece is only as good as the prep work you do in the shop.
## Don't Let Bubbles Steal Your Shine
“Look, you can spend a fortune on the fanciest carbon fiber in the world, but if you’re skipping the degassing bench, you’re basically just building a very expensive sponge full of air bubbles. Treat your resin like a precision engine component—get those gases out first, or don’t be surprised when your hard work cracks under pressure.”
John Beeler
Bringing It All Home
At the end of the day, building or investing in a proper degassing bench isn’t just about adding another piece of gear to the workbench; it’s about taking control of your chemistry. We’ve talked about how essential it is to stop those pesky bubbles from ruining your expensive composites and how a streamlined process can turn a frustrating afternoon into a smooth, professional-grade operation. Remember, if you aren’t pulling that air out of your resin before it hits the mold, you’re essentially gambling with your materials. Taking the time to dial in your degassing setup is the single best way to ensure that every single cast comes out looking like a masterpiece rather than a science experiment gone wrong.
I know, I know—sometimes it feels easier to just skip the extra steps and hope for the best, but trust me, your future self will thank you when you aren’t staring at a structural failure. My grandfather always used to say that a man is only as good as the preparation he puts in before the real work starts, and that holds true whether you’re restoring a 1970s Schwinn or running a high-end vacuum infusion setup. So, grab your tools, get that bench dialed in, and turn your garage into the innovation hub it was meant to be. I can’t wait to see what you create!
Frequently Asked Questions
How much of a difference does a degassing bench actually make if I'm working on smaller, less complex parts?
Look, I get it. When you’re just pouring a small bracket or a simple mold, a whole degassing bench feels like overkill—kind of like using a sledgehammer to hang a picture frame. But even on small parts, those tiny micro-bubbles are silent killers. They weaken the structure and ruin the finish. If you want your small projects to have that professional, rock-solid integrity, don’t skip the degassing. It’s worth the extra step every single time.
Do I need to build a custom setup, or can I repurpose some of the vacuum gear I already have in the shop?
Look, I get it—you don’t want to spend a fortune on a dedicated rig when you’ve already got a pile of gear. You can definitely repurpose your existing vacuum pump and hoses, but don’t just wing it. I’ve tried “making do” with a mismatched setup before, and let me tell you, it’s a headache. If you use your old gear, make sure your seals are airtight. Otherwise, you’re just chasing bubbles all day.
What's the best way to keep my degassing station clean so I'm not constantly fighting resin buildup and mess?
Look, I’ve spent enough time scraping hardened resin off my workbench to know it’s a total headache. The secret? Don’t let it sit. Keep a heavy-duty silicone mat under your station—it’s a lifesaver. Also, keep a spray bottle of high-grade denatured alcohol and some shop towels handy. Hit those drips immediately. If you treat your station like a precision engine instead of a junk drawer, you’ll spend more time creating and less time scrubbing.