I still remember the day I decided to tackle the chaotic garage in my childhood home. My parents, being the eco-conscious enthusiasts they are, had collected a treasure trove of reusable materials over the years, but our garage had become a cluttered nightmare. That’s when I learned how to build heavy-duty garage shelves and transformed the space into a haven for creativity and productivity. The process was not only therapeutic but also eye-opening, as I realized that with a little ingenuity, anyone can turn their garage into a functional and organized oasis.
As someone who’s passionate about sustainable living and DIY projects, I’m excited to share my knowledge with you. In this article, I’ll guide you through the process of building heavy-duty garage shelves that will make your life easier and your garage a joy to spend time in. You can expect practical advice and step-by-step instructions on how to create sturdy shelves that will withstand the test of time. Whether you’re a seasoned DIY enthusiast or a beginner looking to get your hands dirty, this guide is designed to help you achieve your goals and create a space that reflects your unique style and needs.
Table of Contents
- Guide Overview: What You'll Need
- Step-by-Step Instructions
- Crafting Heavy Duty Garage Shelves
- Shelving Hacks from a Seasoned Pro: 5 Tips to Supercharge Your Garage Storage
- 3 Key Takeaways to Revitalize Your Garage
- Shelving Wisdom
- From Dreams to Reality: The Joy of DIY Garage Shelving
- Frequently Asked Questions
Guide Overview: What You'll Need
Total Time: 4 hours 30 minutes
Estimated Cost: $100 – $200
Difficulty Level: Intermediate
Tools Required
- Circular Saw (for cutting lumber)
- Drill (with screwdriver and drill bits)
- Tape Measure (for measuring and marking lumber)
- Level (for ensuring shelves are level)
- Wrench (for tightening bolts)
- Utility Knife (with extra blades)
Supplies & Materials
- 2-in x 4-in lumber (for shelf frames)
- 3/4-in plywood (for shelf boards)
- Wood Screws (2 1/2 inches long)
- Wood Glue (for added strength)
- Bolts (1/2 inch diameter, 4 inches long)
- Washers (for bolts)
Step-by-Step Instructions
- 1. First, let’s start by gathering our materials, which will include 2×4 lumber for the frame, 3/4 inch plywood for the shelves, wood screws, and a drill press. I like to think of this step as a treasure hunt, where I get to scour my local hardware store or salvage yard for the perfect pieces to bring my vision to life. As I always say, the right materials can make all the difference in a project like this.
- 2. Next, we’ll need to measure our garage space to determine the optimal size for our shelves. This is where my environmental design background comes in handy, as I consider the flow of the space and how our new shelves will interact with the existing environment. I take note of any obstacles or limitations, such as pipes or windows, and plan my design accordingly.
- 3. Now it’s time to cut our lumber to the appropriate lengths. I love this part of the process, as it’s where my urban foraging skills come into play. I’ve learned to repurpose old tools and find new uses for discarded items, like using an old handsaw to cut through particularly stubborn wood. With my trusty saw by my side, I carefully cut each piece to size, making sure to wear my safety goggles to protect my eyes from any stray splinters.
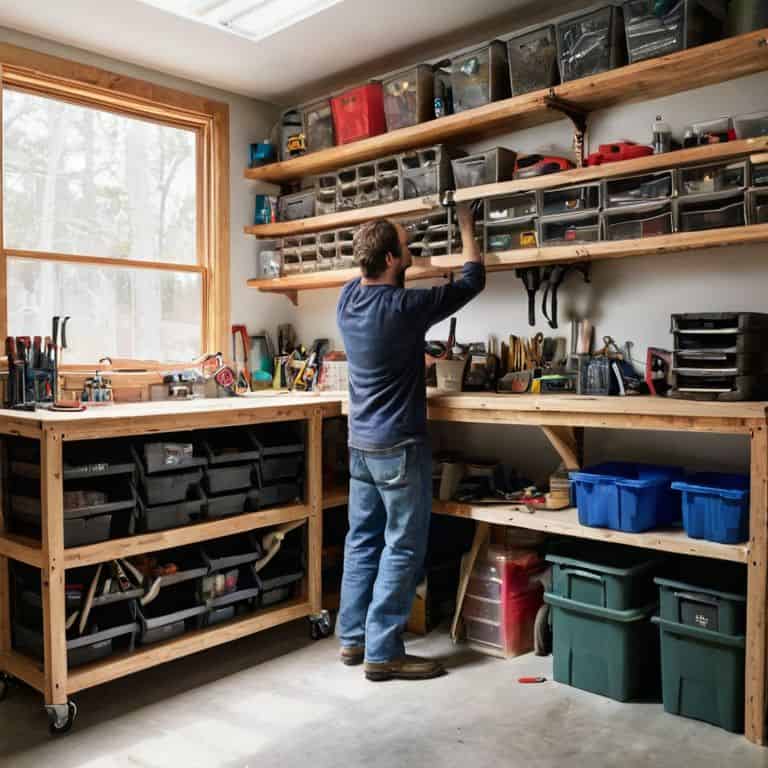
- 4. With our lumber cut, we can start assembling the frame of our shelves. This is where things start to get really exciting, as we begin to see our vision take shape. I use wood screws to secure each piece in place, making sure to pre-drill my holes to avoid any splits or cracks in the wood. As I work, I feel a sense of satisfaction and pride, knowing that I’m creating something truly unique and functional.
- 5. Once our frame is built, it’s time to add the shelves. I carefully cut my plywood to size, using a circular saw to make clean, precise cuts. Then, I attach the shelves to the frame using wood glue and screws, making sure everything is level and secure. This is the part of the process where I get to see my design come to life, and it’s always a thrill to watch my shelves transform from a pile of raw materials into a beautiful and functional storage system.
- 6. Now that our shelves are built, it’s time to add some finishing touches. I like to sand down any rough edges and apply a coat of natural sealant to protect the wood from the elements. This is also a great opportunity to get creative with customization, adding any decorative trim or hardware that suits my style. As I work, I feel a sense of accomplishment and pride, knowing that I’ve created something truly unique and functional.
- 7. Finally, it’s time to install our shelves and start enjoying the fruits of our labor. I carefully lift the shelves into place, making sure they’re level and secure. Then, I step back and admire my handiwork, feeling a sense of satisfaction and joy at having created something truly special. With my new shelves in place, I can finally organize my garage and make the most of my space, and I feel grateful for the opportunity to share this process with you.
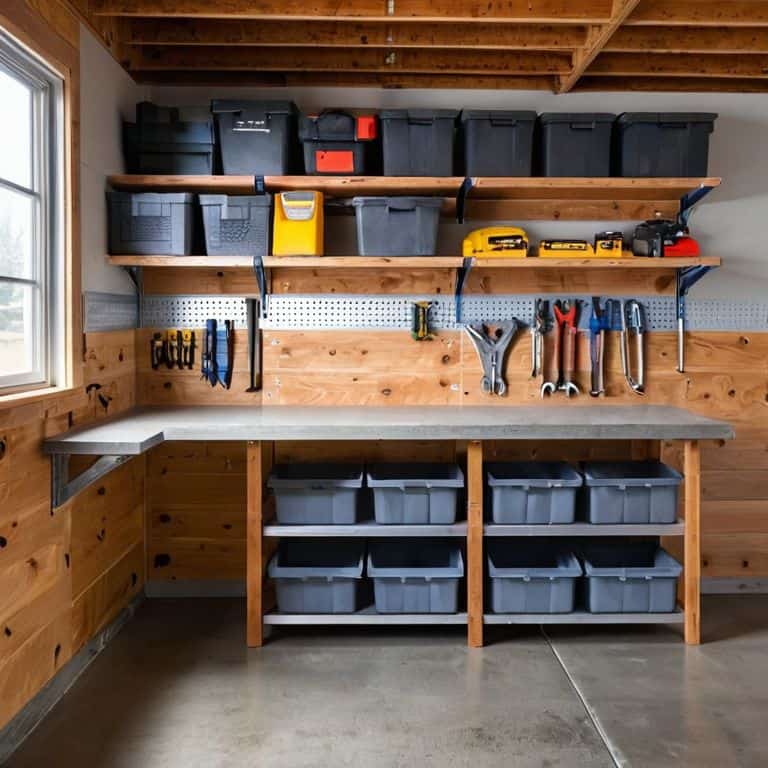
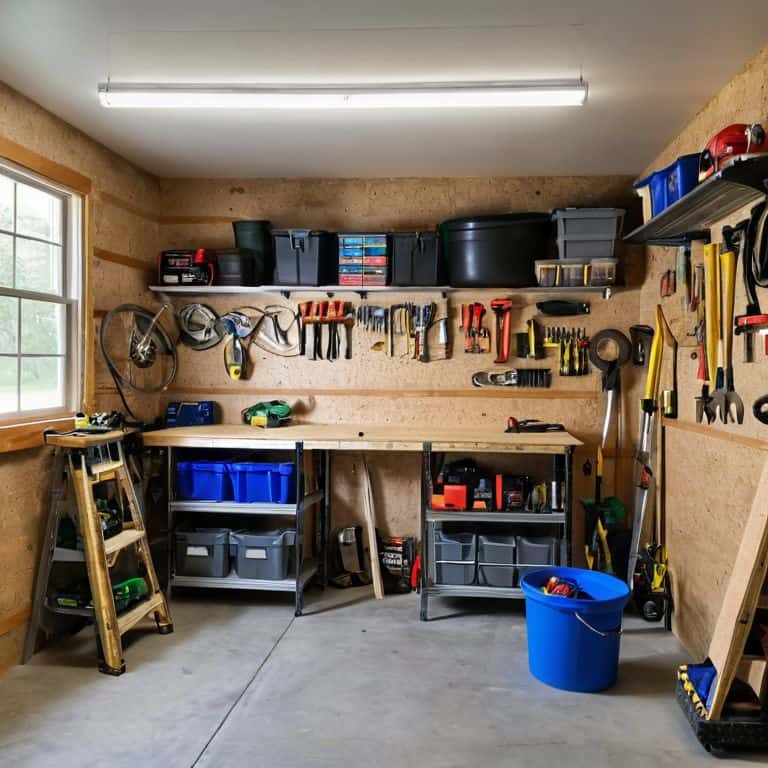
Crafting Heavy Duty Garage Shelves
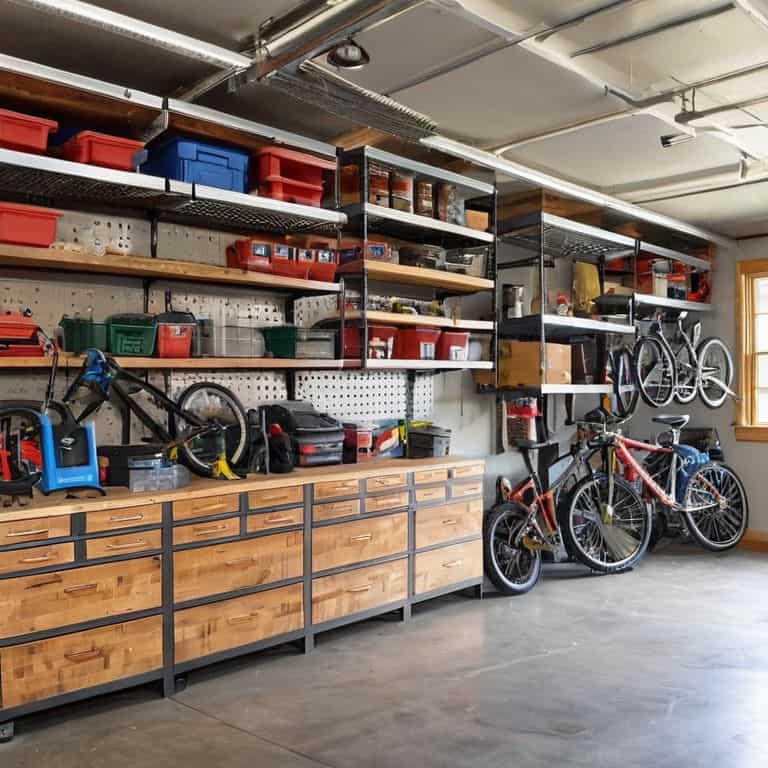
As I delve into the world of heavy duty shelving units for garages, I’m reminded of the countless possibilities that arise when combining reclaimed wood with clever design. One of my favorite approaches is to incorporate maximizing garage storage space by using vertical space, allowing you to store more items without sacrificing floor area. This not only keeps your garage organized but also makes it easier to find what you need when you need it.
When it comes to custom garage shelving designs, the key is to think outside the box – or in this case, the garage. Consider the types of items you’ll be storing and design your shelves accordingly. For instance, if you have a lot of heavy tools, you’ll want to ensure that your shelves can support the weight. A simple garage shelf weight capacity calculation can help you determine the right materials and design for your needs.
By embracing the art of building garage storage from reclaimed wood, you’re not only reducing waste but also creating a unique and functional space that reflects your personality. As you work on your DIY project, remember to have fun and be creative – after all, it’s the journey that makes the destination so rewarding. With a little patience and imagination, you can transform your garage into a diy garage organization system that’s both functional and beautiful.
Calculating Weight Capacity for Maximized Storage
To ensure your heavy-duty garage shelves can handle the weight of your stored treasures, let’s get calculating. Consider the types of items you’ll be storing – are they bulky tools, boxes of crafting supplies, or perhaps bins of urban foraged goodies? Estimate the total weight of these items and aim for shelves that can support at least 1.5 to 2 times that amount. This will give you a comfortable buffer for any unexpected additions.
When calculating weight capacity, also think about the material and construction of your shelves. For instance, reclaimed wood can be incredibly sturdy, but its weight capacity may vary depending on the type and condition of the wood. By taking the time to crunch these numbers, you’ll be able to maximize your storage space while keeping your shelves safe and secure.
Reclaiming Wood for Custom Shelving Units
Reclaiming Wood for Custom Shelving Units
I love scouring local salvage yards and thrift stores for unique, character-filled woods to repurpose into one-of-a-kind shelving units. Consider reclaimed pallet wood, barn wood, or even old fencing – each telling a story of its own. With a little creativity, these discarded treasures can become the foundation of your custom garage shelving.
By reclaiming wood, you’re not only reducing waste but also infusing your space with a sense of history and personality. I’ve found that a good sanding and a fresh coat of finish can work wonders in bringing out the natural beauty of the wood. Get creative and experiment with different textures and tones to craft a truly bespoke shelving system that reflects your style and adds a touch of warmth to your garage.
Shelving Hacks from a Seasoned Pro: 5 Tips to Supercharge Your Garage Storage
- Measure Twice, Cut Once: The Golden Rule of Garage Shelving to Ensure a Perfect Fit
- Choose Your Wood Wisely: Selecting the Right Type of Reclaimed Wood for Heavy-Duty Shelves
- Anchor It Like a Pro: Securing Your Shelves to the Wall for Maximum Stability and Safety
- Think Vertically: Maximizing Your Garage’s Storage Potential with Tiered Shelving Units
- Add a Personal Touch: Incorporating Decorative Elements into Your Shelving Design for a Unique Garage Makeover
3 Key Takeaways to Revitalize Your Garage
By repurposing reclaimed wood and salvaged materials, you can create heavy-duty garage shelves that not only maximize your storage but also tell a story of sustainability and creativity
Calculating the weight capacity of your shelves is crucial for ensured safety and efficiency, allowing you to store everything from tools to seasonal decorations with confidence
Embracing the DIY spirit and turning your garage into an organized haven can be a transformative experience, empowering you to see the potential in every discarded item and to live more mindfully, creatively, and sustainably
Shelving Wisdom
The true strength of a heavy-duty garage shelf lies not in its weight capacity, but in the stories of transformation it tells – of scraps reborn, of space reclaimed, and of the human spirit that crafts something extraordinary from the ordinary.
Stanley Truman
From Dreams to Reality: The Joy of DIY Garage Shelving
As we conclude this journey of transforming your garage into a haven of organization and efficiency, let’s reflect on the key takeaways: from reclaiming wood for custom shelving units to calculating weight capacity for maximized storage, every step has been a testament to the power of creative self-sufficiency. By embracing the art of DIY and giving new life to discarded materials, you’ve not only created a functional space but also contributed to a more sustainable future. Remember, the true magic lies not in the end result, but in the process itself – the problem-solving, the experimentation, and the sense of accomplishment that comes with it.
So, as you stand back to admire your handiwork, surrounded by the fruits of your labor, take a moment to appreciate the journey. The shelves you’ve built are more than just a storage solution – they’re a symbol of your ability to think outside the box, to reimagine, and to create. Let this project be a catalyst for further exploration into the world of DIY and sustainable living, and never stop pushing the boundaries of what’s possible with your own two hands.
Frequently Asked Questions
What type of wood is best suited for building heavy-duty garage shelves that can withstand heavy loads and last for years?
For heavy-duty garage shelves, I recommend using sturdy woods like reclaimed oak, maple, or pine. These woods offer excellent strength and durability, perfect for withstanding heavy loads and lasting for years to come. Plus, repurposing old wood adds a touch of character to your shelves!
How do I ensure the shelves are properly anchored to the wall to prevent them from tipping over, especially if I'm planning to store heavy equipment or tools?
To keep those shelves from tipping, I swear by a good anchor system. Use wall brackets or French brackets to secure them to the studs, and consider adding anti-tip brackets for extra peace of mind, especially when storing heavy gear.
Can I use reclaimed or salvaged materials to build my heavy-duty garage shelves, and if so, what are some tips for preparing and integrating these materials into my project?
Absolutely, I’m all about giving old materials new life. For reclaimed wood, inspect for damage, remove old nails, and sand for a smooth finish. Consider the history and character each piece brings – it’s not just about function, but telling a story with your shelves.


