As I stood in my grandfather’s backyard, watching him frame the shed wall with ease, I realized that a guide to framing a shed wall doesn’t have to be a daunting task. In fact, I’ve often found that the most intimidating projects can become the most rewarding once you break them down into manageable steps. My grandfather’s shed, with its perfectly aligned walls and sturdy frame, was a testament to the fact that with the right approach, anyone can create something truly remarkable. I’ve seen many people struggle with framing a shed wall, but with the right guidance, it can be a fun and creative project.
In this article, I’ll share my own experiences and practical tips for framing a shed wall, from planning and preparation to the actual construction process. I’ll walk you through the steps, highlighting common pitfalls to avoid and providing honest advice on how to overcome them. By the end of this guide, you’ll be equipped with the knowledge and confidence to tackle your own shed-framing project, and maybe even discover a new passion for DIY construction. Whether you’re a seasoned builder or a beginner, this step-by-step guide will help you achieve professional-looking results and create a shed that will stand the test of time.
Table of Contents
Guide Overview: What You'll Need

Total Time: 4 hours 30 minutes
Estimated Cost: $100 – $300
Difficulty Level: Intermediate
Tools Required
- Circule Saw (for cutting lumber)
- Drill (with screwdriver and drill bits)
- Tape Measure (for measuring and marking lumber)
- Square (for ensuring corners are square)
- Level (for ensuring walls are level)
- Hammer (for tapping screws into place)
- Wrench (for tightening screws)
- Ladder (for accessing high areas)
Supplies & Materials
- 2-in x 4-in lumber (for wall framing)
- 2-in x 6-in lumber (for top and bottom plates)
- Exterior-grade plywood (for wall sheathing)
- Exterior screws (for assembling wall frame)
- Nails (for attaching sheathing to frame)
- Weather-resistant wood glue (for sealing gaps and joints)
- Flashings (for protecting against water intrusion)
Step-by-Step Instructions
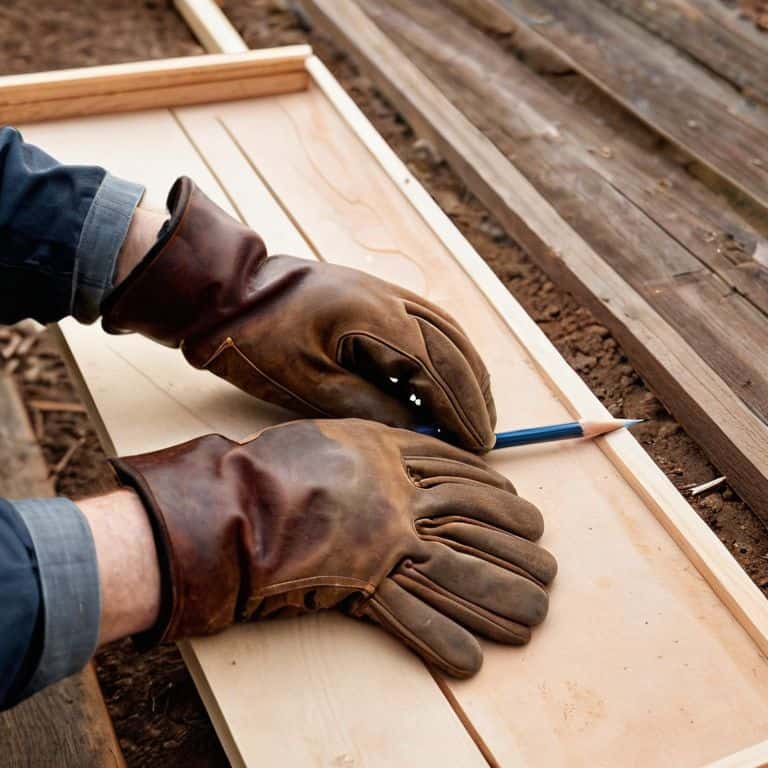
- 1. First, let’s start with the foundation of our shed wall framing project. We need to prepare the site by clearing any debris and ensuring the ground is level. I remember my grandfather always saying that a solid base is crucial for a sturdy shed, so take your time to get this step right.
- 2. Next, we’ll be laying out the wall frames using 2×4 lumber. It’s essential to use a level to ensure the frames are perfectly horizontal and vertical. I’ve found that using a combination of nails and screws provides extra stability, so don’t be afraid to get creative with your fastening methods.
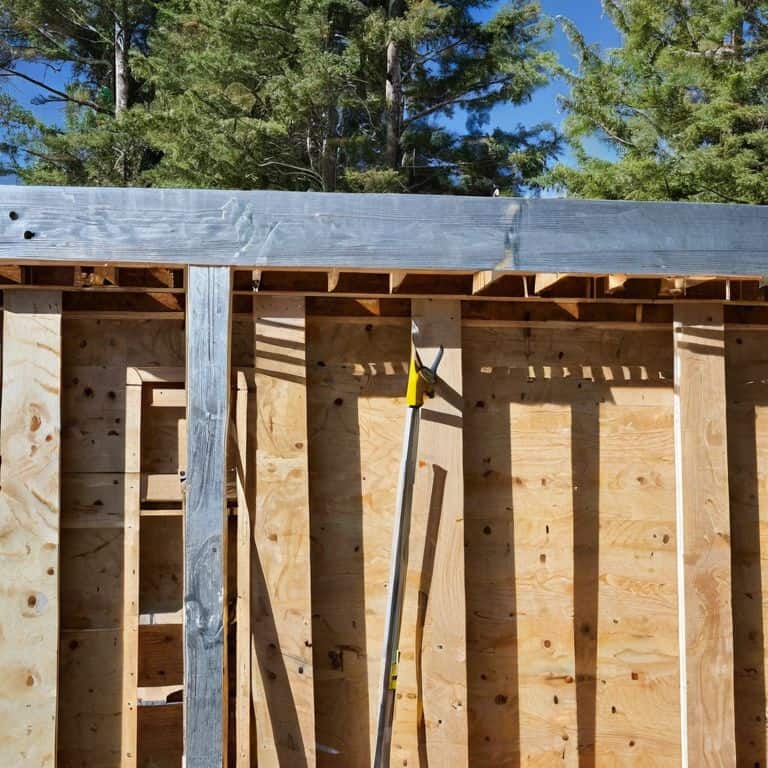
- 3. Now, let’s move on to installing the wall studs, which will provide the structural support for our shed wall. Make sure to space them 16 inches on center to meet local building codes and ensure maximum stability. As you work, take note of any unique features or challenges of your build site, as these can often become fun stories to share later.
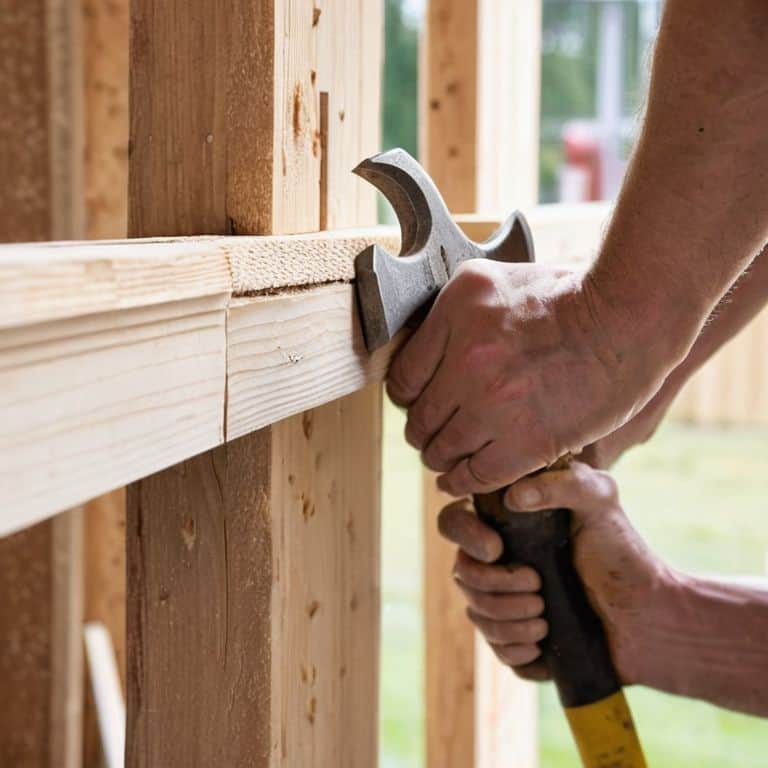
- 4. With the wall studs in place, it’s time to add the top and bottom plates. These will help tie the entire structure together, providing a solid nailing surface for the exterior finishes. Be sure to use plenty of screws to secure these plates, as they’ll be bearing a lot of weight.
- 5. The fifth step involves installing the exterior sheathing, which will provide a weather-tight barrier against the elements. I prefer to use plywood or oriented strand board (OSB) for this step, as they offer excellent durability and resistance to rot. Apply a generous amount of exterior-grade glue to the studs before attaching the sheathing, ensuring a strong bond.
- 6. Next up, we’ll be adding the windows and doors to our shed wall. This is where things can get a bit tricky, as you’ll need to carefully frame out the openings using header and sill plates. Take your time, and don’t hesitate to consult local building codes or seek advice from a professional if you’re unsure about any aspect of this step.
- 7. Finally, let’s finish off our shed wall framing project by installing the exterior finishes, such as siding or trim. This is where you can get creative and add some personal touches to your shed, making it truly unique. Remember to use galvanized fasteners to protect against corrosion and ensure a long-lasting finish.
Veras Shed Framing Guide
As I reflect on my own experiences with shed wall construction tips, I’ve learned that paying attention to the little details can make all the difference. For instance, when framing a shed door, it’s essential to ensure that the frame is level and securely attached to the surrounding wall. This might seem like a no-brainer, but trust me, it’s a step that’s often overlooked.
When it comes to building a shed foundation, I’ve found that a solid base is crucial for the entire structure. This is where diy shed building plans can come in handy, as they often provide a comprehensive guide to getting the foundation right. By following these plans and taking the time to properly prepare the site, you can avoid costly mistakes down the line.
In my opinion, the key to a successful shed build is in the corner framing techniques. This is where the structure starts to take shape, and getting it right can make all the difference. By using shed wall paneling ideas that complement the surrounding architecture, you can create a shed that not only serves its purpose but also adds to the overall aesthetic of your property.
Framing Shed Doors With Ease
As I reflect on my own shed-framing journey, I’ve found that crafting the perfect door frame can be a game-changer. It’s all about creating a seamless transition between the outdoors and your cozy shed haven. I recall a particularly charming flea market find – a vintage door handle that inspired me to get creative with my shed’s entrance. With a few simple tools and some patience, you can achieve a professional-looking finish that adds a touch of personality to your shed.
To frame your shed doors with ease, start by measuring the door opening and cutting your frame pieces to size. Use a level to ensure everything is perfectly aligned, and don’t be afraid to add your own unique touches, like a quirky door knocker or a splash of colorful paint. As you work, imagine the stories your shed will hold, and the memories you’ll create within its walls.
Shed Wall Construction Secrets
As I reflect on my own shed-framing adventures, I’ve uncovered a few secrets that make all the difference. One of my favorites is using a combination of traditional and modern techniques to add character to the frame. I’ve found that incorporating reclaimed wood or vintage hardware can give the shed a unique personality. For instance, I once used old barn doors as the exterior walls of my shed, adding a touch of rustic charm to the overall design. It’s these small details that can transform a ordinary shed into a cozy retreat.
I also swear by the importance of precision when it comes to measuring and cutting the frame’s components. A slight miscalculation can throw off the entire structure, so it’s essential to double-check your measurements and take your time when cutting the wood. With a little patience and creativity, you can create a sturdy and beautiful shed that reflects your personal style.
Nailing It: 5 Essential Tips for Framing a Shed Wall
- Measure Twice, Cut Once: The Golden Rule of Shed Framing
- Choose the Right Wood: Selecting Lumber That Will Withstand the Elements
- Frame with Precision: Using a Level to Ensure Your Shed Walls Are Plumb
- Door and Window Placement: Strategically Positioning Openings for Optimal Natural Light
- Seal the Deal: Adding a Weather-Tight Barrier to Your Shed Frame for Longevity
Key Takeaways for a Sturdy Shed
Always prioritize precision when framing your shed wall, as it lays the foundation for the entire structure’s stability and durability
Selecting the right materials, such as durable lumber and appropriate fasteners, is crucial for withstanding various environmental conditions and ensuring your shed remains secure
Remember, the devil is in the details: paying close attention to the little things, like proper door framing and secure roofing, can make all the difference in the longevity and functionality of your shed
Building Wisdom
As I hammer each nail into the frame of a shed wall, I’m reminded that the true foundation of any structure lies not in its beams, but in the stories it will hold – and it’s our job as builders to craft spaces that can cradle a thousand tales.
Vera Kump
Bringing Your Shed Vision to Life
As I reflect on our journey through the world of shed framing, I’m reminded of the importance of attention to detail. From the initial planning stages to the final touches, every step matters in creating a sturdy and functional shed. We’ve covered the essential steps, from preparing the site to framing the walls and installing doors. My own experiences, shared through Vera’s Shed Framing Guide, have hopefully provided you with valuable insights and practical tips to make your project a success. Whether you’re a seasoned DIY enthusiast or a beginner, the key to a successful shed framing project lies in breaking it down into manageable tasks and enjoying the process.
As you embark on your own shed framing adventure, remember that it’s not just about building a structure – it’s about creating a space that reflects your personality. Don’t be afraid to add your own unique touches and make it a reflection of your style. With every hammer swing and every nail driven, you’re bringing your vision to life. So, go ahead, get creative, and make your shed a testament to your imagination and hard work. Happy building, and I look forward to hearing about your projects and seeing the amazing spaces you create!
Frequently Asked Questions
What are the most common mistakes to avoid when framing a shed wall?
As I reflect on my own shed-framing adventures, I’ve found that common mistakes to avoid include uneven foundation preparation, inadequate spacing between studs, and neglecting to check for squareness – all of which can lead to a wobbly or unstable shed wall, so let’s steer clear of those pitfalls!
How do I determine the correct size and spacing for the wall studs?
When determining the correct size and spacing for wall studs, I always consider the shed’s purpose and local building codes. Typically, 16-inch on-center spacing works well, but it’s essential to check with your local authorities for specific requirements. I like to think of it as uncovering a hidden treasure – the right studs can make all the difference in your shed’s stability and charm!
What type of lumber is best suited for framing a shed wall and why?
I always opt for pressure-treated lumber or durable cedar for framing shed walls – they’re naturally resistant to rot and insects, ensuring my sheds stand the test of time and weather.


