I still remember the first time I tried to clay bar my car – it was a disaster. I thought it was just a matter of slapping some clay on the paint and rubbing it in, but boy was I wrong. The truth is, most people don’t know how to clay bar their car properly, and it’s a shame because it can make all the difference in the world. I’ve spent years perfecting the technique, and I’m excited to share my knowledge with you in this guide on how to clay bar your car.
In this article, I’ll cut through the hype and give you the honest, no-nonsense advice you need to get the job done right. You’ll learn the best practices for clay barring your car, from preparation to completion. Whether you’re a seasoned car enthusiast or just a DIY newbie, I’ll walk you through the process step by step, so you can achieve a showroom shine on your own. So, if you’re ready to give your ride the spa treatment it deserves, keep reading and let’s get started on how to clay bar your car like a pro!
Table of Contents
Guide Overview: What You'll Need
Total Time: 1 hour 30 minutes
Estimated Cost: $20 – $40
Difficulty Level: Easy
Tools Required
- Clay bar Fine or medium grade
- Microfiber towels Several for drying and wiping
- Soft-bristle brush For cleaning tight spaces
- Hose with spray nozzle For rinsing the car
Supplies & Materials
- Car wash soap Mild detergent
- Clay lubricant Or a mixture of car wash soap and water
- Drying agent Optional, for drying the car
Step-by-Step Instructions
- 1. First, gather all the necessary tools and materials, including a clay bar, a lubricant like soapy water, a microfiber towel, and a clean, dry cloth for drying. Make sure your workspace is clear of any debris or obstacles that could get in the way of your detailing process.
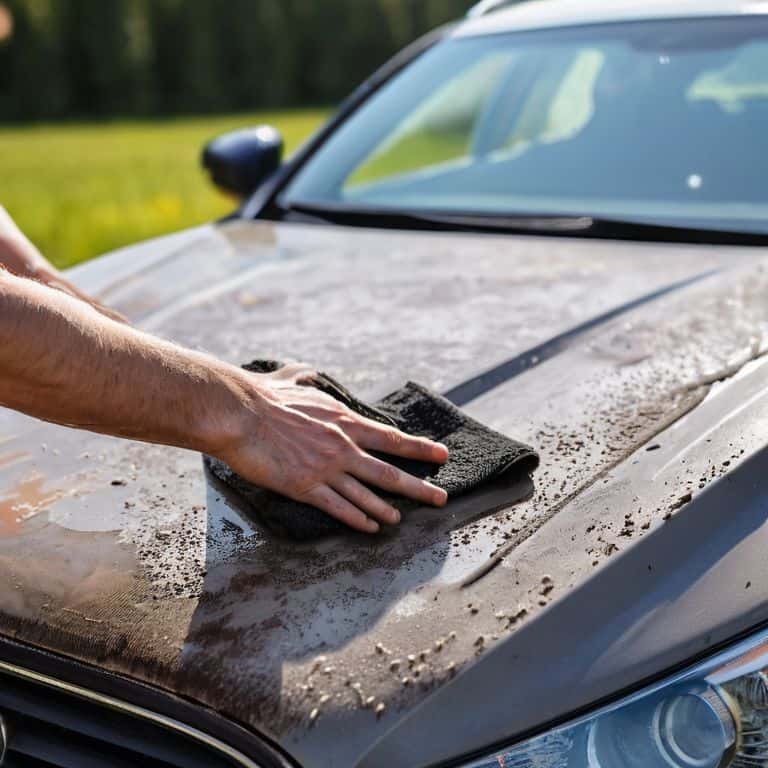
- 2. Next, wash your car thoroughly to remove any loose dirt or contaminants that could interfere with the clay bar process. I like to use a soft-bristle brush to get into all the nooks and crannies, just like my grandfather taught me. After washing, dry the car using a microfiber towel to prevent water spots.
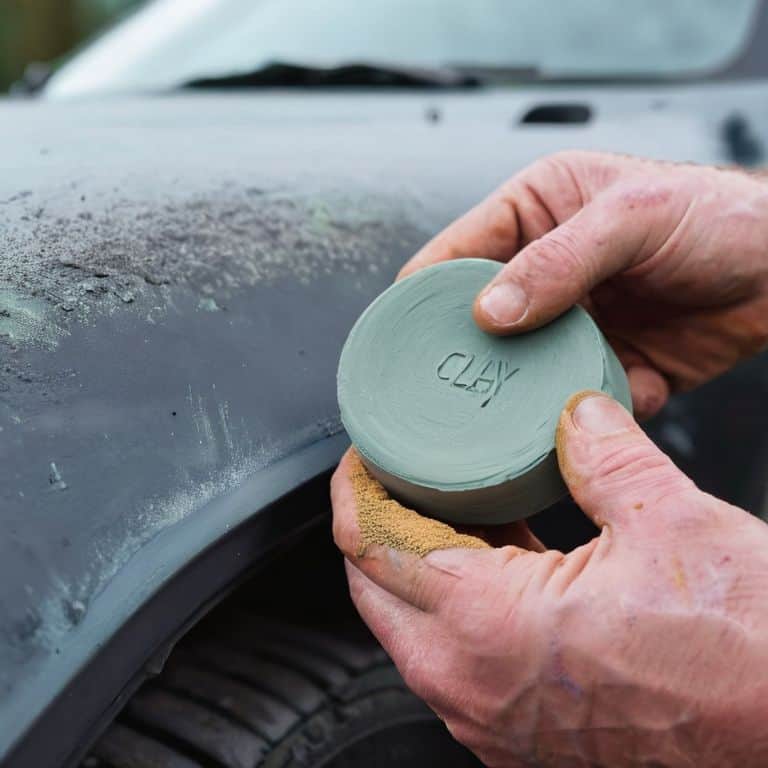
- 3. Now it’s time to prepare your clay bar. If you’re using a new clay bar, knead it with your hands until it becomes pliable and easy to shape. If you’re reusing an old clay bar, make sure to clean it thoroughly before proceeding. I like to name my tools, so I’ve named my trusty clay bar “Claydy” – it’s all about building a relationship with your tools, right?
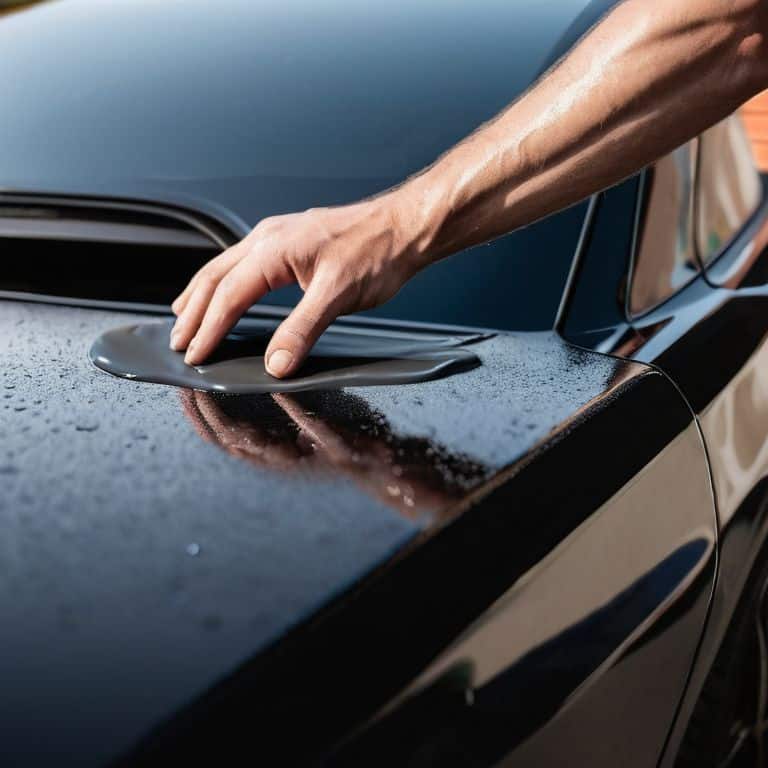
- 4. With your clay bar ready, it’s time to start the detailing process. Begin by dividing your car’s surface into smaller sections, such as the hood, roof, and trunk. This will help you keep track of your progress and ensure that you don’t miss any spots. Apply a small amount of lubricant to the clay bar and start rubbing it gently onto the car’s surface in a back-and-forth motion.
- 5. As you clay bar each section, use a microfiber towel to wipe away any contaminants or residue that the clay bar picks up. This will help prevent scratches and keep your car’s surface smooth. I like to think of this process as giving my car a spa day – it’s all about pampering and taking care of the details.
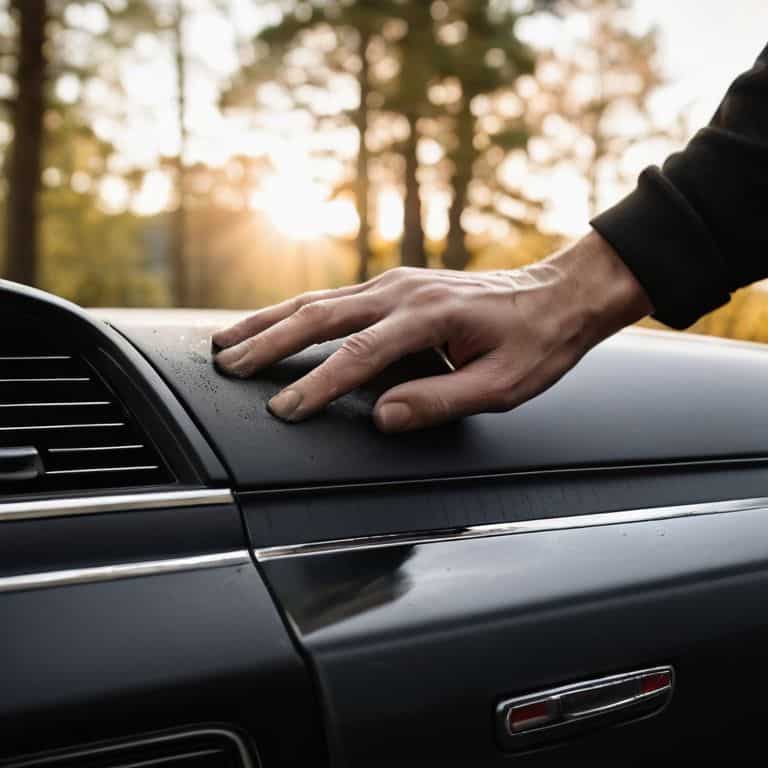
- 6. Once you’ve clay barred the entire car, use a clean, dry cloth to wipe down the surface and remove any remaining lubricant or residue. This will help you inspect your work and make sure that you’ve removed all the contaminants. Take a step back and admire your handiwork – there’s nothing quite like the feeling of a job well done.
- 7. Finally, to keep your clay bar in good condition, make sure to store it properly in a cool, dry place. You can also clean and reuse your clay bar multiple times, making it a cost-effective and eco-friendly detailing tool. With proper care and maintenance, your clay bar can become a trusted companion in your detailing arsenal, just like Claydy is for me.
How to Clay Bar Your Car
As I always say, the key to a smooth paint finish is in the details. When it comes to clay bar techniques, it’s essential to remember that decontamination is just the first step. You want to make sure you’re removing all the contaminants that can affect the paint’s appearance and durability. I like to think of it as giving my trusty old truck a spa day – it’s all about pampering the paint to bring out its natural shine.
For clay bar techniques for beginners, I recommend starting with a gentle touch and gradually increasing the pressure as needed. It’s also crucial to work in small sections, ensuring that each area is thoroughly cleaned before moving on to the next. And don’t forget to inspect your work as you go – it’s amazing how much of a difference a little extra attention can make. When comparing clay bar vs polishing compound, remember that clay bar is all about removing contaminants, while polishing compound is for smoothing out the paint itself.
In terms of car detailing for beginners at home, I always stress the importance of clay bar safety precautions. Make sure you’re working in a well-ventilated area, and avoid using the clay bar in direct sunlight or on hot surfaces. With a little practice and patience, you’ll be a pro at clay bar techniques in no time – and your car will thank you for it. Whether you’re a seasoned car enthusiast or just starting out, the joy of clay barring your car is all about transforming your ride into a stunning work of art.
Clay Bar Techniques for Beginners
Now that we’ve covered the basics, let’s dive into some techniques that’ll make you a clay bar pro in no time. As a beginner, it’s essential to start with light pressure and gradually increase as needed. I like to think of it as dancing with the clay bar – gentle, smooth movements that help you get a feel for the process. Remember, the goal is to remove contaminants, not to scrub away at the paint.
I’ve found that breaking the car down into sections helps, too. Start with the hood or a door panel, and work your way around the vehicle. This approach will help you maintain even pressure and ensure you don’t miss any spots. And don’t worry if you encounter some stubborn areas – just adjust your technique and keep at it. With a little practice, you’ll be clay barring like a pro, and your ride will be looking smoother than my newly restored vintage bicycle.
Decontamination for a Smooth Finish
Decontamination is where the magic happens, folks. It’s like giving your car a brand new skin. I remember my grandfather, a seasoned mechanic, always stressing the importance of a clean slate. To achieve this, I break out my trusty sidekick, “Bertha” – my favorite clay bar. With a gentle touch, I work her across the paint surface, feeling for any bumps or rough spots. It’s amazing how much grime and dirt she can pick up, leaving your car’s paint feeling silky smooth.
As I work, I like to think about the end result – a flawless finish that’s perfect for waxing or sealing. My “detailing duo,” a microfiber towel named “Midge” and a detailing spray called “Sparkles,” are always within arm’s reach, ready to help me inspect and perfect the surface. With decontamination, it’s all about patience and elbow grease. Take your time, and you’ll be rewarded with a finish that’s nothing short of spectacular.
Clay Barring Like a Pro: 5 Tips to Get You Started
- Start with the right clay bar for your car’s paint job – I like to use a mild clay for my vintage bike restorations, but for cars, you’ll want something a bit more heavy-duty
- Prep your car’s surface by washing and drying it thoroughly – think of it like prepping a canvas for a masterpiece, just like my grandfather taught me in his garage
- Don’t be afraid to get a little aggressive with the clay bar, but also don’t press too hard – it’s all about finding that sweet spot, like tuning a bike’s gears
- Work in small sections to maintain even coverage and avoid missing any spots – I like to break it down into quarters, just like I do when I’m detailing my own truck
- Finish off with a nice coat of wax to protect that smooth, newly-clayed surface – it’s the perfect way to seal in all your hard work and make your ride shine like new
Key Takeaways for a Clay Bar Pro
Always remember to wash and dry your car before clay barring to remove loose dirt and debris, just like I do with my vintage bike restorations
Use a lubricating spray or detailing liquid to help the clay bar glide smoothly over the paint surface, and don’t be afraid to get a little creative with your technique
Regular clay barring can make a huge difference in your car’s paint finish and overall appearance, so try to set aside some garage time every few months to give your ride some TLC
The Clay Bar Wisdom
Clay barring your car isn’t just about removing contaminants, it’s about revealing the beauty beneath – it’s like polishing a gem, one gentle stroke at a time, to bring out the shine that’s been hiding under the grime.
John Beeler
Bringing it All Together: A Job Well Done
As we wrap up this guide on how to clay bar your car, let’s take a moment to review the basics: we’ve covered the essential steps, from preparing your vehicle to applying the clay bar and inspecting the surface. Remember, decontamination is key to achieving a smooth finish, and with the right techniques, you’ll be driving off into the sunset with a car that looks like new. Whether you’re a seasoned pro or a beginner, the process of clay barring your car is a great way to get hands-on and give your vehicle the TLC it deserves.
So, the next time you’re out in your garage, don’t just see a bunch of tools and machines – see opportunities for creativity and innovation. As someone who’s spent countless hours restoring vintage bicycles and naming every tool in my collection, I can tell you that the joy of working on your car is just as much about the process as it is the end result. With a little practice and patience, you’ll be well on your way to becoming a clay bar master, and who knows, you might just find yourself falling in love with the art of car maintenance.
Frequently Asked Questions
What's the best way to choose the right clay bar for my car's specific paint type?
Choosing the right clay bar for your ride is crucial. I’ve got a few favorites in my garage, including the medium-grade clay bar from Meguiar’s, which works like a charm on most paint types. For sensitive paints, I recommend a fine-grade clay bar, like the one from Chemical Guys. Just remember, the key is to match the clay bar to your car’s specific paint needs – my trusty sidekick, ‘Claira the Clay Bar,’ always gets the job done!
How often should I clay bar my car to maintain a smooth finish?
Honestly, I clay bar my trusty old truck every 2-3 months, depending on how much it’s been driven and exposed to the elements. If you live in an area with heavy pollution or tree sap, you might want to do it more often. Just remember, regular clay barring keeps your car’s paint smooth and protected, so find a rhythm that works for you!
Can I use a clay bar on other parts of my car, like the windows or trim, or is it just for the paint?
Hey, great question! While clay bars are primarily for paint, you can use them on glass and trim, but be gentle and use a softer clay. Avoid using it on delicate surfaces like headlights or chrome, and always test a small area first. I like to use a separate, dedicated clay bar for these areas, which I’ve named ‘Bertha’ – she’s a gentle giant!


