
I still remember the first time I decided to ditch the mechanic and learn how to change my own oil and filter – it was like uncovering a hidden gem in my trusty roadside notebook. The sense of accomplishment I felt after getting my hands dirty was exhilarating, and it’s a feeling I’m excited to share with you. As a travel blogger, I’ve had my fair share of breakdowns on the road, but learning this simple yet crucial skill has been a game-changer. I’ve found that knowing how to change your own oil and filter is not only a cost-effective hack but also a confidence booster that’s hard to match.
In this article, I’ll share my personal experience and no-nonsense knowledge on how to change your own oil and filter. You can expect a step-by-step guide that’s free from jargon and filled with practical tips. From preparing the necessary tools to disposing of the used oil, I’ll cover it all. My goal is to empower you with the skills and confidence to take care of your vehicle, whether you’re a seasoned traveler or just starting out. So, if you’re ready to take the first step towards becoming a more self-sufficient driver, keep reading, and let’s get started on this journey together!
Table of Contents
Guide Overview: What You'll Need
Total Time: 1 hour 30 minutes
Estimated Cost: $20 – $50
Difficulty Level: Intermediate
Tools Required
- Socket Wrench for your car’s specific oil drain plug
- Oil Drain Pan large enough to hold 4-6 quarts of oil
- New Oil Filter compatible with your vehicle
- Rag for cleaning up spills
- Funnel for pouring in new oil
Supplies & Materials
- New Motor Oil the correct type and amount for your vehicle (usually 4-6 quarts)
- New Oil Filter Gasket if your filter requires one
Step-by-Step Instructions
- 1. First, make sure you’ve got the right tools for the job – it’s all about being prepared. You’ll need a socket wrench, a drain pan, new oil filter, enough motor oil to fill your vehicle, and a car jack to get underneath your car comfortably. I like to lay out all my tools and supplies beforehand, it gives me a sense of control and organization.
- 2. Next, warm up your engine by driving your car for a few minutes. This helps the oil drain more easily, which is a crucial step in the process. While waiting for the engine to warm up, I often think about the freedom of the open road and how taking care of my car ensures I can keep exploring without any hiccups.
- 3. Now, find a level surface and turn off the engine. Engage the parking brake and put the car in park (if it’s an automatic) or first gear (if it’s a manual). This is a critical safety step to prevent any accidents while you’re working underneath the car.
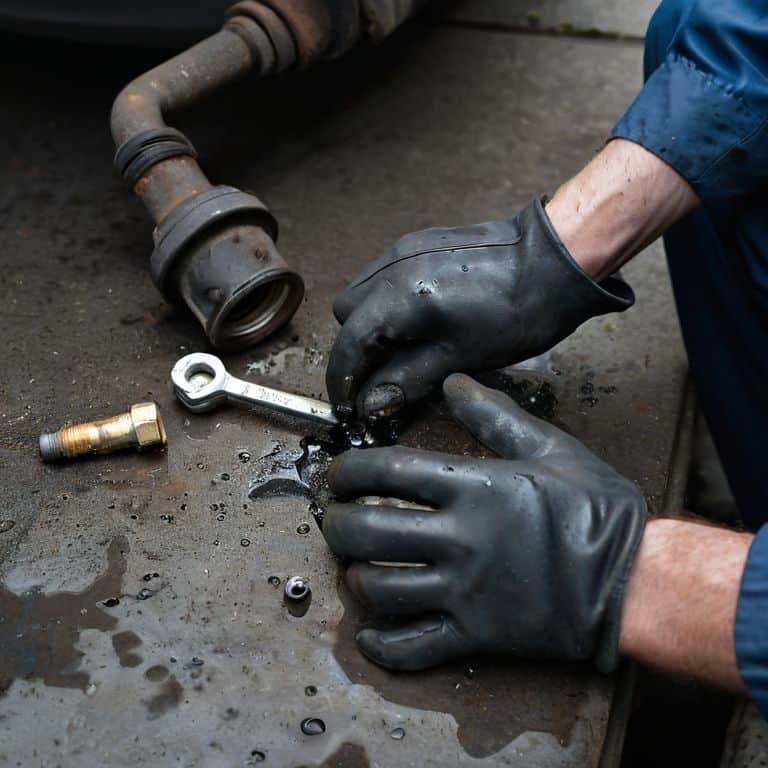
- 4. Locate the oil drain plug, which is usually at the bottom of the engine, near the front of the car. Use your socket wrench to loosen the plug by turning it counterclockwise. Be prepared for the oil to start draining out once you remove the plug, and make sure your drain pan is in place to catch it. I always feel a sense of accomplishment when I see the oil flowing out, knowing I’m one step closer to a well-maintained vehicle.
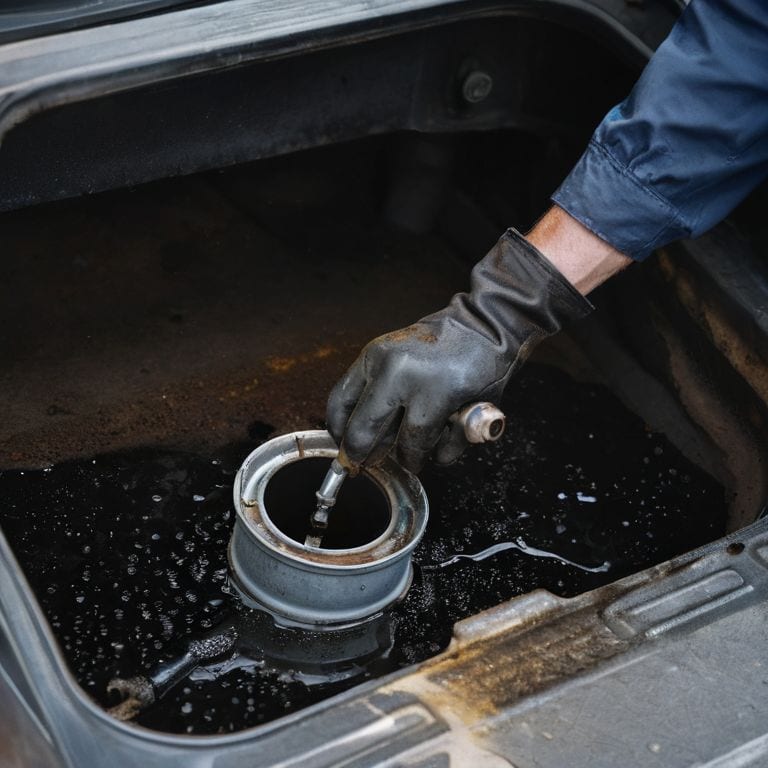
- 5. While the oil is draining, you can start working on the oil filter. Use an oil filter wrench to loosen and remove the filter. Be careful not to spill any oil when removing the filter, and have a rag handy to wipe off any spills. It’s essential to handle used oil and filters responsibly, so make sure to dispose of them properly.
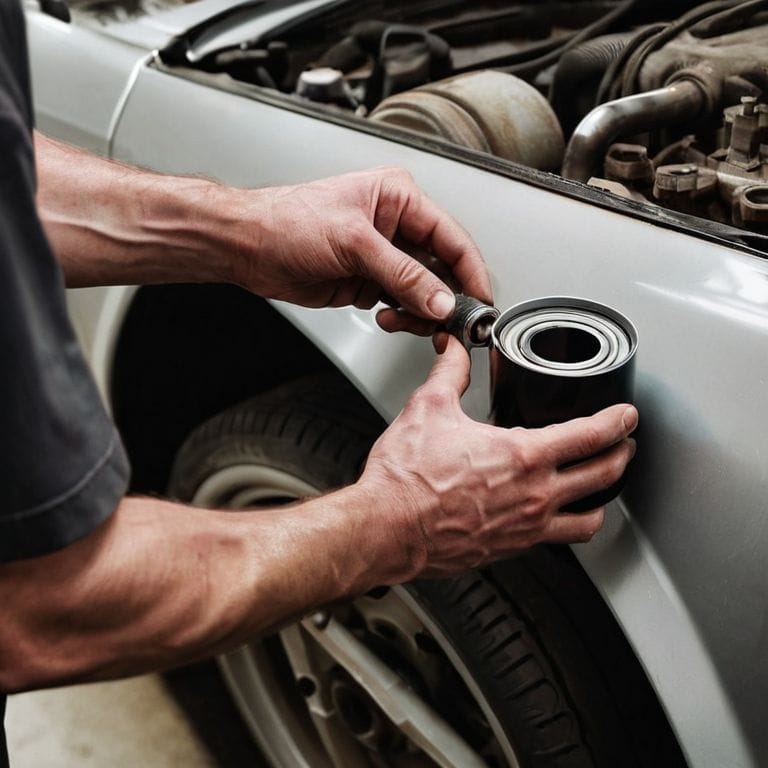
- 6. Once the oil has stopped dripping, replace the oil drain plug and tighten it in a star pattern to ensure it’s securely closed. Then, install a new oil filter by hand tightening it in a clockwise direction. I find this part of the process to be quite therapeutic, as it’s a moment of quiet focus.
- 7. Now it’s time to add new oil to your engine. Check your car’s manual to find out what type of oil is recommended and how much you’ll need. Use a funnel to pour in the new oil, and be careful not to spill any. This is a vital step in the maintenance of your vehicle, as using the right oil can significantly impact your car’s performance and longevity.
- 8. Finally, start the engine and let it run for a few minutes to circulate the new oil. Turn off the engine and check for any leaks around the oil drain plug and oil filter. If everything looks good, congratulations – you’ve successfully changed your own oil and filter! It’s a feeling of independence and pride, knowing you’ve taken care of your vehicle with your own hands.
Tuning Up for Adventure
As I reflect on my own DIY oil change experiences, I’ve come to realize the importance of choosing the right synthetic oil vs conventional for my vehicle. It’s a decision that can significantly impact performance and longevity. I’ve found that synthetic oil provides better protection in extreme temperatures, making it a great choice for those who love to embark on long road trips. When it comes to the actual process, having the right tools is essential, and I always make sure to have an oil filter wrench on hand to make the job smoother.
In terms of maintenance, it’s crucial to stay on top of your car oil change interval to prevent engine damage. I like to keep a record of my oil changes to ensure I’m always on schedule. For those with high mileage cars, selecting the best oil for high mileage cars can help extend the life of the engine. It’s a small but significant detail that can make a big difference in the long run.
When it comes to safety, diy oil change safety precautions should always be a top priority. I always make sure to use car jack stands for added stability and support, giving me peace of mind as I work underneath my vehicle. By taking these extra precautions and being mindful of the details, you’ll be well on your way to becoming a DIY oil change pro, ready to hit the open road with confidence.
Safety First Diy Oil Change Precautions
As I always say, a successful DIY oil change is not just about getting the job done, but doing it safely. I recall my first few attempts, where I didn’t take the necessary precautions, and let’s just say it was a messy affair. Now, I make sure to have a pair of gloves, safety glasses, and a drain pan on hand to avoid any spills or splatters. It’s also crucial to ensure your car is on a level surface and apply the parking brake – you don’t want any unexpected movements while you’re under the hood.
I’ve learned that taking a few extra minutes to prepare and protect yourself can make all the difference. So, before you start, take a deep breath, and double-check that you have everything you need within arm’s reach. Trust me, your hands and clothes will thank you. With the right mindset and precautions, you’ll be well on your way to a successful oil change, and one step closer to tuning up for your next adventure.
Synthetic vs Conventional Oil Secrets
As I delved into the world of DIY car maintenance, I discovered the age-old debate: synthetic vs conventional oil. I recall chatting with a seasoned mechanic at a quirky roadside diner, who swore by synthetic oil for its superior performance in extreme temperatures. My own experience has shown that synthetic oil can indeed make a difference, especially on long road trips where the engine is put to the test. On the other hand, conventional oil has its own set of advantages, including being more budget-friendly.
I’ve found that the choice between synthetic and conventional oil ultimately depends on your driving habits and the climate you’re in. For me, synthetic oil has become a trusted companion on my adventures, but I’ve also learned to appreciate the simplicity of conventional oil for everyday driving.
Getting Your Hands Dirty: 5 Essential Tips for a Smooth Oil Change
- Always refer to your vehicle’s manual to find the correct type of oil and filter recommended by the manufacturer – it’s like finding the treasure map to a successful DIY adventure!
- Prepare your workspace by gathering all the necessary tools and materials, including a socket wrench, drain pan, and new oil filter – a clutter-free space equals a clutter-free mind!
- Warm up your engine before draining the oil to help it flow more smoothly, making the process less messy and more efficient – think of it as getting your car ready for a spa day!
- Be mindful of the environment and dispose of the used oil and filter responsibly, considering recycling options or designated drop-off locations – our planet is our greatest treasure, after all!
- Keep track of when you changed your oil and filter, and set reminders for future maintenance to ensure your vehicle stays in top condition – a well-maintained car is a happy car, and a happy car is a key to endless adventures!
Key Takeaways for a Smooth Ride
Always refer to your vehicle’s manual for specific oil and filter recommendations to ensure you’re using the right materials for your car’s unique needs
Synthetic oil can provide better engine performance and protection in extreme temperatures, but consider your budget and driving habits before making the switch from conventional oil
Remember to dispose of used oil and filters responsibly and consider recycling them to reduce your environmental footprint and keep your garage tidy
A Drop of Wisdom
Changing your own oil and filter is not just about maintaining your vehicle, it’s about embracing the thrill of the unknown, getting your hands dirty, and uncovering the hidden mechanics of the world around you – one engine at a time.
Vera Kump
Embracing the Open Road
As I reflect on our journey through the world of DIY oil changes, I want to emphasize the importance of taking control of your vehicle’s maintenance. From understanding the difference between synthetic and conventional oil to prioritizing safety precautions, we’ve covered it all. By following these steps and tips, you’ll not only save money but also develop a deeper connection with your car. Remember, it’s about more than just changing your oil and filter – it’s about tuning up for adventure and being ready for whatever the road throws your way.
Now that you’ve got the basics down, it’s time to take your newfound knowledge and hit the open road. As you drive, I encourage you to think about the freedom of the journey, not just the destination. Whether you’re a seasoned traveler or just starting to plan your next trip, maintaining your vehicle is crucial. So, go ahead, get your hands dirty, and keep exploring. And when you do, don’t forget to send me a postcard from your favorite stop – I’d love to hear about your adventures and the hidden gems you discover along the way.
Frequently Asked Questions
What are the most common mistakes to avoid when changing my own oil and filter?
As I’ve learned from my own DIY oil change adventures, common mistakes to avoid include over-tightening the filter, using the wrong type of oil, and not properly disposing of used oil and filters – trust me, I’ve been there, and it’s not a treasure hunt you want to embark on!
How often should I change my oil and filter to maintain optimal vehicle performance?
I’m so glad you asked! For most vehicles, it’s recommended to change your oil every 5,000 to 7,500 miles, depending on the type of oil you use. As for the filter, I like to change it every other oil change to keep my engine purring like a contented cat. Trust me, it’s worth the upkeep for a smooth ride and a happy engine!
Can I use synthetic oil in my older vehicle, or is it better to stick with conventional oil?
I’ve gotten this question a lot on my travels, and the answer is, it depends on your vehicle’s specs. If your older ride can handle it, synthetic oil can be a great choice for its superior lubrication and higher viscosity index, but always check your owner’s manual first to avoid any compatibility issues.


