I still remember the first time I tried changing my car’s oil – it was a disaster. My grandfather, who taught me everything I know about mechanics, had warned me about the common oil change mistakes to avoid, but I didn’t listen. I ended up stripping the threads on the oil drain plug and had to spend hours fixing the mess. It was a hard lesson to learn, but it taught me the importance of doing things right. Nowadays, I see people falling into the same traps, and it’s frustrating to see them overspending on unnecessary tools or worse, damaging their engines.
As someone who’s spent years tinkering in the garage, I want to share my experience and help you steer clear of those pitfalls. In this article, I’ll give you the lowdown on the most common oil change mistakes to avoid, and provide you with practical, no-nonsense advice on how to do it right. I’ll cover the essentials, from choosing the right oil filter to disposing of used oil responsibly. My goal is to empower you with the knowledge to take control of your car’s maintenance, and to make your garage a place where you can work on your vehicle with confidence, not frustration.
Table of Contents
Greasy Pitfalls Ahead

As I’ve learned from my years of tinkering in the garage, frequent oil change errors can be a real headache. One of the most critical aspects to get right is the oil viscosity selection. Using the wrong viscosity can lead to decreased engine performance, poor fuel efficiency, and even engine damage. I recall my grandfather teaching me the importance of consulting the owner’s manual to ensure the right viscosity for our vintage bike restorations.
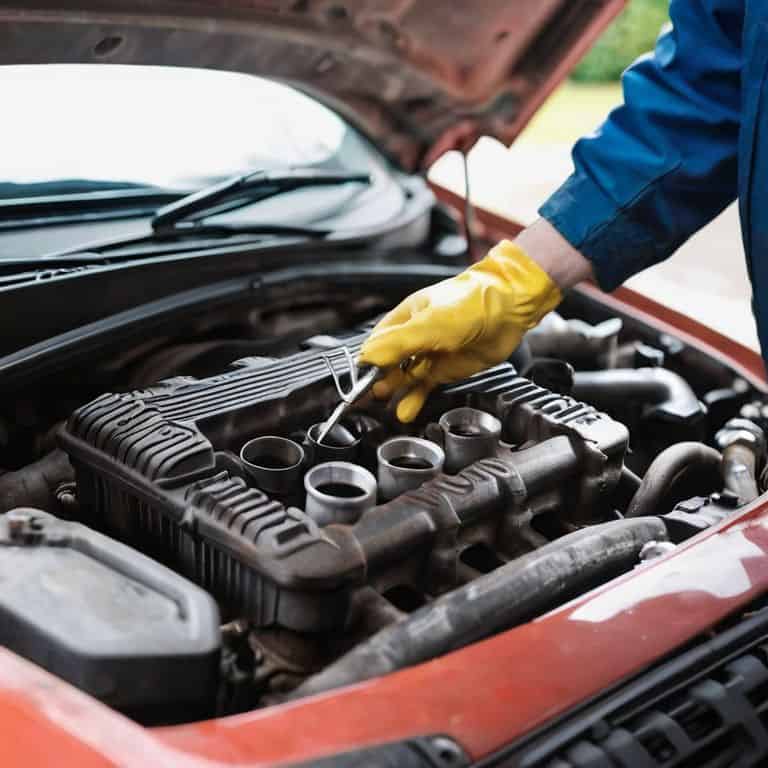
When it comes to the actual oil change process, drain pan best practices are often overlooked. I’ve seen my fair share of spills and messes, which can be avoided by using a sturdy drain pan and taking your time. It’s also essential to have the right tools, like an oil filter wrench, to make the job easier and safer. My trusty sidekick, “Wrenchy,” has been with me through countless oil changes and has earned its name for being a reliable companion.
After the oil change, a post oil change inspection checklist can help you identify any potential issues. This includes checking the oil level, looking for signs of leaks, and test-driving the vehicle to ensure everything is running smoothly. The synthetic vs conventional oil debate is another topic of discussion, but ultimately, the choice depends on your vehicle’s specific needs and your personal preferences. By being mindful of these factors, you can avoid common pitfalls and keep your vehicle running like a well-oiled machine.
Frequent Oil Change Errors to Watch
When it comes to oil changes, there are a few common mistakes that can lead to big problems down the road. One of the most frequent errors is using the wrong type of oil for your vehicle. This can cause damage to your engine and lead to costly repairs.
To avoid these issues, it’s essential to check your manual and make sure you’re using the correct oil for your car. By taking this simple step, you can help ensure a smooth and successful oil change, and keep your vehicle running like a well-oiled machine.
Oil Viscosity Selection Guide
When it comes to choosing the right oil for your vehicle, viscosity matters. When selecting the correct oil viscosity, it’s essential to consider the climate and driving conditions your vehicle will be subjected to.
I always say, check your manual, to ensure you’re using the recommended viscosity, as it can affect your engine’s performance and longevity.
Common Oil Change Mistakes to Avoid
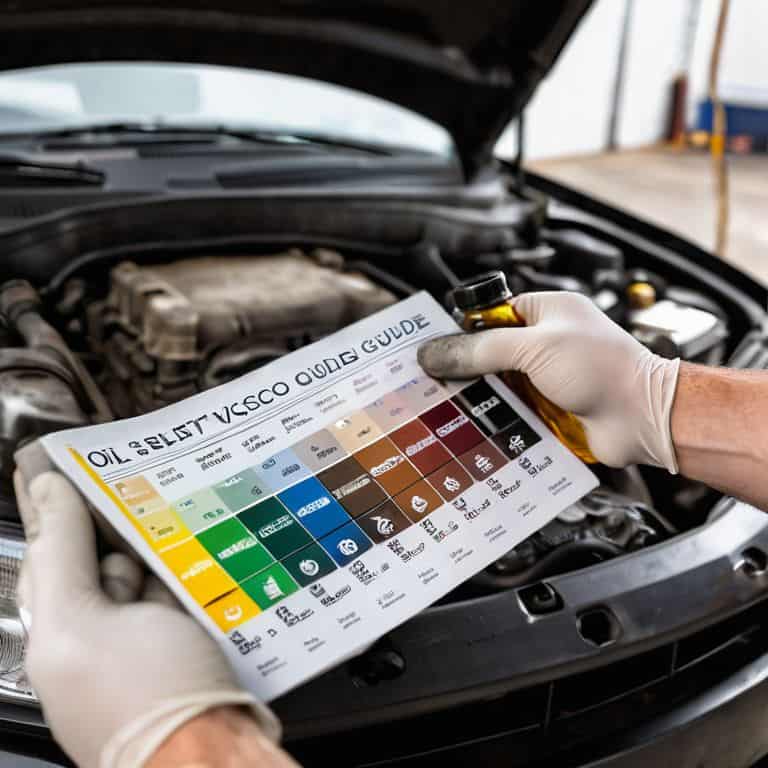
As I always say, a successful oil change is all about the details. One of the frequent oil change errors to watch out for is using the wrong oil viscosity. This is where my trusty oil viscosity selection guide comes in handy. I’ve learned that choosing the right viscosity can make all the difference in your engine’s performance.
When it comes to draining the oil, I swear by my drain pan best practices. It’s amazing how often a simple mistake can lead to a big mess. That’s why I always make sure to have my drain pan in the right position and my oil filter wrench techniques down pat. It’s all about being prepared and taking your time.
After the oil change, it’s essential to do a post oil change inspection checklist to ensure everything is in working order. This includes checking the oil level, looking for any signs of leaks, and testing the engine. I’ve also been known to weigh in on the synthetic vs conventional oil debate, but at the end of the day, it’s all about finding what works best for your vehicle and your wallet.
Drain Pan Best Practices Uncovered
When it comes to changing your car’s oil, having a good drain pan in place can save you from a lot of hassle and mess. I’ve learned this the hard way, with oil spills on my garage floor that seemed to appear out of nowhere. Now, I make sure to position my drain pan carefully, ensuring it’s centered under the oil drain plug to catch every last drop.
To avoid any accidents, I always follow proper placement guidelines for my drain pan. This means choosing a spot where the pan won’t get kicked or knocked over, and making sure it’s large enough to hold all the oil that will be draining out.
Post Oil Change Inspection Checklist
When it comes to giving your vehicle a clean bill of health after an oil change, a thorough inspection is key. I always say, double-checking your work is crucial to avoid any potential issues down the road. This includes verifying that the oil drain plug is securely tightened and that all filters are properly installed.
After completing the oil change, I recommend running through a post-maintenance checklist to ensure everything is in working order. This includes checking the oil level, looking for any signs of leaks, and test-driving the vehicle to ensure it’s running smoothly.
Don't Get Fried: 5 Greasy Truths to Avoid in Your Next Oil Change
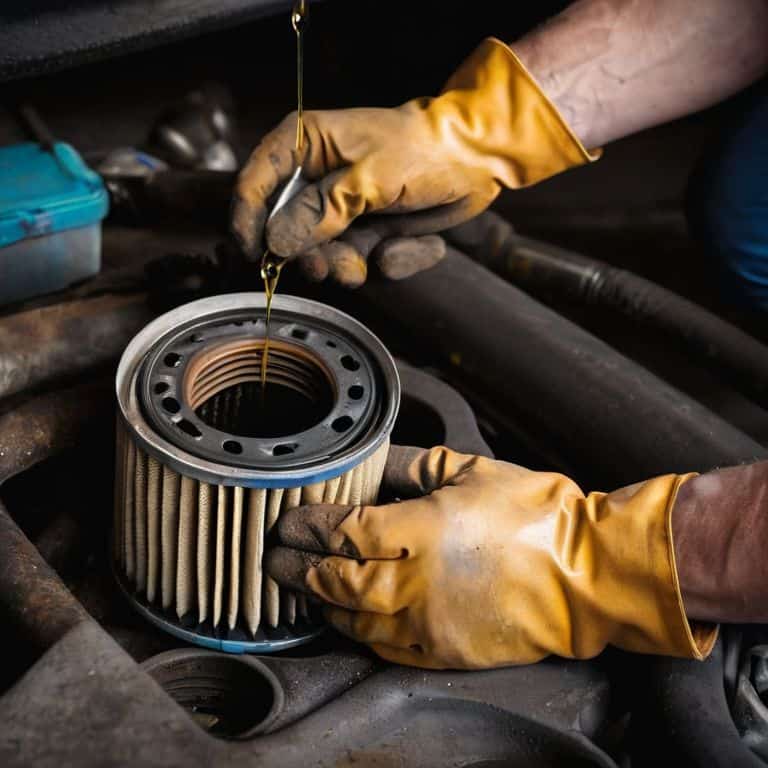
- Using the wrong oil filter can lead to premature wear on your engine, so make sure to choose the right one for your vehicle
- Neglecting to tighten the oil drain plug can cause leaks and damage, always double-check it after an oil change
- Failing to dispose of used oil and filters properly can harm the environment, take them to a recycling center or an auto parts store that accepts them
- Not checking the owner’s manual for the recommended oil change interval can result in over or under maintenance, leading to engine problems
- Forgetting to fill the new oil to the recommended level can cause engine damage, always refer to your owner’s manual for the correct oil capacity and fill level
Key Takeaways to Keep Your Garage Running Smoothly
Don’t let oil change mistakes get the best of you – remember, the right viscosity is key to a healthy engine, and I always say, ‘A good oil change is like a tune-up for your trusty ride’
Keep your drain pan game strong by placing it in the right spot, and for goodness’ sake, don’t over-tighten those filters – I’ve named my trusty drain pan ‘Panny’ and my filter wrench ‘Filterella’ to keep things fun and on track
Post oil change inspections are crucial, so don’t skip ’em – double-check that oil filter, and make sure all caps and covers are securely in place, just like my grandfather taught me in our small Midwestern town’s hardware store, where I grew up with a passion for all things mechanical
Words of Wisdom
The biggest mistake you can make when changing your oil isn’t the mistake itself, but not learning from it – that’s where the real damage is done, and your wallet will be the first to tell you!
John Beeler
Conclusion: Avoiding Common Pitfalls for a Smoother Ride
As we’ve explored the world of oil changes, it’s clear that avoiding common mistakes is key to a healthier engine and a happier you. From greasy pitfalls like incorrect oil viscosity to drain pan best practices, we’ve covered the essential ground to ensure your next oil change is a success. By following the guide and being mindful of frequent errors, you’ll not only save time but also protect your vehicle from potential damage. Remember, it’s all about being prepared and taking your time – your car will thank you.
So, the next time you find yourself in the garage, staring down at an oil-stained floor, take a deep breath and recall the oil change wisdom we’ve shared. With a little patience and practice, you’ll be well on your way to becoming an oil change master, and your garage will transform into a haven of creativity and innovation. Keep tinkering, keep learning, and always keep your tools sharp – and don’t forget to give your trusty drain pan, Bertha, a good cleaning after the job is done!
Frequently Asked Questions
What are the most common mistakes people make when changing their car's oil at home?
Hey there, friend! Let’s dive into the top mistakes folks make when changing their car’s oil at home. I’ve seen it all in my garage, from using the wrong oil filter to not tightening the drain plug enough. And don’t even get me started on disposing of used oil improperly – it’s a recipe for disaster!
How can I ensure I'm using the correct oil viscosity for my vehicle to avoid engine damage?
Ah, great question! To ensure you’re using the correct oil viscosity, always check your vehicle’s owner’s manual. I like to think of it as the bible for your ride. You can also find the info on the oil filler cap or consult with a trusted mechanic, like myself. Trust me, getting it right saves you from a world of engine trouble down the road!
Are there any specific post-oil change inspection checks I should perform to guarantee my car is running smoothly?
Absolutely, after an oil change, I always check the oil level, look for leaks around the drain plug and filter, and give the car a quick test drive to ensure everything’s running smoothly – my grandfather used to say, ‘A few extra minutes now saves a whole lot of headaches later,’ and I couldn’t agree more!


