I still remember the first time my grandfather taught me how to change your own brake pads and rotors in our small Midwestern garage. It was a rite of passage, really – a moment when I realized that with the right tools and a bit of know-how, I could breathe new life into an old vehicle. The myth that you need to be a master mechanic to tackle this job is just that – a myth. In reality, it’s a relatively straightforward process that can save you a pretty penny in repair costs.
As we dive into the nitty-gritty of brake pad and rotor replacement, I want to assure you that this guide is all about practical, hands-on advice. You won’t find any fancy jargon or overly complicated instructions here. Instead, I’ll walk you through the same steps I’ve used to restore my own vintage bicycles and get them running like new. By the end of this article, you’ll be equipped with the knowledge to confidently swap out your brake pads and rotors, and get back on the road with confidence. So, let’s get started and see how a little bit of DIY magic can make all the difference in your vehicle’s performance.
Table of Contents
Guide Overview: What You'll Need

Total Time: 4 hours 30 minutes
Estimated Cost: $200 – $500
Difficulty Level: Intermediate / Hard
Tools Required
- C-clamp for pressing the caliper piston back
- Socket set with 3/8 inch and 1/2 inch drive sockets
- Tire iron for removing the wheel
- Pliers for removing old brake pad clips
- Wheel chocks for safety
Supplies & Materials
- Brake pads correct type for your vehicle
- Rotors correct size for your vehicle
- Brake lubricant for the back of the brake pads
- Brake cleaner for cleaning the brake assembly
- New brake pad clips if your old ones are damaged
Step-by-Step Instructions
- 1. First, gather your tools and equipment, including a lug wrench, a C-clamp, and a new set of brake pads and rotors. I’ve named my trusty lug wrench “Lucy” and my C-clamp “Clara” – it’s a quirk, but it helps me keep track of everything in my garage.
- 2. Next, raise the vehicle using a car lift or jack stands, making sure it’s securely supported and on level ground. I always double-check that my car is stable before starting any work underneath it – safety first, just like my grandfather taught me.
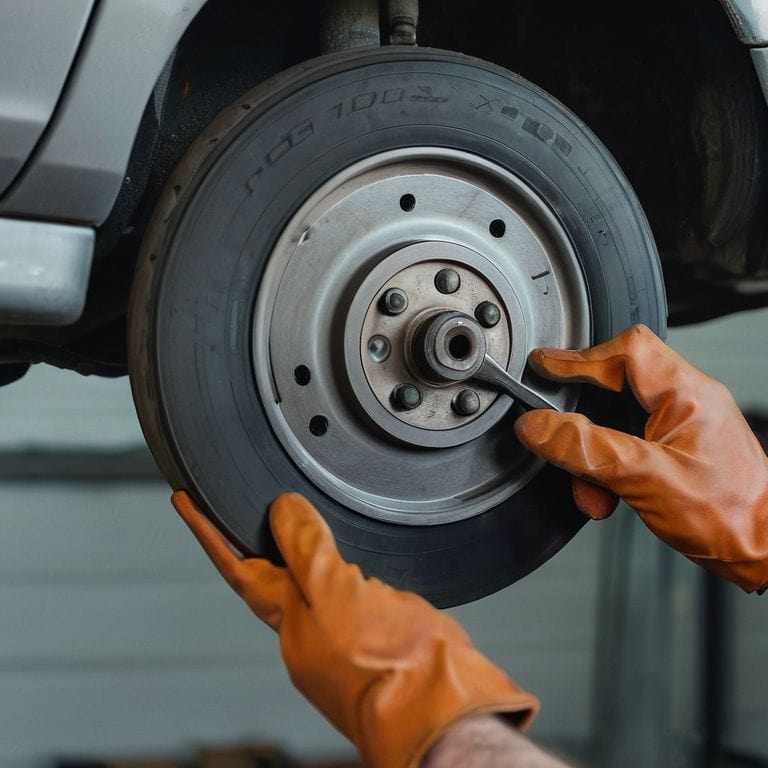
- 3. Now, remove the wheels using Lucy, my lug wrench, and set them aside in a safe place. This will give you clear access to the brake calipers and rotors. Take a moment to inspect the brake assembly for any signs of wear or damage.
- 4. Using Clara, my C-clamp, compress the caliper piston to push it back into the caliper housing. This will give you enough space to remove the old brake pads and take a look at the rotors. Be careful not to scratch the rotor surface when removing the old pads.
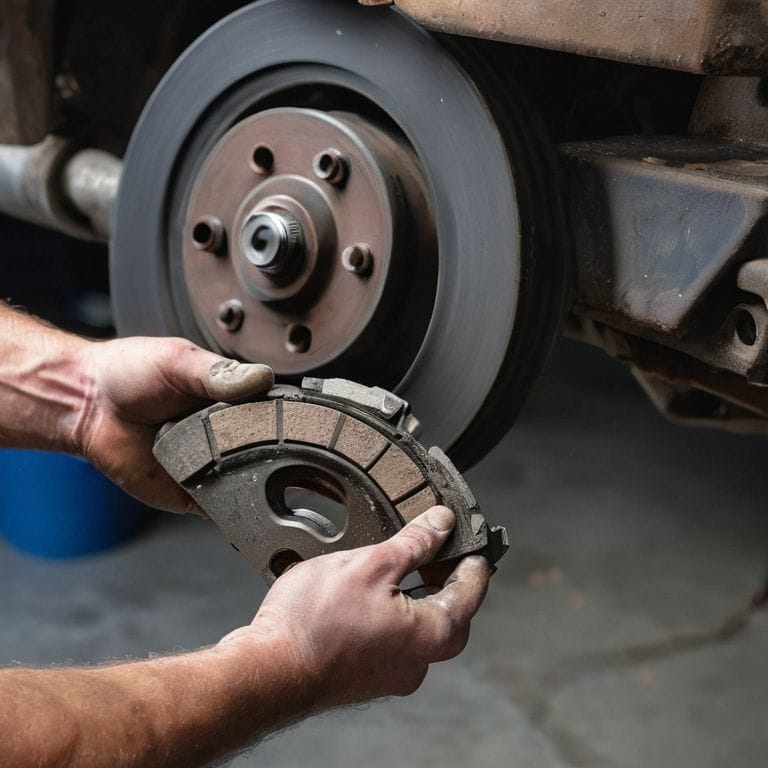
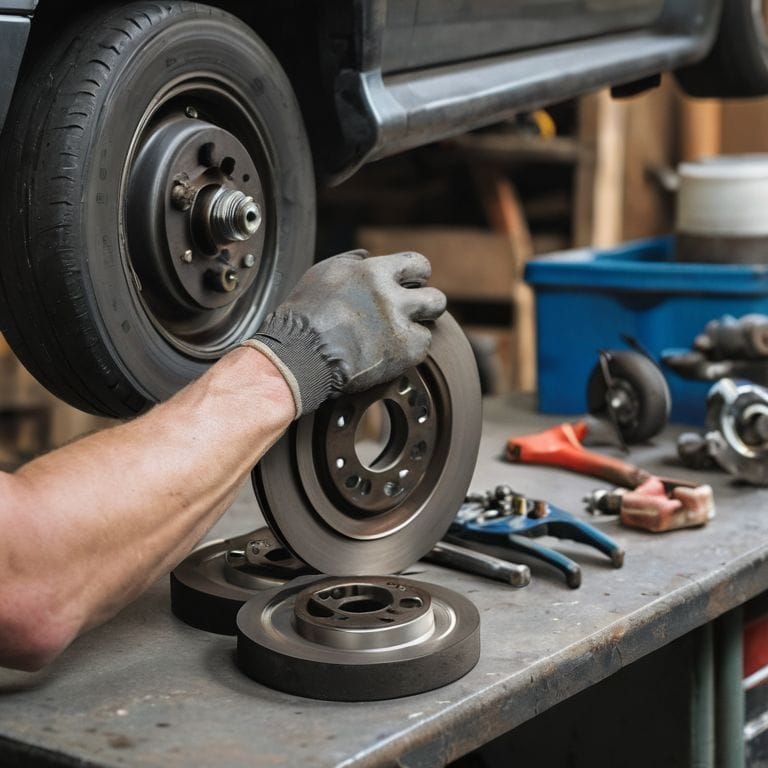
- 5. Inspect the rotors for excessive wear or warping, and decide whether to resurface or replace them. If you’re replacing them, now’s the time to do it – just make sure to properly clean and lubricate the new rotor before installing it.
- 6. With the new rotor in place, install the new brake pads, making sure they’re properly seated and aligned. Take your time, as this is a critical step – you want to ensure even braking performance and prevent any potential problems down the road.
- 7. Once the new pads are in, reinstall the caliper and tighten the bolts in a star pattern to ensure even pressure. Don’t overtighten, as this can damage the caliper or rotor – just snug it up and then double-check your work to make sure everything is secure and properly aligned.
- 8. Finally, bleed the brake system to remove any air bubbles that may have formed during the repair. This is a crucial step, as air in the system can lead to spongy brakes or even a brake failure. Use a brake bleeding kit and follow the manufacturer’s instructions to get the job done right.
Brake Job Mastery
As I always say, practice makes perfect, and brake pad replacement is no exception. The more you work on your vehicle, the more familiar you’ll become with common brake pad wear patterns. You’ll start to notice the subtle signs of wear, like a faint squeal or a soft brake pedal. Don’t worry, it’s not rocket science, but it does take some patience and dedication. I recall my grandfather telling me that a good mechanic can diagnose a problem just by listening to the sound of the engine.
When it comes to rotor resurfacing vs replacement, I always recommend replacing them if you’re not sure. It’s a small price to pay for the added safety and performance. Speaking of price, the brake pad replacement cost can vary depending on the type of vehicle and the quality of the parts. But trust me, it’s worth every penny. A good set of brake pads can make all the difference in the world.
Now, I know some of you might be thinking, “John, what about bleeding brake fluid techniques?” Well, let me tell you, it’s an essential part of any brake safety inspection checklist. You see, air in the brake lines can cause all sorts of problems, from spongy pedals to reduced stopping power. So, make sure you have the right tools needed for brake job and take your time when bleeding the brakes. It’s not a job for the faint of heart, but with a little practice, you’ll be a pro in no time.
Brake Pad Replacement Cost Secrets
When it comes to brake pad replacement, cost can be a major factor. I’ve seen folks shell out big bucks at the mechanic, only to realize they could’ve done it themselves for a fraction of the price. My grandfather used to say, “A dollar saved is a dollar earned,” and I couldn’t agree more. By doing the job yourself, you can save around $200 to $300, depending on the make and model of your vehicle.
I like to think of it as a fun challenge, like restoring my old vintage bicycle – you get to keep the savings and enjoy the satisfaction of a job well done. Plus, with the right tools, like my trusty “Bertha” brake pad spreader, the process is a breeze. So, go ahead, get your hands dirty, and swap out those brake pads like a pro – your wallet (and your ride) will thank you!
Rotor Resurfacing vs Replacement Tips
When it comes to rotor maintenance, I always say, “Don’t be afraid to get a little aggressive!” My trusty sidekick, a drill press I’ve lovingly named “Bertha,” helps me resurface rotors with ease. However, there are times when replacement is the better option. If your rotors are excessively worn or warped, it’s best to swap them out for new ones. I recall a project where I tried to resurface a rotor that was beyond repair – let’s just say it was a costly lesson in knowing when to hold ’em and when to fold ’em.
My rule of thumb? If the rotor is worn down to 1/8 of an inch or less, it’s time for a new one. But if it’s just a matter of minor scoring or warping, a good resurfacing can breathe new life into your brake system. Just remember to always follow proper safety protocols and consult your vehicle’s manual before making any decisions. And, of course, don’t forget to give your tools a good cleaning afterwards – I like to think my grandfather’s old toolbox is smiling down on me whenever I take the time to properly maintain my gear.
Brake-ing Point: 5 Tips to Master the Art of Changing Your Own Brake Pads and Rotors
- Get Familiar with Your Ride: Before you start, take some time to consult your vehicle’s repair manual or look up the specific brake pad and rotor replacement procedure for your make and model – it’s like getting to know a new friend!
- Tool Up: Gather all the necessary tools, including a lug wrench, tire iron, and brake pad spreader – I’ve named mine ‘Bertha’, ‘Terry’, and ‘Paddy’ respectively, because, why not?
- Cleanliness is Next to Brakeness: Make sure the brake caliper and surrounding area are free of dirt and grime before installing new brake pads – a clean workspace is a happy workspace, trust me!
- Don’t Be Afraid to Get a Little Help: If you’re not comfortable with the process or encounter any issues, don’t hesitate to consult a professional mechanic or a trusted friend who’s handy with tools – I learned from my grandfather, and now I’m passing on the knowledge to you!
- Inspect and Test: After completing the brake pad and rotor replacement, take your vehicle for a test drive to ensure the brakes are functioning properly and quietly – it’s like taking your newly restored vintage bicycle out for a spin, exhilarating!
Key Takeaways for a Successful Brake Job
Always remember to bleed your brake system after replacing the brake pads and rotors to ensure there’s no air in the lines, just like I do with my vintage bicycle restorations – a clean system is a safe system!
Choosing between rotor resurfacing and replacement depends on the condition of your rotors, so take the time to inspect them thoroughly before making a decision, it’s like deciding which tool to use for the job, my trusty ‘Bertha’ wrench or ‘Sparky’ pliers?
By following these steps and tips, you’ll not only save money by doing the job yourself, but you’ll also gain a deeper understanding of your vehicle’s mechanics, much like I did working alongside my grandfather in our small Midwestern town’s hardware store, now that’s what I call brake job mastery!
A Word of Wisdom
The key to mastering brake pad and rotor swaps isn’t just about following a manual, it’s about feeling the rhythm of your ride and understanding that every wrench turn is a step closer to freedom on the open road.
John Beeler
Bringing it all to a Stop: A Job Well Done
We’ve covered a lot of ground in this guide, from the initial steps of preparing your workspace to the nitty-gritty of brake pad replacement and rotor resurfacing vs replacement. You’ve learned how to assess your brake pads and rotors, remove the old ones, and install new ones. You’ve also discovered some valuable secrets about the costs associated with brake pad replacement and the pros and cons of resurfacing versus replacing your rotors. By following these steps and tips, you’ll be well on your way to becoming a brake job master.
Now that you’ve completed this guide, I hope you’re feeling a sense of accomplishment and confidence in your ability to tackle your own brake repairs. Remember, the garage is your playground, and with the right tools and knowledge, you can unleash your creativity and take your DIY skills to the next level. So, go ahead, get out there, and start tinkering – your next project is waiting, and who knows, you might just find yourself restoring a vintage bicycle or two in your spare time. Happy wrenching, and I’ll see you in the garage!
Frequently Asked Questions
What are the most common mistakes to avoid when changing brake pads and rotors?
Hey, don’t get caught in the brake blues! Common mistakes to avoid include over-tightening, mismatched pads, and improper rotor installation. My granddad used to say, ‘Measure twice, tighten once.’ Trust me, it’s wisdom that’ll save you headaches and keep your ride stoppin’ smooth.
How do I know if I need to resurface or replace my rotors entirely?
Ah, great question! When deciding between resurfacing and replacing your rotors, I always say: if they’re worn down to about 1/8th of an inch or show significant warping, it’s time to swap ’em out. But if they’re just lightly scored, a good resurfacing might do the trick – my trusty ‘Bertha’ belt sander usually gets the job done!
Can I use the same tools for changing brake pads and rotors on different types of vehicles?
Ah, great question! While some tools are universal, others are vehicle-specific. My trusty sidekicks, ‘Torquey’ the torque wrench and ‘Braky’ the brake pad spreader, work on most cars, but I’ve got specialized tools for certain jobs, like ‘Rotor-Rounder’ for resurfacing. Always check your vehicle’s manual to ensure you’re using the right tools for the job.


