I still remember the day my grandfather taught me how to replace the windshield wiper blades on our old family car. It was a simple yet crucial task that made a world of difference in terms of safety and visibility. As I grew older and became an automotive technician, I realized that many people struggle with this basic maintenance task, often resorting to expensive mechanic visits or, worse, driving with impaired vision. That’s why I’ve decided to write a guide to replacing windshield wiper blades, to empower car owners with the knowledge and confidence to take matters into their own hands.
In this article, I’ll walk you through the step-by-step process of replacing your windshield wiper blades, sharing tips and tricks I’ve learned over the years. You’ll discover how to choose the right replacement blades, remove the old ones, and install the new ones with ease. My goal is to make this task as straightforward as possible, so you can get back on the road with a clear view and a sense of accomplishment. By the end of this guide, you’ll be equipped with the practical advice and hands-on expertise to tackle this essential car maintenance task with confidence, and maybe even inspire you to tackle more projects in your garage, just like I do with my vintage bicycle restorations.
Table of Contents
Guide Overview: What You'll Need
Total Time: 30 minutes to 1 hour
Estimated Cost: $10 – $30
Difficulty Level: Easy
Tools Required
- Screwdriver (flathead or Phillips)
- Towel or rag (for cleaning the windshield)
- Gloves (optional)
Supplies & Materials
- New windshield wiper blades (correct size and type for your vehicle)
- Windshield cleaner (for cleaning the windshield before installation)
- Rubber gloves (optional, for protecting your hands from the elements)
Step-by-Step Instructions
- 1. First, gather your tools and supplies, which should include a new set of windshield wiper blades, a screwdriver (I’ve named mine “Screwy” by the way), and possibly a small torque wrench, depending on your vehicle’s make and model. Make sure you’re working in a well-lit area, like my grandfather’s old garage, where every project felt like an adventure.
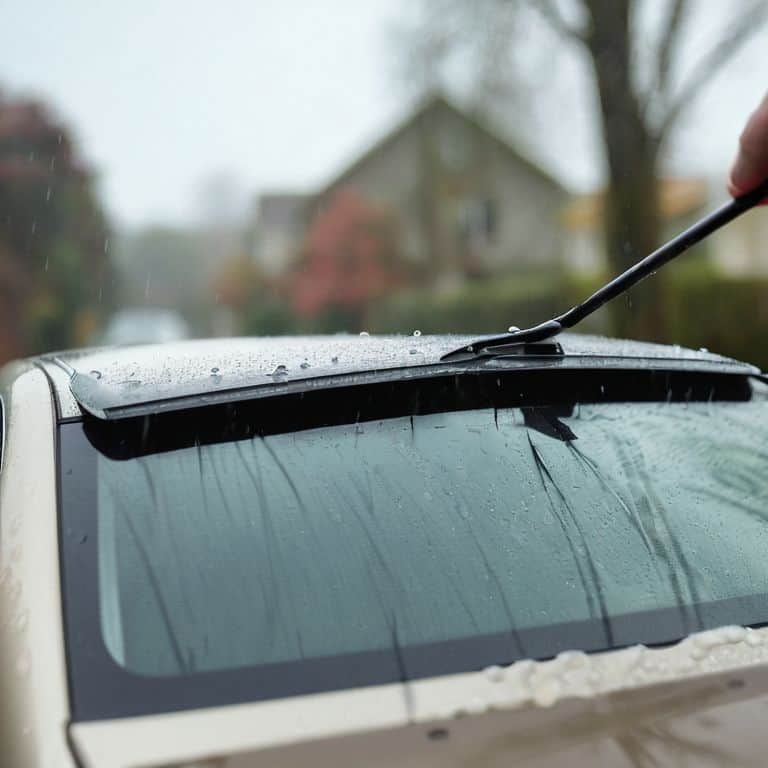
- 2. Next, locate the windshield wiper arms on your vehicle. They’re usually held in place by a small nut or clip, which you’ll need to remove to access the old wiper blades. Be careful not to strip the nut, as this can lead to more complicated repairs down the line. I recall my grandfather always saying, “A good mechanic is patient and gentle, like a summer breeze.
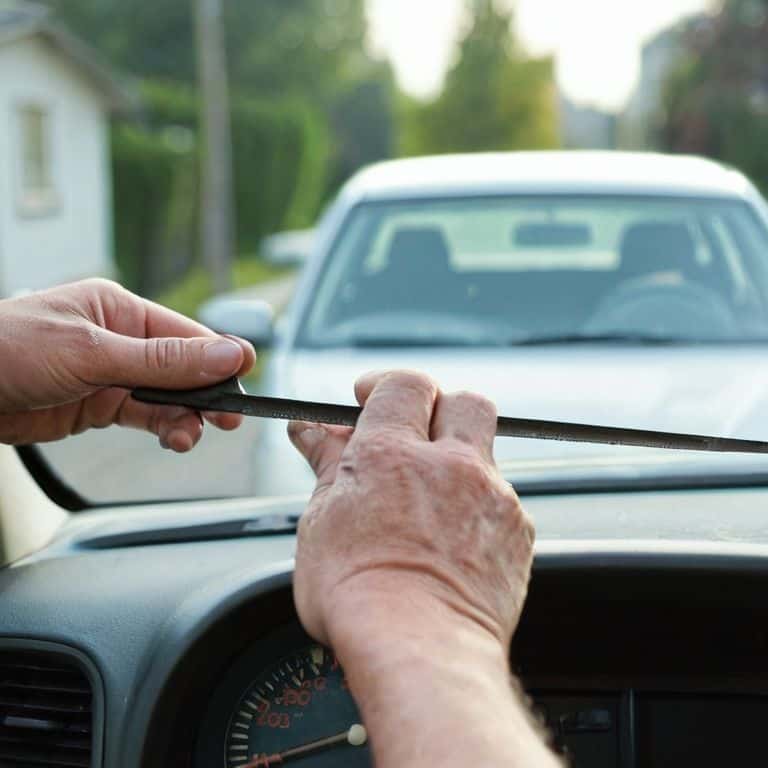
- 3. Now, remove the old wiper blades by sliding them off the wiper arm or releasing the tab that holds them in place. This is a good opportunity to inspect the wiper arms themselves for any signs of wear or damage. If you find any issues, it’s best to address them now to ensure your new wiper blades work effectively. My trusty “Wiper Wizard” (that’s what I call my favorite pair of pliers) comes in handy for gripping small parts.
- 4. With the old blades off, inspect and clean the wiper arms. Use a soft cloth or brush to remove any dirt, grime, or old rubber that might be stuck to the arms. This step is crucial for ensuring a smooth operation of your new wiper blades. I always keep a can of compressed air and a microfiber cloth handy for this kind of job, which I’ve affectionately named “The Cleaning Duo.
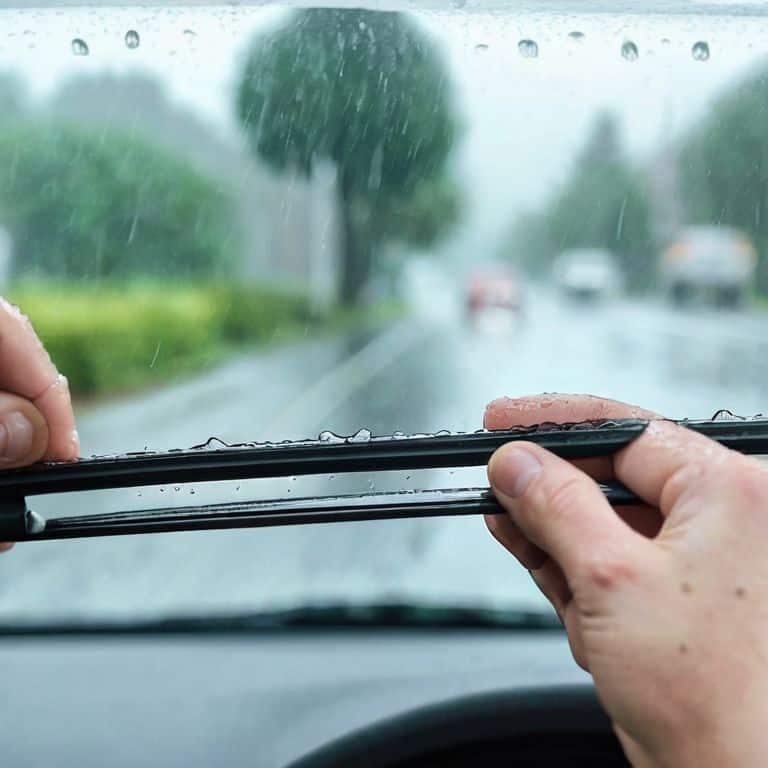
- 5. Next, install the new wiper blades by sliding them onto the wiper arms or attaching them to the tab. Make sure they’re securely fastened but not over-tightened, as this can damage the wiper arm or the blade itself. If your new blades come with any specific installation instructions, be sure to follow them closely. My “Torque Titan” (a reliable torque wrench) is essential for getting the right fit without overdoing it.
- 6. Once the new blades are in place, replace the nut or clip that holds the wiper arm in position. Tighten it securely, but again, be mindful of the torque to avoid stripping the nut. This is where my “Screw Squad” (a set of precision screwdrivers) comes into play, offering the right amount of leverage and control.
- 7. Finally, test the windshield wipers to ensure they’re working properly. Turn on the windshield washer and wipers to check for any streaks or uneven wiping. If necessary, adjust the wiper arms slightly to optimize their performance. This final check is where all your hard work pays off, and you get to enjoy the satisfaction of a job well done, just like I do every time I restore a vintage bicycle to its former glory.
A Guide to Replacing Windshield Wiper Blades
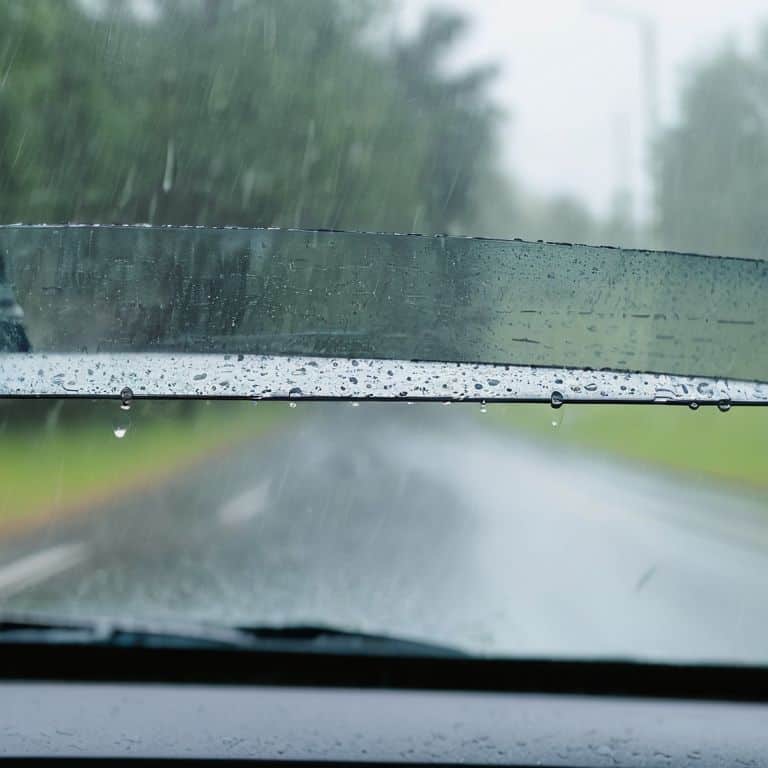
As I always say, proper wiper maintenance is key to ensuring your windshield stays clear, regardless of the weather. One of the signs of worn out wiper blades is a squeaky or chattering sound when they’re in use. If you notice this, it’s time to swap them out. I like to think of it as giving your ride a fresh new pair of eyes.
When it comes to choosing the right wiper size, it’s essential to consult your vehicle’s manual or look for a sticker on the driver’s side doorjamb. You don’t want to end up with DIY wiper blade replacement tips that don’t quite fit. Types of windshield wiper blades vary, but most vehicles use a standard hook-type arm. If you’re unsure, don’t hesitate to ask a professional, like I did when I was learning from my grandfather in his garage.
To avoid common wiper blade problems and solutions, make sure to clean your wipers regularly and replace them every six to twelve months. I also recommend using a microfiber cloth to wipe down the blades and remove any debris. By following these simple tips, you’ll be well on your way to maintaining clear visibility on the road, and that’s what it’s all about – importance of proper wiper maintenance.
Choosing the Right Wiper Size Matters
When it comes to choosing the right wiper size, it’s not just about slapping on any old blade. I’ve seen folks make that mistake, and trust me, it’s a recipe for disaster. You want to make sure you’re getting a wiper that’s specifically designed for your ride. Check your owner’s manual or look for a sticker on the driver’s side doorjamb – it should have the exact specs you need. My grandfather used to say, “Measure twice, install once,” and that’s especially true here.
I’ve got a whole drawer full of wipers in my garage, each one labeled with its corresponding vehicle make and model. It’s a bit quirky, I know, but it saves me a headache in the long run. Take the time to get it right, and you’ll be rewarded with a clear view and a whole lot less stress on the road.
Signs Your Wipers Need a Swap
So, how do you know when it’s time to give your wipers the old switcheroo? Well, my grandfather used to say, “If they’re not wiping like they used to, it’s time to get new ones, boy!” And that’s still great advice today.
Signs your wipers need a swap include streaks or scratches on the windshield, wipers that chatter or vibrate, or even just a good ol’ fashioned visual inspection showing wear and tear on the blades themselves. My trusty sidekick, a tool I’ve named “Wrenchy,” always seems to be by my side when I’m checking these things out.
Wiper Wisdom: 5 Tips to Keep Your View Clear
- Measure Twice, Install Once: Double-check your wiper blade size to ensure a perfect fit, just like I do when I’m restoring a vintage bike
- Don’t Get Caught Slipping: Regularly inspect your wipers for signs of wear, like my grandfather taught me to do with the tools in his garage
- Choose the Right Rubber: Select wiper blades with a durable rubber compound that can withstand the elements, like the ones I use on my trusty old bike
- Clean Sweep: Make sure to clean your windshield and wiper blades regularly to prevent debris buildup and maintain clear visibility
- Tool Time: Keep your wiper replacement tools handy and organized, like I keep my trusty toolbox, where every tool has a name, like ‘Bertha’ the screwdriver
Key Takeaways for a Clear Ride
Wiper blades should be replaced every 6-12 months or as soon as you notice signs of wear, such as streaks, squeaks, or cracked rubber, to ensure maximum visibility and safety on the road
Choosing the right wiper size is crucial – always refer to your vehicle’s manual or the manufacturer’s website for the correct fit, as improper sizing can lead to reduced effectiveness and increased risk of damage
By following these simple steps and tips, you’ll be well on your way to giving your ride a clear view, one wiper at a time, and making the most out of your garage as a playground for creativity and innovation, just like I do with my vintage bicycle restorations
Wiping Away the Obvious
A clear view isn’t just about seeing the road ahead, it’s about seeing the potential in every project, every repair, and every restoration – like bringing an old bike back to life, one wrench at a time.
John Beeler
Wrapping Up: You're Now a Wiper Wizard
As we conclude our journey through the world of windshield wiper blades, remember that regular maintenance is key to ensuring your safety on the road. We’ve covered the essential steps to replace your wiper blades, from recognizing the signs of worn-out wipers to choosing the right size for your vehicle. By following these simple steps, you’ll be well on your way to enjoying a clear view of the road ahead, no matter the weather conditions. Whether you’re a seasoned mechanic or a DIY novice, taking care of your wiper blades is an easy win for your vehicle’s upkeep.
So, the next time you find yourself in your garage, tinkering with your trusty ride, take a moment to appreciate the little things – like the satisfaction of installing a brand new set of wiper blades. As someone who’s passionate about restoration, I can tell you that it’s these small victories that make the hobby so rewarding. With your newfound knowledge, go forth and give your vehicle the TLC it deserves. And who knows, you might just find yourself inspired to tackle that vintage bicycle restoration project you’ve been putting off – after all, a clear view of the road can be pretty liberating!
Frequently Asked Questions
What are the most common mistakes to avoid when replacing windshield wiper blades?
Don’t get caught slipping – common mistakes to avoid include installing wipers with the wrong arm attachment, not tightening the nut securely, and neglecting to test them after installation. Trust me, I’ve seen it happen, and it’s a real wiper wipeout! Take your time, and double-check your work, just like I do when I’m tinkering with my vintage bike restorations.
Can I reuse the old wiper arm or do I need to replace it with a new one?
Ah, great question! Typically, you can reuse the old wiper arm, but make sure it’s free of corrosion and moving smoothly. If it’s worn out or damaged, it’s best to replace it with a new one to ensure proper fit and function. I like to think of it like tuning up my vintage bike – every part matters for a smooth ride!
How often should I replace my windshield wiper blades if I live in an area with heavy rainfall or extreme weather conditions?
If you’re in an area with heavy rainfall or extreme weather, I’d recommend swapping your wiper blades every 6 to 12 months. My trusty sidekick, a tool I’ve named ‘Rainy’, is a rain gauge that helps me keep track of just how much moisture my own vehicle’s wipers are dealing with, and it’s a good reminder to check theirs regularly.


