I still remember the first time I tackled a kitchen faucet replacement in my own home – it was a daunting task that left me covered in mystery grime and questioning my life choices. But, as it often does, necessity bred ingenuity, and I discovered that with the right mindset and a few clever tricks, even the most intimidating DIY projects can become empowering experiences. If you’re searching for a guide to replacing a kitchen faucet, you’re likely no stranger to the frustration of a dripping faucet or the disappointment of a botched DIY attempt.
In this article, I promise to cut through the noise and provide you with honest, no-nonsense advice on how to replace your kitchen faucet with confidence. You’ll learn how to navigate the unexpected challenges that arise during the process, and how to transform this mundane task into an opportunity to breathe new life into your kitchen. From preparing your workspace to selecting the perfect replacement faucet, I’ll walk you through each step with the same care and attention to detail that I would if we were working side by side in my workshop.
Table of Contents
- Guide Overview: What You'll Need
- Step-by-Step Instructions
- A Guide to Replacing a Kitchen Faucet
- From Leaks to Luxury: 5 Essential Tips for a Successful DIY Faucet Replacement
- Three Key Takeaways for a Successful DIY Faucet Swap
- Tapping into Creativity
- Wrapping Up Your DIY Faucet Adventure
- Frequently Asked Questions
Guide Overview: What You'll Need

Total Time: 2 hours 30 minutes
Estimated Cost: $50 – $200
Difficulty Level: Intermediate
Tools Required
- Adjustable wrench (for removing old faucet)
- Basin wrench (for reaching faucet mounting nuts)
- Channel-type pliers (for gripping small objects)
- Needle-nose pliers (for bending water supply lines)
- Teflon tape (for threading pipe connections)
- Utility knife (with extra blades)
Supplies & Materials
- New kitchen faucet
- Water supply lines (2, 24 inches long)
- Faucet mounting nuts
- Faucet washers
- Plumber’s putty
Step-by-Step Instructions
- 1. First, let’s get started by gathering our tools and materials, which will include a new faucet, adjustable wrench, basin wrench, channel-type pliers, and some Teflon tape. It’s essential to have everything ready before we begin to ensure a smooth and efficient process.
- 2. Next, we need to shut off the water supply to the faucet by locating the shut-off valves under the sink and turning them clockwise. Open the faucet to drain the water from the pipes, and then you can proceed with the replacement process.
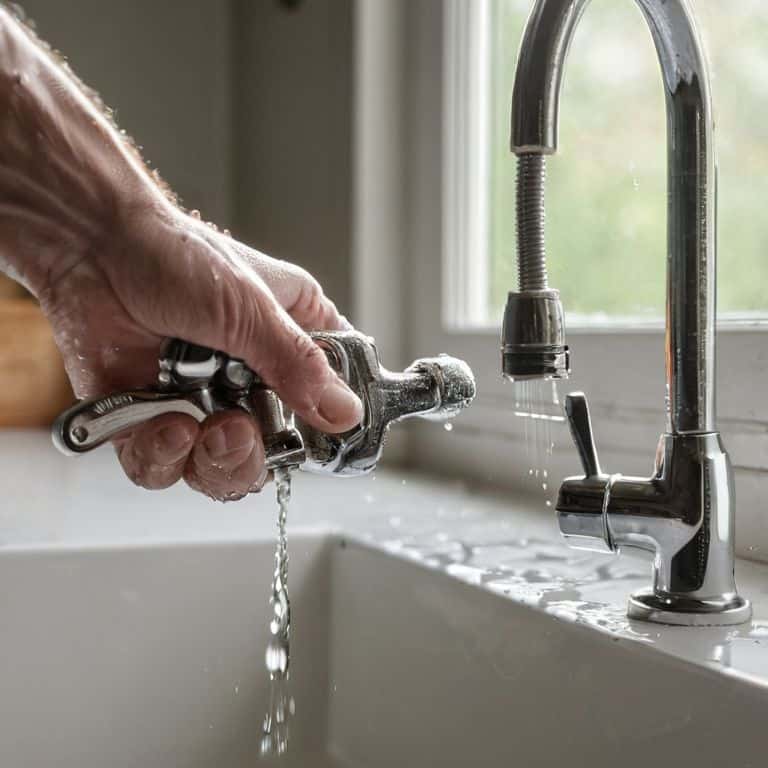
- 3. Now, it’s time to disconnect the water supply lines from the old faucet. Use your adjustable wrench to loosen any fittings, and then completely remove the lines from the faucet. You may need to use your channel-type pliers to grip the fittings if they’re stubborn.
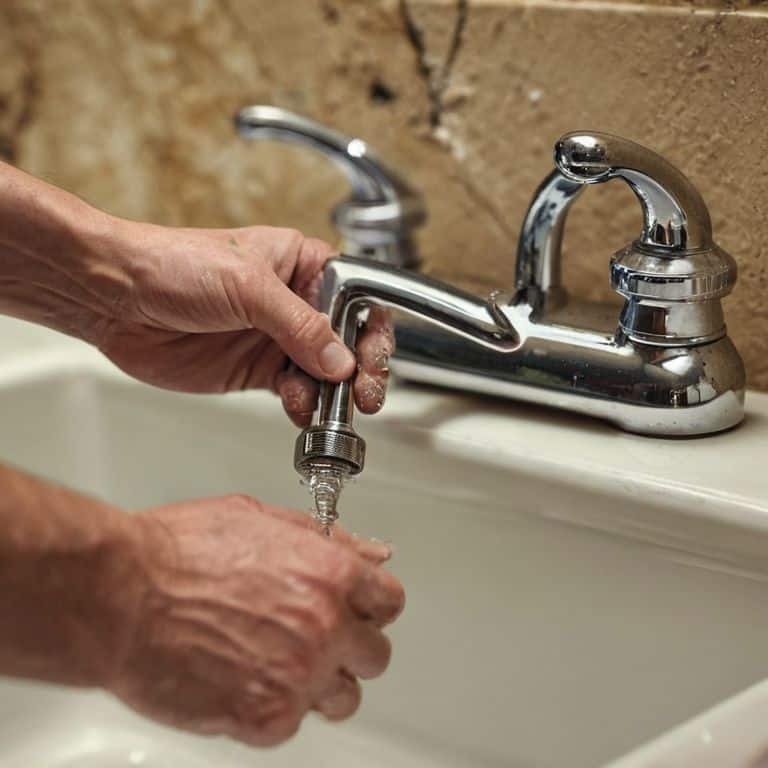
- 4. The fourth step involves removing the old faucet, which typically requires using your basin wrench to loosen the nuts that hold the faucet in place. Be careful not to scratch the sink surface as you lift the old faucet out.
- 5. With the old faucet removed, we can now clean and prepare the sink area for the new faucet installation. Use a gentle cleanser and a soft cloth to remove any grime, mineral deposits, or old adhesive that might be present.
- 6. It’s time to install the new faucet, starting by applying a thin layer of plumber’s putty or silicone sealant to the faucet’s mounting holes. Then, carefully lower the new faucet into place, ensuring it’s centered and even.
- 7. Next, we need to secure the new faucet by tightening the mounting nuts with your basin wrench. Make sure they’re snug but avoid overtightening, which could damage the sink or faucet.
- 8. Now that the faucet is in place, we can reconnect the water supply lines. Use Teflon tape to create a watertight seal on the threads of the faucet’s inlet ports, and then attach the supply lines, tightening them securely with your adjustable wrench.
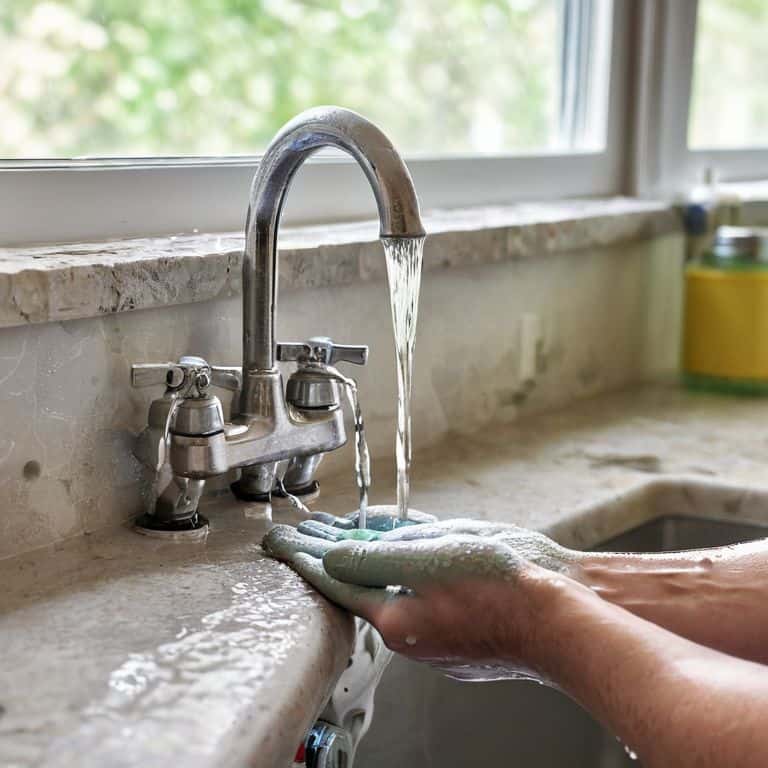
- 9. Finally, let’s test the new faucet by turning on the water supply and checking for any leaks around the faucet and its connections. Run some water through the faucet to ensure it’s working smoothly and make any necessary adjustments.
A Guide to Replacing a Kitchen Faucet
As you embark on this DIY adventure, keep in mind that kitchen faucet installation cost can vary greatly depending on the type of faucet you choose. However, with the right tools and a bit of patience, you can save yourself a significant amount of money. I always say, investing in the best tools for faucet replacement is key to a successful and stress-free installation process.
When it comes to avoiding common faucet replacement mistakes, it’s essential to take your time and follow the instructions carefully. One of the most critical decisions you’ll make is choosing between faucet mounting types and styles that fit your kitchen’s unique layout. Whether you’re going for a sleek and modern look or a more traditional feel, there are plenty of options to choose from.
In some cases, you might be wondering whether to opt for kitchen faucet repair vs replacement. If your faucet is still in good condition but just needs a few tweaks, repairing it might be the more eco-friendly and cost-effective option. However, if your faucet is old and inefficient, replacing it with a new one can make a significant difference in your water consumption and overall kitchen experience.
Drip to Shine Avoiding Common Mistakes
As I always say, a successful DIY project is all about being prepared for the unexpected. When replacing a kitchen faucet, it’s easy to get caught up in the excitement of giving your kitchen a fresh new look. However, there are a few common pitfalls to watch out for. One of the most important things to remember is to turn off the water supply before you start tinkering – trust me, you don’t want to be dealing with a geyser of water in the middle of your project!
To avoid any headaches, take your time and double-check that all connections are secure and tightened properly. A little patience and attention to detail will save you from those frustrating drips and leaks that can drive you crazy.
Faucet Fix Saving With Diy Installation
By taking on the faucet replacement project yourself, you’re not only gaining a sense of accomplishment, but also saving a pretty penny on labor costs. I mean, think about it – the money you’d normally spend on a professional installation can now be invested in something truly special, like a beautiful reclaimed wood kitchen island or a vibrant indoor herb garden. The DIY route also allows you to get creative with the materials and design, giving your kitchen a unique touch that reflects your personality. Plus, you’ll be reducing waste by repurposing or responsibly disposing of the old faucet, which is a win for the environment.
From Leaks to Luxury: 5 Essential Tips for a Successful DIY Faucet Replacement
- Tighten Up: Don’t Forget to Shut Off the Water Supply Before You Start
- Tool Time: Gather Your Trusty Sidekicks, Including an Adjustable Wrench and Channel-Type Pliers
- Measure Twice, Install Once: Ensure Your New Faucet Fits Your Sink’s Mounting Holes
- Seal the Deal: Apply a Thin Layer of Plumber’s Putty or Silicone Caulk to Prevent Leaks
- Test the Waters: Turn On the Water Supply and Check for Leaks Before Declaring Victory
Three Key Takeaways for a Successful DIY Faucet Swap
Embracing the DIY spirit can save you up to 50% on labor costs, making it a financially savvy choice for the budget-conscious homeowner
By avoiding common mistakes such as incorrect faucet sizing and improper water supply line connection, you can ensure a leak-free and efficient installation
Upcycling or repurposing materials from your old faucet, like metal or ceramic components, can add a touch of creative reuse to your project, reflecting your personal style and commitment to sustainable living
Tapping into Creativity
As we turn the wrench on our old faucet, we’re not just fixing a leak, we’re unleashing a flow of creativity and self-sufficiency that can transform our entire approach to home and life.
Stanley Truman
Wrapping Up Your DIY Faucet Adventure
As we conclude this journey of replacing your kitchen faucet, let’s take a moment to reflect on the process. From preparing your workspace to the final tightening of the faucet’s mounting nuts, every step has been a testament to your capability for self-sufficiency. You’ve not only saved money by avoiding professional installation fees, but you’ve also gained a deeper understanding of your plumbing system. This newfound knowledge will serve you well in future DIY endeavors, empowering you to tackle more complex projects with confidence.
Now that you’ve successfully replaced your kitchen faucet, remember that this achievement is just the beginning. It’s a stepping stone to a world of creative problem-solving and sustainable living. As you stand back to admire your handiwork, consider the countless other ways you can apply your DIY skills to reduce waste, conserve resources, and breathe new life into outdated items. Your kitchen faucet may have started as a simple replacement project, but it has the potential to inspire a movement of eco-friendly innovation in your home and beyond.
Frequently Asked Questions
What are the most common mistakes to avoid when replacing a kitchen faucet to ensure a leak-free installation?
When swapping out your kitchen faucet, beware of overtightening, misaligned mounting nuts, and inadequate pipe cleaning – these sneaky mistakes can lead to leaks and headaches. Take your time, and don’t be afraid to get a little creative with some makeshift tools from around the house, like using a rubber band to mark those pesky pipe positions!
Can I reuse any of the old faucet's parts, such as the water supply lines, or is it best to replace everything?
Absolutely, you can breathe new life into some of those old parts. The water supply lines, for instance, can often be reused if they’re in good condition. Just give them a good inspection and cleaning. However, it’s usually best to replace the faucet’s mounting hardware and gaskets to ensure a watertight seal and prevent future leaks.
How do I know if I need to replace the entire faucet or just repair a faulty component, like the cartridge or aerator?
Ah, great question! Before ripping out the whole faucet, let’s troubleshoot. Inspect the cartridge, aerator, and O-rings for mineral buildup or wear. If it’s just one of these culprits, a simple swap or cleaning might do the trick. But if you’re dealing with corroded pipes, leaks, or outdated parts, it might be time to consider a full faucet replacement.


