I still remember the day I decided to turn my garage into a welding wonderland. I had always been fascinated by the idea of how to set up a welding space in your garage, but every guide I read made it seem like a daunting task that required a lot of space and expensive equipment. As someone who’s passionate about sustainable living and DIY projects, I was determined to find a way to make it work. I started by clearing out my garage and assessing what I had to work with. I realized that with a little creativity, I could turn this neglected space into a functional welding area.
In this article, I’ll share my personal experience and provide you with honest, no-hype advice on how to set up a welding space in your garage. I’ll walk you through the process of transforming your garage into a safe and efficient welding space, from choosing the right equipment to organizing your tools and materials. My goal is to inspire you to take control of your DIY projects and make the most of your garage space. By the end of this guide, you’ll have a clear understanding of what it takes to set up a welding space that works for you, and you’ll be ready to start creating your own projects with confidence.
Table of Contents
Guide Overview: What You'll Need
Total Time: 4 hours 30 minutes
Estimated Cost: $200 – $500
Difficulty Level: Intermediate
Tools Required
- Workbench (sturdy, 6 feet long, 30 inches wide)
- Vice (heavy-duty, for securing metal)
- Welding Helmet (with shaded lens)
- Fire Extinguisher (rated for garage use)
- Steel-Toed Boots (for safety)
- Wire Brush (for cleaning metal)
- Clamp Set (including C-clamps and bar clamps)
- Measuring Tape (25 feet long)
- Level (to ensure work surface is even)
- Drill Press (optional, for precision drilling)
Supplies & Materials
- 2-in x 6-in lumber (for building workbench or shelving)
- Plywood (for work surface, 1/2 inch thick, 4 feet x 8 feet)
- Steel Shelving (for storing welding equipment and supplies)
- Welding Rods (various types and sizes)
- Welding Machine (MIG, TIG, or Arc welder)
- Ventilation System (to remove welding fumes)
- Fire-Resistant Curtains (to separate welding area from rest of garage)
- Non-Slip Mat (for preventing slips and falls)
- First Aid Kit (including burn cream and bandages)
Step-by-Step Instructions
- 1. First, let’s start by clearing out the clutter in your garage, making space for your future welding sanctuary. I like to think of this step as an opportunity to practice my urban foraging skills, but instead of searching for wild herbs, I’m on the hunt for any items that can be repurposed or recycled. Begin by sorting items into categories: keep, donate, and discard. Be ruthless – if you haven’t used it in the past year, it’s probably safe to get rid of it. As you’re clearing, keep an eye out for any items that could be transformed into tools or storage solutions for your welding space.
- 2. Next, we need to assess the lighting in your garage. Proper lighting is essential for welding, as it allows you to see what you’re working on and ensures your safety. If your garage has limited natural light, consider installing additional lighting fixtures, such as LED strips or overhead lights. I’ve found that using reclaimed wood to create a unique lighting fixture can add a touch of warmth and character to your welding space.
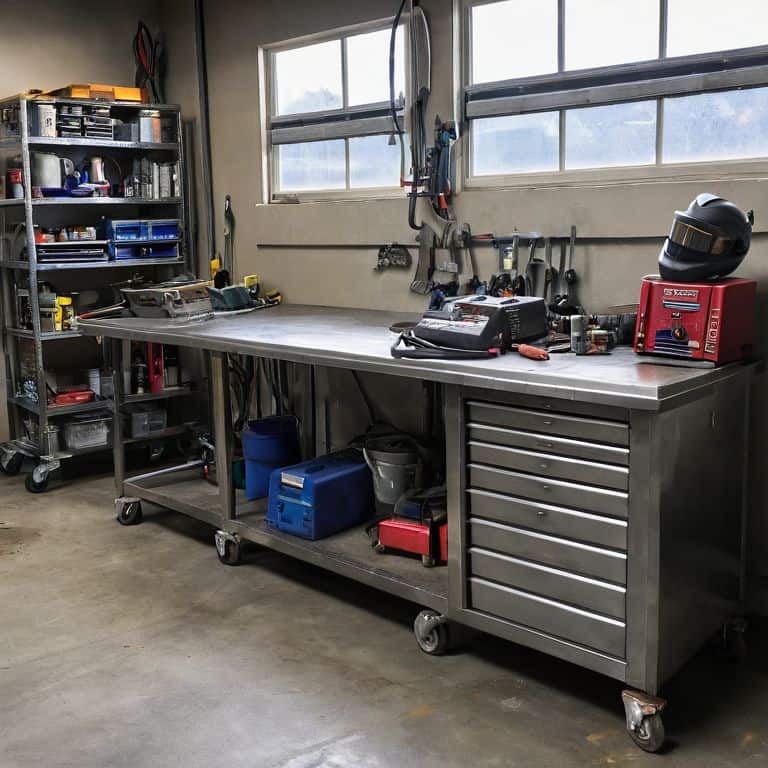
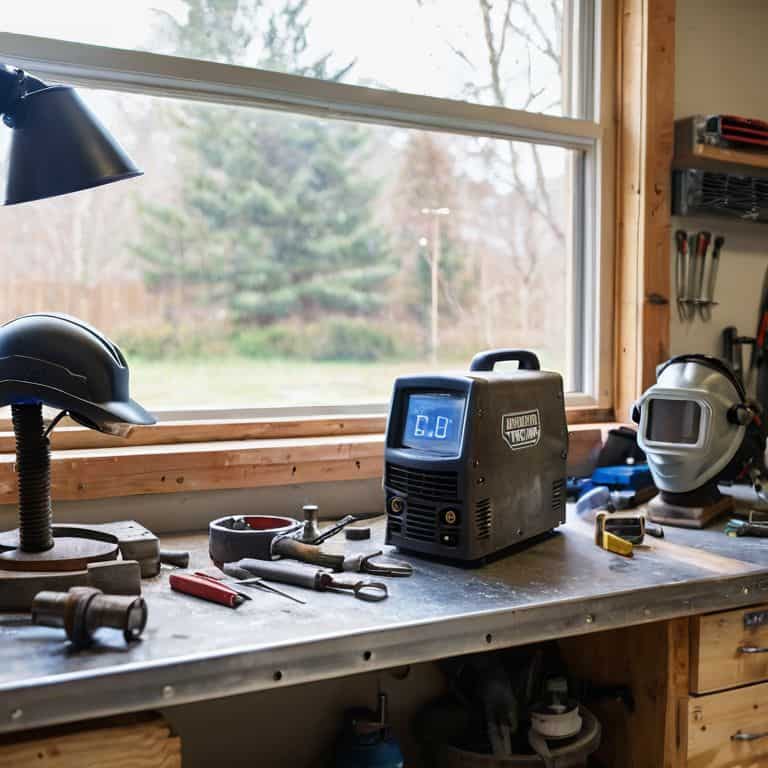
- 3. Now it’s time to set up your welding station. This will be the heart of your operation, where you’ll spend most of your time working on projects. Choose a sturdy table or workbench that can withstand the heat and sparks generated by welding. I like to use an old door or a piece of salvaged plywood as my work surface, as it provides a smooth, durable finish. Make sure your station is well-ventilated, with a fume extractor or a fan to remove any hazardous fumes.
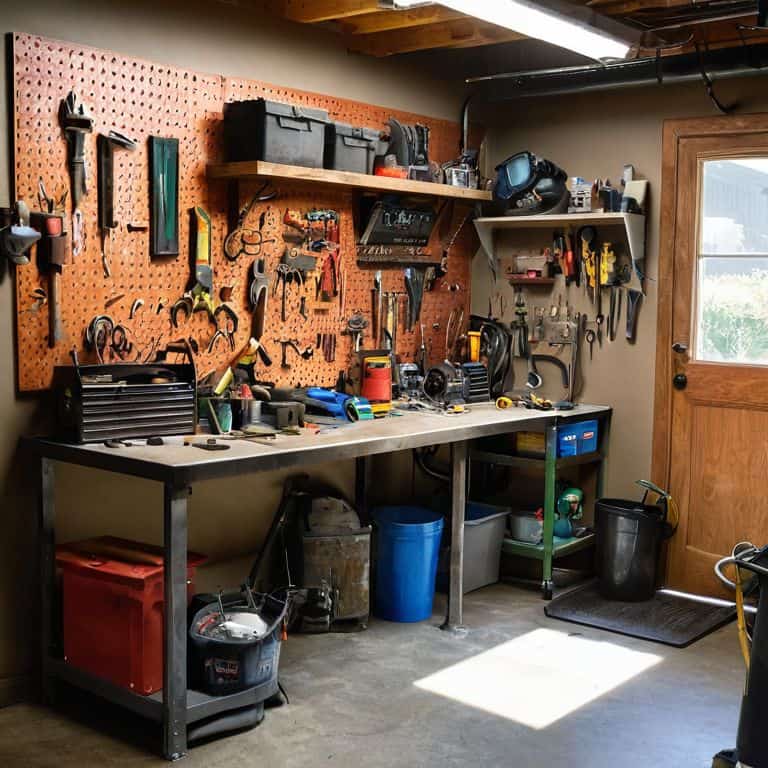
- 4. With your station set up, it’s time to organize your tools. A well-organized workspace is essential for efficiency and safety. Use bins, baskets, or repurposed containers to store your welding supplies, such as electrodes, gloves, and safety glasses. Consider installing a pegboard or a tool rack to keep your frequently used tools within easy reach. I’ve found that using a old pallet to create a tool rack can be a great way to add some rustic charm to your welding space.
- 5. Next, we need to establish a safe working area. Welding can be hazardous, so it’s crucial to take precautions to protect yourself and others. Clear a circle of at least 3 feet around your welding station to prevent accidents. Use fire-resistant materials to cover any flammable surfaces, such as wood or fabric. Make sure you have a fire extinguisher nearby and that you know how to use it.
- 6. Now it’s time to set up your welding equipment. Follow the manufacturer’s instructions to assemble and install your welder, wire feeder, and any other equipment you’ll be using. Make sure all cables and hoses are securely connected and properly routed to prevent damage or tripping hazards. I like to use old bike inner tubes to create a custom cable management system that keeps my workspace tidy.
- 7. Finally, let’s add some personal touches to your welding space. This is where you can get creative and make your space truly unique. Consider adding some colorful decorations, such as vintage signs or welding-themed artwork. You could also install a sound system to listen to music or podcasts while you work. I’ve found that using an old guitar amp to create a one-of-a-kind sound system can be a great way to add some personality to your welding space.
Conjuring a Welding Haven
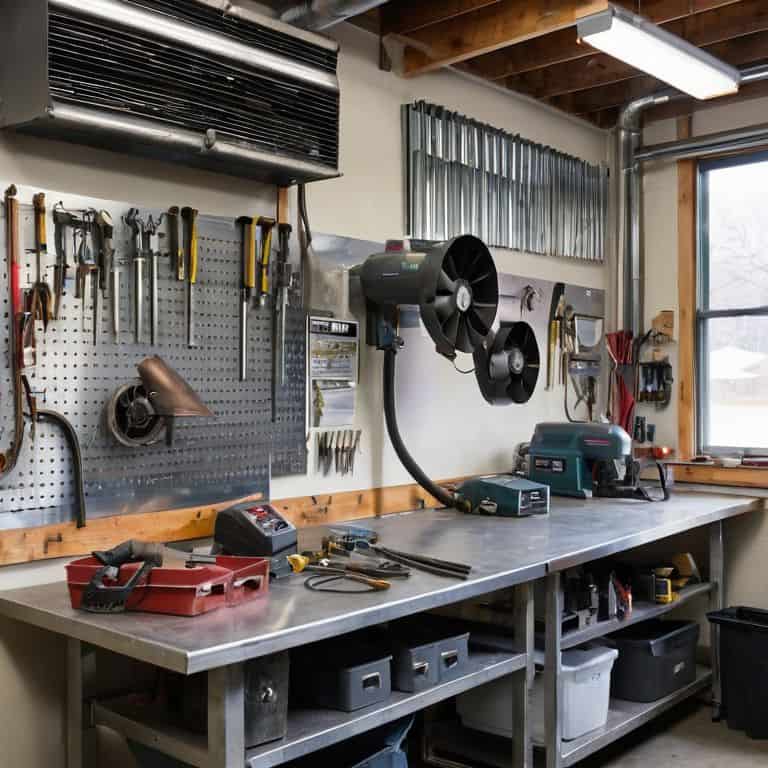
As I delve into the world of welding, I’m reminded of the importance of proper ventilation for welding. This isn’t just about avoiding the lingering smell of metal and smoke; it’s about creating a safe space for you to work in. I like to think of my garage welding station as a haven, where I can let my creativity shine without worrying about my health. To achieve this, consider installing a ventilation system that can efficiently remove fumes and particles from the air.
When it comes to designing your garage welding station, it’s essential to think about organizing welding tools and supplies. A cluttered space can be hazardous, especially when working with fire and metal. I recommend investing in a welding table plan that includes built-in storage for your equipment. This will not only keep your tools within reach but also help prevent accidents. By keeping your workspace tidy, you’ll be able to focus on the creative process, rather than navigating a sea of wires and machinery.
As you’re setting up your welding haven, don’t forget to consider fire resistant materials for welding. This might seem like a no-brainer, but it’s crucial to ensure that your workspace is protected from potential fires. By taking these extra precautions, you’ll be able to weld with confidence, knowing that you’ve created a safe and functional space. With a little creativity and planning, your garage can become a thriving maker’s sanctuary, where you can bring your ideas to life.
Garage Welding Station Design Magic
As I always say, the right design can turn any space into a haven. For your garage welding station, consider the flow of your work. Think about the tools you use most often and place them within easy reach. I like to use old pallets or crates to create a modular storage system – it’s amazing how a little creativity can keep your workspace tidy and functional. And don’t forget to leave some room for inspiration – a.pinboard for ideas, a few favorite tools on display, or even a small potted plant can make all the difference.
By infusing your welding station with a dash of personality, you’ll find yourself looking forward to spending time there, experimenting with new projects, and pushing the boundaries of what’s possible. Remember, the goal is to create a space that sparks joy and inspires creativity – so don’t be afraid to get a little unconventional and make it your own!
Welding Safety Equipment Checklist Secrets
As I always say, safety is the secret ingredient to a truly magical welding experience. When it comes to conjuring a welding haven, having the right safety equipment is paramount. I like to think of it as gathering the right herbs for a potion – you need the essentials to make the magic happen. A good welding helmet, gloves, and a fire-resistant jacket are just the beginning. I also recommend keeping a fire extinguisher nearby, just in case.
My urban foraging skills have also taught me to be resourceful with safety equipment. For instance, an old pair of goggles can be repurposed as a makeshift shield for smaller welding projects. And, a vintage leather jacket can provide extra protection from sparks. By getting creative with your safety gear, you’ll not only be protected but also be inspired to think outside the box with your welding projects.
5 Sparkling Tips to Ignite Your Garage Welding Oasis
- Design your welding space with flexibility in mind, considering the types of projects you’ll be working on and the tools you’ll need to have within arm’s reach
- Invest in a top-notch ventilation system to keep your garage air clean and safe to breathe, because a healthy maker is a happy maker
- Choose a welding station location that’s close to a power source, but far from any flammable materials, because safety always comes first in our maker’s paradise
- Get creative with storage solutions, repurposing old containers or building custom shelving to keep your welding supplies organized and within easy grasp
- Consider the lighting in your garage, adding extra lamps or installing brighter bulbs to illuminate your work area, because proper lighting can make all the difference in the quality of your welds
3 Key Takeaways to Ignite Your Garage Welding Sanctuary
Transform your garage into a thriving welding workshop by repurposing existing materials and embracing creative problem-solving, just like I did with my own urban foraging finds
Prioritize welding safety by investing in essential equipment, such as helmets, gloves, and fire-resistant mats, to ensure a protected and enjoyable maker’s experience
Unlock your full DIY potential by experimenting with innovative garage welding station designs, from modular workbenches to space-saving storage solutions, and make the most of your newly conjured welding haven
Igniting the Spark
As you transform your garage into a welding sanctuary, remember that the true magic lies not in the tools, but in the tales of transformation that unfold with every spark, every weld, and every creation that rises from the ashes of the ordinary.
Stanley Truman
Embracing the Spark of Creativity
As we conclude this journey of transforming your garage into a welding wonderland, let’s recap the essential steps we’ve taken together. From setting up the space to conjuring a welding haven, and from designing a magical garage welding station to checking off the welding safety equipment checklist, every detail has been crucial in creating an environment that fosters creativity and self-sufficiency. By embracing these steps, you’re not just building a workspace, you’re cultivating a mindset that values sustainable living and the joy of making something out of nothing.
Now, as you stand in your newly minted welding sanctuary, remember that the true magic lies not in the tools or the space itself, but in the boundless possibilities that await you. Every project, every spark, and every creation is a testament to your ability to transform the ordinary into the extraordinary. So, let your imagination run wild, and as you weld, craft, and bring your ideas to life, know that you’re part of a larger movement that celebrates creative self-sufficiency and the beauty of making things with your own hands.
Frequently Asked Questions
What are the essential tools and equipment I need to get started with welding in my garage?
My friend, let’s get welding! To get started, you’ll need a welder, welding helmet, gloves, safety glasses, and a fire extinguisher. Don’t forget a wire brush and a welding cart to keep things organized. I like to repurpose old furniture to create my welding stations – it’s all about creativity and safety!
How can I ensure proper ventilation in my garage welding space to prevent inhalation of fumes and particles?
To breathe easy in your garage welding space, I recommend installing a ventilation system that includes an exhaust fan and a fume extractor – it’s like giving your workspace a fresh pair of lungs! You can also repurpose an old window into a ventilation shaft or craft a DIY air purifier using natural materials like activated charcoal and plants.
What are some creative ways to organize and store my welding supplies and materials in a small garage workspace?
I love a good organizational challenge. For my own welding nook, I repurposed an old pallet into a supply rack and hung mason jars from the ceiling to store smaller items like welding tips and rods. You can also upcycle old drawers or crates to stash larger equipment, keeping your workspace clutter-free and your creativity sparked!


