I still remember the first time I tried MIG welding – it was like unlocking a secret world of creativity. I was working on a project in my backyard, trying to repurpose an old bike into a planter, and I needed a way to join the metal pieces together. A friend introduced me to MIG welding, and it was love at first spark. I realized that with the right tools and a bit of practice, anyone can create something truly unique and functional. That’s why I’m excited to share a guide to mig welding for beginners, to help you unlock your own creative potential and start turning scraps into amazing projects.
As you dive into this guide, you can expect honest and practical advice on how to get started with MIG welding. I’ll walk you through the basics, from setting up your equipment to troubleshooting common issues. My goal is to empower you with the knowledge and confidence to take on your own DIY projects, whether it’s building a treehouse, creating a garden fence, or simply repairing a broken appliance. With MIG welding, the possibilities are endless, and I’m excited to be your guide on this journey. By the end of this article, you’ll be well on your way to becoming a MIG welding master, capable of transforming discarded materials into truly remarkable creations.
Table of Contents
Guide Overview: What You'll Need
Total Time: 2 hours 30 minutes
Estimated Cost: $100 – $200
Difficulty Level: Intermediate
Tools Required
- MIG Welder (with appropriate voltage and amperage ratings)
- Welding Helmet (with shade 10 lens)
- Welding Gloves (insulated and heat-resistant)
- Wire Brush (for cleaning metal surfaces)
- C-Clamps (for holding metal pieces in place)
- Measuring Tape (for measuring and marking metal)
- Square (for ensuring accurate angles)
- Safety Glasses (for protecting eyes from debris)
Supplies & Materials
- MIG Welding Wire (0.023 inches or 0.030 inches diameter)
- Shielding Gas (75/25 Argon-CO2 mix)
- Metal Stock (mild steel, 1/8 inches thick, 6 inches x 6 inches square)
- Welding Backup Tape (for preventing weld blow-through)
- Fire Extinguisher (rated for metal fires)
Step-by-Step Instructions
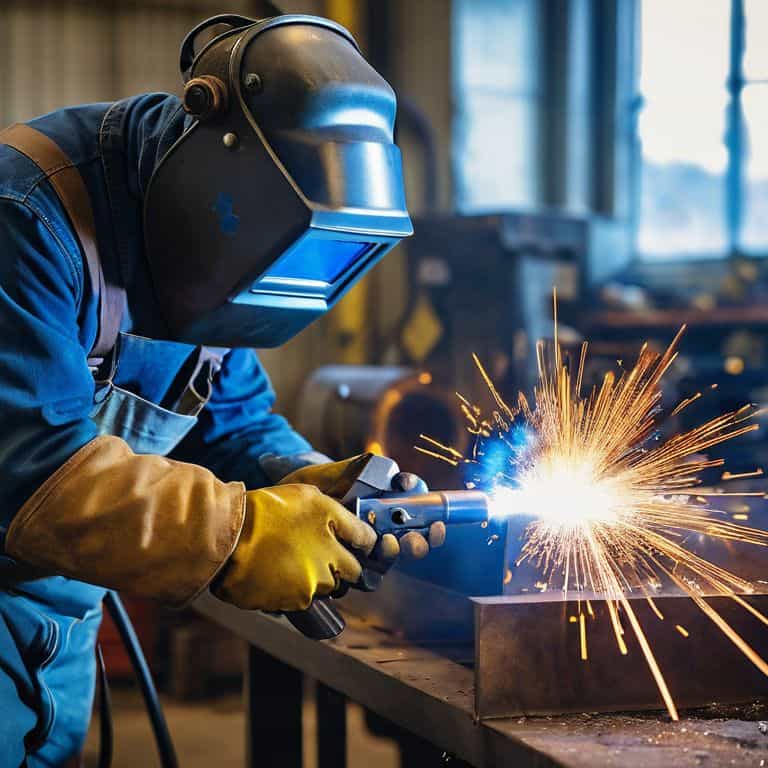
- 1. First, let’s get started with the basics of MIG welding, and I always say that safety comes first. Make sure you have a clean and well-ventilated workspace, and always wear protective gear such as a welding helmet, gloves, and a fire-resistant jacket. I like to think of it as dressing up for a fun, fiery party, but with a lot more caution.
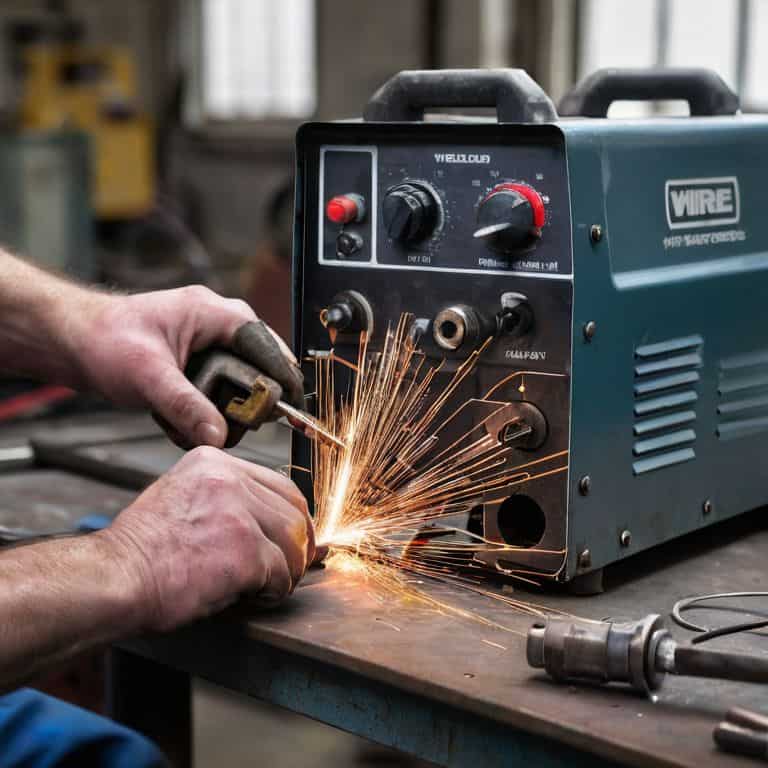
- 2. Next, you’ll need to prepare your MIG welder and the materials you’ll be working with. This involves reading the manual and understanding the different settings and features of your welder. Don’t worry if it seems overwhelming at first; with a little practice, you’ll be navigating the controls like a pro. Ensure that your welder is properly grounded and that you have the correct shielding gas and wire for the type of metal you’re working with.
- 3. Now, let’s talk about choosing the right wire for your MIG welding project. The type of wire you use will depend on the type of metal you’re working with, as well as the desired strength and appearance of the weld. For beginners, it’s often best to start with a versatile wire that can handle a variety of tasks, such as ER70S-6. This wire is great for welding steel and is a good all-around choice for most DIY projects.
- 4. With your welder and materials ready, it’s time to set up your workspace. This includes clamping your metal pieces together and ensuring that they are properly aligned. Use a welding clamp or magnet to hold the pieces in place, and make sure that the area around the weld is clear of any debris or flammable materials. I like to think of this step as preparing the stage for a beautiful, fiery dance.
- 5. Next, you’ll need to strike an arc and begin welding. Hold the MIG gun at a 10- to 15-degree angle, with the nozzle about 1/4 inch from the metal. Squeeze the trigger to strike the arc, and then slowly move the gun along the joint, maintaining a steady, consistent pace. Remember to keep the gun moving to avoid overheating the metal and to maintain a smooth, even weld.
- 6. As you weld, pay attention to the sound and appearance of the arc. A good MIG weld should have a smooth, consistent sound and a bright, blue-white color. If the arc sounds rough or the weld appears porous or discolored, it may be necessary to adjust your technique or welding settings. Don’t worry if it takes a little practice to get the hang of it – with time and experience, you’ll develop a keen ear and eye for a good weld.
- 7. Finally, once you’ve completed the weld, allow it to cool before inspecting and handling the metal. Use a wire brush to clean the weld area, removing any slag or spatter, and then inspect the weld for any defects or weaknesses. With a little patience and practice, you’ll be creating strong, beautiful welds like a pro, and you’ll be well on your way to unleashing your DIY potential.
Mig Magic for Newbies
As I always say, the right mindset is key to mastering MIG welding. When working with thin metals, it’s essential to consider mig welding safety precautions to avoid any damage or injury. This includes wearing proper protective gear, such as gloves and a helmet, and ensuring good ventilation in your workspace. By taking these precautions, you’ll be able to focus on the creative process of transforming scraps into amazing projects.
Choosing the right MIG welder for your needs is also crucial. Consider the types of projects you’ll be working on and the thickness of the metals you’ll be welding. Welding thin metals with MIG requires a delicate touch, so it’s essential to select a welder that can handle the job. Look for a welder with adjustable settings and a smooth, consistent arc. This will help you achieve professional-looking results and make the process more enjoyable.
As you gain more experience with MIG welding, you’ll encounter various troubleshooting common mig welder issues. Don’t be discouraged if you run into problems – they’re an opportunity to learn and improve. By staying calm and methodically working through the issue, you’ll develop the skills and confidence to tackle more complex projects, such as mig welding for automotive repairs. Remember, practice makes perfect, so keep experimenting and pushing the boundaries of what’s possible with MIG welding.
Choosing Your Wand Right Mig Welder
When it comes to selecting the perfect MIG welder, it’s like choosing a trusty sidekick for your DIY adventures. You want one that’s reliable, versatile, and suits your style. Consider the types of projects you’ll be tackling most often – are you a thin-metal master or a thick-plate wizard? Look for a welder with adjustable settings to accommodate different materials and thicknesses. I’ve found that a compact, portable MIG welder is perfect for urban foraging-turned-crafting projects, allowing me to weld on-the-go.
My personal favorite is a welder with a built-in spool gun, perfect for precision work and delicate details. Whatever you choose, remember that your MIG welder is an extension of your creativity, so pick one that feels like an old friend – comfortable, familiar, and ready to bring your imagination to life.
Safety First Mig Welding Precautions
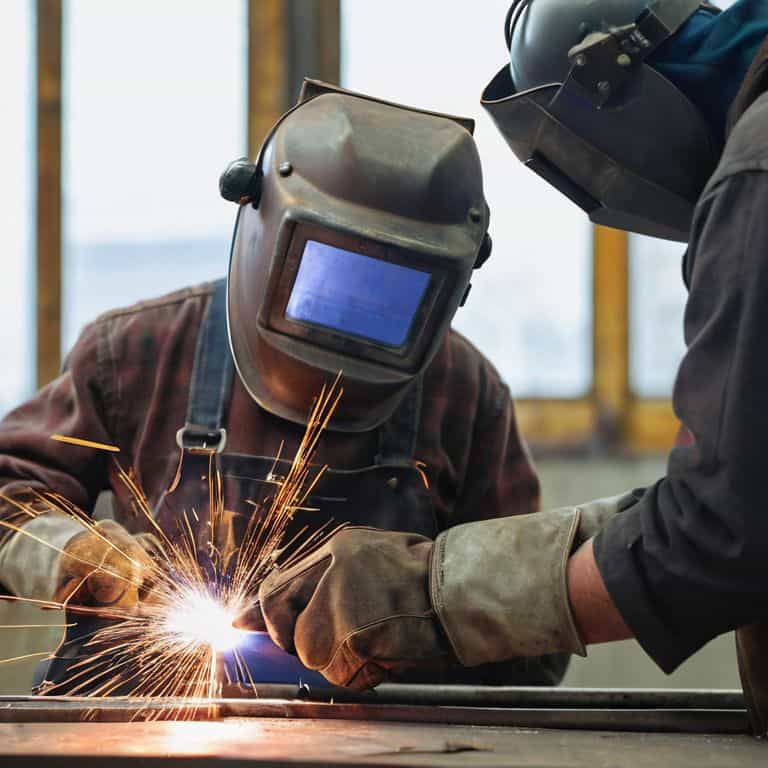
As I always say, with great power comes great responsibility – and that’s especially true when it comes to MIG welding. Before you start sparking, make sure you’re geared up with the right safety equipment. I’m talking welding helmets, gloves, and a fire-resistant jacket. Don’t be afraid to get creative with your safety gear, either – I’ve seen people upcycle old leather jackets into welding vests. The key is to protect yourself from those flying sparks and UV rays.
Now, I know it might seem like a no-brainer, but make sure your workspace is clear of any flammable materials. I like to think of it as a mini-urban foraging expedition – clearing out the old to make way for the new. Keep a fire extinguisher nearby, just in case. With these precautions in place, you’ll be free to focus on the fun part: bringing your MIG welding projects to life.
A Guide to Mig Welding for Beginners
As I delve into the world of MIG welding, I’m reminded of the importance of safety first. When working with MIG welders, it’s crucial to take necessary precautions to avoid injuries. This includes wearing protective gear, such as gloves and a helmet, and ensuring good ventilation in the workspace. By taking these simple steps, you can minimize the risk of accidents and create a safe environment for your projects.
One of the most exciting aspects of MIG welding is its versatility. For instance, welding thin metals with MIG requires a delicate touch, but with the right technique, you can achieve professional-looking results. It’s also essential to consider the type of joint you’re working with, as different MIG welding joint types require unique approaches. By understanding these nuances, you can expand your creative possibilities and tackle a wide range of projects, from automotive repairs to intricate metalwork designs.
As you become more comfortable with MIG welding, you may encounter some common issues, such as faulty wire feeding or inconsistent arc quality. Don’t worry – these problems are easily solvable with some troubleshooting. By identifying the root cause of the issue and making adjustments as needed, you can get back to creating amazing projects in no time. Whether you’re working on a restoration project or building something from scratch, MIG welding offers a world of possibilities, and with practice, you’ll be mastering the craft in no time.
Joint Ventures Mig Welding Types
As I delve into the world of MIG welding, I’m excited to share with you the various joint ventures that await. From butt joints to lap joints, and even the occasional T-joint, each type requires a unique approach. I love how MIG welding allows me to get creative with different joint types, like plug welds or slot welds, which can add an extra layer of stability to my projects.
Whether I’m working with thin metal or thicker stock, understanding the different MIG welding types has been a game-changer for my DIY endeavors. By mastering these techniques, I can tackle a wide range of projects, from building a treehouse to crafting custom furniture. The versatility of MIG welding has opened up a world of possibilities, and I’m eager to explore them all.
Thin Metal Mastery Welding With Mig
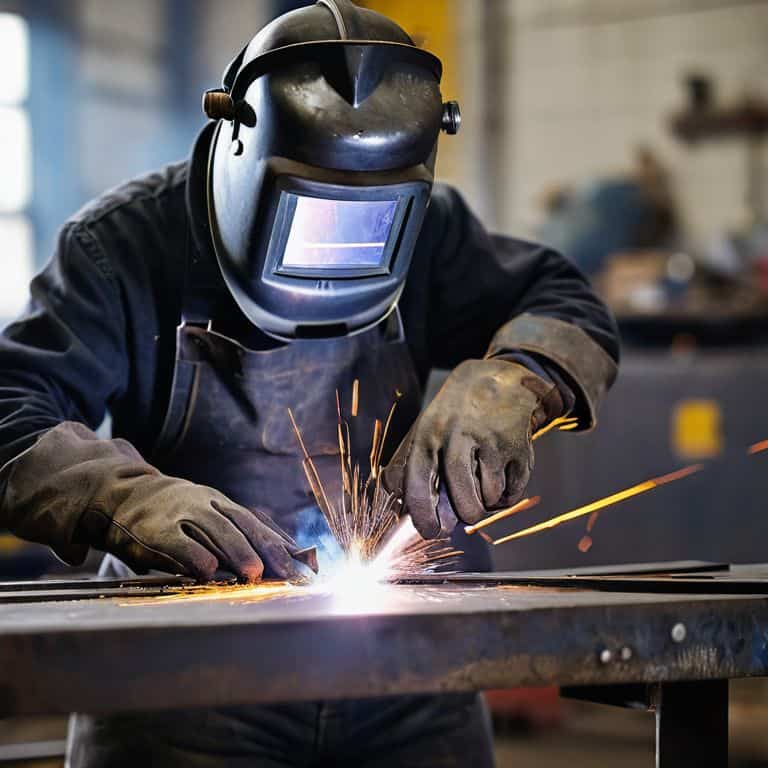
When it comes to welding thin metals, MIG welding is a game-changer. I’ve found that with the right technique, you can create seamless joints that are both strong and beautiful. To master thin metal welding, it’s essential to adjust your welder’s settings to a lower voltage and wire speed. This will help prevent burning through the metal and give you a smooth, even weld. I like to think of it as cooking a delicate dish – you need to have the right touch to get it just right.
By practicing with different types of thin metal, such as aluminum or stainless steel, you’ll develop the skills and confidence to tackle a wide range of projects. I’ve used MIG welding to create everything from intricate wind chimes to sturdy bike racks, and I’m always amazed at the versatility of this technique. With patience and practice, you’ll be welding like a pro in no time, and unleashing your full creative potential.
Mig Troubleshooting
As I delve into the world of MIG welding, I’ve found that troubleshooting common issues is an essential part of the learning process. One of the most common problems beginners face is poor wire feeding, which can be caused by a faulty liner or incorrect wire tension. To resolve this, I recommend checking the wire feeder for any blockages and adjusting the tension according to the manufacturer’s guidelines.
When working with thin metals, it’s crucial to be mindful of the heat input to avoid warping or burning the material. To mitigate this, I suggest using a lower voltage and adjusting the wire feed speed to maintain a stable arc. Additionally, choosing the right MIG welder for your project can make a significant difference in the quality of your welds. Look for a welder with adjustable settings and a reliable wire feeding system to ensure smooth and consistent results.
By following these tips and being aware of potential issues, you’ll be well on your way to mastering the art of MIG welding. Remember to always follow MIG welding safety precautions to avoid any accidents or injuries. With practice and patience, you’ll be able to tackle even the most complex projects, including mig welding for automotive repairs, and create professional-looking welds that will make you proud.
Auto Revival Mig for Car Repairs
When it comes to reviving your trusty ride, MIG welding can be a game-changer. I’ve seen it time and time again in my own community – a little creativity and some well-placed welds can breathe new life into a vehicle that might otherwise be headed for the junkyard. From patching up rusty fenders to fabricating custom exhaust systems, MIG welding offers a world of possibilities for car enthusiasts and DIY mechanics alike.
With the right techniques and a bit of practice, you can use MIG welding to repair and restore your vehicle’s body and chassis, saving you money and extending the life of your car. Plus, there’s something undeniably satisfying about getting your hands dirty and bringing your vehicle back to its former glory. Whether you’re a seasoned pro or just starting out, MIG welding is an invaluable skill to have in your toolkit.
Fixing the Spark Common Mig Issues
When your MIG welder starts to sputter, don’t worry – it’s an easy fix. A common issue is improper wire feed, which can cause uneven welds. Check that your wire is seated correctly and not tangled. Another culprit could be a dirty or clogged gun, so give it a good cleaning and make sure all connections are secure. If your arc is inconsistent, try adjusting your voltage and wire speed to find the sweet spot.
By troubleshooting these common issues, you’ll be back to welding like a pro in no time. Remember, practice makes perfect, so don’t be discouraged if you encounter a few bumps along the way. With patience and persistence, you’ll master the art of MIG welding and be creating amazing projects in your DIY haven.
MIG Welding Essentials: 3 Key Takeaways
Ignite your DIY passion with MIG welding, a versatile technique for transforming scraps into amazing projects, from artistic creations to functional repairs
Master the art of MIG welding by choosing the right equipment, understanding safety precautions, and practicing various joint techniques to achieve professional-looking results
Troubleshoot like a pro by identifying common MIG welding issues, such as poor spark or inconsistent arcs, and apply your newfound skills to revive and restore metallic treasures, from automotive parts to handmade decor
Igniting Creativity with MIG Welding
As we spark to life the world of MIG welding, remember that every beginner’s attempt is not just a lesson in technique, but a testament to the transformative power of creativity and self-sufficiency.
Stanley Truman
Embracing the Spark of Creativity
As we conclude this journey through the world of MIG welding for beginners, let’s take a moment to reflect on the key takeaways. From safety precautions and choosing the right MIG welder, to mastering thin metal and understanding various joint types, we’ve covered a wide range of essential topics. Remember, practice is key, and it’s crucial to start with small projects to build your confidence and skills. Don’t be afraid to experiment and try new things – it’s all part of the learning process.
As you embark on your MIG welding adventures, keep in mind that creativity knows no bounds. With every spark, you’re not just joining metals, you’re bringing ideas to life. So, go ahead, unleash your inner DIY dreamer, and watch how MIG welding can transform not just scraps, but your entire perspective on what’s possible. Happy welding, and I look forward to seeing the incredible creations you’ll bring into the world!
Frequently Asked Questions
What are the most common mistakes beginners make when starting with MIG welding and how can I avoid them?
As a beginner, it’s easy to get sparked into trouble! Common mistakes include improper wire feed, incorrect shield gas, and poor workpiece preparation. To avoid these, take your time setting up, follow the manufacturer’s guidelines, and practice on scrap metal – trust me, it’s worth the extra effort to get that perfect weld!
How do I know which MIG welder is right for my specific projects and skill level?
For me, choosing the right MIG welder is like foraging for the perfect wild mushroom – it’s all about matching your find to your needs. Consider the thickness of the metals you’ll be working with, the size of your projects, and your own comfort level with the equipment. I like to think of it as finding the right tool in your DIY toolbox – it’s all about harmony between you, your welder, and your creative vision!
What kind of practice projects would you recommend for a beginner to build confidence and mastery in MIG welding?
For building confidence and mastery in MIG welding, I recommend starting with simple projects like welding scrap metal into plant holders or creating a DIY birdhouse. These fun exercises will help you get a feel for the welder and develop your technique, all while repurposing materials and bringing new life to old treasures.


