
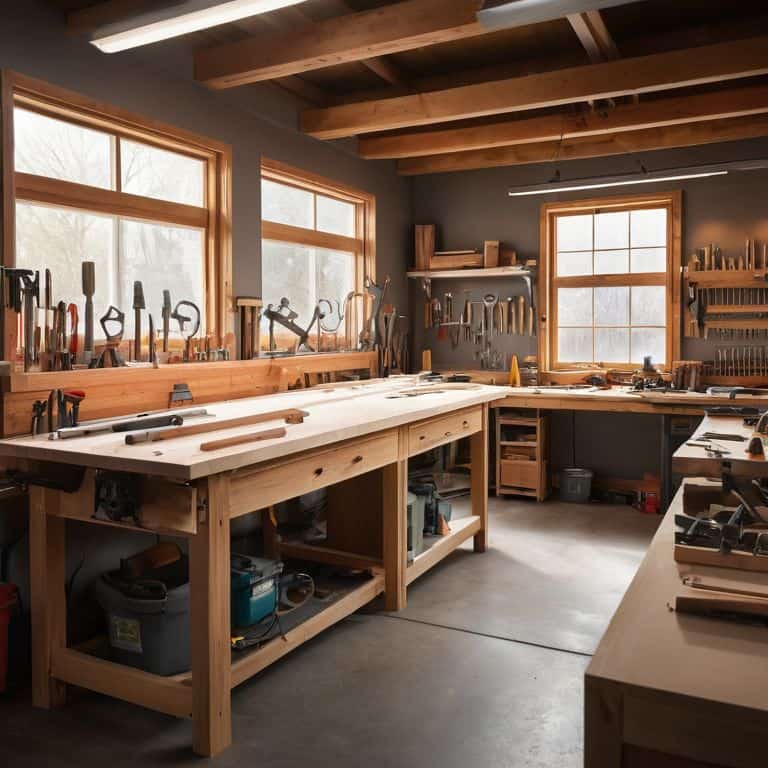
I still remember the day I transformed my grandfather’s old garage into my own DIY haven. The first challenge I faced was finding the best lighting for a workshop or garage that would illuminate my creations without breaking the bank. As I delved into the world of lighting, I realized that there’s a common myth that you need to spend a fortune on fancy LED strips or high-end fixtures to get the job done. But the truth is, with a little creativity and resourcefulness, you can create a well-lit workspace that sparks joy and productivity.
In this article, I’ll share my personal favorite tips and tricks for achieving the perfect glow in your workshop or garage. You’ll learn how to assess your space, choose the right lighting fixtures, and even repurpose everyday items to create unique lighting solutions. My goal is to empower you with honest, no-hype advice that will help you turn your workshop or garage into a creative sanctuary. Whether you’re a seasoned DIY enthusiast or just starting out, I’m excited to share my expertise with you and help you find the best lighting for a workshop or garage that suits your style and budget.
Table of Contents
- Guide Overview: What You'll Need
- Step-by-Step Instructions
- Unleashing Creativity
- Illuminating Your Workspace With Energy Efficient Garage Lighting
- Task Lighting for Woodworking Led Strip Lighting for Workbenches
- Shining a Light on Efficiency: 5 Tips for Optimizing Your Workshop or Garage Lighting
- Key Takeaways for Your DIY Haven
- Shining a Light on Creativity
- Shining a Light on Your Creative Potential
- Frequently Asked Questions
Guide Overview: What You'll Need
Total Time: 2 hours 30 minutes
Estimated Cost: $50 – $100
Difficulty Level: Intermediate
Tools Required
- Drill (with screwdriver and drill bits)
- Level (laser or bubble level)
- Tape Measure (for measuring spaces)
- Pliers (for gripping small objects)
- Screwdriver (flathead and Phillips)
Supplies & Materials
- LED Strip Lights (for under shelf lighting)
- Fluorescent Light Fixtures (for general lighting)
- Incandescent Bulbs (for task lighting)
- Power Strips (with surge protectors)
- Mounting Hardware (screws, brackets, etc.)
- Extension Cords (rated for workshop use)
- Work Light Stands (for portable lighting)
Step-by-Step Instructions
- 1. To start creating the perfect lighting for your workshop or garage, assess your space by walking through the area and noting the locations of your workstations, toolboxes, and any areas where you’ll be working with power tools or performing tasks that require focused light. Consider the natural light available and how it changes throughout the day, as well as any existing light fixtures that might be worth repurposing or upgrading.
- 2. Next, determine your lighting needs based on the types of projects you typically work on. If you’re into woodwork, for example, you might require more focused, high-intensity lighting for tasks like sanding or detailed cuts. On the other hand, if you’re more into metalwork or automotive repairs, you might need lighting that’s more durable and resistant to moisture and dust.
- 3. Now, let’s talk about the types of lighting you can use. Overhead lighting is great for general illumination, while task lighting is better suited for specific workstations or areas where you need a concentrated beam of light. Consider using a combination of both to achieve the perfect balance of brightness and shadows in your workshop or garage.
- 4. When it comes to selecting light fixtures, look for energy efficiency as a top priority. LED lights are a great choice because they use significantly less energy than traditional incandescent bulbs and can last up to 50 times longer. Plus, they’re often more durable and resistant to vibration, making them perfect for workshops and garages where things can get a little rough.
- 5. To create a truly custom lighting setup, don’t be afraid to think outside the box (or fixture, in this case). Consider repurposing old lamps, lanterns, or even mason jars to create unique and functional light sources that add a touch of personality to your space. You can also use found materials like reclaimed wood or metal to build custom light fixtures that reflect your personal style.
- 6. Once you’ve selected your light fixtures, it’s time to install them strategically throughout your workshop or garage. Start by placing overhead lights in areas where you’ll be working on large projects, and then add task lighting to specific workstations or areas where you need more focused illumination. Don’t forget to consider the height and angle of each light fixture to minimize glare and shadows.
- 7. Finally, test and adjust your lighting setup to ensure it’s working perfectly for your needs. Turn on all the lights and walk through the space to identify any areas that might be too bright or too dim. Make adjustments as needed, and don’t be afraid to add or remove light fixtures until you achieve the perfect balance of light and shadow in your workshop or garage.
Unleashing Creativity
As I delve into the world of workshop and garage lighting, I’m reminded of the importance of energy efficient solutions. Not only do they help reduce our carbon footprint, but they also save us money in the long run. When it comes to task lighting for woodworking, I’ve found that LED strip lighting can be a game-changer. It provides focused illumination exactly where I need it, allowing me to work with precision and accuracy.
One of the most significant advantages of using LED lighting is its versatility. For instance, high bay LED lighting solutions can be used to create a well-lit workspace, while also being energy efficient. This is especially important in a garage or workshop, where safety is a top priority. By incorporating workshop lighting safety tips into our design, we can create a space that’s not only functional but also secure.
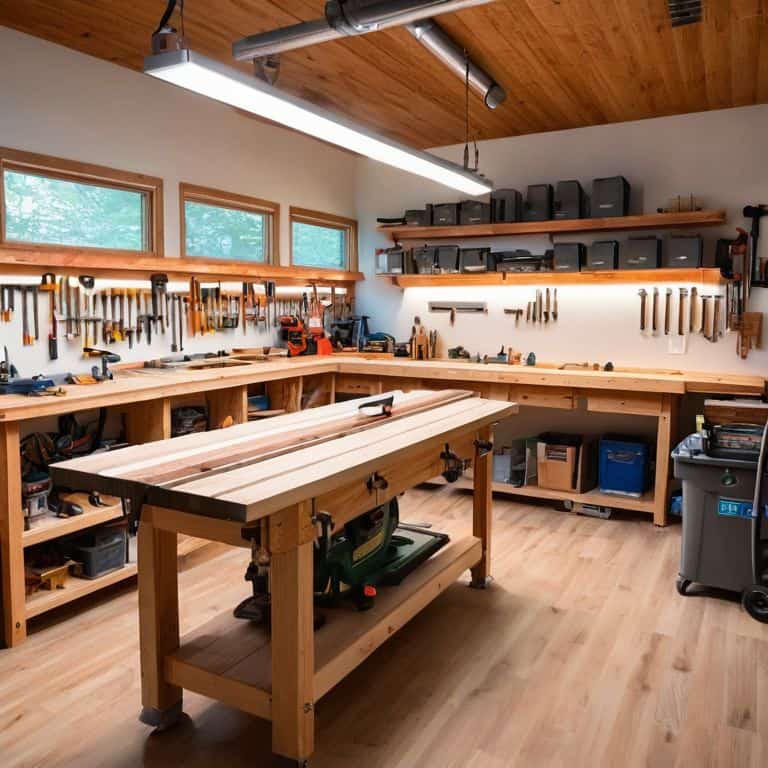
To take your workshop or garage to the next level, consider experimenting with different garage lighting layout ideas. This can include installing LED strips under shelves or using pendant lights to create pools of warm, inviting light. By doing so, you’ll be able to create a space that’s not only well-lit but also inspiring, fostering a sense of creativity and innovation that will help you bring your projects to life.
Illuminating Your Workspace With Energy Efficient Garage Lighting
As I delve into the world of energy-efficient garage lighting, I’m reminded of the countless hours I spent in my grandmother’s workshop, surrounded by the warm glow of repurposed lanterns. To create a similar ambiance, consider installing LED strips or pendant lights made from reclaimed materials. Not only do they reduce energy consumption, but they also add a touch of whimsy to your workspace. For instance, you can use old mason jars to create unique pendant lights or transform vintage metal lanterns into stunning LED fixtures.
By embracing energy-efficient solutions, you’ll not only reduce your carbon footprint but also free up your creativity to focus on the projects that bring you joy. As someone who’s passionate about urban foraging and crafting with found natural materials, I can attest that the right lighting can make all the difference in sparking new ideas and inspiration.
Task Lighting for Woodworking Led Strip Lighting for Workbenches
When it comes to woodworking, task lighting is essential for precision and detail. That’s where LED strip lighting comes in – a game-changer for workbenches. I’ve found that installing LED strips under my workbench shelves or along the edges of my table provides focused light exactly where I need it. This targeted illumination helps me see the intricate details of my projects, reducing eye strain and improving overall craftsmanship. Plus, LED strips are energy-efficient and easy to install, making them a sustainable choice for my workshop.
I love experimenting with different LED strip colors and intensities to create the perfect ambiance for my woodworking sessions. Warm white lights can create a cozy atmosphere, while cool blue lights can enhance focus and concentration. By combining LED strip lighting with other lighting sources, I can create a layered lighting effect that adapts to my needs, whether I’m working on a delicate wood carving or a large-scale furniture project.
Shining a Light on Efficiency: 5 Tips for Optimizing Your Workshop or Garage Lighting
- Consider the Color Temperature: Warm white lighting (2700K-3000K) is perfect for ambient lighting, while cool white (3500K-5000K) is ideal for task-oriented areas like workbenches
- Layer Your Lighting: Combine overhead lighting, task lighting, and accent lighting to create a versatile and functional space that adapts to your various DIY projects
- LEDs are Your Friend: Not only are LEDs energy-efficient, but they also produce minimal heat, reducing the risk of accidents and making them perfect for workshops and garages
- Assess Your Shadows: Pay attention to areas where shadows fall, and adjust your lighting accordingly to ensure you have sufficient illumination for intricate tasks and detailed work
- Get Creative with Placement: Don’t be afraid to think outside the box when it comes to lighting placement – consider under-shelf lighting, floor lamps, or even string lights to add a touch of personality to your workspace
Key Takeaways for Your DIY Haven
By choosing the right lighting for your workshop or garage, you can transform it into a space that sparks creativity and productivity, making every DIY project a joy to work on
Incorporating energy-efficient and task-specific lighting solutions, such as LED strip lighting for workbenches, can significantly enhance your woodworking experiences and reduce eye strain
Remember, the perfect lighting setup is not just about functionality, but also about creating an ambiance that inspires you to unleash your full creative potential and turn your DIY space into a true sanctuary
Shining a Light on Creativity
The right lighting in your workshop or garage is not just about illuminating space, it’s about igniting imagination – every glow, every beam, and every shadow has the potential to spark a new idea, to inspire a new creation, and to bring your most innovative self to life.
Stanley Truman
Shining a Light on Your Creative Potential

As we’ve explored the world of workshop and garage lighting, it’s clear that the right glow can make all the difference in our creative pursuits. From energy-efficient solutions to task-specific lighting, such as LED strip lighting for workbenches, we’ve covered the essential steps to illuminate your workspace. By choosing the best lighting for your workshop or garage, you’re not only enhancing your productivity but also reducing eye strain and creating an environment that fosters imagination and innovation. Whether you’re a seasoned woodworker or an urban forager like myself, the right lighting can help you unlock your full potential.
So, as you embark on your next DIY adventure, remember that lighting is not just a practical necessity, but a creative catalyst. It’s an opportunity to transform your workspace into a haven of inspiration, where ideas flow freely and the ordinary becomes extraordinary. As you shine a light on your projects, you’ll find that the true magic lies not in the tools or materials, but in the boundless possibilities that emerge when creativity and sustainability come together. Let your light shine bright, and watch your imagination flourish!
Frequently Asked Questions
What are the most energy-efficient lighting options for a large workshop or garage?
For a large workshop or garage, I swear by LED panels and strips – they’re energy-efficient, bright, and perfect for illuminating expansive spaces. Plus, they’re super versatile and can be placed almost anywhere, making them ideal for task lighting or overall ambient glow.
How can I determine the optimal lighting layout for my specific workspace and DIY projects?
To determine the optimal lighting layout, I recommend mapping out your workspace and DIY projects, noting areas that require focused light. Consider the tasks you’ll be performing, like woodworking or crafting, and place lighting accordingly. Think of it as creating a ‘lighting recipe’ tailored to your unique creative needs!
Are there any smart lighting solutions that can be integrated with other workshop tools and equipment for enhanced productivity?
I’m all about streamlining my workshop workflow, and smart lighting is a game-changer. I’ve integrated LED strips with my workbench that sync with my power tools, automatically adjusting brightness and color based on the task at hand – it’s amazing how much of a difference it makes in my productivity and focus!


