I still remember the summer I spent helping my neighbor, Mrs. Jenkins, fix a leaky pipe in her backyard. It was a sweltering day, and the last thing we wanted was to waste any more water. As we worked, she told me that she had been putting off the repair for weeks, intimidated by the thought of calling a plumber. But with a few simple tools and some creativity, we were able to breathe new life into that old pipe. It’s experiences like these that remind me why I love sharing my knowledge of how to fix a leaky pipe – it’s not just about saving water, but about empowering people to take control of their own DIY projects.
As someone who’s passionate about sustainable living, I’ve learned that fixing things yourself can be incredibly rewarding. In this article, I’ll share my honest, no-hype advice on how to fix a leaky pipe using everyday materials you might have lying around the house. I’ll walk you through the process, from identifying the source of the leak to completing the repair, with practical tips and creative workarounds along the way. By the end of this guide, you’ll be equipped with the confidence and skills to tackle that pesky leak and start saving water – all without breaking the bank or calling in a professional.
Table of Contents
Guide Overview: What You'll Need
Total Time: 1 hour 30 minutes
Estimated Cost: $20 – $40
Difficulty Level: Intermediate
Tools Required
- Adjustable Wrench (for tightening and loosening pipes)
- Pipe Wrench (for gripping and turning pipes)
- Teflon Tape (for sealing threaded connections)
- Bucket (for catching water leaks)
- Plumber’s Putty (for creating watertight seals)
Supplies & Materials
- Replacement Gasket or O-Ring (depending on the type of leaky pipe)
- Pipe Coupling (for connecting two pipes together)
- Waterproof Glue (for bonding pipes and fittings)
- 6 inches of Copper Pipe (for patching or replacing damaged sections)
- Teflon-Based Pipe Lubricant (for reducing friction on threaded connections)
Step-by-Step Instructions
- 1. First, let’s gather our tools and get ready to tackle that leaky pipe. You’ll need a few basic items like a pipe wrench, some Teflon tape, and a bucket to catch any water that might still be dripping out. I like to think of this step as _preparing for a creative adventure_, where we’re not just fixing a pipe, but also exploring the possibility of reducing our water waste.
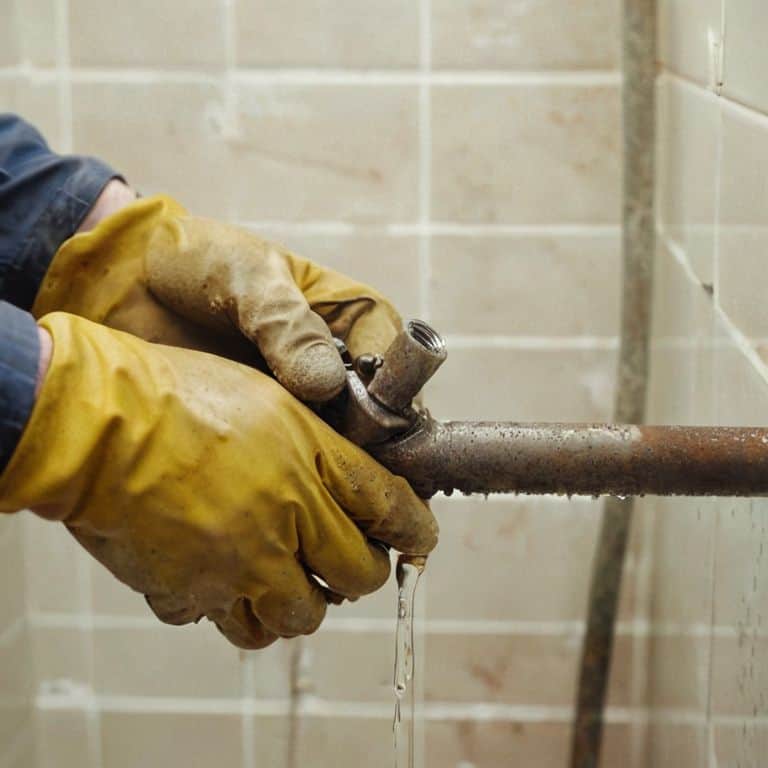
- 2. Next, we need to turn off the water supply to the pipe. This is usually done by locating the shut-off valves and giving them a good turn. Don’t worry if you’re not sure where they are – it’s all part of the _discovery process_. Once you’ve turned off the supply, open the faucet to drain the water from the pipe. This step is crucial because it allows us to work on a dry pipe, making the whole process much safer and more efficient.
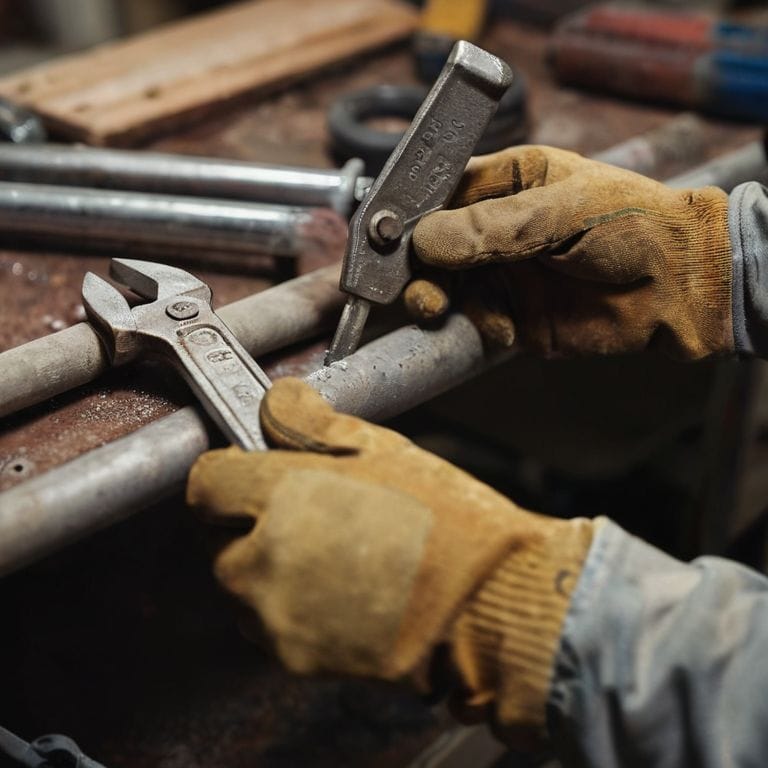
- 3. Now, let’s disassemble the pipe to find the source of the leak. This might involve removing some fittings or couplings, so be sure to have your pipe wrench ready. I find that _working methodically_ and taking your time is key here. Don’t rush through this step, as you want to make sure you’ve identified the leak correctly to apply the right fix.
- 4. With the pipe disassembled, it’s time to inspect and clean the area around the leak. Sometimes, leaks are caused by dirt or mineral buildup, so giving the area a good clean can help. I like to use a mixture of vinegar and water for this, as it’s _eco-friendly_ and effective. This step is important because it ensures that our fix will last, by removing any debris that could cause future leaks.
- 5. Next up, we need to apply the fix. Depending on the type of leak you have, this might involve replacing a worn-out O-ring, re-soldering a joint, or applying some pipe dope to a threaded connection. Remember, the key to a successful fix is _attention to detail_. Make sure everything is tightened securely but not over-tightened, as this can cause more problems down the line.
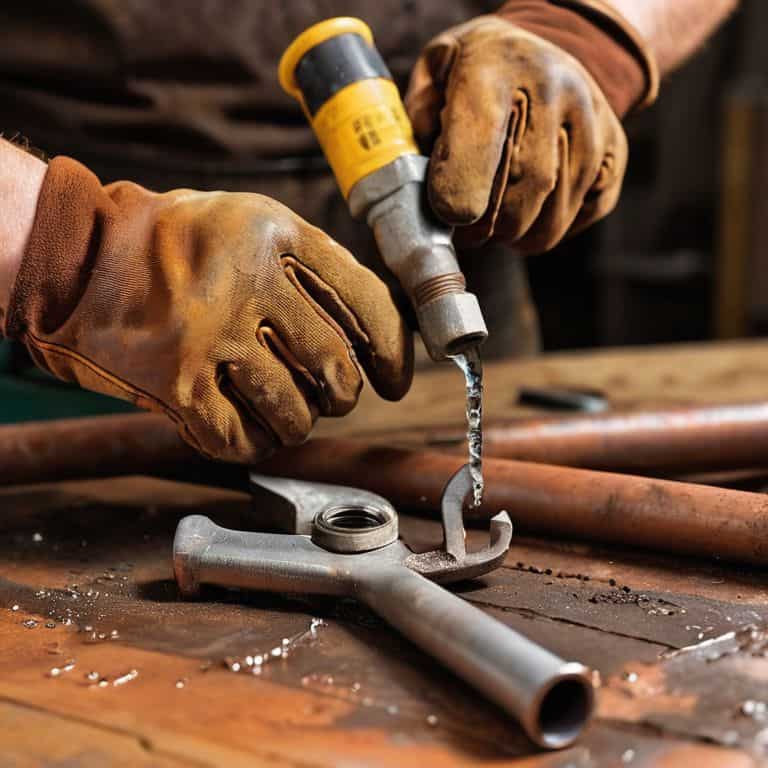
- 6. Once you’ve applied the fix, it’s time to reassemble the pipe. Make sure all connections are secure and that you’ve used Teflon tape on any threaded joints to ensure a watertight seal. This step requires some _patience and care_, as you want to make sure everything is properly in place before turning the water supply back on.
- 7. Finally, turn the water supply back on and check for leaks. Start with the water pressure low and gradually increase it, keeping a close eye on the pipe for any signs of dripping. If you’ve done everything correctly, you should now have a _leak-free pipe_ and the satisfaction of having fixed it yourself with minimal cost and environmental impact.
Fixing Leaks With Flair
As I always say, fixing leaks is not just about stopping the water, it’s about breathing new life into your plumbing system. When it comes to common pipe leak locations, I’ve found that being proactive is key. Take some time to inspect those areas, and consider investing in an emergency pipe repair kit – it’s like having a superhero cape for your pipes. With a little creativity, you can turn a potentially disastrous situation into a fun DIY project.
Now, let’s talk about the materials. I’m a big fan of copper pipe vs pex – there’s something special about working with natural materials. But, at the end of the day, it’s all about finding what works best for you and your unique situation. Pipe leak detection methods can be as simple as using a few everyday items, like food coloring or a moisture meter. By being resourceful and flexible, you can save time, money, and reduce the risk of water damage prevention tips becoming a major issue.
In my experience, it’s all about the little details – like using plumber’s tape to add an extra layer of security to your pipe connections. By taking the time to get creative with your repairs, you can turn a mundane task into a fun and rewarding experience. So, don’t be afraid to think outside the box and come up with your own unique solutions – after all, that’s what DIY is all about.
Detecting Hidden Leaks With Ease
Detecting hidden leaks can be a fun adventure, like a treasure hunt around the house. I like to use a simple method: turn off all faucets and appliances, then check the water meter. If it’s still running, you’ve got a hidden leak somewhere. Another trick is to look for water spots or warping on walls and ceilings. You can also use a moisture meter or a DIY version made from a wooden skewer and a few copper wires – yes, you read that right, a wooden skewer and copper wires can become your best friends in leak detection!
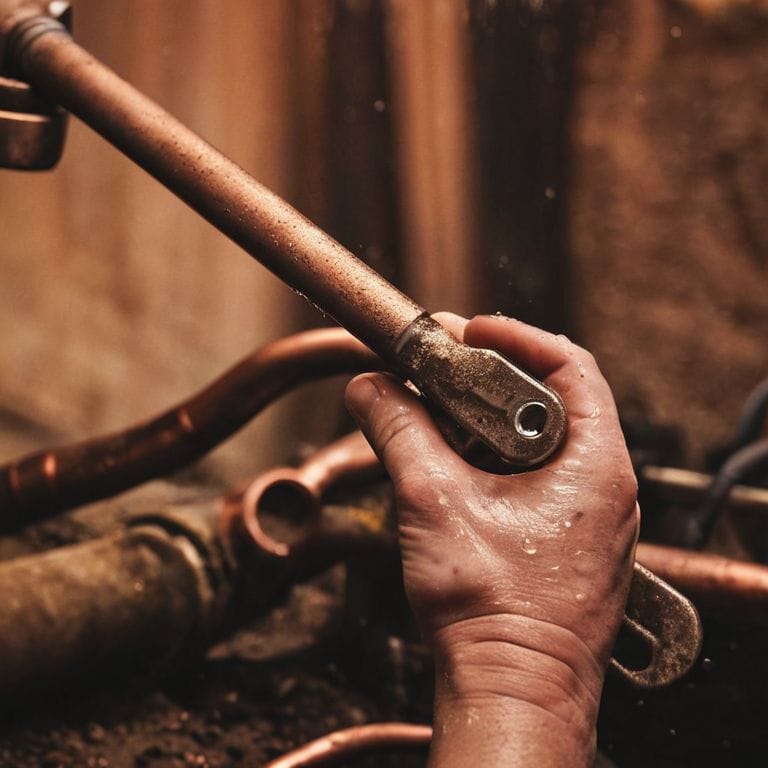
Emergency Repairs With Copper Pipe
When a leak strikes, every minute counts. That’s why I always keep a few trusty copper pipes on hand for emergency repairs. Not only are they incredibly durable, but they can also be shaped and molded to fit even the most awkward spaces. With a little creativity, you can use copper pipe to bypass a leaking section or even create a temporary fix until you can get to the hardware store.
I like to think of copper pipe as the MacGyver of plumbing supplies – it can be used in a pinch to fix just about anything. Simply cut a length of pipe to size, shape it to fit your needs, and you’re good to go. It’s amazing how often a simple copper pipe can save the day (and your water bill)!
Pipe Dreams: 5 Savvy Tips to Seal the Deal
- Use a pipe wrench to grip and twist, but don’t overtighten – you don’t want to crack the pipe or surrounding material, my friend!
- Employ the mighty duct tape for temporary fixes or as a reinforcement for more permanent solutions – it’s like a warm hug for your pipes
- Get creative with pipe sealants, like using epoxy or pipe dope to create a watertight bond – think of it as a special sauce for your plumbing
- Inspect your pipes regularly, just like you would tend to a garden, to catch any leaks before they become a major issue – prevention is the best policy, after all
- Repurpose household items, such as old t-shirts or cloth scraps, to create makeshift pipe wraps for added insulation and protection – reduce, reuse, repair, that’s my motto!
Key Takeaways for a Leak-Free Life
Always keep an eye out for signs of hidden leaks, like water stains or unusual sounds, and don’t hesitate to get creative with everyday items to detect them
Emergency repairs can be a breeze with a little copper pipe ingenuity – think outside the box and repurpose materials you have at home to save time and money
By embracing a DIY mindset and using what you have to fix what’s broken, you’ll not only save resources but also cultivate a sense of self-sufficiency and joyful creativity in your daily life
Fixing Leaks with Wisdom
The art of fixing a leaky pipe isn’t just about stopping the drip, it’s about uncovering the hidden potential in the everyday, and transforming a moment of frustration into a masterpiece of resourcefulness.
Stanley Truman
From Leaks to Luxury: Embracing the Art of DIY Pipe Repair
As we’ve journeyed through the world of leaky pipe repair, we’ve uncovered the essence of self-sufficiency that lies within each of us. From detecting hidden leaks with ease to executing emergency repairs with copper pipe, every step has been a testament to the power of human ingenuity. We’ve learned to transform potential pitfalls into opportunities for growth, and in doing so, have developed a deeper appreciation for the intricate dance between functionality and sustainable living. By embracing the art of DIY pipe repair, we not only save resources but also cultivate a sense of community and collaboration that is essential for a thriving ecosystem.
As we conclude this journey, let’s remember that the true magic lies not in the fixed pipe itself, but in the creative potential it unlocks within us. So, the next time you’re faced with a drip, don’t just see a problem – see an opportunity to breathe new life into your space, to tell a story of resilience and resourcefulness, and to inspire others to do the same. In the end, it’s not just about fixing a leaky pipe; it’s about crafting a world where every challenge is a chance to create something extraordinary, one DIY project at a time.
Frequently Asked Questions
What are some common causes of leaky pipes that I should look out for before attempting a fix?
Hey, before we dive into fixes, let’s uncover the culprits! Common causes of leaky pipes include worn-out washers, loose connections, and corrosion. Also, keep an eye out for mineral buildup, freezing temps, and accidental damage from nearby construction. Knowing the root cause will help you tackle the issue with the right DIY magic!
How can I prevent water damage while waiting for parts or assistance to repair a leaky pipe?
No worries, friend! While waiting for parts or help, turn off the main water valve and drain the system. Use towels, buckets, or even old t-shirts to soak up any remaining water. If possible, redirect water flow or use a temporary patch, like epoxy or pipe clamps, to minimize damage. Get creative and stay dry!
Are there any eco-friendly or sustainable materials I can use to replace traditional piping materials when fixing a leak?
Ah, fantastic question, friend! When it comes to eco-friendly piping alternatives, I’m a big fan of PEX tubing, made from cross-linked polyethylene, and copper pipes, which are fully recyclable. You can also explore options like bamboo or hemp-based pipes, although they might require a bit more creativity to work with. Let’s get innovative and reduce our water waste, shall we?


