I still remember the day I inherited my grandfather’s old workbench, covered in a tangled mess of tools and half-finished projects. As I set out to restore it to its former glory, I realized that learning how to organize your tools on a workbench was not just about tidying up, but about unlocking a space that fosters creativity and productivity. The common myth that a cluttered workbench is a sign of a busy craftsperson is, in my opinion, a misconception that can actually hinder our ability to work efficiently.
As we embark on this journey to transform our workbenches into hubs of innovation, I promise to share practical, no-nonsense advice on how to create a system that works for you. In this article, we’ll explore the essentials of tool organization, from categorizing and grouping your tools to implementing a maintenance routine that keeps your workbench clutter-free. By the end of this guide, you’ll be equipped with the knowledge to turn your workbench into a symphony of productivity, where every tool has its place and every project is a joy to work on.
Table of Contents
Guide Overview: What You'll Need
Total Time: 1 hour 45 minutes
Estimated Cost: $20 – $40
Difficulty Level: Easy
Tools Required
- Tape Measure for measuring workbench and tools
- Level for ensuring even installation
- Drill with screwdriver and drill bits
- Wrench for tightening bolts and nuts
- Pencil for marking tool locations
Supplies & Materials
- Pegboard 1/4 inch thick, 2 feet x 4 feet
- Tool Hooks assorted sizes, 10-12 hooks
- Small Bins for storing small parts, 6 inches x 4 inches x 2 inches
- Tool Holder Tray 12 inches x 6 inches x 2 inches
- Wood Screws 1 inch and 2 inches long
Step-by-Step Instructions
- 1. First, let’s start by clearing the clutter from our workbench. This means taking everything off the surface and sorting items into categories, like tools, materials, and projects in progress. I like to think of this step as a fresh start, a chance to reimagine our workspace and make it more efficient.
- 2. Next, we need to assess our tools and decide which ones we use most frequently. These are the tools that should be easily accessible, maybe even within arm’s reach. For me, this includes my trusty hammer, a set of pliers, and a screwdriver. I like to keep them in a tool belt or a small container on the edge of my workbench.
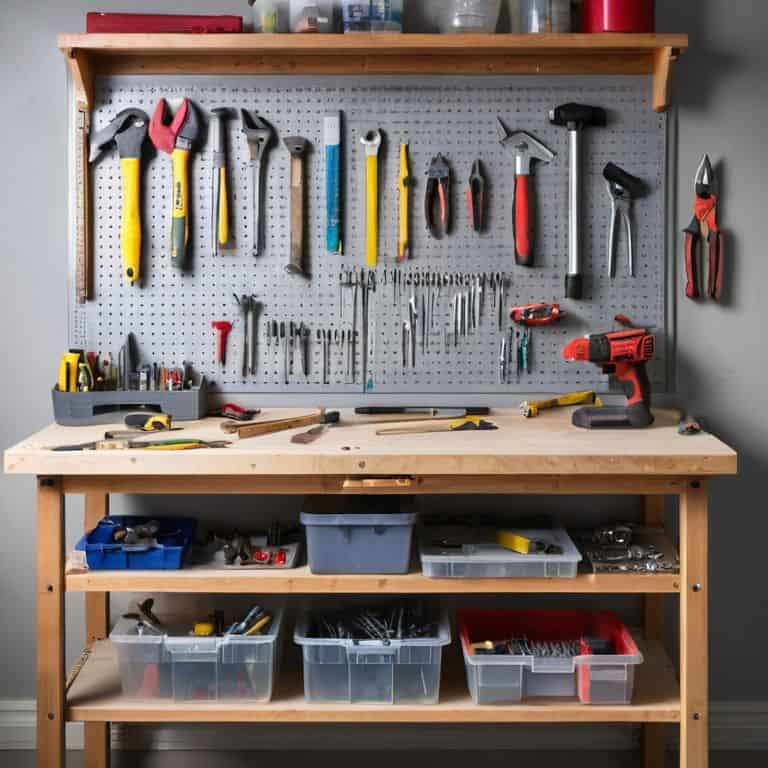
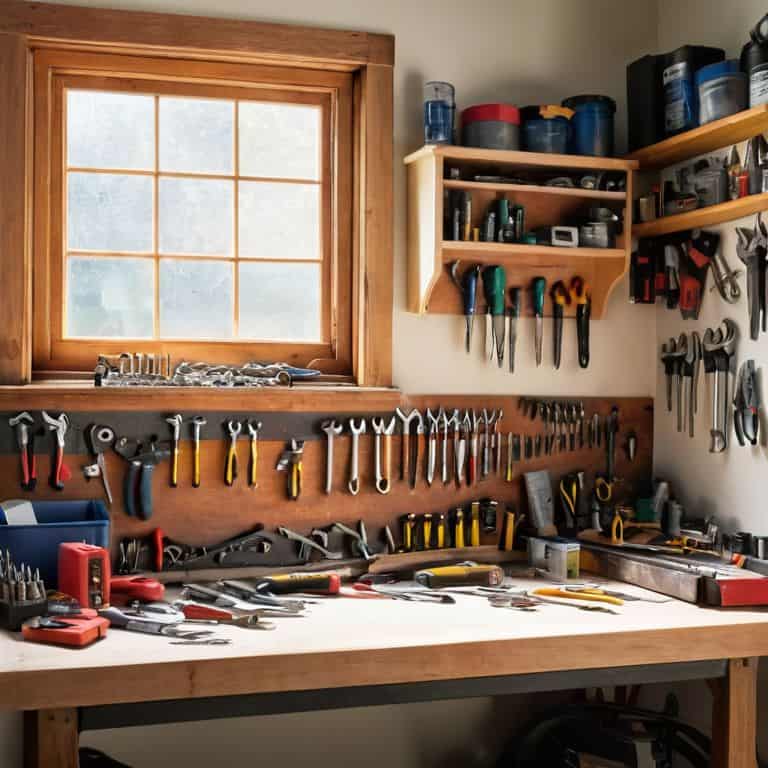
- 3. Now, let’s think about vertical storage. We can use walls, pegboards, or even magnetic strips to hang our tools, keeping them organized and off the workbench surface. This is where we can get creative with repurposed materials, like old pallets or wooden crates, to create unique storage solutions.
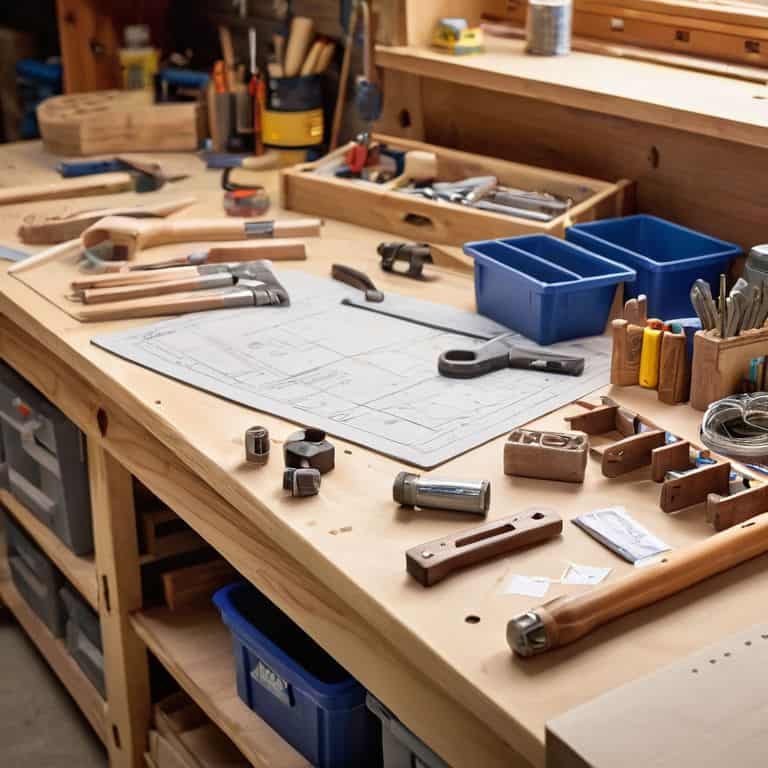
- 4. The next step is to designate zones on our workbench for specific tasks or projects. For example, we might have a cutting zone with a vice and a saw, or a sanding zone with a sanding block and some sandpaper. This helps us stay focused and avoid cluttering our workspace with unnecessary tools.
- 5. After that, we should implement a maintenance routine to keep our workbench organized over time. This could be as simple as setting aside 10 minutes each week to tidy up, or scheduling a monthly deep clean to get into all the nooks and crannies. I like to think of this step as practicing self-care for our workspace.
- 6. Another important step is to utilize hidden storage. We can use drawers, cabinets, or even secret compartments to store items that we don’t need immediate access to. This helps keep our workbench surface clutter-free and makes it easier to focus on our projects.
- 7. Finally, let’s not forget to make it personal. Our workbench should reflect our personality and style, so don’t be afraid to add some decorative touches, like a fun rug or a few favorite quotes on the wall. This will make our workspace feel more inviting and inspiring, and maybe even spark some new ideas for our next project.
Transforming Workbench Chaos
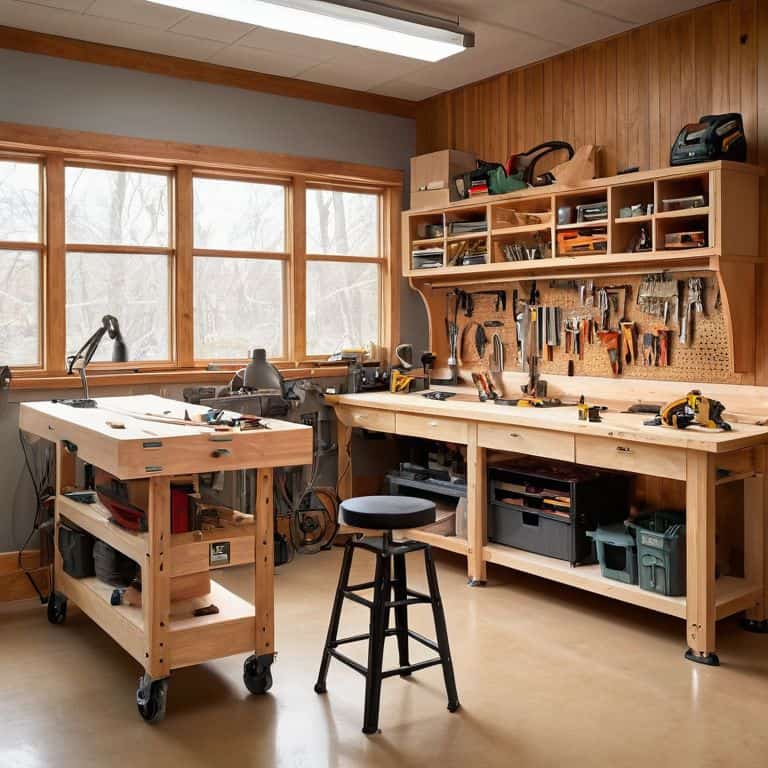
As I delve into the world of workbench storage solutions, I’m reminded of my grandmother’s quilt-making days. She’d always say, “A place for everything, and everything in its place.” This mantra still guides me when tackling a cluttered workbench. To truly transform your workbench from chaos to craftsmanship, consider implementing custom workbench designs that cater to your specific needs. Perhaps you’re a fan of compact storage or prefer a more open layout – the key is to create a space that inspires creativity.
When it comes to tool organization ideas, I’m a firm believer in thinking outside the box (or workbench, in this case!). Look to unconventional items like old mason jars, wooden crates, or even vintage suitcases to store your tools and supplies. Not only will this add a touch of personality to your workspace, but it’ll also keep your essentials within easy reach. As you work on your ergonomic workbench setup, remember to prioritize comfort and efficiency – a well-designed workspace is one that nurtures both body and mind.
In smaller workspaces, small workbench organization requires a bit of creative problem-solving. I’ve found that maximizing vertical space with wall-mounted shelves or pegboards can be a game-changer. Additionally, investing in workbench lighting options that provide ample illumination can help reduce eye strain and make it easier to focus on your projects. By combining these elements, you’ll be well on your way to creating a harmonious and functional workbench that sparks joy and productivity.
Custom Workbench Designs for Tool Bliss
As I delve into the world of customized workbenches, I’m reminded of my grandmother’s quilts – each patch carefully chosen to create a unique masterpiece. Similarly, a well-designed workbench is a masterpiece of functionality, with every tool and feature carefully selected to spark creativity. I’ve seen workbenches with built-in vice systems, others with modular storage units, and some with clever cable management solutions. The key is to create a space that reflects your personal workflow and inspires you to create.
For me, the perfect workbench is one that combines form and function, with a dash of personality. I’ve added a wooden inlay, made from a reclaimed tree branch, to my own workbench, giving it a touch of warmth and character. You can do the same – add a pop of color, a quirky gadget, or a handmade tool holder to make your workbench truly yours.
Ergonomic Storage Solutions for Small Spaces
In smaller workshops, every inch counts, and clever storage is key. I’ve found that repurposing old crates or wooden boxes can provide excellent ergonomic storage for my tools. By attaching them to the wall or underside of my workbench, I’ve created a seamless and space-efficient system that keeps my essentials within easy reach. This not only saves me time but also reduces clutter, allowing me to focus on the creative process.
For instance, I’ve converted an old wooden ladder into a storage unit for my smaller tools and supplies. Its compact design fits perfectly in a corner, maximizing my workbench’s real estate while keeping my materials organized and easily accessible. This kind of inventive storage solution is a game-changer for small spaces, and I encourage you to think outside the box (or crate, or ladder!) to find the perfect fit for your unique workshop needs.
Weaving Order from Chaos: 5 Whimsical Ways to Organize Your Workbench Tools
- Designate a Home for Each Tool: Assign a specific spot for each tool, making it easier to find what you need and put things back in their place, kind of like a treasure hunt where everything ends up exactly where it belongs
- Create a Toolbox Treasure Trove: Use an old trunk, crate, or even a vintage suitcase to store smaller tools and supplies, adding a touch of adventure to your workbench
- Make the Most of Vertical Space: Install pegboards, hooks, or a magnetic strip to keep frequently used tools within easy reach, freeing up your work surface for the real magic to happen
- Implement a ‘Clean as You Go’ Policy: Set aside a few minutes after each project to tidy up and put away tools, maintaining a sense of flow and ensuring your workbench remains a haven of creativity
- Let Your Tools Tell a Story: Display your favorite or most unusual tools in a decorative way, like a quirky tool mobile or a handmade tool rack, adding a personal touch to your workbench and inspiring your next creative endeavor
Key Takeaways for a Harmonious Workbench
By embracing the art of tool organization, you can transform your workbench from a cluttered chaos to a haven of creativity and productivity, where every item has its designated place and purpose.
Customizing your workbench with ergonomic storage solutions and designs tailored to your specific needs can significantly enhance your DIY experience, making it more enjoyable and efficient.
Remember, the journey to a perfectly organized workbench is not just about the destination; it’s about fostering a mindset of sustainable living and creative self-sufficiency, where every tool and material tells a story of innovation and reuse.
Bringing Order to Your Creative Sanctuary
As we’ve journeyed through the world of workbench organization, we’ve discovered that transforming chaos into craftsmanship is not just about tidying up, but about cultivating a space that inspires creativity and productivity. From custom designs to ergonomic storage solutions, we’ve explored the many ways to make your workbench a haven for innovation. By implementing these strategies, you’ll be well on your way to creating a space that not only reflects your unique style but also fosters a sense of community with fellow makers and DIY enthusiasts.
As you put the final touches on your newly organized workbench, remember that the true magic happens when you embrace the art of making. It’s about experimenting with new materials, trying novel techniques, and pushing the boundaries of what’s possible. So, go ahead, get creative, and make your workbench a canvas for self-expression. With every project, you’ll be one step closer to turning your vision into a reality, and that’s a truly beautiful thing.
Frequently Asked Questions
What are some creative ways to repurpose old containers or materials to store tools on a workbench?
I just love giving old things new life. For tool storage, try repurposing vintage mason jars, wooden crates, or even old pipes and fittings. You can also transform plastic containers into mini toolboxes or use reclaimed wood to create a custom pegboard. Get creative and have fun with it – your workbench will thank you!
How can I balance the need for easy tool access with the importance of keeping my workbench clutter-free and organized?
For me, it’s all about finding that sweet spot between accessibility and tidiness. I like to think of it as a ‘tool tapestry’ – weaving my essentials into easy-to-reach zones, while keeping the rest neatly stored, yet still within arm’s reach. It’s a balance that’s both functional and visually pleasing, don’t you think?
Are there any specific tool organization strategies that can help me optimize my workbench for a small or shared workspace?
For small or shared workspaces, I swear by the ‘zone defense’ strategy – grouping tools by task or frequency of use. It’s all about creating micro-stations that make sense for your workflow. Try designating a ‘launching pad’ for your most-used tools, and try using vertical storage to keep your workbench surface clear and clutter-free!


