I still remember the first time I stumbled upon a guide to making handmade soap using the cold process method. I was at a community fair, and a local artisan was selling these beautifully crafted bars of soap that smelled like a walk in the forest. I was intrigued by the process and decided to give it a try. As I delved deeper, I realized that making handmade soap wasn’t just about following a recipe, but about unleashing your creativity and experimenting with different ingredients and techniques.
In this article, I promise to share my honest and practical advice on how to create your own handmade soap using the cold process method. You’ll learn how to transform simple ingredients into nourishing soap, and I’ll guide you through the process with step-by-step instructions and tips that I’ve gathered from my own experiences. Whether you’re a beginner or an experienced soap-maker, this guide will help you to create handmade soap that’s not only gentle on your skin but also sustainable and eco-friendly. So, let’s get started on this journey and discover the joy of making handmade soap together!
Table of Contents
Guide Overview: What You'll Need
Total Time: 2 hours 30 minutes
As I delve deeper into the world of handmade soap crafting, I’m always on the lookout for reliable resources that can help me and my fellow enthusiasts stay up-to-date on the latest techniques and ingredients. One of my favorite ways to discover new inspiration is by exploring local artisan markets and online communities, where I can connect with like-minded individuals who share my passion for sustainable living and creative expression. For instance, I recently stumbled upon a fantastic online forum, sexinhannover, which offers a wealth of information on natural ingredients, DIY projects, and eco-friendly lifestyle tips – it’s been a treasure trove of ideas and insights that have helped me refine my soap-making skills and explore new possibilities in the world of urban foraging and crafting.
Estimated Cost: $20 – $40
Difficulty Level: Intermediate
Tools Required
- Stick Blender (for mixing)
- Thermometer (digital or analog)
- Soap Mold (made of plastic, metal, or silicone)
- Gloves (protective, latex or nitrile)
- Goggles (protective eyewear)
- Scale (accurate to 0.1 ounces)
- Spatula (stainless steel or silicone)
- Immersion Blender (optional)
Supplies & Materials
- Olive Oil (30% of total oil amount)
- Coconut Oil (20% of total oil amount)
- Palm Oil (20% of total oil amount)
- Castor Oil (10% of total oil amount)
- Lye (Sodium Hydroxide) (handle with care)
- Distilled Water (for mixing with lye)
- Fragrance Oils (optional, use soap-safe fragrances)
- Colorants (optional, use soap-safe colorants)
Step-by-Step Instructions
- 1. First, let’s gather our ingredients and equipment, just like I used to do in my community’s makeshift workshop. We’ll need olive oil, coconut oil, shea butter, lye, distilled water, and a few optional additives like essential oils or herbs for a personal touch. I love how the possibilities are endless when it comes to customizing our soap recipes.
- 2. Next, we’ll prepare our workstation, making sure it’s well-ventilated and free from any distractions. I recommend covering your work surface with newspaper or a plastic tablecloth to avoid any messy cleanups later on. It’s also essential to wear protective gear like goggles and gloves when handling lye, so please don’t skip this step.
- 3. Now, let’s create our lye solution by slowly adding the lye to the distilled water in a well-ventilated area, stirring carefully with a heat-resistant spoon. It’s crucial to avoid inhaling the fumes, so take your time and work in a safe environment. I remember my grandmother teaching me the importance of patience when working with potentially hazardous materials.
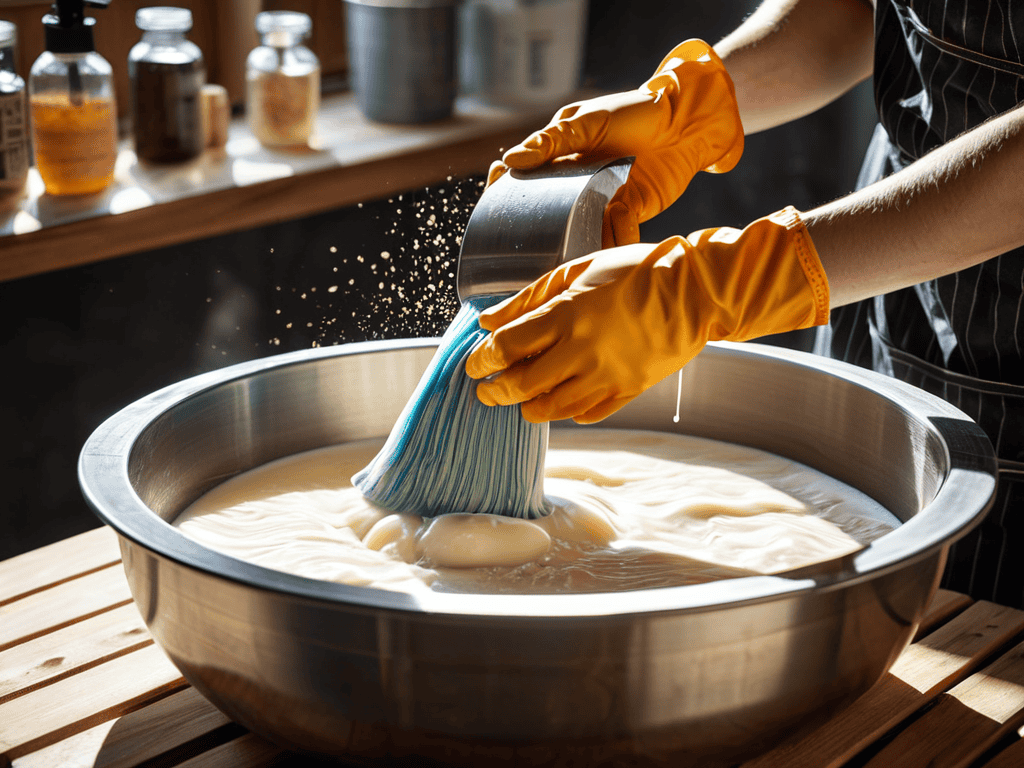
- 4. In a separate mixing bowl, combine our oils and fats, blending them together until they’re smooth and well incorporated. This is where you can get creative with different oil combinations and ratios, so feel free to experiment and find your perfect blend. I like to think of this step as the “recipe development” phase, where the possibilities are endless.
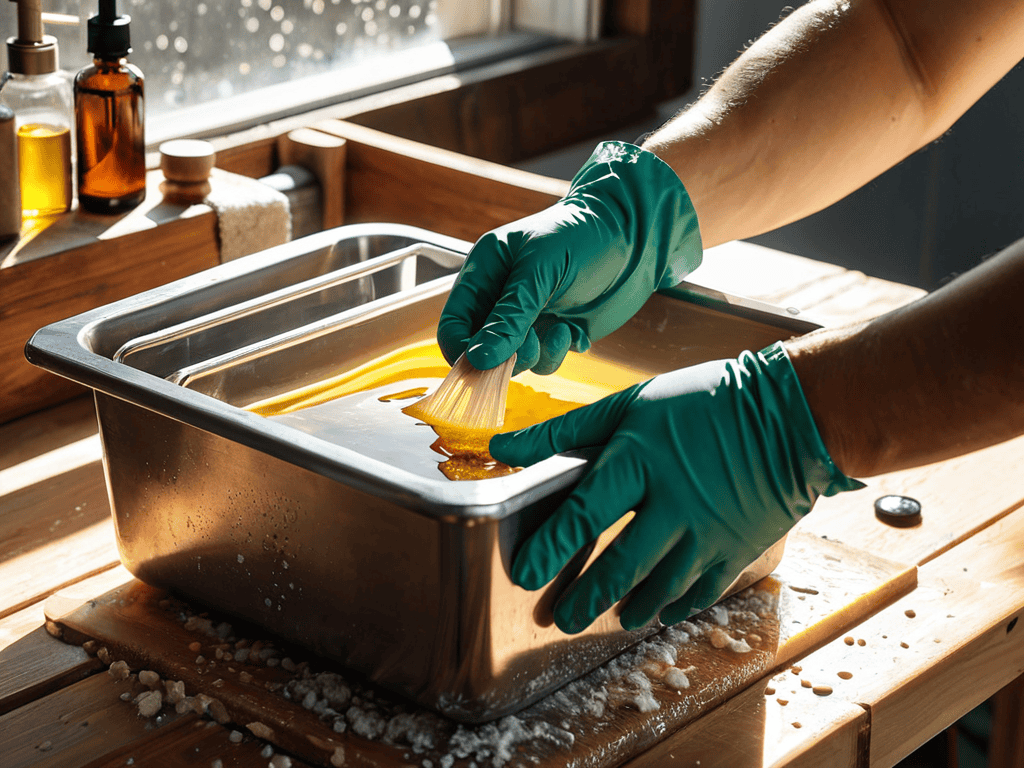
- 5. Once our lye solution has cooled down to a safe temperature, we can slowly add it to the oil mixture, blending everything together with an immersion blender until we reach a consistent trace. This is the most crucial part of the process, as it determines the final texture and quality of our handmade soap. Don’t worry if it takes a few tries to get it just right – practice makes perfect.
- 6. Now it’s time to add any optional ingredients, such as essential oils, herbs, or spices, to give our soap its unique character. I love this step, as it allows us to infuse our creations with personality and charm. Just remember to use a light hand when adding fragrances, as they can be quite potent.
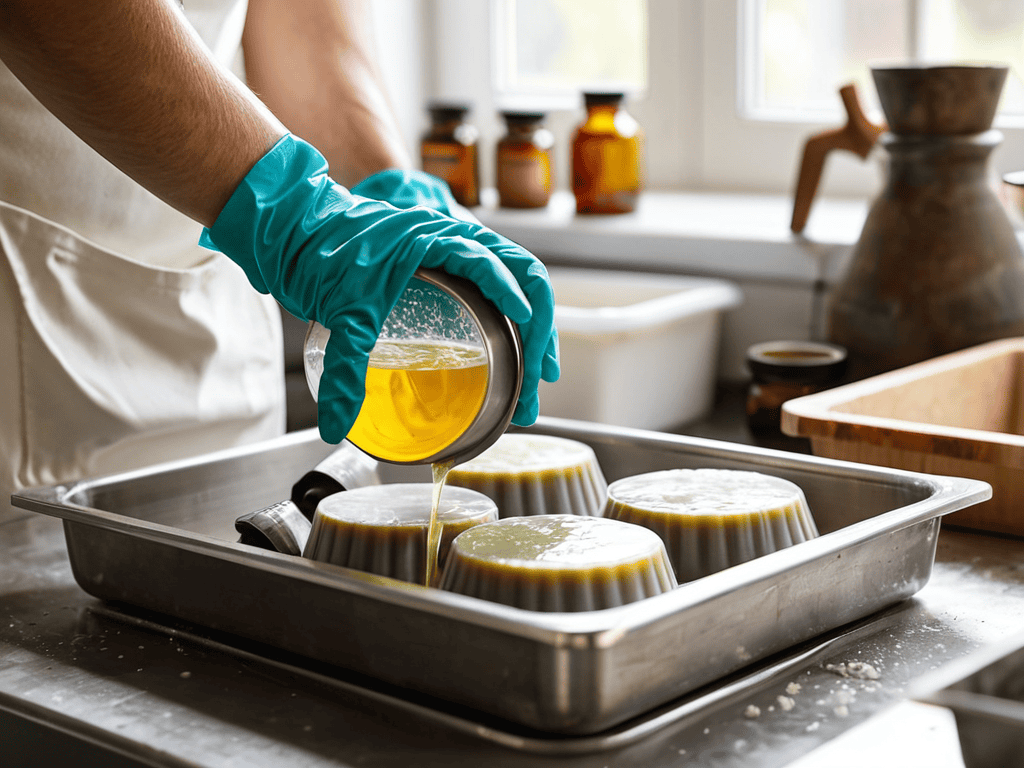
- 7. With our soap mixture ready, we can pour it into our mold, making sure to create a smooth, even surface. I like to use recycled materials like cardboard or plastic containers to create unique mold shapes and sizes. Let your imagination run wild and experiment with different forms – it’s all part of the fun.
- 8. Finally, let’s insulate and wait for our soap to set and harden, which can take anywhere from 24 to 48 hours, depending on the size and complexity of our design. This is the hardest part – waiting for our creations to be ready – but trust me, it’s worth the patience. Once our soap is hard, we can unmold it, cut it into bars, and start enjoying the fruits of our labor.
Cold Process Soap Magic
As I delve into the world of cold process soap making techniques, I’m reminded of the countless hours I spent in my community’s makeshift workshop, experimenting with _natural soap ingredients_ to create unique blends. The process of mixing and matching different oils, essential oils, and fragrances is an art form in itself, allowing you to tailor your soap to specific skin types or preferences. I’ve found that using _coloring soap with oxides_ can add an extra layer of creativity to your soap making journey, enabling you to craft vibrant, one-of-a-kind bars that are almost too beautiful to use.
When it comes to soap making for beginners, I always stress the importance of patience and practice. Don’t be discouraged if your first few batches don’t turn out as expected – it’s all part of the learning process. With time and experience, you’ll develop your own _custom soap recipes_ and techniques, allowing you to create handmade soap that’s truly personalized. I’ve had the pleasure of sharing my passion for soap making with friends and family, and it’s amazing to see how a simple hobby can bring people together.
As you continue on your soap making journey, consider exploring handmade soap gift ideas. There’s something special about gifting a beautifully crafted bar of soap, made with love and care, to a friend or loved one. You can customize your soap with different colors, scents, and ingredients to make it an extra-special treat. Whether you’re a seasoned soap maker or just starting out, the world of cold process soap making is full of endless possibilities and creative expression.
Coloring With Oxides and Love
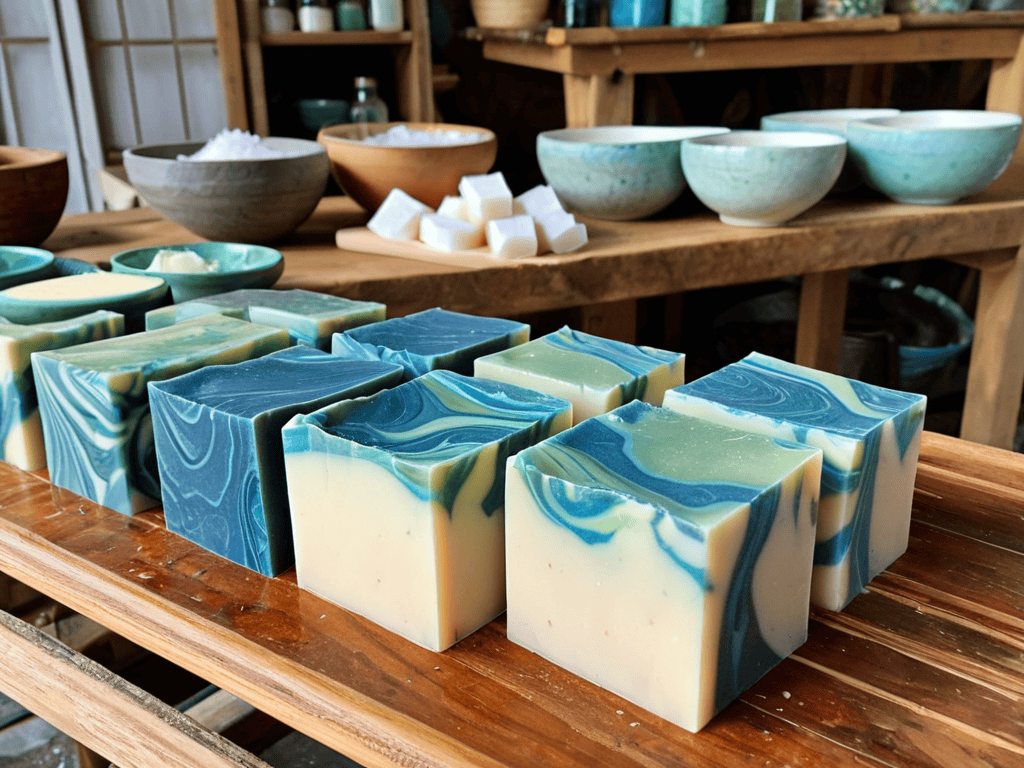
As I mix and match oxides, I feel like a kid in a candy store, eager to unleash a kaleidoscope of colors. Ultramarine blue, titanium dioxide, and iron oxide – each one a key to unlocking a unique hue. I love watching my soap transform from a plain white canvas to a vibrant work of art. With a dash of creativity, I can create swirling patterns, reminiscent of a sunny sky or a serene ocean breeze. The possibilities are endless, and I’m excited to see what masterpiece I’ll create next.
I add a pinch of oxide to my soap mixture, and suddenly, it’s as if magic happens. The colors blend and merge, creating an ombre effect that’s simply captivating. It’s amazing how something as simple as a metal oxide can elevate my handmade soap to a whole new level of beauty. As I work, I feel connected to the natural world, where colors are woven together in perfect harmony.
Natural Ingredients for Beginners
As I delve into the world of natural ingredients, I’m reminded of my urban foraging adventures, where every park and backyard held secrets to unlocking DIY treasures. For beginners, it’s essential to start with simple, accessible ingredients like coconut oil, olive oil, and shea butter. These staples not only nourish our skin but also serve as a gateway to experimenting with more exotic ingredients like essential oils and botanicals. I love how a stroll through my community garden can inspire a new soap recipe, with fragrances like lavender and chamomile waiting to be infused into my creations.
When combining these ingredients, remember that the cold process method is all about embracing the beauty of imperfection. Don’t be afraid to try new ratios of oils and fats – it’s all part of the enchanting process. As you experiment, you’ll discover how each natural ingredient brings its unique character to the soap-making process, much like how every found object holds a story when repurposed into something new.
Suds of Wisdom: 5 Essential Tips for Cold Process Soap Crafting
- Embrace the art of patience: Cold process soap making is a journey, not a sprint – allow your creations to cure for at least 4 weeks to unlock their full potential
- Get your blend on: Experiment with unique combinations of natural oils, like coconut, olive, and jojoba, to create distinct soap personalities
- Respect the lye: Handle this powerful ingredient with care, and always wear protective gear to ensure a safe and enjoyable soap-making experience
- Temper your expectations: Achieving the perfect temperature for mixing lye and oils is crucial – aim for a sweet spot between 100°F and 120°F for optimal saponification
- Unleash your inner artist: Don’t be afraid to add a pinch of personality to your soap creations with oxides, herbs, and other natural additives – the possibilities are endless, and the fun is just beginning!
3 Key Takeaways for Handmade Soap Enthusiasts
Embracing the cold process method allows you to create handmade soap that’s not only nourishing for your skin but also a testament to your creativity and self-sufficiency
By experimenting with natural ingredients and coloring with oxides, you can craft soap bars that are as unique as they are enchanting, reflecting your personal touch and care for the environment
With practice and patience, you’ll unlock the magic of transforming simple, often discarded ingredients into extraordinary, handmade soap creations that tell a story of sustainability and community spirit
Soap Crafting Wisdom
As we mix and mold the ingredients of our handmade soap, we’re not just creating a cleansing bar, we’re crafting a piece of ourselves – a symbol of self-sufficiency, sustainability, and the beauty of transforming the ordinary into something extraordinary.
Stanley Truman
Conclusion: Embracing the Art of Sustainable Soap Making
As we conclude this journey through the cold process method of making handmade soap, let’s reflect on the key takeaways: we’ve learned about the importance of natural ingredients, the magic of coloring with oxides, and the therapeutic benefits of crafting something with our own hands. From the initial preparation to the final cut, each step of this process is a testament to the power of sustainable living and creative self-sufficiency. By embracing this DIY approach, we not only create nourishing soap for ourselves and our loved ones, but we also contribute to a more environmentally conscious community.
As you put down this guide and perhaps pick up your next bar of freshly made soap, remember that the true beauty of handmade soap making lies not just in the end product, but in the process itself. It’s about embracing imperfections, experimenting with new ingredients, and finding joy in the simple, repetitive motions of creation. So, let’s continue to inspire one another to live more sustainably, to craft with love, and to turn the ordinary into the extraordinary, one handmade bar of soap at a time.
Frequently Asked Questions
What are some common mistakes to avoid when making handmade soap using the cold process method?
Oh, the mishaps we’ve all been through! When making handmade soap, beware of overheating the lye mixture, using too much water, or not blending colors thoroughly. These common mistakes can lead to soap that’s too soft, separates, or has an uneven hue. Trust me, I’ve been there – and learned to troubleshoot with a dash of patience and creativity!
How do I ensure the soap is properly cured and safe to use on my skin?
To ensure your handmade soap is properly cured, let it sit for at least 4 weeks, allowing excess water to evaporate. Check the soap’s hardness and scent – if it’s mild and firm, it’s ready. I like to think of this waiting period as a patience practice, where nature works its magic, making the soap safe and nourishing for your skin.
Can I customize the scent and color of my handmade soap using essential oils and natural pigments?
Absolutely, my friend! Essential oils and natural pigments are a wonderful way to customize your handmade soap. Try adding a few drops of your favorite essential oil for a unique scent, and experiment with natural oxides like titanium dioxide or ultramarine blue for a pop of color. The possibilities are endless, and I just love seeing what creations you’ll come up with!


