I still remember the day I turned my cluttered garage into a dream workshop – it was like unleashing chaos, but in a good way! My grandfather, who taught me the art of tool restoration, always said that a garage should be a haven of creativity and innovation. That’s why I’m excited to share my story on how to set up a home garage workshop, and help you transform your own space into a playground for your imagination. I’ve seen many people struggle with turning their garage into a functional workshop, but with the right approach, it can be a relatively simple process.
In this article, I’ll cut through the noise and provide you with practical advice on how to set up a home garage workshop that suits your needs. I’ll share my personal experiences, from naming every tool in my collection (yes, I’ve named them all – there’s Bertha the wrench, Sammy the screwdriver, and many more!) to restoring vintage bicycles. You’ll learn how to create a space that’s tailored to your projects and hobbies, and discover the joy of bringing old machines back to life. By the end of this guide, you’ll have a clear understanding of how to turn your garage into a functional and inspiring workspace that reflects your personality and creativity.
Table of Contents
- Guide Overview: What You'll Need
- Step-by-Step Instructions
- Setting Up Garage Workshop
- Getting Down to Business: 5 Key Tips to Set Up Your Dream Home Garage Workshop
- Key Takeaways to Transform Your Garage
- Words to Live By
- Unleashing the Full Potential of Your Garage Workshop
- Frequently Asked Questions
Guide Overview: What You'll Need
Total Time: 4 hours 30 minutes
Estimated Cost: $500 – $1000
Difficulty Level: Intermediate
Tools Required
- Tape Measure for measuring spaces
- Level for ensuring surfaces are even
- Drill Press for precise drilling
- Hand Saw or circular saw for cutting lumber
- Socket Set for assembling equipment
- Work Light for illuminating the workspace
- Clamp Set for holding items in place
Supplies & Materials
- 2-in x 4-in lumber for shelving and framework
- Plywood for workbench tops
- MDF Boards for additional shelving
- Wood Screws for assembling shelving
- Nails for general construction
- Sandpaper for smoothing out wood surfaces
- Paint for protecting and decorating the workshop
- Epoxy Floor Coating for protecting the floor
Step-by-Step Instructions
- 1. First, let’s start with the foundation of our garage workshop: a clean and organized space. I like to think of it as a blank canvas, just like my grandfather used to say when we’d start a new project in his garage back in the Midwest. Begin by clearing out any clutter, dust, or debris that’s accumulated over the years. This will give you a chance to assess what you have, what you need, and what you can get rid of. I’ve found that having a solid plan in place before starting any project is key to its success.
- 2. Next, it’s time to sort and categorize your tools and equipment. I’ve named every tool in my garage, from my trusty wrench, Bertha, to my drill press, Daisy. This might seem like a quirky habit, but it helps me keep track of everything and ensures that I can find what I need when I need it. Start by grouping similar items together, such as all your hand tools in one area and your power tools in another. This will make it easier to find what you’re looking for and prevent you from having to search the entire garage for a specific tool.
- 3. Now that you have your tools organized, it’s time to think about workstation setup. I like to have a dedicated area for each type of project I work on, whether it’s a workbench for general repairs or a vice for more precise work. Consider investing in a few modular workstations that can be easily rearranged as needed. This will give you the flexibility to work on a variety of projects without having to completely reconfigure your garage. My grandfather always said that a good workstation is the key to a successful project.
- 4. With your workstations in place, it’s time to think about *lighting and electrical. I’ve installed LED strips under my workbenches to provide extra lighting, and I’ve also invested in a few power outlets with built-in USB ports. This might seem like a small detail, but it’s amazing how much of a difference it can make when you’re working on a project. Consider hiring a licensed electrician to assess your garage’s electrical system and make any necessary upgrades. Safety first is my motto when it comes to working with electricity.
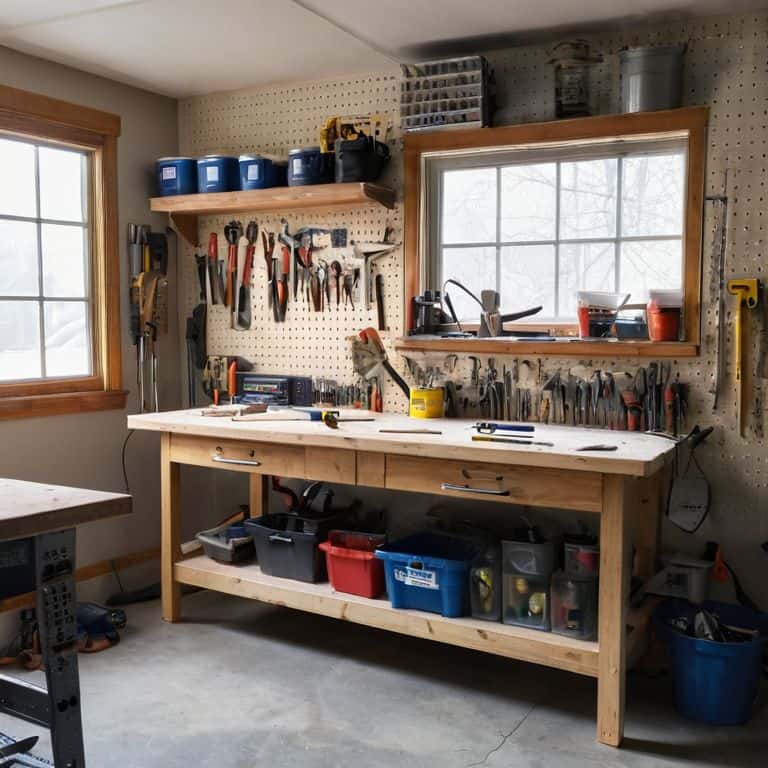
- 5. Next up is *storage and shelving. I’ve invested in a few industrial-style shelving units to store my tools and equipment, and I’ve also added some hooks and bins for smaller items. The key is to have a dedicated home for each item, so you can easily find what you need when you need it. Consider using label makers to identify what’s stored on each shelf or in each bin. This will save you time and frustration in the long run, and it’s a game-changer when it comes to staying organized.
- 6. Now that you have your tools and equipment organized, it’s time to think about *ventilation and heating. I’ve installed a garage heater to keep my workspace warm during the cold winter months, and I’ve also added a few windows to provide natural light and ventilation. Consider investing in a garage fan to circulate the air and prevent dust and fumes from building up. A comfortable working environment is essential for productivity and safety.
- 7. Finally, it’s time to think about *safety and security. I’ve installed a fire extinguisher and a first aid kit in my garage, and I’ve also added a few security cameras to keep an eye on my tools and equipment. Consider investing in a garage alarm system to prevent theft and vandalism. Safety is my top priority when it comes to working in my garage, and it should be yours too. By following these steps, you’ll be well on your way to creating a dream workshop that’s both functional and fun.
Setting Up Garage Workshop
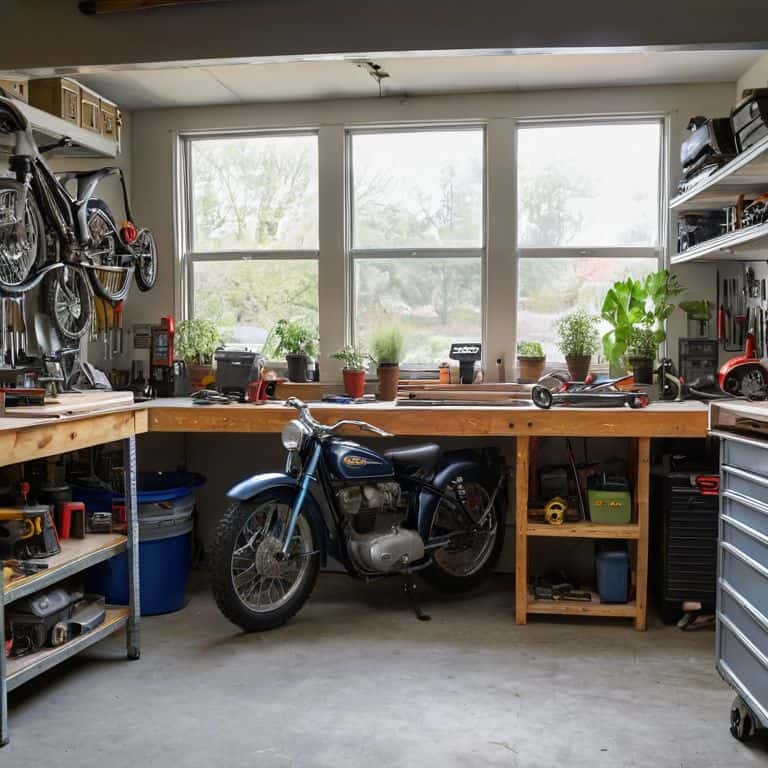
As I share my experience of setting up my own garage workshop, I want to emphasize the importance of garage workshop layout ideas. A well-planned layout can make all the difference in maximizing your space and efficiency. I’ve found that creating a work zone for each type of project, such as a dedicated area for my vintage bicycle restorations, helps me stay organized and focused. When designing your layout, consider the work flow of your projects and try to minimize unnecessary movement around the garage.
When it comes to stocking your workshop, having the right essential tools for a home workshop is crucial. I’ve named each of my tools, from my trusty wrench, “Winnie,” to my reliable drill press, “Bertha.” This not only adds a personal touch but also helps me quickly identify the tool I need for a specific task. Investing in good-quality tools may seem expensive, but it’s worth it in the long run. I’ve also learned that workshop lighting options can greatly impact the overall ambiance and functionality of your garage workshop.
To ensure a safe and enjoyable working experience, don’t overlook electrical safety in the garage. I’ve installed DIY workbench plans that include built-in safety features, such as surge protectors and cord organizers. Additionally, I’ve implemented garage storage solutions to keep my tools and materials organized and out of the way, reducing the risk of accidents and injuries. By taking the time to set up your garage workshop with these considerations in mind, you’ll be well on your way to creating a space that’s both functional and enjoyable.
Essential Tools and Lighting Options
When it comes to essential tools, I’ve got my trusty sidekicks – Bertha the wrench, Sammy the screwdriver, and Terry the tape measure. These guys have been with me through thick and thin, and I couldn’t imagine my garage without them. Of course, every project requires its own set of specialized tools, but having a solid foundation of basics is key. As for lighting, I’m a big fan of LED strips – they’re energy-efficient, bright, and easy to install. I’ve got them running along my workbench and underneath my shelving units, making it easy to see what I’m working on, even in the darkest of garages.
Garage Workshop Layout Ideas
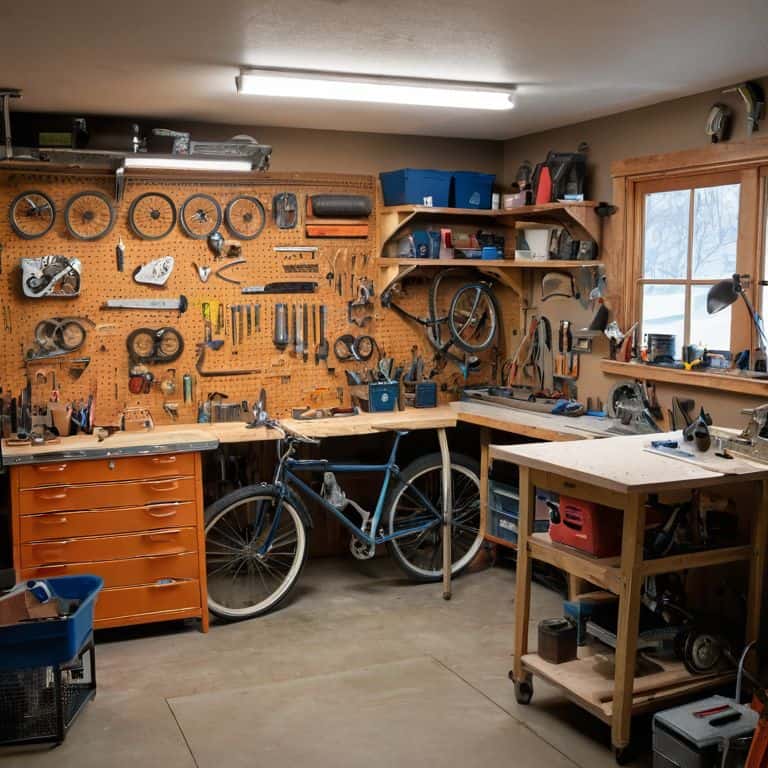
Now that we’ve got the basics covered, let’s talk layout. I like to think of my garage as a well-oiled machine – every tool has its place, and I can find what I need in a snap. When designing your layout, consider the work flow: where will you be spending most of your time, and what tools will you need closest at hand? For me, that means my trusty “Bertha” (that’s my favorite wrench) is always within arm’s reach.
I’ve found that a mix of open shelving and closed cabinets keeps things organized and easy to find. My “Sparky” (drill press) and “Midge” (sandblaster) have their own dedicated areas, making it easy to get to work on projects like restoring my vintage bicycles. By assigning a home for each tool, you’ll be amazed at how much more efficiently you can work – and how much more fun you’ll have tinkering in your garage!
Getting Down to Business: 5 Key Tips to Set Up Your Dream Home Garage Workshop
- Start by purging your garage of unnecessary items and organizing the remaining tools and equipment into categories, just like I do with my vintage bicycle restoration projects
- Designate zones for different activities, such as a workbench area, a tool storage area, and a space for your favorite hobby, whether that’s woodworking or, like me, tinkering with old bikes
- Invest in good lighting, including overhead lights and task lights, to ensure you can see what you’re doing and avoid eye strain – trust me, your eyes will thank you after a long day of tinkering
- Choose tools that are versatile and can be used for multiple tasks, and don’t be afraid to get creative and repurpose items, like turning an old pallet into a shelving unit
- Make it a habit to clean and maintain your workspace regularly, including wiping down tools and sweeping the floor, to keep your garage workshop running smoothly and safely – just like my granddad taught me back in the Midwest
Key Takeaways to Transform Your Garage
Design your garage workshop with flexibility in mind, considering the projects you want to tackle and the tools you’ll need within easy reach, just like I do with my vintage bicycle restorations
Invest in quality, versatile tools – like my trusty ‘Bertha’ wrench and ‘Midge’ pliers – and proper lighting to ensure your workspace is both functional and safe, illuminating your path to creativity and innovation
Remember, your garage workshop is a reflection of your personality and interests, so don’t be afraid to add personal touches and make it your own playground for experimentation and fun, where the smell of grease and wood can inspire your next big project
Words to Live By
A garage is not just a space, it’s a state of mind – where creativity meets elbow grease and imagination knows no bounds, so don’t just set up a workshop, build a playground for your dreams!
John Beeler
Unleashing the Full Potential of Your Garage Workshop
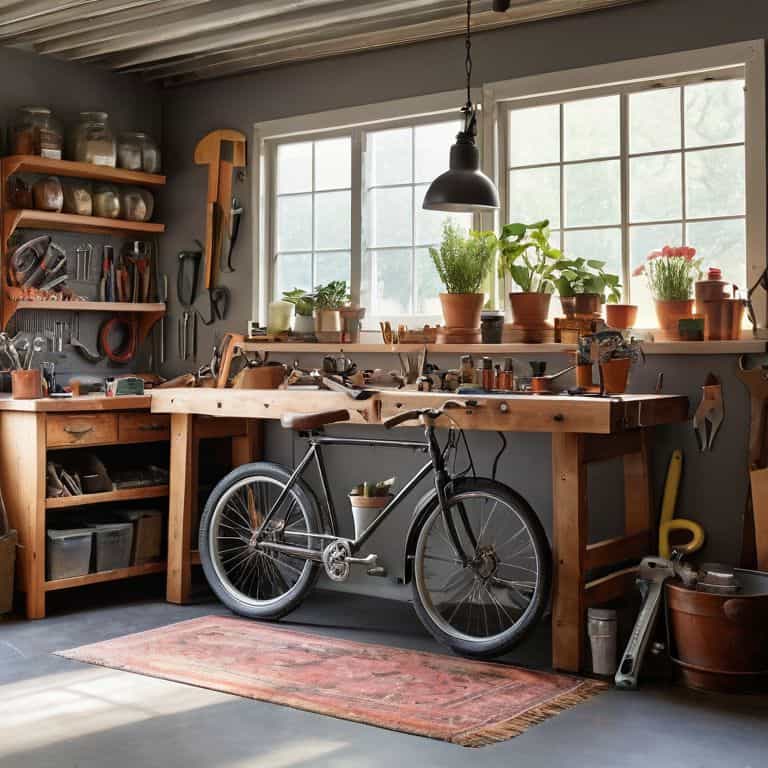
As we wrap up our journey to set up a home garage workshop, let’s take a moment to reflect on the key elements that will bring your space to life. We’ve covered the importance of a well-planned layout, essential tools, and lighting options that will make your projects easier and more enjoyable. Remember, the goal is to create a space that sparks creativity and fosters a sense of community, whether you’re working on a vintage bicycle or a cutting-edge innovation. By following these steps and adding your personal touch, you’ll be well on your way to turning your garage into a playground of creativity and innovation.
As you stand in your newly transformed garage, surrounded by the tools and projects that bring you joy, I hope you feel a sense of pride and accomplishment. Your garage is no longer just a storage space, but a haven for imagination and experimentation. So go ahead, get your hands dirty, and see where your creativity takes you. With every project, you’ll be inspired to push the boundaries of what’s possible, and that’s where the real magic happens. Happy building, and remember, the garage is your playground – make it an amazing one!
Frequently Asked Questions
What are the most essential tools I need to get started with setting up my home garage workshop?
Ah, the fun part! To get started, you’ll need the basics: a good socket set, pliers, screwdrivers, and a trusty hammer. I like to think of them as the foundation of my toolbox, which I’ve lovingly named ‘Bertha’. Don’t forget a solid workbench and some decent lighting – it makes all the difference, trust me!
How can I optimize the layout of my garage to maximize space and efficiency for my workshop?
Let’s get strategic with that garage layout! I recommend grouping similar tools and tasks together, like my ‘Bertha’ bench saw and ‘Betsy’ drill press. Consider a slatwall for hanging frequently used items, and don’t forget a mobile workbench for flexibility – it’s all about creating a workflow that saves time and reduces clutter!
What kind of lighting options are best suited for a home garage workshop and how can I ensure proper illumination?
Proper lighting is key in my garage workshop. I swear by LED strips and overhead fluorescent lights for bright, even illumination. My trusty ‘Lumi’ lamp, a restored vintage find, also provides focused light where I need it. Remember, good lighting helps you see the details and work safely – don’t skimp on it, just like my granddad always said!


