I still remember the first time I tried my hand at welding – it was a simple welding project for beginners that my grandfather, a seasoned DIY enthusiast, had assigned to me. He believed that with the right tools and a bit of patience, anyone could breathe new life into discarded metal scraps. As I lit the torch and watched the metal melt together, I felt an overwhelming sense of pride and accomplishment. It was then that I realized that welding wasn’t just about joining two pieces of metal; it was about transforming the ordinary into the extraordinary. This experience sparked a passion within me, and I’ve been hooked on DIY projects ever since.
In this article, I’ll share my honest, no-hype advice on how to get started with a simple welding project for beginners. You’ll learn how to choose the right equipment, prepare your workspace, and safely weld your first project. I’ll walk you through each step, providing you with practical tips and tricks to ensure a successful outcome. By the end of this guide, you’ll be confident in your ability to tackle your own welding projects, and who knows, you might just discover a new passion. So, let’s get started and unleash your creative potential with welding!
Table of Contents
Guide Overview: What You'll Need
Total Time: 2 hours 30 minutes
Estimated Cost: $50 – $100
Difficulty Level: Easy
Tools Required
- MIG Welder (with shielding gas)
- Welding Helmet (with shade 10 lens)
- Wire Brush (for cleaning metal)
- Workbench (with vise)
- Measuring Tape (for measuring 6 inches by 4 inches metal pieces)
Supplies & Materials
- Mild Steel Plate (1/4 inch thick, 6 inches by 4 inches)
- MIG Welding Wire (0.030 inch diameter, steel)
- Welding Gloves (heat resistant)
- Safety Glasses (with side shields)
- 2-in x 2-in Angle Iron (for practice welds)
Step-by-Step Instructions
- 1. First, let’s start with the basics and gather our materials, which include a welder, welding helmet, gloves, and the metal pieces we want to weld together. I like to think of this step as a treasure hunt, where I get to scour my workshop or local hardware store for the perfect scraps to bring my project to life.
- 2. Next, we need to prepare our workspace by clearing any clutter or flammable materials. As someone who loves urban foraging, I’m always on the lookout for unique items to repurpose, but when it comes to welding, safety comes first. Make sure your area is well-ventilated and that you have a fire extinguisher nearby.
- 3. Now it’s time to clean and degrease our metal pieces. This step is crucial in ensuring a strong weld, as any dirt or oil can weaken the bond between the metals. I like to use a mixture of soap and water to clean my pieces, and then dry them thoroughly with a towel.
- 4. With our materials prepared, it’s time to set up our welder and choose the right settings. As a beginner, it’s essential to start with a simple project, like welding two pieces of scrap metal together. I recommend starting with a low voltage and gradually increasing it as you become more comfortable with the process.
- 5. Next, we need to align our metal pieces and clamp them together. This is where the magic happens, and our project starts to take shape. I like to use a combination of clamps and tape to hold my pieces in place, making sure they’re perfectly aligned and secure.
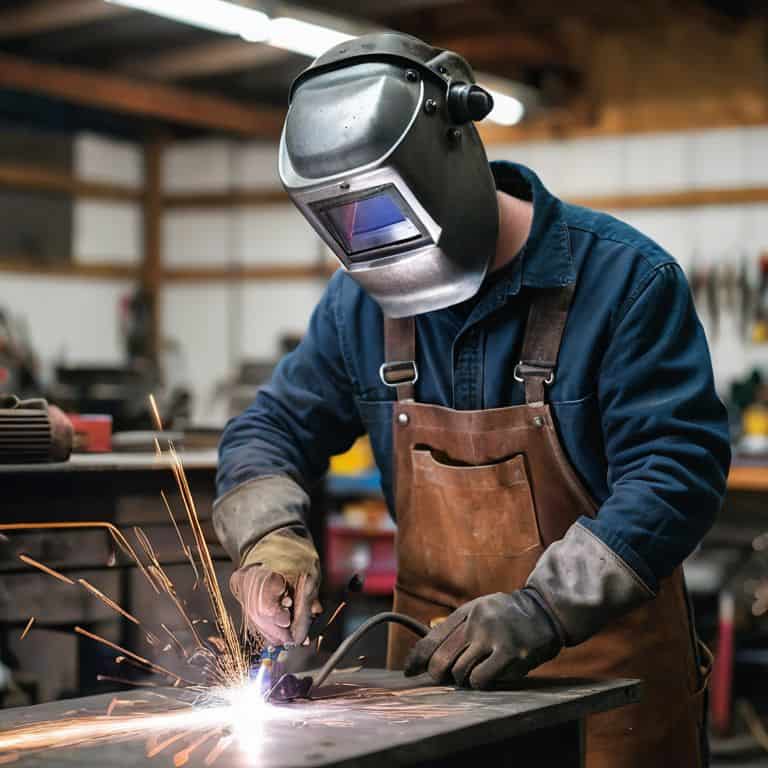
- 6. Now it’s time to put on our welding helmet and start welding. Remember to keep a steady hand and move the welder in a smooth, consistent motion. As you weld, make sure to keep the area well-ventilated and avoid breathing in any fumes.
- 7. Once we’ve completed our weld, it’s time to inspect and refine our work. Check for any weak spots or imperfections, and make any necessary adjustments. This is also a great opportunity to get creative and add any decorative touches, like grinding down the edges or adding a coat of paint.
- 8. Finally, let’s add a personal touch to our project and make it truly unique. As someone who loves crafting with found natural materials, I like to incorporate elements like wood or stone into my designs. Get creative and think outside the box – after all, that’s what DIY is all about!
Simple Welding for Beginners
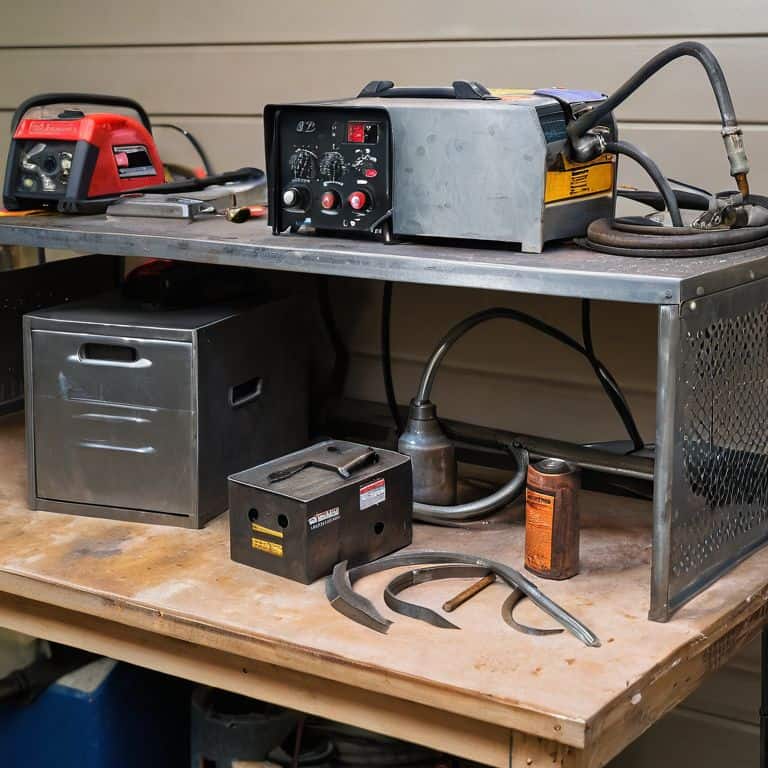
As I always say, getting started with welding is all about experimentation and having fun. To make the process even more enjoyable, it’s essential to invest in beginner friendly welding tools that are easy to use and understand. This will not only boost your confidence but also help you to create something truly unique. For instance, a basic MIG welder is a great tool for beginners, as it’s relatively simple to operate and can be used for a variety of simple welding projects for practice.
When working with thin metal, it’s crucial to master welding techniques for thin metal to avoid damaging the material. One tip is to use a lower heat setting and move the welder slowly to ensure a clean and strong weld. Additionally, metalworking safety tips for beginners should always be followed, such as wearing protective gear and ensuring good ventilation in the workspace. By following these guidelines, you’ll be well on your way to creating amazing projects.
As you progress in your welding journey, you’ll find that having a well-organized workspace is key to efficiency and productivity. Consider building a DIY welding cart to store your tools and materials, and don’t be afraid to experiment with different basic welding joint types to add some variety to your projects. With practice and patience, you’ll become more comfortable with the welding process, and your creations will become more intricate and impressive.
Basic Safety Tips for Thin Metal Welds
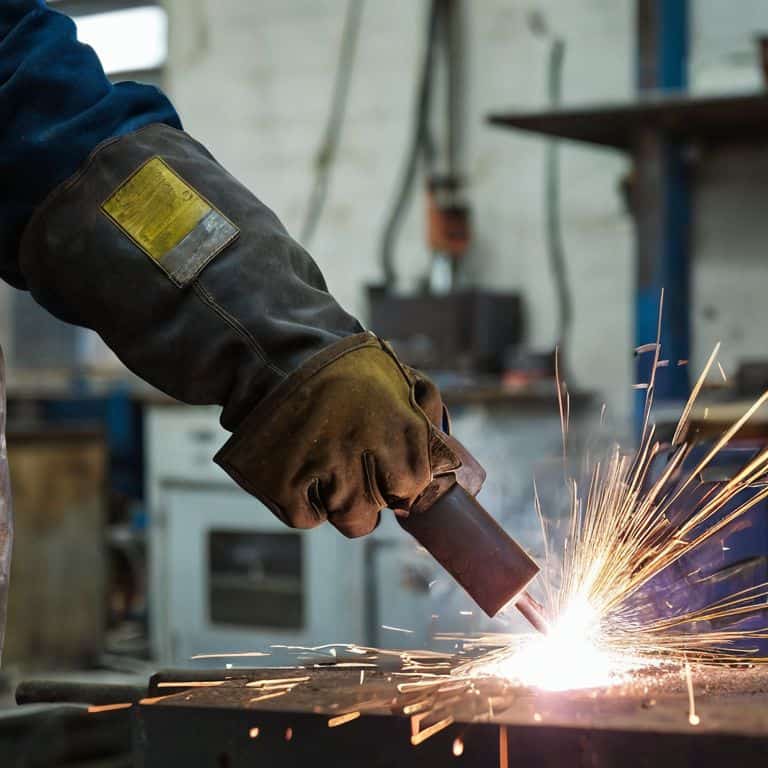
When working with thin metal, safety is paramount. Always wear protective gear, including gloves, safety glasses, and a welding helmet to shield yourself from sparks and heat. Ensure good ventilation in your workspace to prevent inhaling fumes. Keep a fire extinguisher nearby, and never weld near flammable materials. It’s also essential to use the correct welding technique to avoid warping or damaging the metal.
By following these simple safety tips, you’ll be able to confidently work with thin metal and create amazing projects. Remember, safety is just the starting point – with practice and patience, you’ll be breathing life into scrap metal in no time, and who knows, you might just discover a new passion for welding and upcycling old materials into something entirely new and wonderful.
Breathing Life Into Scrap Metal
As I always say, the best projects start with a treasure hunt – scouring local scrap yards, thrift stores, or even your own backyard for hidden gems. For this simple welding project, you’ll need a few basic materials like scrap metal pieces, a welding torch, and some safety gear. I love the thrill of the hunt, never knowing what unique piece I’ll stumble upon. Maybe it’s an old bike frame, a rusty gate, or a discarded pipe – each one holds potential for a one-of-a-kind creation.
With your materials gathered, it’s time to unleash your creativity. Think about the shape, texture, and story behind each piece. How can you combine them to create something new and functional? Perhaps a quirky planter, a decorative lamp, or a functional coat rack. Remember, the beauty of welding lies in its ability to breathe life into scrap metal, transforming the discarded into the extraordinary.
Igniting Your Welding Journey: 5 Essential Tips for Beginners
- Start with the right equipment: invest in a decent welding helmet, gloves, and a wire brush to ensure a safe and successful project
- Choose the perfect scrap metal: look for thin, clean metal sheets or scraps with minimal rust or debris for an easier welding experience
- Practice your welding technique: begin with small, simple welds and gradually move on to more complex joints and designs
- Keep it cool: maintain a well-ventilated workspace, and consider using a cooling pad or a fire extinguisher nearby to prevent accidents
- Get creative with your welds: don’t be afraid to experiment with different patterns, designs, and materials to breathe new life into your scrap metal project
Igniting Your Welding Journey: 3 Key Takeaways
Embracing the thrill of transformation, you’ve learned to turn scrap metal into a unique piece of art, fostering a sense of creative self-sufficiency and sustainable living
By mastering basic safety tips and simple welding techniques, you’ve unlocked the door to a world of inventive DIY projects, where every discarded object holds potential for new life
Remember, the true magic lies not in the tools or materials, but in the stories you tell through your creations, so keep experimenting, pushing boundaries, and breathing life into the ordinary, as you continue on your journey of discovery and growth
Igniting the Spark
As we weld, we don’t just join metals, we bridge the gap between what’s discarded and what’s possible, transforming scraps into stories and beginners into makers.
Stanley Truman
Embracing the Spark of Creativity

As we conclude this simple welding project for beginners, let’s take a moment to reflect on the key points we’ve covered. From the initial introduction to the world of welding, to the step-by-step guide, and the essential safety tips for thin metal welds, we’ve breathed life into scrap metal and transformed it into something new and useful. This project is more than just a fun activity; it’s a gateway to a world of creative possibilities and a step towards sustainable living.
As you put down your welding torch and admire your handiwork, remember that the true magic lies not in the tools or the techniques, but in the creative spark that drives you to experiment, to innovate, and to push beyond the boundaries of what’s possible. So, don’t be afraid to think outside the box, to try new things, and to turn everyday objects into extraordinary creations. The world of DIY and sustainable living is full of endless possibilities, and with this simple welding project, you’ve taken the first step towards a more self-sufficient and creative you.
Frequently Asked Questions
What are the essential safety precautions I need to take when working with thin metal welds?
When working with thin metal welds, safety is key! I always say, ‘protect your spark!’ Wear heat-resistant gloves, safety glasses, and a face shield to shield yourself from sparks and UV rays. Keep a fire extinguisher nearby and ensure good ventilation to avoid inhaling fumes. Let’s weld wisely, friends!
How do I choose the right type of welding rod for my beginner project?
For a beginner project, I recommend starting with a versatile welding rod like ER70S-6. It’s a great all-around choice that works well with thin metals and is easy to find at most hardware stores. Trust me, it’s a game-changer for breathing new life into scrap metal!
Can I use a DIY welding setup at home, or do I need to invest in professional equipment?
Absolutely, you can start welding at home with a DIY setup! I’ve worked with homemade rigs and they can be just as effective as professional equipment, especially for small projects. Just ensure you’re following proper safety precautions and using the right materials for your thin metal welds.


