I still remember the first time I tried to replace a wall outlet in my grandfather’s old workshop. I was determined to do it myself, but I ended up feeling frustrated and unsure if I was doing it safely. It wasn’t until my grandfather, a seasoned DIY enthusiast, showed me the ropes that I realized how to safely replace a wall outlet wasn’t as complicated as I thought. In fact, with the right guidance, it’s a task that can be accomplished with ease and confidence. As someone who’s passionate about sustainable living and DIY projects, I’ve learned that it’s all about having the right mindset and skills.
In this article, I’ll share my personal experience and expertise on how to safely replace a wall outlet, providing you with practical tips and step-by-step instructions to make the process a breeze. You’ll learn how to prepare your workspace, choose the right materials, and avoid common mistakes that can lead to safety hazards. My goal is to empower you with the knowledge and confidence to take on this task and many more, inspiring you to embrace a more self-sufficient lifestyle. By the end of this guide, you’ll be equipped with the skills to safely replace a wall outlet and tackle other DIY projects with ease, all while reducing your environmental footprint.
Table of Contents
Guide Overview: What You'll Need
Total Time: 30 minutes to 1 hour
Estimated Cost: $10 – $30
Difficulty Level: Easy
Tools Required
- Voltage Tester (for safety)
- Needle-nose Pliers (for wire handling)
- Screwdriver (flathead and Phillips)
- Wire Strippers (for 14-gauge or 12-gauge wire)
- Utility Knife (with extra blades)
Supplies & Materials
- New Wall Outlet (15-amp or 20-amp, depending on needs)
- Wall Plate (to match existing decor)
- Wire Nuts (for connecting wires)
- Electrical Tape (for insulation and security)
Step-by-Step Instructions
- 1. First, let’s get started by turning off the power to the circuit at the main electrical panel. This is a crucial step to ensure your safety while working with electrical components. Locate the correct circuit breaker or fuse and switch it off. Verify that the power is off using a non-contact voltage tester to avoid any accidental shocks.
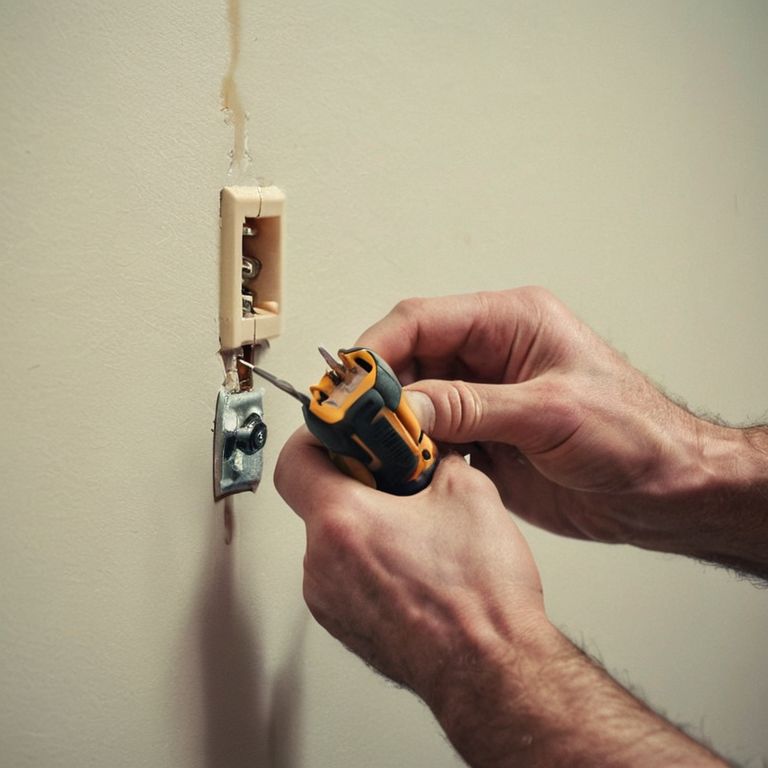
- 2. Next, remove the outlet cover plate to access the outlet. You’ll typically find a small screw holding it in place. Use a screwdriver to remove this screw, and gently pull the cover plate away from the wall. Set the screw and cover plate aside in a safe place where they won’t get lost. Now, you should see the outlet and the wires connected to it. Take a moment to inspect the wires and understand their configuration.
- 3. Carefully pull the outlet out from the wall to get a better view of the wires and the outlet’s clips. You might need to wiggle it a bit to dislodge it from its mounting clips. Once it’s out, you can see how the wires are attached to the outlet. There are usually three or four wires: black (hot), white (neutral), copper (ground), and sometimes a red wire (another hot wire). Take note of which wire is connected to which terminal on the outlet.
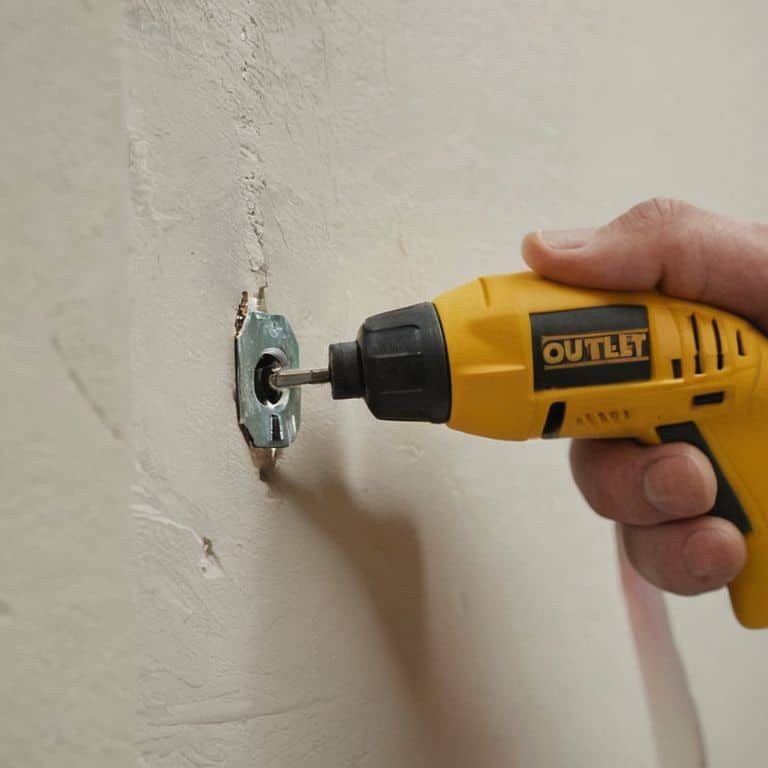
- 4. Now, it’s time to disconnect the wires from the old outlet. Use a needle-nose plier to grip the wire nuts or connectors, and then twist and pull them off the outlet’s terminals. Be gentle to avoid damaging the wires. If the wires are stuck, you can use a wire pulling tool to help loosen them without causing damage. Once all the wires are disconnected, you can remove the old outlet completely.
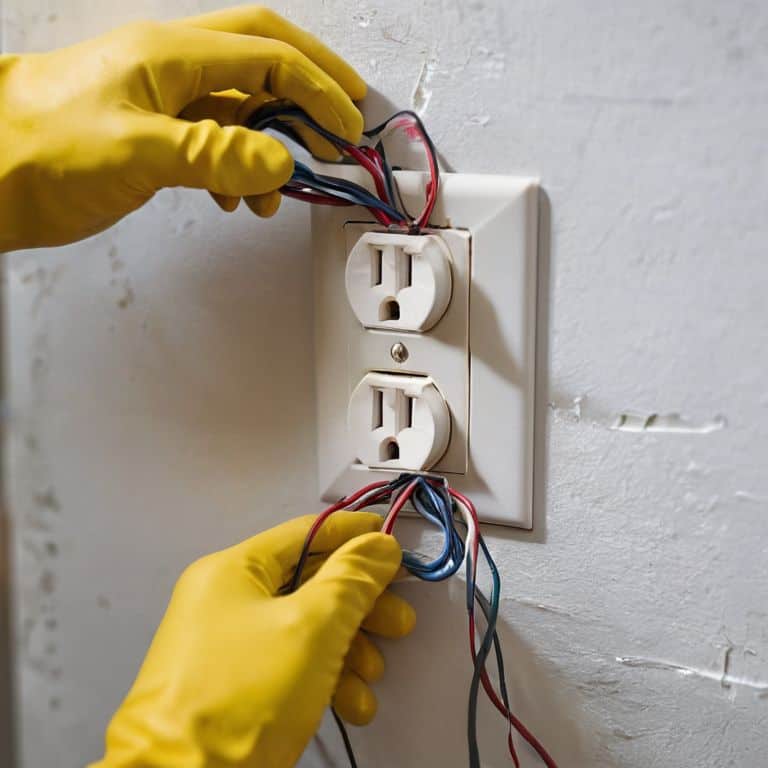
- 5. Before installing the new outlet, take a moment to clean the area around the electrical box. Any dust or debris can interfere with the new outlet’s performance, so use a small brush or a cloth to wipe it clean. Now, take your new outlet and connect the wires to their corresponding terminals. Make sure to match the wire colors to the correct terminals: black to brass, white to silver, and copper to the ground terminal.
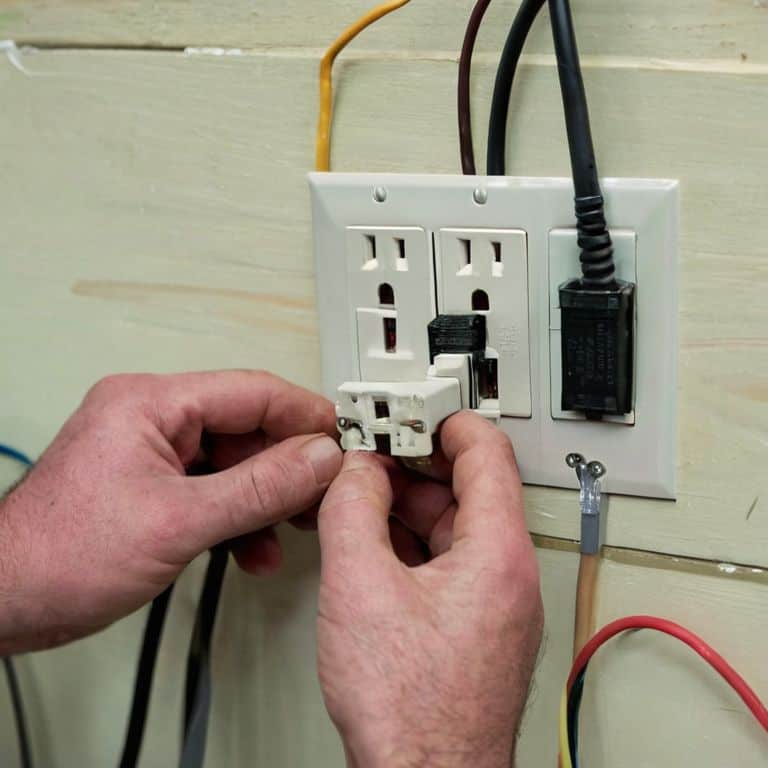
- 6. With all the wires connected, gently push the new outlet back into the wall until it clicks into place with its mounting clips. Make sure it’s secure and even. Replace the outlet cover plate and screw it back into place. Tighten the screw just enough to hold the plate firmly without overtightening.
- 7. Finally, turn the power back on at the main electrical panel and test your new outlet with a voltage tester or by plugging in a small appliance. If everything is working correctly, you should see the appliance turn on or the voltage tester light up. Congratulations, you’ve successfully replaced your wall outlet! Take a moment to inspect your work and ensure everything is safe and functional.
Safely Swapping Outlets
As I always say, safety first is the motto when it comes to any DIY electrical project. When working with outlet wiring diagrams, it’s essential to understand the layout and connections to avoid any potential hazards. I like to think of it as navigating a treasure map, where each symbol and line represents a crucial step in the process. By taking the time to study and comprehend these diagrams, you’ll be well on your way to a successful and safe outlet replacement.
When it comes to replacing outdated outlets, it’s not just about swapping out the old for the new; it’s also about ensuring that your electrical system is up to date and functioning efficiently. This might involve considering a gfci outlet installation guide to provide an added layer of protection against ground faults. As someone who’s passionate about sustainable living, I believe that investing time in understanding and implementing diy electrical safety tips can make all the difference in creating a safer and more self-sufficient home.
In my experience, the key to a seamless outlet replacement lies in the preparation and attention to detail. Before you begin, take a moment to review your electrical panel upgrade options and ensure that your system can handle any additional demands. By doing so, you’ll be able to tackle the project with confidence, knowing that you’ve got a solid foundation to work from. And remember, it’s all about creative problem-solving and finding innovative ways to repurpose and reuse materials, which is at the heart of my approach to sustainable living.
Diy Wiring Diagrams Uncovered
Now that we’ve got the basics covered, let’s dive into the fascinating world of DIY wiring diagrams. I just love how a simple sketch can bring clarity to what might seem like a daunting task. When I’m working on a project, I always start by mapping out my wiring plan – it’s like drawing a treasure map to hidden potential. By creating your own DIY wiring diagrams, you’ll be able to visualize the flow of electricity and make informed decisions about your outlet swap. Plus, it’s a great way to get creative and feel like a true maker.
Gfci Outlet Installation Guide
When it comes to GFCI outlets, the key is to understand their role in preventing electrical shocks. These outlets are designed to interrupt the circuit when they detect even the slightest imbalance in current, making them a must-have in areas like kitchens and bathrooms. To install one, start by turning off the power to the circuit at your main electrical panel – don’t rely on the outlet’s test button for this. Next, remove the old outlet and take note of the wire connections. GFCI outlets usually have designated spots for the hot, neutral, and ground wires, so make sure to match them up correctly.
I like to think of GFCI outlet installation as a fun puzzle, where each wire clicks into place to create a safe and functional whole. With the wires securely connected, screw the new outlet into place and turn the power back on. Finally, test your GFCI outlet using its built-in test button to ensure it’s working as it should.
Spark of Safety: 5 Tips to Illuminate Your Outlet Replacement Journey
- Always switch off the power to the circuit at the main electrical panel before starting work, and verify the outlet is dead using a non-contact voltage tester
- Use a screwdriver with an insulated handle to protect yourself from potential electrical shocks, and consider wearing protective gloves for extra safety
- Take a clear photo of the existing wiring configuration before disassembling the old outlet, to ensure you can accurately replicate the setup with the new one
- Never overload your outlets with too many devices or extensions, as this can cause overheating and increase the risk of electrical fires
- Once you’ve completed the replacement, test the new outlet with a simple device like a lamp or phone charger to ensure it’s working correctly and safely
Key Takeaways for a Successful Outlet Swap
Always turn off the power to the outlet at the main electrical panel before starting the replacement process to ensure your safety
Use a voltage tester to confirm the outlet is de-energized, and consider recruiting a friend to lend a hand for an extra pair of eyes and hands
Remember, with a little patience and the right guidance, you can breathe new life into your walls by safely swapping out old outlets for new ones, and even add some personal flair with creative DIY projects using repurposed materials
A Spark of Wisdom
As we embark on the journey of replacing a wall outlet, remember that safety is not just about following instructions, but about embracing the art of transformation – where every wire and every screw tells a story of resourcefulness and creativity.
Stanley Truman
Embracing the Joy of DIY Electrical Work
As we wrap up our journey on how to safely replace a wall outlet, let’s take a moment to reflect on the key points we’ve covered. From understanding the importance of turning off the power at the circuit breaker to carefully removing the old outlet and installing the new one, each step is crucial for a successful and safe replacement. We’ve also delved into the world of DIY wiring diagrams and explored the specifics of GFCI outlet installation, empowering you with the knowledge to tackle these tasks with confidence. By following these steps and tips, you’ll not only have a functional outlet but also a sense of accomplishment that comes from creating something with your own hands.
As you put your tools away and step back to admire your handiwork, remember that this project is more than just a practical fix – it’s a celebration of self-sufficiency and a step towards a more sustainable lifestyle. So, don’t be afraid to get creative, to experiment, and to push the boundaries of what you thought was possible. The joy of DIY lies not just in the end result, but in the journey itself, where every challenge is an opportunity to learn and every completed project is a testament to your ingenuity and determination.
Frequently Asked Questions
What are the most common mistakes to avoid when replacing a wall outlet to ensure safety and avoid electrical shocks?
Hey friend, when swapping out a wall outlet, beware of common mistakes like not turning off the power, using incorrect wire nuts, or forgetting to secure the outlet box. These oversights can lead to electrical shocks or fires, so double-check your work and take your time – it’s worth the extra caution to ensure a safe and successful upgrade!
How do I know if I need to upgrade to a GFCI outlet, and what are the benefits of doing so?
Hey, friend! So, you’re wondering if you need a GFCI outlet upgrade? If you live in an area prone to moisture or have kids/pets, it’s a great idea! GFCI outlets provide an extra layer of shock protection, giving you peace of mind and added safety in your home.
Can I replace a wall outlet myself if I have no prior electrical experience, or is it recommended to hire a professional electrician?
Absolutely, you can replace a wall outlet yourself, even with no prior electrical experience. With caution and the right guidance, it’s a manageable DIY task. Just remember to turn off the power to the outlet at the main electrical panel and verify it’s off using a voltage tester. If you’re still unsure, consider consulting a professional, but don’t be afraid to give it a try – you might just discover a new skill.


