I still remember the day my grandfather taught me the secret to a showroom shine – a guide to the two-bucket car wash method. It was a sunny Saturday morning in our small Midwestern town, and I was eager to get my hands dirty. He showed me how to mix the perfect blend of soap and water, and how to use two buckets to rinse and wash my bike. I was amazed at how easily the dirt and grime came off, leaving my bike looking like new. From that day on, I was hooked on the two-bucket method, and I’ve been using it to wash my cars and bikes ever since.
As someone who’s spent years tinkering in their garage, I’ve learned that the key to a great wash is not just about the soap or the water, but about the technique. In this article, I’ll share my honest and practical advice on how to use the two-bucket car wash method to get a showroom shine on your vehicle. I’ll walk you through the steps, from preparing the buckets to drying the car, and provide you with tips and tricks to avoid common mistakes. By the end of this guide, you’ll be equipped with the knowledge to make your ride sparkle like new, without breaking the bank or using harsh chemicals.
Table of Contents
- Guide Overview: What You'll Need
- Step-by-Step Instructions
- A Guide to Two Bucket Car Wash
- My Top 5 Tips for a Showroom Shine with the Two-Bucket Car Wash Method
- My Top 3 Takeaways for a Showroom Shine
- The Secret to a Showroom Shine
- Bringing It All Together: A Sparkling Finish
- Frequently Asked Questions
Guide Overview: What You'll Need
Total Time: 1 hour 30 minutes
Estimated Cost: $20 – $40
Difficulty Level: Easy
Tools Required
- Hose with spray nozzle (for rinsing)
- Soft-bristle brush (for cleaning wheels and tires)
- Microfiber towels (for drying)
- Mitt or sponge (for washing the car)
Supplies & Materials
- Mild car wash soap
- Two buckets (one for soapy water and one for clean water)
- Wheel cleaner (optional)
- Tire cleaner (optional)
- Glass cleaner (optional)
- Water (warm water is preferred)
Step-by-Step Instructions
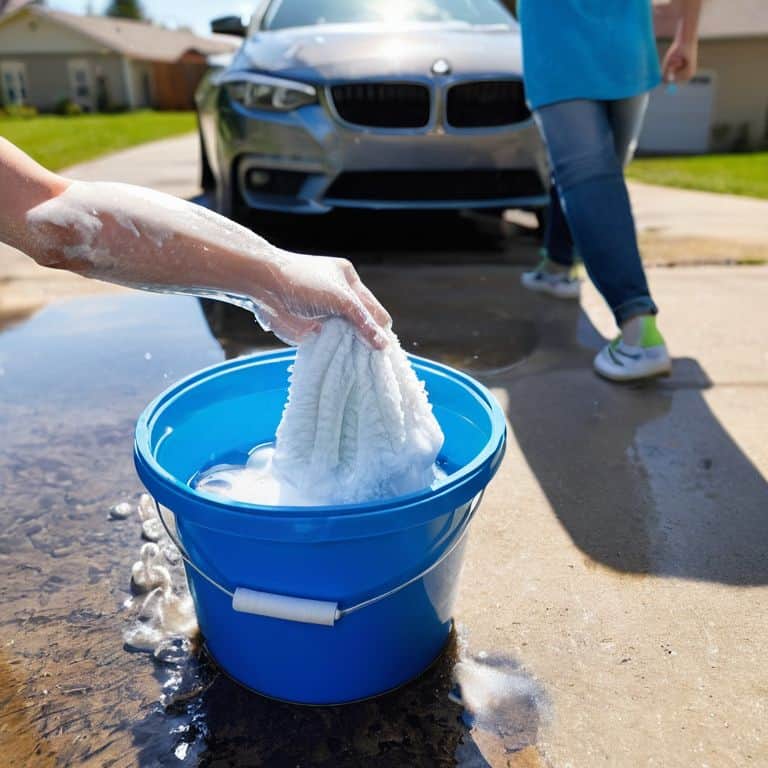
- 1. First, let’s get started by gathering all the necessary tools and supplies, which I like to call my “car wash arsenal”. This includes two large buckets, a soft-bristle brush, a microfiber wash mitt, a hose with a spray nozzle, and a mild car wash soap that’s specifically designed for your vehicle’s finish. I’ve named my trusty buckets “Bertha” and “Betsy,” and I always make sure they’re clean and ready for action.
- 2. Next, rinse your vehicle thoroughly using the hose with a spray nozzle to remove any loose dirt and debris. This is an essential step, as it helps prevent scratches and ensures a smooth washing process. I like to think of it as giving my car a _gentle wake-up call_ before the actual washing begins. Make sure to rinse from the top down, starting with the roof and working your way down to the wheels.
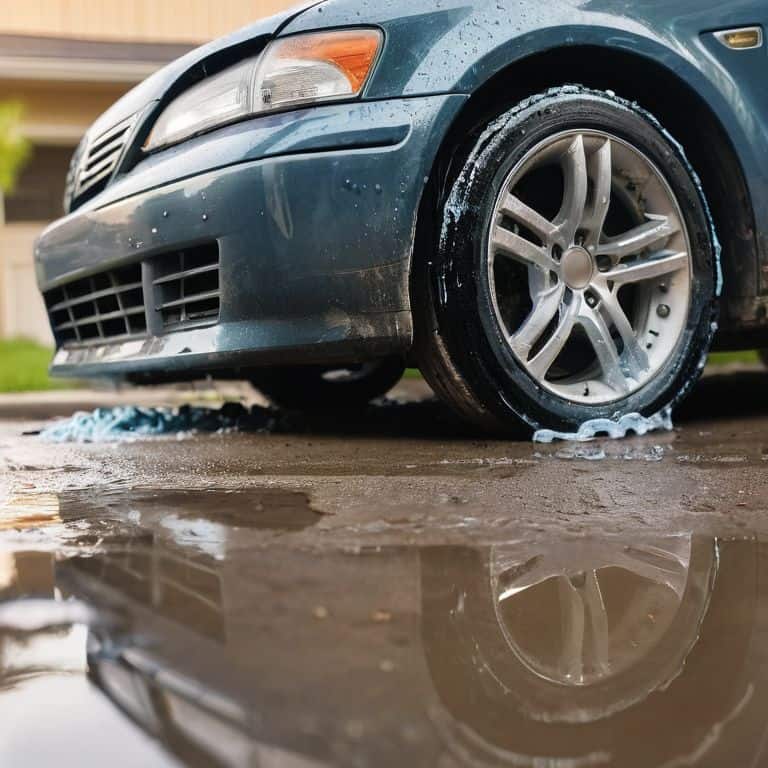
- 3. Now it’s time to fill “Bertha” with warm water and add the recommended amount of car wash soap. I always use a _microfiber wash mitt_ to avoid scratching the paint, and I make sure to dip it into the soapy water and wring it out thoroughly before applying it to the vehicle. Start washing from the top down, working in sections to clean the entire car. Be sure to clean the wheels and tires as well, using a separate, softer brush to avoid damaging the wheels.
- 4. As you wash each section, use “Betsy” to rinse your microfiber wash mitt, making sure to remove any dirt and debris that may have accumulated. This _two-bucket method_ is crucial in preventing dirt and contaminants from being redeposited onto the vehicle, which can cause scratches and swirl marks. I like to think of “Betsy” as my “_cleaning guardian_,” always ready to provide a fresh rinse.
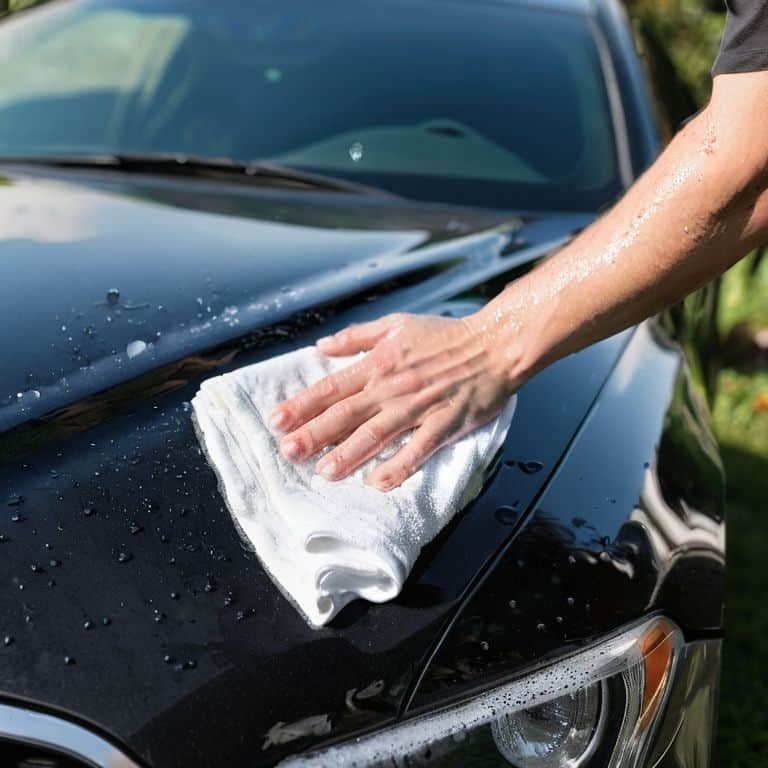
- 5. Once you’ve washed and rinsed the entire vehicle, use a _drying aid_ like a microfiber drying towel or a chamois to gently dry the car, starting from the top and working your way down. This helps prevent water spots from forming and gives your car a sleek, shiny finish. I always make sure to dry my car in a shaded area to prevent water spots from forming.
- 6. To give your car an extra layer of protection and shine, consider applying a _drying detailer_ or a quick detailer spray after washing and drying. This helps to remove any remaining water spots and adds a layer of protection to the paint. I like to think of it as giving my car a “_final flourish_,” making it look like it just rolled out of the showroom.
- 7. Finally, take a step back and admire your handiwork. Your car should now be sparkling clean, with a shiny finish that’s free of dirt, dust, and water spots. I always feel a sense of pride and satisfaction after washing my car using the two-bucket method, knowing that I’ve given it the _best possible care_. And, of course, I make sure to clean and store my trusty buckets, “Bertha” and “Betsy,” until the next wash.
A Guide to Two Bucket Car Wash

As I always say, the key to a showroom shine is in the details. When it comes to drying your car, I swear by microfiber towels – they’re gentle on the paint and leave no streaks or marks. I’ve found that using a microfiber towel to dry your car, especially after a two-bucket wash, makes all the difference in maintaining that perfect finish. It’s also important to use a soft brush for cleaning the car wheels, as harsh materials can damage the rims or tires.
In my experience, using a high-quality car wash soap concentrate can make the washing process much more efficient. However, it’s crucial to follow the instructions and avoid using too much soap, as this can lead to residue and streaks on the paint. I’ve also experimented with the two bucket method vs one bucket, and I can confidently say that the two-bucket method is the way to go – it reduces the risk of contaminating the wash water with dirt and debris.
When it comes to car paint protection during wash, I always recommend being gentle and avoiding any materials that could potentially scratch the surface. For drying car windows without streaks, I use a microfiber cloth and a gentle touch. By following these tips and using the right materials, you’ll be able to achieve a shine that’s worthy of a showroom.
Car Wash Soap for Paint Protection
When it comes to car wash soap for paint protection, I’ve got a few favorites that I swear by. My grandfather used to say, “You can’t have a shiny car without the right soap!” He was right, of course. I look for soaps that are specifically designed to be gentle on the paint while still cutting through dirt and grime. Some of my top picks include soaps with built-in wax or ceramic coatings that help protect the paint from the elements.
I’ve named my soap dispenser “Sudsy” – it’s an old friend that’s been with me through countless car washes. With Sudsy by my side, I can trust that my ride is getting the gentle yet effective clean it needs. Whether I’m washing my daily driver or one of my vintage bicycles, the right car wash soap makes all the difference.
Microfiber Towel Drying Secrets
Now that we’ve covered the two-bucket car wash method, let’s talk about drying your ride. I’m obsessed with microfiber towels – I’ve named mine “The Soft Squad”! When it comes to drying, it’s all about gently blotting the water off the surface. Avoid rubbing or scrubbing, as this can create scratches. My grandfather taught me to use a pat-dry technique, almost like you’re giving your car a gentle hug. This helps prevent water spots and leaves your car looking sleek. By using microfiber towels, you’ll be amazed at how easily water disappears, leaving your car with a showroom shine.
My Top 5 Tips for a Showroom Shine with the Two-Bucket Car Wash Method
- Use a soft-bristle brush to clean wheels and tires before washing the car body to prevent dirt and debris from spreading
- Select a car wash soap that’s specifically designed for your car’s paint type, whether it’s wax-based, ceramic, or matte finish
- Always use two buckets – one for soapy water and the other for clean water – to rinse your microfiber towel and prevent scratching the car’s surface
- Dry your car using a microfiber towel in a blotting motion, rather than rubbing, to prevent water spots and scratches
- Regularly clean and maintain your microfiber towels by washing them in mild detergent and letting them air dry to ensure they remain effective and gentle on your car’s surface
My Top 3 Takeaways for a Showroom Shine
I’ve found that using the two-bucket method with a microfiber towel for drying is a game-changer – it reduces streaks and scratches, giving my ride a showroom shine that turns heads
Choosing the right car wash soap is crucial for paint protection – I always look for pH-balanced and biodegradable options that won’t strip away the wax or damage the clear coat
By following these simple steps and using the right tools, you can transform your garage into a detailing paradise and make your car look like it just rolled off the lot – trust me, I’ve spent years perfecting this method in my own garage!
The Secret to a Showroom Shine
A clean car isn’t just about looks, it’s about love – the two-bucket car wash method is my way of showing my ride some serious TLC, and I’m excited to share that love with you!
John Beeler
Bringing It All Together: A Sparkling Finish
As we wrap up this guide to the two-bucket car wash method, let’s recap the key elements that will make your car shine like new. From the initial rinse to the final dry with a microfiber towel, each step plays a crucial role in achieving a showroom finish. Remember, the right car wash soap and a good microfiber towel are essential for protecting your car’s paint and giving it that extra gleam. By following these simple, yet effective steps, you’ll not only keep your car clean but also maintain its value and appearance over time.
So, the next time you’re in your garage, don’t just see a space for storage – see a playground for creativity. With the two-bucket car wash method under your belt, you’re ready to take on more projects, whether it’s restoring a vintage bicycle like I do, or tackling that engine overhaul you’ve been putting off. The point is, every project starts with a spark of inspiration, and I hope this guide has been that spark for you. Now, go ahead, get dirty, and have fun – your garage is waiting!
Frequently Asked Questions
What are the benefits of using the two-bucket car wash method over other car washing techniques?
The two-bucket method is a game-changer – it prevents scratches, saves water, and gives a showroom shine. I’ve seen it outperform other techniques in my garage, and my granddad swore by it too!
How often should I wash my car using the two-bucket method to maintain its paint and overall condition?
Honestly, I wash my ride every 1-2 weeks, depending on the weather. If it’s been a muddy week, I’ll give it a good two-bucket wash. But if it’s been a dry spell, I might just stick to a quick rinse. My granddad always said, “A clean car’s a happy car,” and I think he was right on the money!
Can I use any type of soap or cleaner with the two-bucket car wash method, or are there specific products that are recommended?
Not all soaps are created equal, my friend! For the two-bucket method, you’ll want a mild car wash soap that’s specifically designed for paint protection. I recommend using a soap that’s pH-balanced and free of harsh chemicals. My go-to is a soap called ‘GlossMaster’ – it’s gentle on the paint and leaves a brilliant shine.


