I still remember the day my grandfather’s old truck broke down on the side of the road due to faulty brakes. It was a hard lesson in the importance of a guide to brake maintenance. As a seasoned automotive technician, I’ve seen my fair share of brake-related issues, and I’m here to tell you that it’s not as complicated as it seems. In fact, with the right knowledge and tools, you can keep your brakes in top shape and avoid those frustrating breakdowns.
In this article, I’ll share my hands-on experience and provide you with practical tips on how to maintain your brakes. You’ll learn how to identify common issues, replace worn-out parts, and even troubleshoot problems like a pro. My goal is to empower you with the knowledge and confidence to take control of your vehicle’s maintenance, and I promise that by the end of this guide, you’ll be well on your way to becoming a brake maintenance expert. So, let’s get started and unlock the secrets of a guide to brake maintenance together!
Table of Contents
Guide Overview: What You'll Need
Total Time: 2 hours 30 minutes
Estimated Cost: $50 – $100
Difficulty Level: Intermediate
Tools Required
- C-clamp for bleeding the brake system
- Tire pressure gauge for checking tire pressure
- Socket set with 3/8 inch and 1/2 inch sockets
- Pliers for gripping small parts
- Wrench set with adjustable wrench
Supplies & Materials
- Brake fluid compatible with vehicle’s brake system
- Brake pads if replacement is necessary
- Rotors if replacement is necessary
- Brake cleaner for cleaning brake components
- New brake hoses if inspection reveals damage or wear
Step-by-Step Instructions
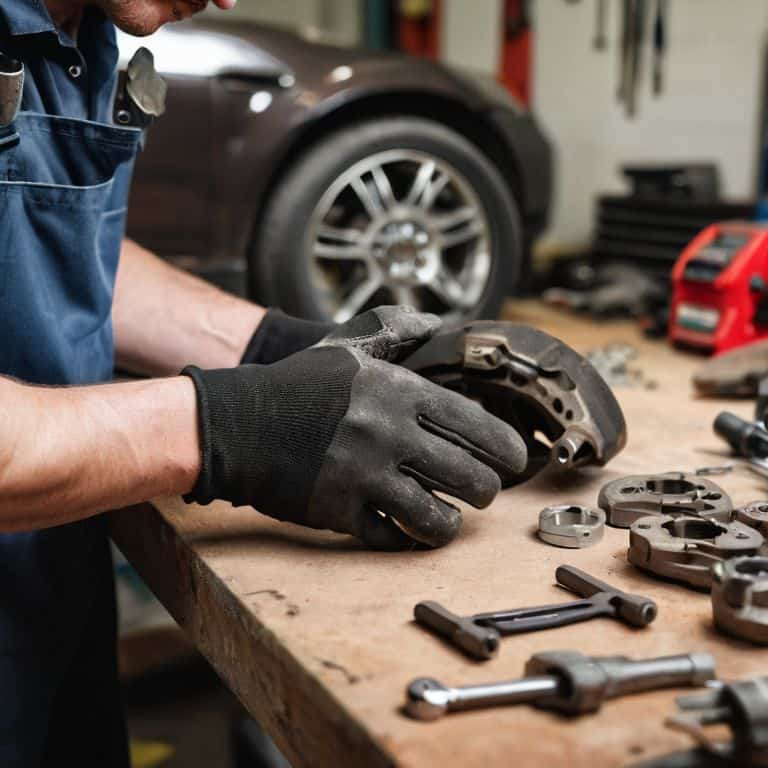
- 1. First, let’s get started by gathering our tools – you’ll need a lug wrench, a C-clamp, and a few other basics to get the job done. I like to keep all my tools organized and named, just like my grandfather taught me – it makes the process a whole lot smoother. For this project, I’ll be using my trusty “Bertha” (that’s what I call my lug wrench) to loosen those wheels.
- 2. Next, we need to raise the vehicle and remove the wheels to get access to the brake pads. Now, I know some folks might be thinking, “John, this is a lot of work just to check the brakes,” but trust me, it’s worth it to ensure your safety on the road. Make sure you’ve got a good set of jack stands and a hydraulic jack to make this process easier and safer.
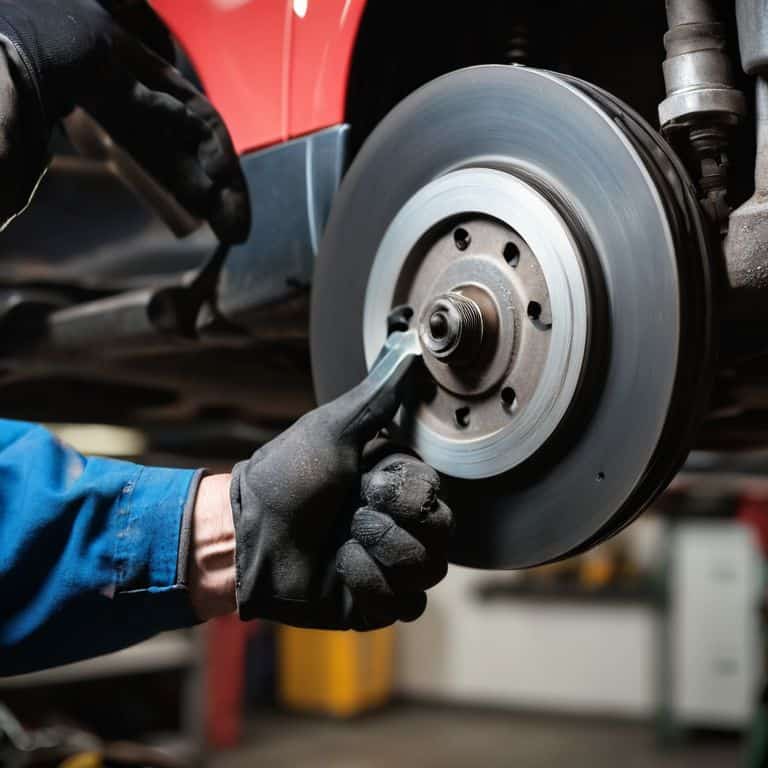
- 3. Now that we’ve got the wheels off, it’s time to inspect the brake pads. Take a closer look at the friction material and check for any wear or damage. If they’re worn down to less than 1/8 of an inch, it’s time to replace them. Don’t worry if you’re not sure – just take your time and refer to your vehicle’s manual for guidance.
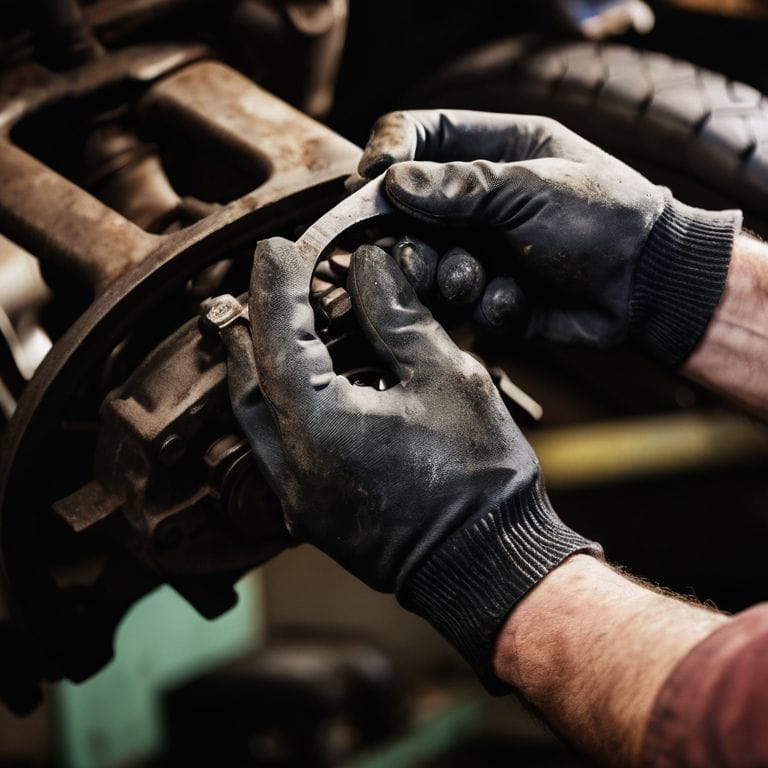
- 4. With the old brake pads removed, it’s time to clean the brake caliper and get everything ready for the new pads. Use a wire brush to scrub away any corrosion or debris, and then give it a good wipe down with some brake cleaner. I like to use my “Sparky” (that’s my trusty wire brush) to get the job done.
- 5. Next, we need to install the new brake pads. Make sure they’re properly seated and aligned, and then use your C-clamp to press them into place. Don’t overtighten – you don’t want to damage the caliper or the new pads. Take your time and double-check your work to ensure everything is secure.
- 6. With the new brake pads in place, it’s time to reassemble everything and get your vehicle back on the road. Put the wheels back on, tighten the lug nuts in a star pattern, and then lower the vehicle to the ground. Don’t forget to test the brakes before you head out – you want to make sure everything is working smoothly and safely.
- 7. Finally, take some time to record your maintenance and keep track of when you last checked your brakes. This will help you stay on top of things and ensure you’re always running safely and efficiently. I like to keep a little notebook in my garage, where I jot down notes and reminders for all my projects – it’s a great way to stay organized and inspired.
A Guide to Brake Maintenance
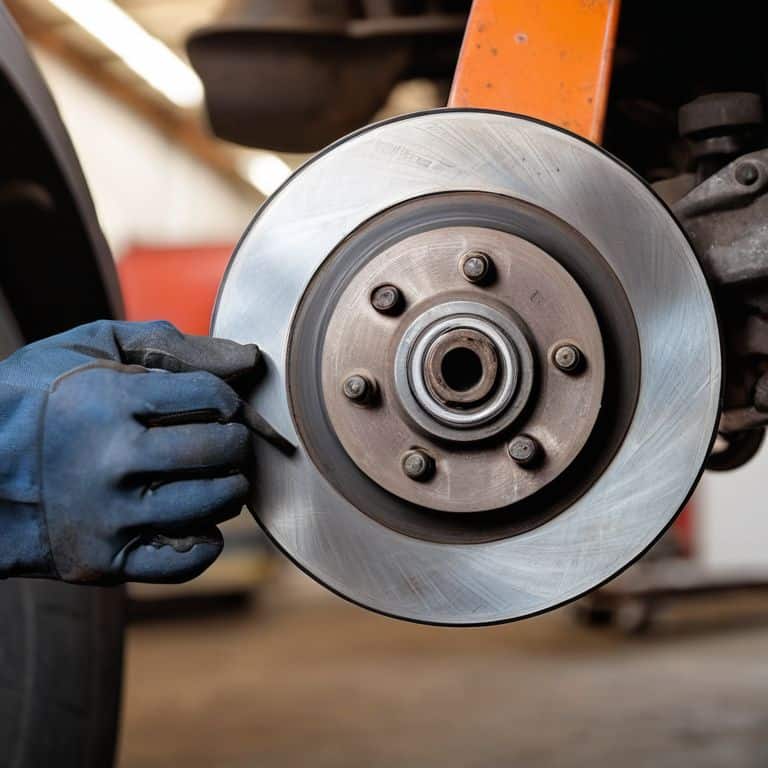
As I always say, a well-maintained brake system is the backbone of any vehicle’s safety. When it comes to common brake problems, I’ve seen my fair share of worn-out brake pads and warped rotors. To avoid these issues, it’s essential to regularly inspect your brake rotors for any signs of wear or damage. A simple visual inspection can go a long way in preventing more severe problems down the road.
When replacing brake pads, it’s crucial to consider the brake pad replacement cost. While it may seem like a significant expense, it’s a small price to pay for the safety and peace of mind that comes with knowing your brakes are in top shape. Additionally, using the right brake fluid types and uses can make all the difference in your vehicle’s braking performance. I always recommend consulting your vehicle’s manual to determine the best type of brake fluid for your specific make and model.
To ensure your brakes are functioning properly, it’s vital to be aware of the symptoms of worn brake pads, such as squealing or grinding noises when applying the brakes. By catching these issues early on, you can avoid more costly repairs and keep your vehicle running smoothly. Whether you’re a seasoned mechanic or a DIY enthusiast, taking the time to inspect and maintain your brake system can make all the difference in your safety on the road.
Brake Pad Replacement Cost
When it comes to replacing brake pads, the cost can vary depending on the type of vehicle and the quality of the pads. On average, you’re looking at anywhere from $50 to $150 per axle, including labor. Now, I know what you’re thinking – that’s a pretty wide range. But trust me, it’s worth doing it right. I’ve seen folks try to cut corners with cheap pads, only to end up paying more in the long run.
My trusty sidekick, “Pliers,” always reminds me to consider the long-term benefits of using high-quality brake pads. Not only will they last longer, but they’ll also provide better stopping power and reduce wear on your rotors. So, when you’re calculating the cost, be sure to factor in the potential savings down the road.
Solving Common Brake Problems
Solving Common Brake Problems
Now that we’ve covered the basics of brake maintenance, let’s dive into some common issues that might arise. I’ve seen my fair share of squeaky brakes and worn-out pads in my garage, and I’m excited to share some tips on how to tackle these problems. From uneven wear to brake fluid leaks, we’ll explore the most common culprits and how to fix them with ease.
I recall a particularly stubborn brake job on my grandfather’s old Chevy – it took us hours to diagnose the issue, but with the right tools and a bit of patience, we got it running smoothly again. That’s the kind of know-how I want to pass on to you, so you can confidently tackle any brake problem that comes your way in your own garage haven.
Brake Maintenance Mastery: 5 Tips to Keep You Rolling
- Check your brake pads regularly, just like I check the chain on my vintage bicycle – a quick glance can save you from a world of trouble down the road
- Keep your brake fluid fresh, and don’t be afraid to get a little messy – after all, that’s what the garage is for, right?
- Don’t neglect your brake rotors – a little rust or warping can lead to big problems, so grab my trusty ‘Rusty’ wire brush and get to work
- Listen to your brakes – if they’re squealing or grinding, it’s time to take a closer look and possibly replace some parts, like my ‘Squeaky’ brake pads
- Finally, don’t be a stranger to your garage – get in there and get your hands dirty, just like my grandfather taught me, and you’ll be a brake maintenance master in no time, with tools like ‘Tighty’ the torque wrench by your side
Brake Maintenance Essentials: 3 Key Takeaways
My grandfather used to say, ‘A well-maintained brake system is like a well-oiled machine – it’s the backbone of your vehicle’s safety and performance, so keep those brake pads and rotors in top shape!
Remember, folks, solving common brake problems is all about being proactive, whether it’s addressing squeaky brakes or knowing when to replace your brake fluid – stay on top of it and you’ll be riding smooth in no time, just like my restored vintage bicycle!
Lastly, don’t let brake pad replacement costs break the bank – with the right tools, like my trusty ‘Bertha’ brake pad spreader, and a bit of DIY know-how, you can keep your hard-earned cash in your pocket and your vehicle running safely and efficiently, that’s the garage spirit!
Braking Point Wisdom
A well-maintained brake system is more than just a safety net, it’s a promise to yourself and your loved ones that you’ll always arrive at your destination with a story to tell, not a worry to share.
John Beeler
Braking Point: Conclusion and Call to Action
As we conclude this journey through the world of brake maintenance, it’s essential to remember the basics: regular checks, timely replacements, and a clean environment for your brake system. We’ve covered the step-by-step guide to maintaining your brakes, solved common problems, and even dived into the costs associated with brake pad replacements. By following these guidelines, you’ll not only ensure your safety on the road but also prolong the life of your vehicle. Whether you’re a seasoned mechanic or a DIY enthusiast, taking care of your brakes is a crucial part of being a responsible car owner.
As you put down your tools and step back to admire your handiwork, remember that every garage is a playground. It’s where ideas are born, and innovations happen. So, don’t just see brake maintenance as a chore, but as an opportunity to get creative and connect with your vehicle on a deeper level. Whether I’m restoring a vintage bicycle or naming every tool in my collection, I find joy in the process. I hope this guide has inspired you to do the same, and I look forward to seeing what masterpieces you’ll create in your own garage haven.
Frequently Asked Questions
What are the most common signs that my brake pads need to be replaced?
Time to listen to your ride! Common signs your brake pads are begging for a swap include squealing or grinding noises, a spongy brake pedal, or vibrations when you press down. My trusty sidekick, ‘Squeaky’ the air compressor, always reminds me to keep an ear out for these warnings. Catch them early and you’ll be back to smooth stops in no time!
How often should I have my brakes inspected to ensure they're in good working condition?
For peace of mind, I recommend inspecting your brakes every 10,000 to 15,000 miles. Think of it like checking the chain on my vintage bicycle – you want to catch any issues before they become major problems. Trust me, a little preventative maintenance can save you from a world of trouble down the road!
Can I replace my brake pads myself or do I need to take my vehicle to a professional mechanic?
Replacing brake pads yourself is definitely doable with the right tools and a bit of know-how. I did it with my trusty sidekick, “Bertha the wrench,” and some patience. Just make sure to consult your vehicle’s manual and take necessary safety precautions. If you’re not comfortable, don’t hesitate to visit a pro – safety first, my friend!


