I still remember the first time I tried to make a simple box joint – I was attempting to build a wooden planter for my grandmother’s garden, and I ended up with a wonky, crumbling mess. It was a frustrating experience, but it taught me that mastering the basics is key to creating something truly beautiful. As someone who’s passionate about sustainable living and DIY projects, I’ve learned that how to make a simple box joint is not just about following a set of instructions, but about understanding the art of working with wood and the joy of creating something with your own hands.
In this article, I’ll share my personal tips and tricks for making a simple box joint that will make your DIY projects stand out. You’ll learn how to choose the right materials, prepare your tools, and assemble the joint with ease. I’ll also cover some common mistakes to avoid and provide practical advice on how to troubleshoot any issues that may arise. By the end of this guide, you’ll be equipped with the knowledge and confidence to create your own stunning wooden creations, from planters to furniture, using the simple yet versatile box joint technique.
Table of Contents
Guide Overview: What You'll Need
Total Time: 1 hour 45 minutes
Estimated Cost: $20 – $40
Difficulty Level: Intermediate
Tools Required
- Table saw (for precise cuts)
- Miter saw (optional for angled cuts)
- Hand saw or backsaw (for fine tuning)
- Clamps (for holding pieces in place)
- Marking gauge (for accurate measurements)
- Sandpaper (for smoothing out the joint)
Supplies & Materials
- 1/2 inch thick wood (for the box pieces)
- Wood glue
- 2 inches wide wood (for the box top and bottom)
- 1 1/4 inches wood screws (for assembly)
- Wood filler (optional for filling gaps)
Step-by-Step Instructions
- 1. First, let’s gather our materials, which include a piece of scrap wood for the joint, a table saw or handheld saw for cutting, a drill press or hand drill for making precise holes, and some sandpaper for smoothing out the edges. I like to think of this step as a treasure hunt, where I get to rummage through my workshop and find the perfect pieces to bring my project to life.
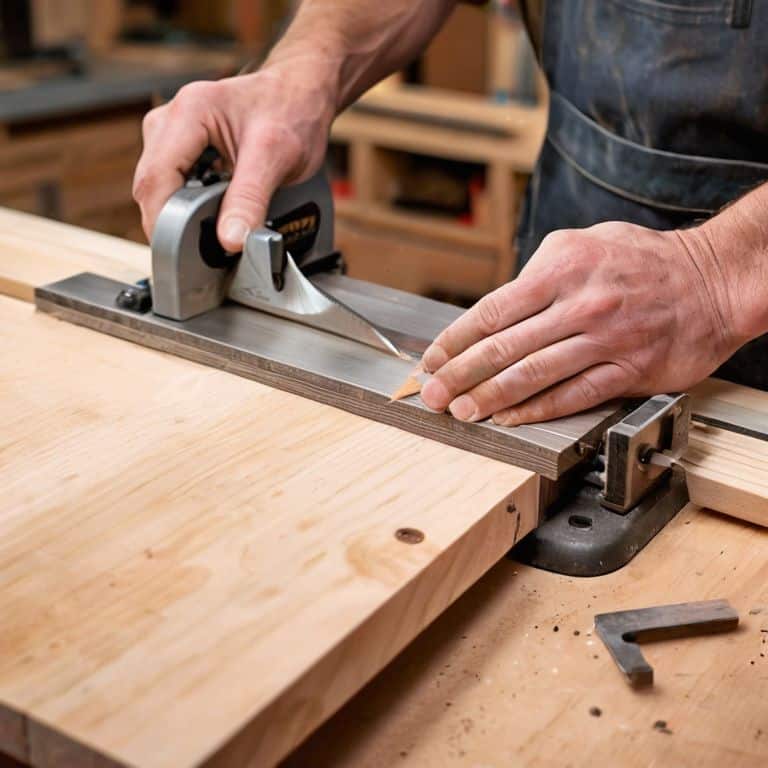
- 2. Next, we need to prepare our wood by cutting it into the required pieces for the box joint. This involves measuring and marking the wood carefully, taking into account the size and design of the joint we want to create. I always double-check my measurements, as accuracy is key when it comes to making a sturdy and functional joint.
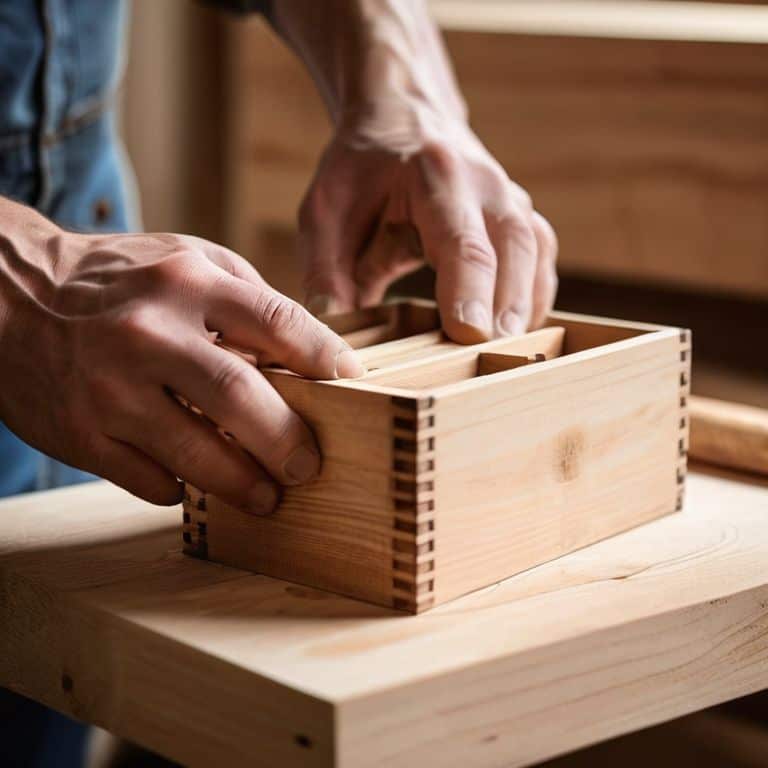
- 3. Now, let’s move on to creating the joint itself. This involves cutting a series of interlocking fingers on the ends of the two pieces of wood that will form the joint. I use a combination of my table saw and handheld saw to make these cuts, taking care to ensure that the fingers are evenly spaced and precisely cut.
- 4. With our fingers cut, it’s time to assemble the joint. This involves carefully aligning the fingers and pressing the two pieces of wood together. I like to use a bit of wood glue to hold everything in place, and then use clamps to apply even pressure and ensure a strong bond.
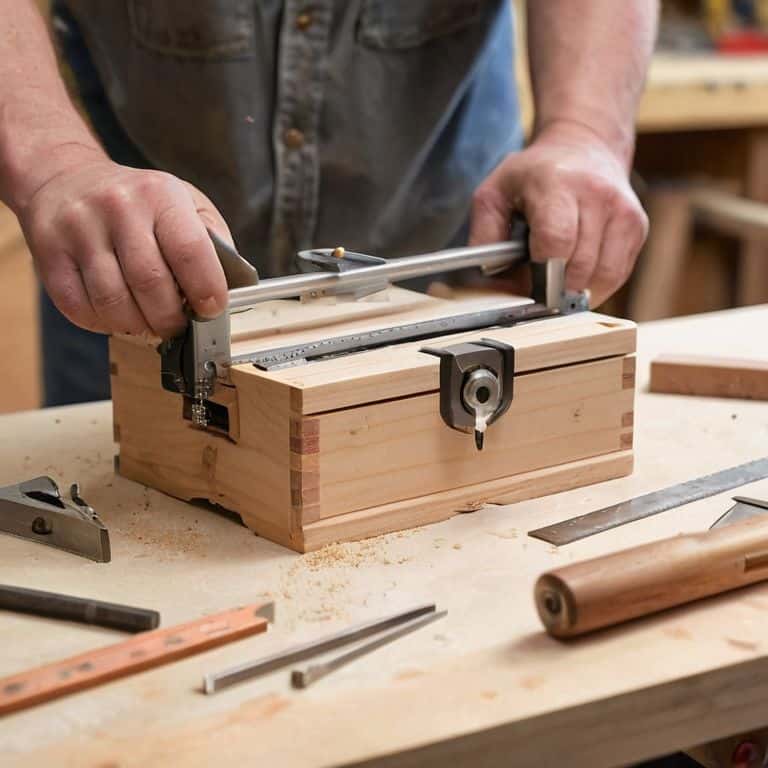
- 5. Once the glue has dried, we can add some reinforcement to the joint to make it even stronger. This can be done by drilling a series of small holes and inserting wooden dowels or screws. I find that this step really helps to add some extra stability to the joint, and gives me peace of mind when it comes to withstanding everyday wear and tear.
- 6. Now that our joint is assembled and reinforced, it’s time to sand it down and smooth out any rough edges. I use a combination of coarse and fine grit sandpaper to get the job done, working my way up to a high shine. This step is all about attention to detail, and really helps to bring out the natural beauty of the wood.
- 7. Finally, let’s add a finish to our box joint to protect it from the elements and give it a nice sheen. I like to use a natural oil or wax, as these allow the wood to breathe and don’t contain any harsh chemicals. This step is all about adding a bit of personality to our project, and really makes the joint stand out as a unique and handmade piece.
Crafting Simple Box Joints
As I delve into the world of box joint jig plans, I’ve discovered that the key to a successful project lies in the details. Precision cutting is essential to ensure a snug fit between the joints. When using a table saw, it’s crucial to employ table saw box joint techniques that minimize tear-out and maximize accuracy. By doing so, you’ll be able to create strong and durable joints that will withstand the test of time.
In my experience, a well-crafted box joint can be just as sturdy as a dovetail joint, but with a more straightforward design. When exploring simple box joint design patterns, consider the type of wood you’re working with and the intended use of the final product. For instance, a box joint with a slightly tighter fit might be more suitable for a piece of furniture that will bear heavy loads. By understanding the strengths and weaknesses of different joint types, you can make informed decisions about your project.
To take your box joint game to the next level, experiment with different router table box joint setup configurations. This will allow you to achieve a variety of looks and feels, from rustic to refined. By mastering the art of box joints, you’ll be able to create beautiful and functional pieces that showcase your craftsmanship and attention to detail. Remember, woodworking joint strength comparison is not just about creating strong joints, but also about creating visually appealing ones that enhance the overall aesthetic of your project.
Box Joint Jig Plans for Beginners
As we dive deeper into crafting simple box joints, let’s talk about creating a box joint jig – a game-changer for beginners. I love repurposing old materials to make new tools, and a jig is no exception. You can use scrap wood or even an old picture frame to create a custom fit for your box joints. The key is to ensure it’s sturdy and easy to use, allowing you to focus on the fun part – creating!
For a beginner-friendly design, consider using a simple L-shaped jig. You can attach it to your workbench or use clamps to hold it in place. This will give you a solid foundation to practice making box joints without worrying about the jig moving around. Plus, it’s a great way to get creative with materials you might otherwise throw away, which is right up my alley as an urban forager and crafty DIY enthusiast.
Router Table Setup for Strong Joints
To create strong joints, setting up your router table is key. I like to think of it as the foundation of a sturdy treehouse – it’s where the magic begins. Choose a robust router bit, like a 1/2″ or 1/4″ straight bit, and ensure it’s properly secured. A sturdy fence and a smooth, even surface are also essential for precise cuts.
As you set up, consider the type of wood you’re working with and adjust your router table accordingly. For example, if you’re using reclaimed wood, you may need to account for any irregularities in the material. With your table setup and ready to go, you’ll be well on your way to crafting simple box joints that will make your projects shine.
Joint Ventures: 5 Tips to Master the Simple Box Joint
- Start with the right wood: Choose scraps that are straight-grained and have a similar density, so your box joint lies flat and strong
- Measure twice, cut once: Double-check your cuts to ensure a precise fit, and don’t be afraid to use a little sandpaper to fine-tune
- Get a grip on your jig: Whether you’re using a homemade or store-bought jig, make sure it’s clamped down securely to prevent any wobbling or misalignment
- Don’t over-tighten: Leave a little wiggle room for the joint to breathe, or you might end up with a box that’s more like a puzzle piece
- Practice makes perfect: Don’t be discouraged if your first few attempts at a simple box joint don’t turn out exactly as planned – it’s all part of the process, and you’ll get the hang of it in no time
Key Takeaways for Crafting Simple Box Joints
Embracing the art of upcycling, you can create simple box joints using scraps of wood and basic tools, reducing waste and fostering creativity in your DIY projects
By following the step-by-step guide and utilizing tools like box joint jigs and router tables, you can ensure strong and precise joints that elevate your woodworking skills
Remember, the essence of sustainable living lies in repurposing and reimagining, so don’t be afraid to experiment and turn everyday items into unique components of your DIY endeavors, just like I do with my urban foraging finds
The Heart of Crafting
The beauty of a simple box joint lies not just in its functionality, but in the story it tells of transformation – of taking the discarded and the ordinary, and with a little creativity and some skilled hands, turning it into something truly extraordinary.
Stanley Truman
Embracing the Joy of Simple Box Joints
As we wrap up our journey into the world of simple box joints, let’s take a moment to reflect on what we’ve accomplished. We’ve learned how to transform scraps into functional pieces, explored the basics of box joint jigs and router table setups, and discovered the satisfaction of crafting something with our own hands. Whether you’re a seasoned woodworker or a beginner, the process of making a simple box joint is a testament to the power of creativity and self-sufficiency. By embracing this DIY approach, we not only reduce waste but also cultivate a deeper connection with the materials and tools we use.
As you move forward, remember that the art of making a simple box joint is just the beginning. It’s a gateway to a world of inventive possibilities, where every discarded object holds potential for new life. So, don’t be afraid to experiment, to try new things, and to push the boundaries of what’s possible. With every project, you’ll become more confident in your ability to create, to adapt, and to thrive in a world that increasingly values sustainability and creativity. Keep making, keep experimenting, and most importantly, keep inspiring others to do the same.
Frequently Asked Questions
What type of wood is best suited for creating a simple box joint?
For a simple box joint, I recommend using durable, versatile woods like oak, maple, or cherry. These hardwoods offer a great balance of strength and workability, making them perfect for DIY projects. You can also experiment with reclaimed or repurposed wood to add a touch of character to your creation!
How do I ensure accurate and precise cuts when making a box joint?
To ensure accurate cuts, I swear by my trusty homemade jig made from an old CD and some scrap wood – it’s a game-changer for precise box joints. Simply attach it to your table saw or router, and you’ll be making perfect cuts in no time. Give it a try, and you’ll see what I mean!
Can I use a handheld saw or do I need a table saw to make a simple box joint?
Absolutely, you can make a simple box joint without a table saw. I’ve done it myself with a handheld saw, and it’s totally doable. Just be prepared for a bit more elbow grease and patience. If you’re new to woodworking, consider starting with a handheld saw to get a feel for the process before investing in a table saw.


