I still remember the day my grandfather handed me a worn-out pegboard in our small garage and said, “John, a guide to organizing your tools on a pegboard is not just about hanging them up, it’s about creating a system.” I was fascinated by how he could find any tool in a matter of seconds, thanks to his meticulous organization. As I grew older, I realized that this skill was not just limited to our garage, but it was a game-changer for any workspace. I’ve seen many people struggle with cluttered garages and toolboxes, which is why I want to share my knowledge on creating an efficient pegboard system.
In this article, I’ll provide you with practical tips on how to turn your pegboard into a garage playground. You’ll learn how to categorize your tools, assign a home for each one, and maintain your newly organized space. My goal is to help you create a system that works for you, not against you. By the end of this guide, you’ll be able to maximize your garage’s potential and make the most out of your tools. So, let’s get started and turn your garage into a haven of creativity and innovation, one pegboard at a time.
Table of Contents
Guide Overview: What You'll Need
Total Time: 1 hour 30 minutes
Estimated Cost: $20 – $40
Difficulty Level: Easy
Tools Required
- Drill (with screwdriver and drill bits)
- Level (for ensuring pegboard is straight)
- Measuring Tape (for measuring wall and tools)
- Pencil (for marking pegboard and wall)
- Wrench (for tightening pegs)
Supplies & Materials
- Pegboard (available in various sizes, e.g., 2 feet x 4 feet)
- Pegs (assorted sizes, e.g., 1 inch, 2 inches, 3 inches)
- Wall Anchors (for securing pegboard to wall, e.g., 1/2 inch or 1 inch)
- Screws (for attaching pegs to pegboard, e.g., 1/2 inch or 1 inch)
- Tool Hooks (optional, for hanging tools like hammers or saws)
Step-by-Step Instructions
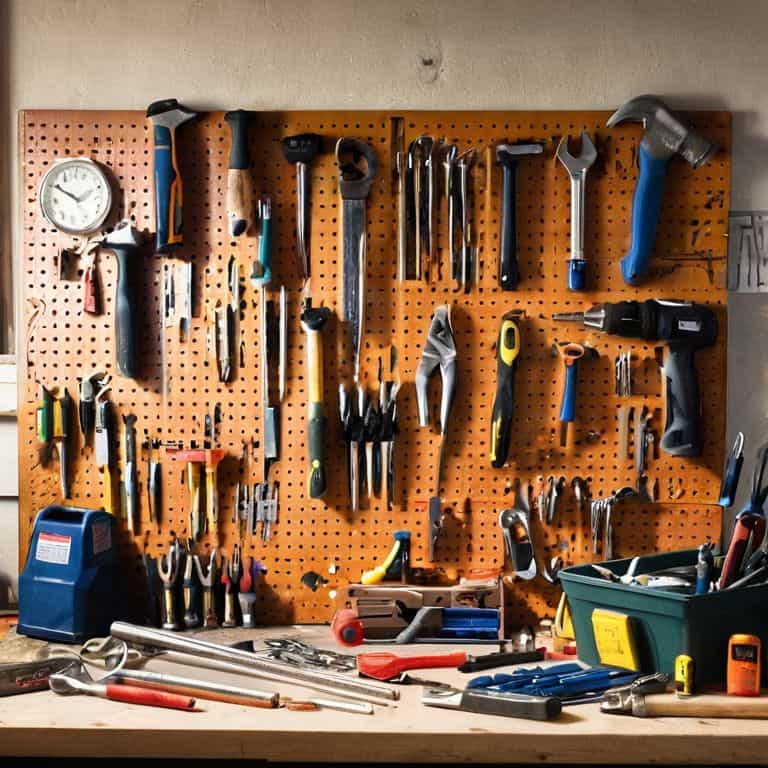
- 1. First, let’s get familiar with our pegboard and tools. Take everything off the pegboard and sort your tools into categories, like wrenches, pliers, and screwdrivers. This will give you a good idea of what you have and what you need to store. I like to think of it as a treasure hunt, discovering old friends like my trusty socket set.
- 2. Next, give your pegboard a good cleaning. Dust and dirt can build up quickly, making it harder for your tools to hang properly. Use a mixture of soap and water, and scrub it down with a soft brush. My grandfather used to say, “A clean workspace is a happy workspace,” and I couldn’t agree more. Now, take a step back and admire your clean pegboard – it’s a blank canvas waiting for your tools.
- 3. Now it’s time to plan your pegboard layout. Think about the tools you use most frequently and group them together. You’ll want to place your most-used tools at eye level for easy access. Less frequently used tools can be stored higher or lower on the pegboard. I like to use a piece of graph paper to sketch out my design before I start hanging tools.
- 4. Start hanging your tools, beginning with the ones you use most often. Use a mix of hook types to maximize your space. For example, you can use a double hook for hanging two tools, like a hammer and a tape measure, together. Don’t be afraid to experiment and move things around until it feels just right.
- 5. As you’re hanging your tools, make sure to leave some space between each one. You don’t want your pegboard to look like a jumbled mess. Leave about an inch or two between each tool to make it easy to grab what you need without having to navigate a crowded board. My grandfather taught me that a well-organized pegboard is a thing of beauty.
- 6. Once you have all your tools hung, take a step back and admire your handiwork. Make any necessary adjustments to your layout, and then start labeling your tools. I like to use a label maker to identify each tool, so I can quickly find what I need. This is also a great opportunity to name your tools, like I do – my favorite wrench is named “Bertha.
- 7. Finally, take some time to maintain your pegboard. Set aside a few minutes each week to tidy up and make sure everything is still in its place. This will help keep your pegboard organized and ensure that your tools are always easy to find. I like to think of it as a way to show my tools some love and respect, just like I do with my vintage bicycles.
Pegboard Paradise Found
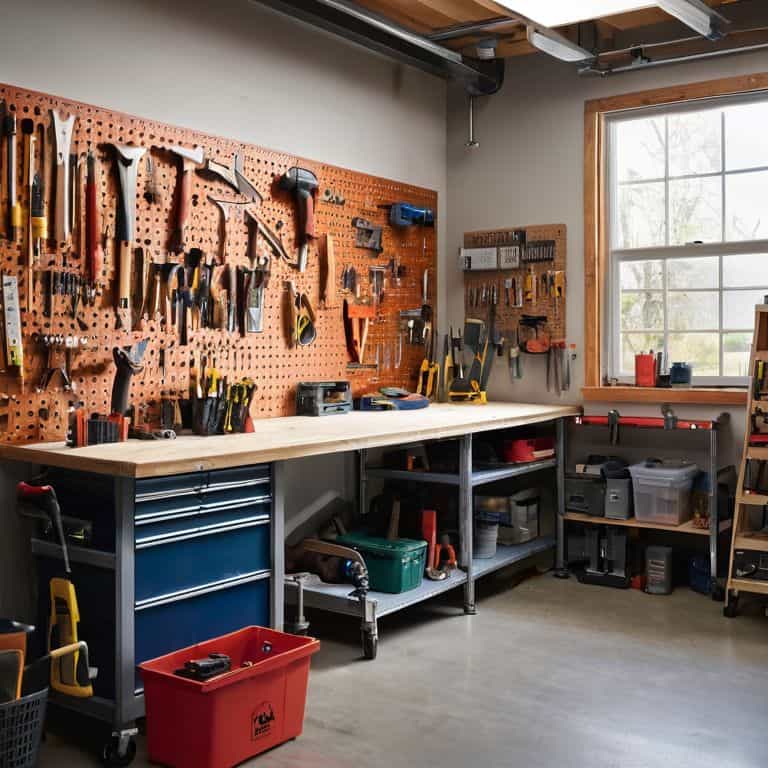
Now that we’ve got our tools in order, it’s time to think about the overall workshop layout. I like to consider my pegboard as the centerpiece of my garage, with all my other tools and equipment arranged around it in a way that makes sense for my workflow. This means placing my most frequently used tools in easy-to-reach locations, and grouping similar tools together to reduce clutter.
As I’ve experimented with different custom pegboard designs over the years, I’ve learned that it’s all about finding a balance between form and function. My grandfather used to say that a well-organized pegboard is like a well-oiled machine – it’s all about creating a system that works for you, not against you. One thing that’s really helped me achieve this balance is creating a pegboard hook selection guide to ensure I’m using the right hooks for each tool.
In my experience, optimizing garage storage space is all about making the most of the space you have. By installing my pegboard in a strategic location, I’ve been able to free up floor space and create a more efficient workflow. Whether you’re a professional mechanic or just a hobbyist like me, having a well-organized pegboard can make all the difference in your productivity and overall satisfaction with your workshop.
Custom Designs for Tool Enthusiasts
Now that we’ve reached pegboard paradise, let’s talk about taking it to the next level with custom designs. As someone who’s named every tool in my garage – yes, even Bertha the blowtorch and Sammy the socket wrench – I can tell you that a personalized pegboard is the ultimate haven for tool enthusiasts. Imagine having a dedicated spot for your favorite wrench, or a custom holder for your prized possession, a vintage bike wheel.
I’ve seen folks get creative with 3D-printed hooks, magnetic strips, and even handmade wooden holders. The possibilities are endless, and it’s a great way to add some personality to your garage. Whether you’re a seasoned mechanic or a DIY newbie, a custom pegboard design can make all the difference in your workflow and overall garage experience.
Hook Selection Guide for Pros
When it comes to hook selection, I’ve got a few favorites that I just can’t get enough of. My trusty “Bertha” – a sturdy 5-inch hook – is perfect for hanging heavy tools like my vintage bicycle repair stand. And for smaller items like pliers and wrenches, I swear by my “Little Legends” – a set of compact hooks that keep everything tidy and within reach.
I’ve also got a soft spot for adjustable hooks, which I’ve lovingly dubbed “The Chameleons”. These versatile hooks can accommodate tools of all shapes and sizes, making them a must-have for any pegboard. With the right hooks, you’ll be well on your way to creating a pegboard paradise that’s tailored to your unique needs and style.
Pegboard Perfection: 5 Tips to Get You There

- Start by purging your tool collection – get rid of anything rusty, broken, or just plain useless, and make room for the good stuff
- Use a mix of short and long hooks to create a visually appealing and functional pegboard layout, just like I do in my own garage
- Assign a ‘home’ for each tool, and make sure it’s within easy reach – my granddad always said, ‘a place for everything, and everything in its place’
- Consider adding a few baskets or bins to your pegboard for storing small parts, screws, or other miscellaneous items that tend to get lost
- Take it to the next level by labeling each hook and bin – I like to use a label maker, and even give my tools fun names, like ‘Bertha’ for my trusty socket wrench
Key Takeaways for a Pegboard Paradise
By organizing your tools on a pegboard, you can transform your garage into a haven of creativity and efficiency, just like my granddad’s workshop back in the day
Customizing your pegboard with the right hooks and designs can make all the difference in keeping your tools within easy reach and your workspace clutter-free – it’s all about finding that perfect balance
Whether you’re a seasoned pro or a DIY newbie, having a well-organized pegboard is the first step to unlocking your full potential in the garage, and I’m excited to see what projects you’ll tackle next
Words of Wisdom
A well-organized pegboard is more than just a pretty face – it’s the backbone of a garage that’s ready for anything, where every tool has a name and a story, just like my trusty sidekick, a wrench I’ve lovingly dubbed ‘Betsy’
John Beeler
Wrapping Up Your Pegboard Paradise
As we’ve covered in this guide, turning your pegboard into a garage playground is all about maximizing efficiency and having fun while doing it. From the initial setup to custom designs and hook selection, every step is crucial in creating a space that sparks your creativity and makes you want to spend more time in the garage. Whether you’re a seasoned mechanic or a DIY enthusiast, the key to a successful pegboard organization is finding a balance between functionality and personalization. By following the steps outlined in this guide, you’ll be well on your way to creating a pegboard that not only keeps your tools tidy but also inspires you to take on new projects.
So, as you put the final touches on your pegboard paradise, remember that it’s not just about the tools or the organization – it’s about the joy of creation. It’s about looking at a old, rusty bicycle and seeing a restored beauty, or gazing at a cluttered garage and envisioning a haven of innovation. Your pegboard is more than just a storage solution; it’s a gateway to a world of possibilities, where every project is an opportunity to learn, to grow, and to bring your ideas to life. Happy building, and don’t forget to name your tools – it’s a habit that’ll make the experience even more enjoyable!
Frequently Asked Questions
What's the best way to measure and mark the pegboard for optimal tool placement?
Measuring and marking your pegboard is a breeze, my friend! I use my trusty ‘Bertha’ tape measure and ‘Sparky’ pencil to get the job done. Simply measure the width of each tool, leave about a quarter inch of space between them, and mark the spot with a small ‘X’. My grandfather used to say, ‘A good mark is like a good friend – it’ll never let you down!’
How do I choose the right type of hooks and bins for my specific tools and garage space?
For my trusty sidekicks, like ‘Bertha the Bolt Cutter’ and ‘Sparky the Socket’, I swear by a mix of sturdy J-hooks and mini bins. Consider the size and shape of your tools, and don’t be afraid to get creative – my grandfather used to say, ‘The right hook can make all the difference!’
Can I customize my pegboard with DIY or 3D-printed accessories to fit unusual or oversized tools?
Absolutely, you can customize your pegboard with DIY or 3D-printed accessories. I’ve done it myself for my vintage bike restoration tools. Just think outside the box, or in this case, the pegboard. You can create custom holders for oversized tools or unique items like my ‘Bertha’ wrench, and it’s a total game-changer for your garage workspace!