
I still remember the first time I used an OBD2 scanner in my grandfather’s garage – it was like uncovering a secret world of automotive diagnostics. As a young tinkerer, I was fascinated by the way this simple tool could reveal the hidden language of my vehicle’s computer system. Fast forward to today, and I’m excited to share my knowledge with you in this guide to using an OBD2 scanner. Many people think that using an OBD2 scanner is only for professional mechanics, but I’m here to tell you that’s just not true – with the right guidance, anyone can become a DIY diagnostic expert.
In this article, I’ll cut through the jargon and give you the straight truth about how to use an OBD2 scanner to troubleshoot and repair your vehicle. You’ll learn how to read diagnostic codes, monitor engine performance, and identify potential issues before they become major problems. My goal is to empower you with the knowledge and confidence to take control of your vehicle’s maintenance and repairs, and to make the most out of your guide to using an OBD2 scanner. Whether you’re a seasoned car enthusiast or just starting out, I’ll provide you with practical, hands-on advice that’s easy to follow and apply.
Table of Contents
Guide Overview: What You'll Need
Total Time: 30 minutes to 1 hour
Estimated Cost: $20 – $100
Difficulty Level: Easy
Tools Required
- OBD2 Scanner (compatible with your vehicle)
- Laptop or Mobile Device (for optional software)
- USB Cable (for connecting the scanner to a laptop)
Supplies & Materials
- Vehicle Repair Manual (for your specific vehicle make and model)
- Code Lookup Guide (for interpreting trouble codes)
Step-by-Step Instructions
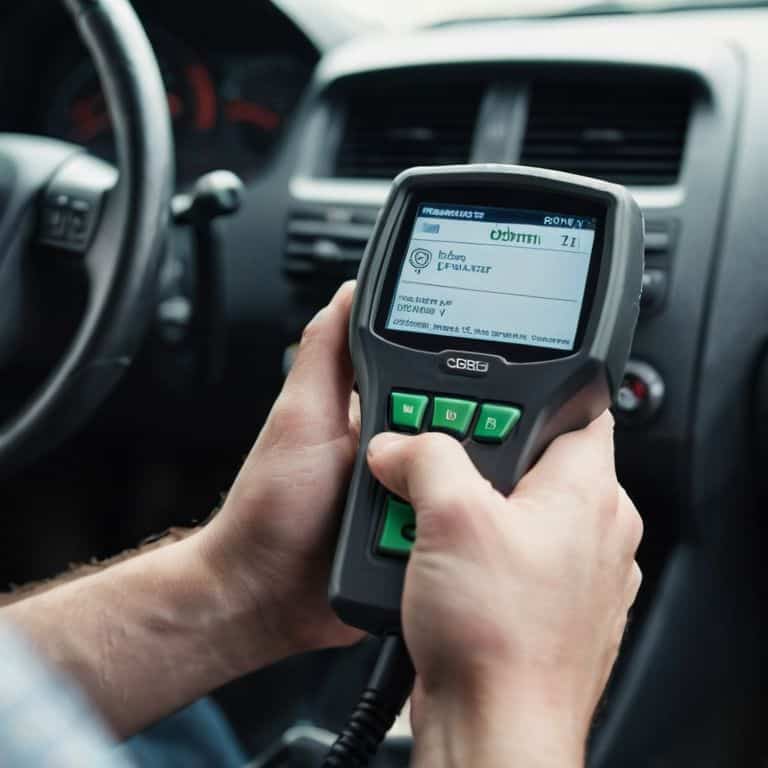
- 1. First, let’s get familiar with the OBD2 scanner itself – it’s a handy device that plugs into your car’s OBD2 port, usually located under the steering column. Make sure you’ve got the right scanner for your vehicle, as some models might require specific adapters or software.
- 2. Next, power up your OBD2 scanner by plugging it into the OBD2 port and turning the ignition switch to the “on” position – don’t worry, you don’t need to start the engine. You should see the scanner’s screen light up, and it will start to communicate with your car’s onboard computer.
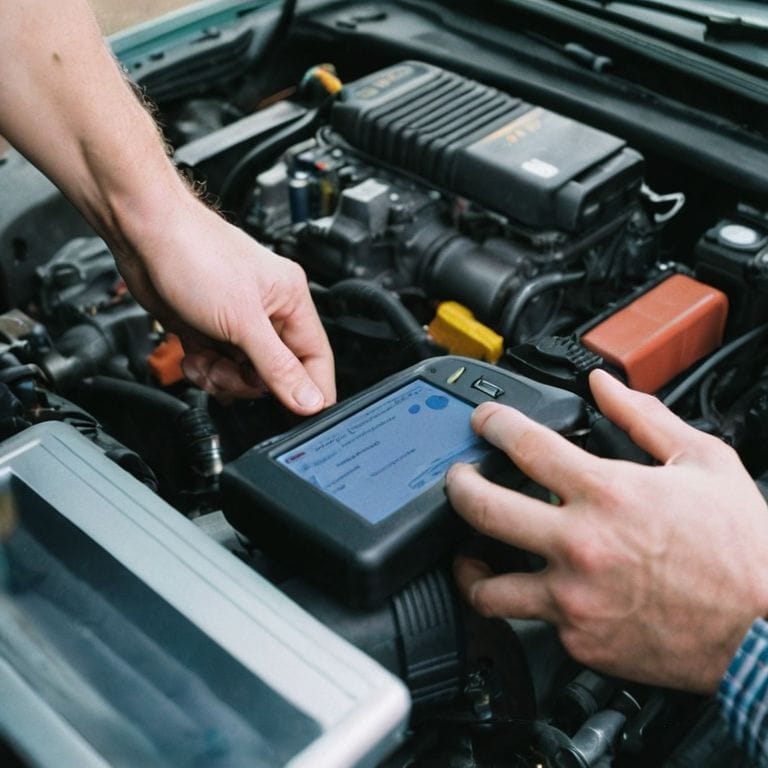
- 3. Now it’s time to select the protocol that your vehicle uses – most modern cars use a standard OBD2 protocol, but some older models might use a different one. Consult your car’s manual or the scanner’s documentation to find out which protocol you need to select.
- 4. With the protocol selected, you can start to browse through the menus on your OBD2 scanner. Look for the “Read Codes” or “Trouble Codes” option, which will allow you to see any error messages that your car’s computer has stored. Take note of any codes that appear, as these will give you a clue about what’s going on under the hood.
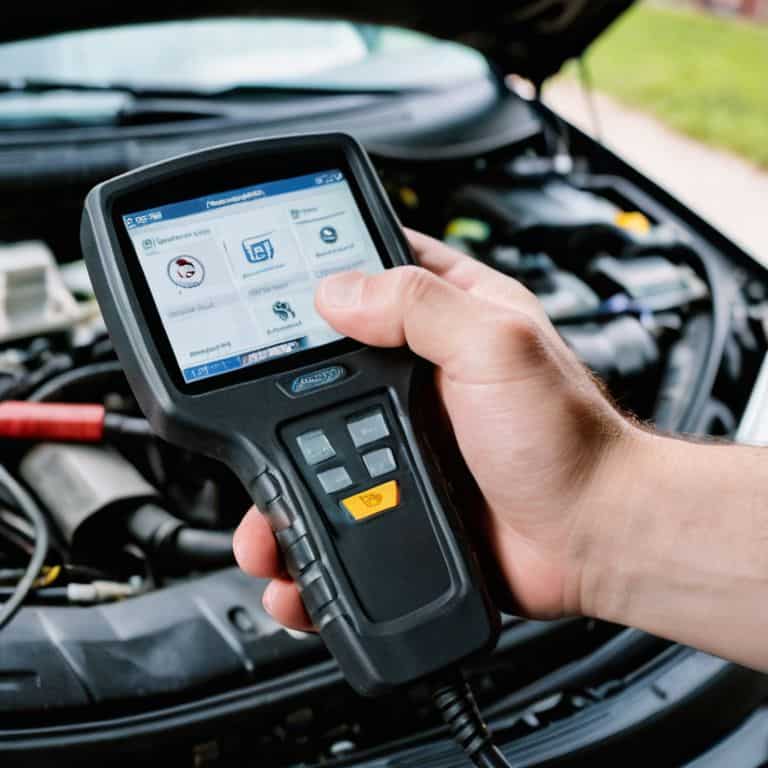
- 5. If you’ve got any trouble codes, it’s time to look them up in the scanner’s database or online. Most OBD2 scanners come with a built-in database of common codes, but you can also find websites that list codes and their corresponding meanings. Make a note of what each code means, and start to think about how you can use this information to diagnose the problem.
- 6. Now that you’ve got a better understanding of what’s going on, it’s time to clear the codes and see if the problem persists. Use the OBD2 scanner to clear the trouble codes, and then take your car for a spin to see if the issue comes back. If it does, you’ll know that you need to dig deeper to find the root cause.
- 7. Finally, save your results and keep a record of what you’ve found. This will help you to track any progress you make, and give you a reference point if you need to consult with a mechanic or do further research. Take a screenshot of the scanner’s display, or write down the codes and their meanings in a notebook – trust me, you’ll be glad you did.
A Guide to Using an Obd2 Scanner
As I delve deeper into the world of OBD2 scanners, I’ve found that understanding obd2 diagnostic codes is crucial for effective troubleshooting. It’s like being a detective, searching for clues to solve the mystery of what’s going on under the hood. When using an OBD2 scanner, it’s essential to take the time to read and interpret the codes correctly, rather than just relying on the scanner’s default readings.
One of the most common mistakes beginners make is not being aware of common obd2 scanner errors. These can range from incorrect cable connections to outdated software, and can lead to misleading or inaccurate readings. To avoid these pitfalls, it’s vital to familiarize yourself with the scanner’s manual and understand its limitations. Additionally, investing in one of the best obd2 scanners for beginners can make a significant difference in the accuracy and reliability of your diagnoses.
By mastering the art of using an OBD2 scanner, you’ll be able to read obd2 live data and gain valuable insights into your vehicle’s performance. This can help you identify potential issues before they become major problems, saving you time and money in the long run. Whether you’re a seasoned mechanic or a DIY enthusiast, having the right tools and knowledge can make all the difference in keeping your vehicle running smoothly.
Decoding Secrets Understanding Obd2 Diagnostic Codes
Now that we’ve got our OBD2 scanner up and running, it’s time to dive into the world of diagnostic codes. These codes are like a secret language that your car’s computer uses to tell you what’s going on under the hood. Don’t worry, decoding them isn’t as tough as it sounds – with a little practice, you’ll be a pro in no time. I like to think of it as solving a puzzle, and my trusty sidekick, “Bertha the code breaker” (that’s what I’ve named my OBD2 scanner, by the way), is always ready to lend a hand.
When you plug in your OBD2 scanner, you’ll get a list of codes that correspond to specific issues with your vehicle. Some codes are pretty straightforward, while others might require a little more digging to figure out what’s going on. My grandfather used to say, “A good mechanic is like a detective – always looking for clues.” That’s exactly what we’re doing here, using the OBD2 scanner to uncover the secrets of our car’s computer and get to the bottom of any problems that might be lurking beneath the surface.
Rev Up With Obd2 Scanner Troubleshooting Tips
Now that we’ve gotten our hands dirty with the basics, it’s time to dive into some troubleshooting tips to get the most out of your OBD2 scanner. I’ve found that naming my trusty tools, like “Bertha” my scanner, helps me stay organized and focused. When you’re faced with a stubborn check engine light, remember to check the basics first – is the scanner properly connected, and are the batteries fresh? It’s amazing how often a simple fix can get you back on track.
By following these tips and practicing with your OBD2 scanner, you’ll be well on your way to becoming a garage guru, just like my grandfather taught me in his workshop. With a little patience and practice, you’ll be revving up your garage in no time, and who knows, maybe even inspired to tackle that vintage bicycle restoration project you’ve been putting off.
Tinkering Gems: 5 Essential Tips for Mastering Your OBD2 Scanner
- Get Familiar with Your Ride: Always consult your vehicle’s manual to understand its specific OBD2 port location and any unique diagnostic procedures
- Scanner Savvy: Choose an OBD2 scanner that fits your needs, whether you’re a DIY novice or a seasoned mechanic, and don’t be afraid to explore its various features and settings
- Cable Care: Handle your OBD2 scanner’s cable with love – a damaged or faulty connection can lead to misleading readings and unnecessary headaches
- Code Cracking: Don’t let diagnostic codes intimidate you – take the time to understand what each code means and how it relates to your vehicle’s performance and health
- Garage Wisdom: Keep a log of your scans and repairs to track your progress, identify patterns, and become a more informed and self-sufficient car owner over time
Key Takeaways for a Garage Guru
Always remember to choose the right OBD2 scanner for your vehicle’s make and model, as this will ensure you’re getting the most accurate readings and diagnoses
Don’t be afraid to get a little messy and experiment with different troubleshooting techniques – after all, that’s what the garage is for, right?
Keep a log of your scans and repairs to track your progress and identify any recurring issues, just like I do with my vintage bicycle restorations – it’s all about the journey, not just the destination
Tuning into Success
A guide to using an OBD2 scanner is not just about diagnosing problems, it’s about unlocking the full potential of your vehicle and becoming the master of your own garage – where every scan is a step closer to a smoother ride and a happier you!
John Beeler
Putting it all Together: Mastering Your OBD2 Scanner
As we wrap up this guide to using an OBD2 scanner, let’s recap the essentials: from connecting your scanner to interpreting diagnostic codes, we’ve covered the bases to get you started on your automotive troubleshooting journey. Remember, understanding your vehicle’s language is key to unlocking its secrets and keeping it running smoothly. Whether you’re a seasoned mechanic or a DIY enthusiast, an OBD2 scanner is an indispensable tool that can save you time, money, and a whole lot of frustration.
So, the next time you hear an unusual noise or notice a peculiar light on your dashboard, don’t panic! Instead, grab your trusty OBD2 scanner and get ready to unleash your inner mechanic. With practice and patience, you’ll be well on your way to becoming a master diagnostician, and who knows, you might just find yourself enjoying the process of figuring out what makes your vehicle tick. Happy tinkering, and I’ll see you in the garage!
Frequently Asked Questions
What are the most common OBD2 diagnostic codes I should know about?
Ah, buddy, let me tell you, there are a few codes you should know by heart! P0123, P0300, and P0455 are some of the most common ones. These codes usually indicate issues with your oxygen sensor, misfires, or evaporative emission control systems. Now, don’t worry, I’ve got a cheat sheet for you – my trusty ‘Bertha’ (that’s my multimeter) and I will walk you through decoding these secrets!
Can I use an OBD2 scanner on any vehicle, or are there specific compatibility issues I should be aware of?
Not all vehicles are created equal when it comes to OBD2 scanners. Generally, any car made after 1996 should be compatible, but it’s essential to check your vehicle’s make and model to ensure it’s OBD2 compliant. Some scanners may also have specific limitations, so it’s crucial to consult the manufacturer’s guidelines to avoid any headaches – trust me, I’ve been there with my vintage bike restorations!
How often should I use an OBD2 scanner to monitor my vehicle's health and prevent potential issues?
I like to think of my OBD2 scanner as a regular health checkup for my ride. I recommend using it every 3,000 to 5,000 miles, or when you notice something’s off. It’s like giving your car a quick once-over to catch any potential issues before they become major problems – trust me, it’s worth it to stay on top of things!


