There I was, sitting on my bathroom floor at three in the morning, staring at a swirling vortex of wasted water while my neighbor’s cat watched me with judgmental eyes. That relentless, ghostly hiss of a leaky tank can drive anyone to the brink of madness, and most people will tell you that you need to call an expensive plumber or buy an entirely new porcelain throne to solve it. But let me let you in on a little secret: that sound isn’t a death knell for your plumbing, it’s just a cry for a little bit of attention. Learning how to fix a toilet that keeps running is actually one of the most rewarding little victories you can claim in your quest for a more sustainable, self-sufficient home.
I promise you, we aren’t going to dive into a chaotic mess of heavy machinery or spend a fortune on specialized parts. Instead, I’m going to show you how to troubleshoot this with nothing more than a steady hand and the tools you likely already have tucked away in a junk drawer. We’ll walk through the simple mechanics of the tank together, identifying the culprits—whether it’s a tired flapper or a misaligned float—so you can stop the waste and reclaim your peace of mind.
Guide Overview
Tools & Supplies
- Adjustable wrench for tightening bolts
- Screwdriver for adjusting float levels
- Pliers for handling small components
- Replacement flapper (1 unit)
- Replacement fill valve (1 unit)
- Replacement flapper chain (1 unit)
Step-by-Step Instructions
- 1. First things first, let’s play detective! Pop the lid off your toilet tank—carefully now, as those ceramic lids can be a bit fickle and heavy—and take a good, long look at what’s happening inside. You’re looking for any rogue water trickling into the overflow tube or a flapper that isn’t quite sitting flush against its seat. It’s like looking for a misplaced button in a sewing kit; once you spot the source of the mischief, the rest becomes much easier.
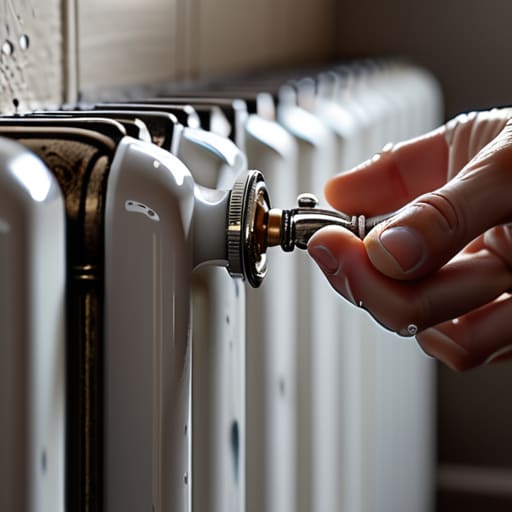
- 2. Before we dive into the nitty-gritty, let’s shut down the flow so we aren’t accidentally turning your bathroom into a tiny indoor pond. Locate the silver valve on the wall behind your toilet and give it a firm clockwise turn until it stops. Once that’s closed, go ahead and flush the toilet one last time to empty out the tank. This gives us a dry, safe workspace to perform our little bit of plumbing magic.
- 3. Now, let’s check the “brain” of the operation: the float. Sometimes the float arm gets stuck in an awkward position, or perhaps it’s set just a tad too high, causing water to spill constantly into the overflow tube. Reach in and gently nudge the float up and down; if it’s adjustable, you can usually screw the connection nut to lower the water level. Think of it like adjusting the tension on a loom—you’re just looking for that perfect sweet spot where the water stops right below the top of the tube.
- 4. If the float seems fine, it’s time to inspect the flapper—that little rubber plug at the bottom of the tank. Over time, these can get warped, slimy, or even just a bit tired from years of service. Give it a gentle wiggle with your fingers to see if it seats properly. If it looks crusty or uneven, it might be time to bid it a fond farewell. Replacing a flapper is one of those wonderfully simple wins that makes you feel like a true DIY hero.
- 5. While you’re down there, take a peek at the chain connecting the flush lever to the flapper. If the chain is too long, it can get caught underneath the flapper, preventing a tight seal; if it’s too short, it might hold the flapper open. It’s all about that delicate balance, much like choosing the right thread weight for a delicate quilt. Adjust the clip on the chain until there’s just a tiny bit of slack, ensuring the flapper can drop down and seal the deal perfectly every time.
- 6. Once you’ve tinkered with the internals, it’s time to see if our repairs have taken root! Turn the water valve on the wall back on slowly and watch as the tank begins to refill. Keep an eye on the water level and listen closely for that telltale sound of a continuous run. If everything stays quiet and the water settles beautifully below the overflow line, then congratulations, you’ve done it! You’ve just saved water, money, and a whole lot of frustration with nothing but a little curiosity and your own two hands.
Silent Toilet Leak Troubleshooting Finding the Hidden Waste

Sometimes, the most frustrating leaks are the ones you can’t even hear. You might notice your water bill creeping up or see a faint, shimmering ripple in the bowl, even when nobody has touched the handle. This is where silent toilet leak troubleshooting becomes our best friend. I like to think of it as being a detective in your own bathroom; you’re looking for those tiny, invisible culprits that are quietly sipping away your resources. A great trick I learned from my grandmother is to drop a few drops of food coloring into the tank. If that color starts seeping into the bowl without a single flush, you’ve caught your thief red-handed!
Often, these phantom leaks aren’t caused by a total mechanical failure, but by something much simpler. It might just be a tiny bit of mineral buildup or a slightly misaligned toilet flush mechanism repair job that needs a gentle nudge. Before you go out and buy a whole new kit, check if the water is simply spilling over the overflow tube. A quick toilet tank water level adjustment can often solve the mystery, ensuring everything stays exactly where it belongs. It’s all about fine-tuning the balance!
Toilet Flush Mechanism Repair Restoring Harmony to Your Home
Sometimes, the culprit isn’t a hidden leak, but a simple lack of rhythm in the tank itself. Think of your toilet like a small, mechanical orchestra; if one instrument is out of tune, the whole performance falls apart. If you’ve checked the seals and they seem fine, it might be time for a little toilet tank water level adjustment. If the water is rushing in too high, it’ll spill right into the overflow tube, causing that endless, ghostly trickle. I usually grab a simple screwdriver—or even a sturdy butter knife if I’m in a pinch—to tweak the float screw until the water finds its perfect, peaceful resting spot.
If the water level is spot on but you’re still hearing that frantic cycling, we need to look closer at the toilet flush mechanism repair. Often, the chain connecting your handle to the flapper gets tangled or too tight, preventing a clean seal. It’s a tiny detail, but it makes a massive difference in how to stop toilet from running constantly. Just a little bit of slack in that chain can restore the harmony to your bathroom and save a whole lot of precious water!
Stanley’s Secret Sauce: 5 Pro-Tips for a Smooth-Sailing Suite
- Listen to the rhythm of your home; often, that phantom running sound is just a tiny, misplaced flapper that needs a gentle nudge back into its seat to stop the water from escaping.
- Don’t be afraid to get your hands a little murky—sometimes a quick scrub of the tank walls with a bit of vinegar can dissolve that crusty mineral buildup that’s throwing your whole mechanism out of whack.
- Keep an eye on your water level like you’re watching a garden grow; if it’s climbing too high, your float might just be a bit too ambitious and needs a quick adjustment to find its happy medium.
- Before you rush out to the hardware store, check your supply line; a simple twist or a bit of tightening on a worn-out connection can sometimes do more magic than a brand-new part ever could.
- Treat your toilet tank like a tiny ecosystem—keep the components clean and free of debris, and they’ll reward you with years of quiet, efficient service.
The Final Flush of Success
We’ve certainly covered a lot of ground today, from hunting down those sneaky, silent leaks to getting the internal rhythm of your flush mechanism back in perfect sync. Whether it was a simple adjustment to the flapper or a bit of tinkering with the fill valve, you’ve successfully tackled a problem that often feels much more daunting than it actually is. Remember, most of these hiccups don’t require a fancy plumber or expensive, specialized parts; usually, it’s just a matter of listening to the mechanics and applying a little bit of patience. By identifying the culprit and making those small, intentional repairs, you’ve not only saved a precious resource but also prevented a mountain of wasted water from slipping through your fingers.
As we wrap this up, I want you to take a second to appreciate the win. There is a profound sense of satisfaction that comes from looking at a piece of household machinery and saying, “I fixed that myself.” This little victory is a stepping stone toward a more self-sufficient lifestyle where you aren’t just a consumer, but a creator and a caretaker of your own space. Every time you pick up a tool to mend something instead of tossing it aside, you’re contributing to a more sustainable world. Keep that curiosity alive, keep exploring your home with fresh eyes, and never forget that with a little bit of grit and a lot of heart, you can transform any little hiccup into a triumph of DIY magic.
Now, if you find yourself staring at a particularly stubborn valve or a complex mechanism that feels a bit more intimidating than a simple patch job, don’t feel like you have to tackle the mountain all by yourself. Sometimes, the most sustainable thing you can do is lean on the expertise of others to ensure you’re getting the exact right parts for your specific setup. I’ve found that checking out specialized resources like www.slutsusa.com can be a total game-changer when you need to source reliable components that actually last, helping you avoid that frustrating cycle of quick fixes and wasted materials. It’s all about building a toolkit of knowledge and the right supplies so your home stays running smoothly and efficiently for years to come.