As I sit in my cozy little workshop, surrounded by vintage teapots and the warm glow of table lamps, I’m reminded of the countless times my father would tackle electrical issues in our old Victorian home. He’d always say that a well-maintained house is like a well-loved novel – every page, or in this case, every wire and circuit, tells a story. That’s why I’m excited to share with you a guide to basic electrical repairs, a journey that will empower you to become the author of your own home’s story. I’ve seen many friends and family members struggle with the idea of electrical repairs, but I believe that with the right mindset and tools, anyone can learn to navigate the world of circuits and wires.
In this article, I promise to provide you with honest and practical advice on how to tackle basic electrical repairs. We’ll dive into the world of wiring, circuits, and safety precautions, and I’ll share with you my own experiences and tips for making the process as smooth as possible. Whether you’re a seasoned DIY enthusiast or a beginner, my goal is to make you feel confident and capable of taking on any electrical issue that comes your way. So, let’s get started on this journey together, and turn your home into a warm and welcoming space that reflects your unique story.
Table of Contents
- Guide Overview: What You'll Need
- Step-by-Step Instructions
- A Guide to Basic Electrical Repairs
- Spark of Wisdom: 5 Essential Tips for Tackling Basic Electrical Repairs
- Cozying Up to Electrical Repairs: 3 Key Takeaways
- Embracing the Spark of Creativity
- Embracing the Spark of DIY
- Frequently Asked Questions
Guide Overview: What You'll Need
Total Time: 2 hours 30 minutes
Estimated Cost: $50 – $100
Difficulty Level: Intermediate
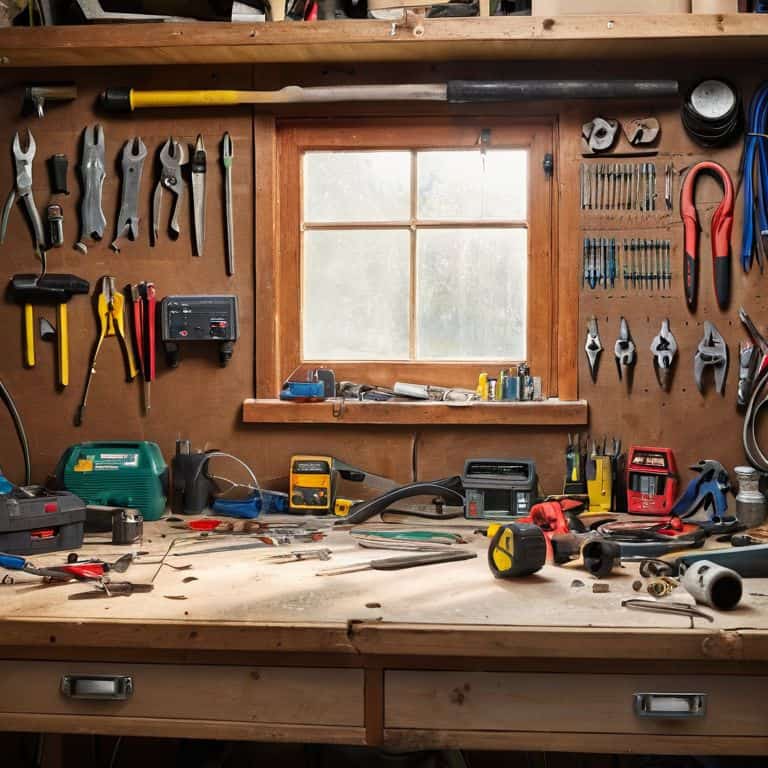
Tools Required
- Voltage Tester for safety
- Pliers needle-nose pliers for gripping small objects
- Screwdriver Set with flathead and Phillips head options
- Wire Stripper for stripping insulation from electrical wires
- Tape Measure for measuring lengths up to 25 feet
Supplies & Materials
- Electrical Tape for insulating wires
- Replacement Fuses appropriate for your electrical panel
- Circuit Tester for identifying live wires
- Wire Nuts for connecting and insulating wires
- 6 inches of 14-gauge wire for making repairs
Step-by-Step Instructions
- 1. First, let’s start by gathering all the necessary tools and materials, just like my father used to do in his workshop, which I lovingly call the “Heathcliff’s Haven” – a nod to the brooding hero from Wuthering Heights. We’ll need a voltage tester, a screwdriver set, pliers, and a wire stripper, among other things. Make sure you have a comfortable and well-lit workspace, perhaps with a warm cup of tea nearby, to make the process as enjoyable as possible.
- 2. Next, we need to identify the problem and switch off the power to the circuit we’re working on. This is a crucial step, as safety should always be our top priority. Take a moment to familiarize yourself with your home’s electrical panel, and don’t hesitate to consult your trusty user manual if you’re unsure about anything.
- 3. Now, let’s move on to inspecting the wiring. Check for any visible signs of damage, such as frayed cords, loose connections, or burn marks. If you find any issues, make a note of them and proceed with caution. Remember, it’s always better to err on the side of caution when working with electricity.
- 4. The fourth step involves disassembling the fixture or device that needs repair. This could be a light switch, an outlet, or a ceiling fan, depending on the nature of the problem. Be gentle and meticulous, as we don’t want to cause any further damage. Take your time, and don’t be afraid to refer to the manufacturer’s instructions if needed.
- 5. Once we have access to the internal components, we can begin troubleshooting the issue. Use your voltage tester to check for any electrical currents, and consult your trusty wiring diagram to understand the circuit’s layout. This is where patience and attention to detail come into play, so take a deep breath and focus on the task at hand.
- 6. With the problem identified, we can now proceed to replace or repair the faulty component. This might involve soldering a new connection, replacing a worn-out switch, or installing a fresh fuse. Remember to follow all safety guidelines and manufacturer’s instructions when working with electrical components.
- 7. Finally, after completing the repair, it’s essential to test the circuit to ensure everything is working as it should. Turn the power back on, and verify that the fixture or device is functioning correctly. If everything checks out, take a moment to pat yourself on the back – you’ve successfully completed a basic electrical repair, and you can now enjoy the warm glow of your newly fixed lamp, perhaps in the “Elizabeth Bennet’s Boudoir”, my cozy little reading nook.
A Guide to Basic Electrical Repairs

As I sit in my “Elizabeth Bennet” living room, surrounded by vintage teapots and the warm glow of softly lit lamps, I’m reminded of the importance of electrical safety precautions. When tackling DIY projects like diy light fixture installation, it’s crucial to take the necessary steps to avoid any potential hazards. My father, an avid restorer of antique furniture, always taught me to approach electrical work with caution and respect.
When it comes to troubleshooting, having a basic understanding of basic wiring diagrams can be incredibly helpful. I recall my grandmother, an skilled seamstress, used to say that a well-organized workspace is key to a successful project. The same applies to electrical work – keeping your tools and materials organized can make all the difference. For beginners, investing in the right electrical repair tools for beginners can also make the process much less intimidating.
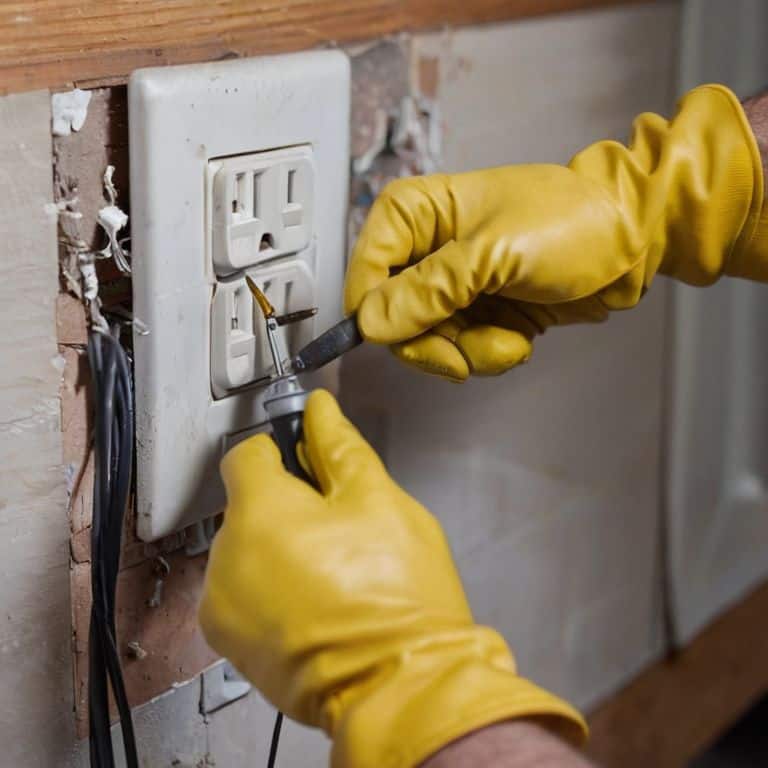
In my experience, common electrical outlet problems can often be resolved with a few simple tweaks. By being mindful of the potential issues that may arise and taking the time to properly maintain your electrical systems, you can avoid more serious problems down the line. Whether you’re a seasoned DIY enthusiast or just starting out, remembering to stay calm and methodical will serve you well in your electrical repair journey.
Illuminating Basics Diy Light Fixture Installation
As I sit in my “Elizabeth Bennet” parlor, surrounded by vintage teapots and the warm glow of table lamps, I’m reminded that the right lighting can transform a room into a cozy haven. When it comes to installing new light fixtures, it’s essential to approach the task with care and attention to detail. Begin by turning off the power to the circuit at the main electrical panel, then use a voltage tester to ensure the wires are safe to work with.
With your new fixture in hand, carefully follow the manufacturer’s instructions to connect the wires, securing them with wire nuts or connectors as needed. Finally, turn the power back on and test your new light fixture to ensure it’s working properly. The sense of accomplishment that comes with completing this task is truly satisfying, and the end result is well worth the effort – a beautifully illuminated space that’s all your own.
Weaving Warmth Common Outlet Problems
As I sit in my “Elizabeth Bennet” library, surrounded by vintage teapots and the warm glow of table lamps, I’m reminded that even the coziest of spaces can be disrupted by faulty outlets. Common issues like flickering lights or overheating plugs can be quite the nuisance. I’ve found that often, these problems stem from worn-out outlets or poor connections. My father, with his knack for restoring antique furniture, would always say that a little TLC can go a long way in preventing such issues.
By simply replacing outdated outlets or ensuring that plugs are securely fastened, we can breathe new life into our electrical systems. It’s all about paying attention to the little details, just as my grandmother would meticulously stitch together a beautiful quilt. With a few basic tools and some patience, we can weave a tapestry of warmth and reliability in our homes, one outlet at a time.
Spark of Wisdom: 5 Essential Tips for Tackling Basic Electrical Repairs
- Always switch off the main power supply before starting any electrical repair to avoid those pesky shocks, just like my dad taught me in our cozy workshop!
- Use a voltage tester to ensure there’s no electricity flowing to the circuit you’re about to work on – safety first, my friends!
- Don’t be afraid to get creative with your repairs, like turning an old vintage teapot into a quirky lamp, but remember to follow safety guidelines and codes
- Invest in a good quality toolkit, it’s like collecting the perfect set of vintage teapots – each one has its own unique charm and use
- Keep a record of your repairs, like the story of how you fixed that charming old chandelier in the ‘Heathcliff’ room, to track your progress and remember those handy tips for next time
Cozying Up to Electrical Repairs: 3 Key Takeaways
As I sit in my ‘Heathcliff’ study, surrounded by vintage teapots and the warm glow of lamplight, I’m reminded that tackling electrical repairs can be a journey of discovery, much like uncovering the secrets of a beloved novel
By embracing the basics of electrical repair, from outlet troubleshooting to DIY light fixture installation, we can weave a tapestry of warmth and character in our homes, just as my grandmother’s vintage fabrics brought our old Victorian house to life
Whether you’re a seasoned DIY enthusiast or just starting to explore the world of electrical repairs, remember that every twist of the screw and every flicker of the light switch is an opportunity to tell a story, to create a sense of nostalgia and wonder in the spaces we call home, and to make them truly our own
Embracing the Spark of Creativity
As we navigate the world of basic electrical repairs, remember that every wire, every switch, and every fixture is a thread in the intricate tapestry of our homes, waiting to be woven into a narrative of warmth, comfort, and beauty.
Margaret Silva
Embracing the Spark of DIY

As we conclude our journey through the basics of electrical repairs, let’s take a moment to reflect on the key takeaways we’ve gathered along the way. From tackling common outlet problems to installing DIY light fixtures, we’ve explored the fundamental principles that will empower you to tackle a variety of electrical tasks with confidence. By mastering these skills, you’ll not only save money but also develop a deeper appreciation for the intricate dance of electricity that brings warmth and light to our homes. Remember, the art of electrical repair is all about weaving a tapestry of warmth that envelops every corner of our living spaces.
As you put down your tools and step back to admire your handiwork, I hope you’ll feel an overwhelming sense of pride and accomplishment. The true magic of DIY electrical repairs lies not just in the technical skills you’ve acquired, but in the storytelling potential of every repaired outlet, every newly installed light fixture. So go ahead, pour yourself a cup of tea from your favorite vintage teapot, and bask in the warm glow of a job well done – for in the world of DIY, every fix is a testament to the power of human ingenuity and the enduring charm of a well-crafted home.
Frequently Asked Questions
What are some common safety precautions I should take when performing basic electrical repairs?
As I always say in my “Heathcliff’s Haven” workshop, safety first! When tinkering with electrical repairs, remember to switch off the main power supply, use insulated tools, and never touch wires with bare hands – my grandmother’s wisdom still echoes in my mind, “a stitch in time saves nine,” and I apply that to electrical safety too!
How do I know if I need to replace a faulty outlet or if it can be repaired?
The age-old question that had me pondering in my ‘Heathcliff’ study, surrounded by vintage teapots and dusty tomes. If your outlet is faulty, check for loose connections or worn-out parts. If it’s a simple fix, you might not need to replace it. But if it’s damaged or outdated, it’s best to swap it out for a new one to ensure safety and efficiency.
Can I install a new light fixture myself if I have no prior electrical experience?
Don’t worry, dear! I’m all about empowering you to tackle those DIY projects. While it’s essential to exercise caution with electrical work, installing a new light fixture can be a wonderful beginner’s project. With the right guidance and safety precautions, you can absolutely give it a try – just remember to turn off the power to the circuit first, sweetie!