As I sit in my Emily Dickinson room, surrounded by vintage teapots and the warmth of a crackling fireplace, I am reminded of the countless times I’ve heard friends and family members lament about the daunting task of a guide to installing a tile backsplash. The myth that it’s a chore only suited for the most skilled DIY enthusiasts has led many to shy away from this wonderful opportunity to add a touch of personality to their kitchens. But the truth is, with the right guidance, anyone can achieve a beautiful, timeless tile backsplash that tells a story of its own.
In this article, I promise to share my honest, no-nonsense advice on how to bring your kitchen to life with a stunning tile backsplash. From choosing the perfect tiles to the final grouting touches, I’ll walk you through each step of the process, sharing my own experiences and tips gathered from years of transforming spaces into living stories. Whether you’re a seasoned DIY enthusiast or a beginner looking to add some whimsy to your home, this guide is designed to empower you with the knowledge and confidence to create a tile backsplash that’s truly yours.
Table of Contents
Guide Overview: What You'll Need
Total Time: 4 hours 30 minutes
Estimated Cost: $50 – $200
Difficulty Level: Intermediate
Tools Required
- Notched Trowel (1/4 inch or 1/2 inch notches)
- Tile Cutter (or a wet saw)
- Drill (with a mixing paddle attachment)
- Grout Float
- Grout Sponge
- Level
- Pencil and Marker
- Measuring Tape
Supplies & Materials
- Tile Backsplash (choose your material: glass, ceramic, marble, etc.)
- Thinset Mortar
- Grout (choose your color)
- Grout Sealer (optional)
- Backer Board (if necessary)
- Caulk
Step-by-Step Instructions
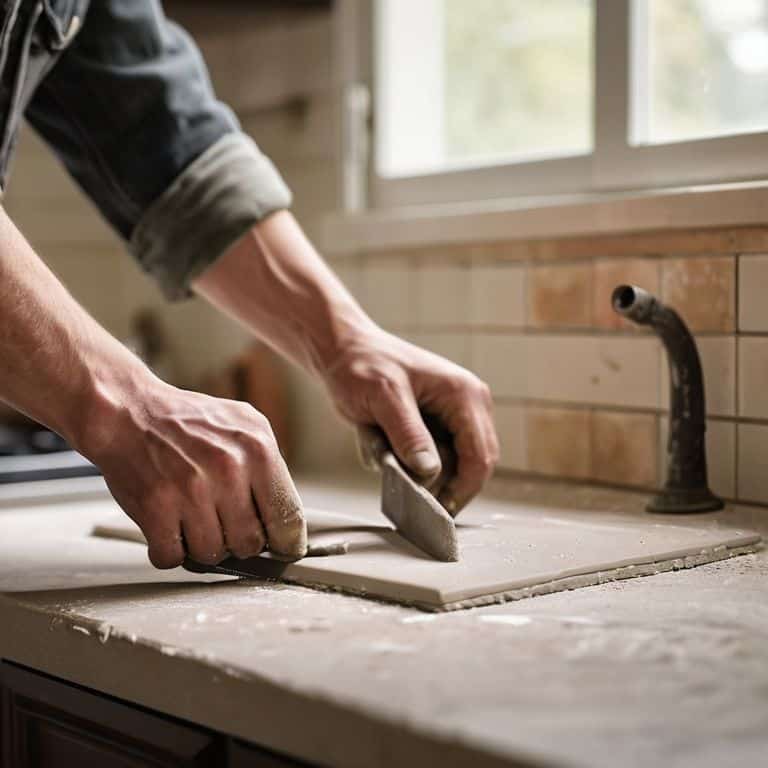
- 1. First, let’s prepare the area by clearing away any dusty decorations and covering the countertops with drop cloths to prevent any damage or mess. This will give us a clean slate to work with, much like the blank pages of a new novel waiting for its story to unfold.
- 2. Next, we need to measure the wall where the tile backsplash will be installed, taking into account any outlets, switches, or other obstacles that might affect the layout. I like to think of this step as _plotting the narrative_ of our tile design, ensuring that every element works together in harmony.
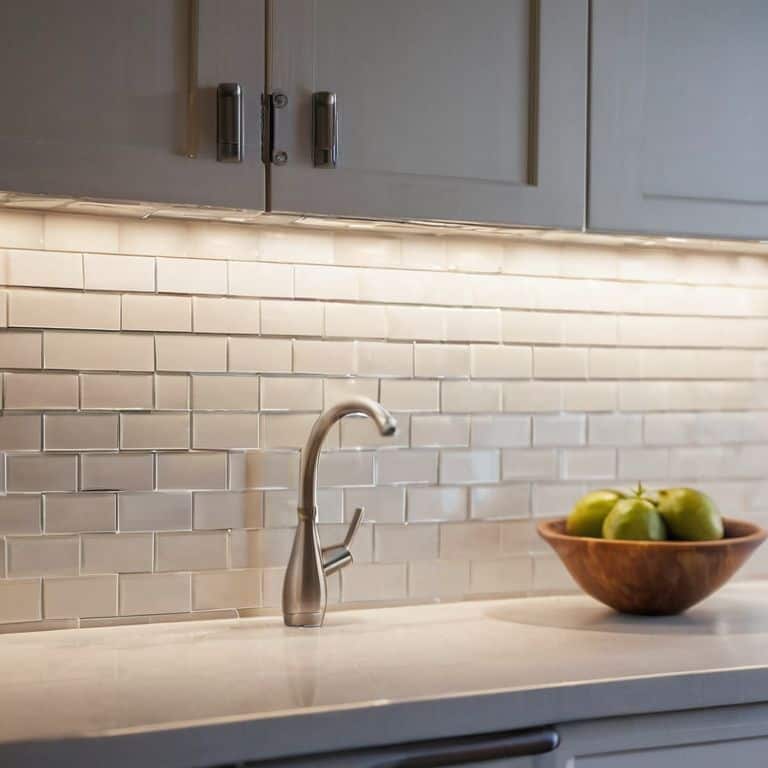
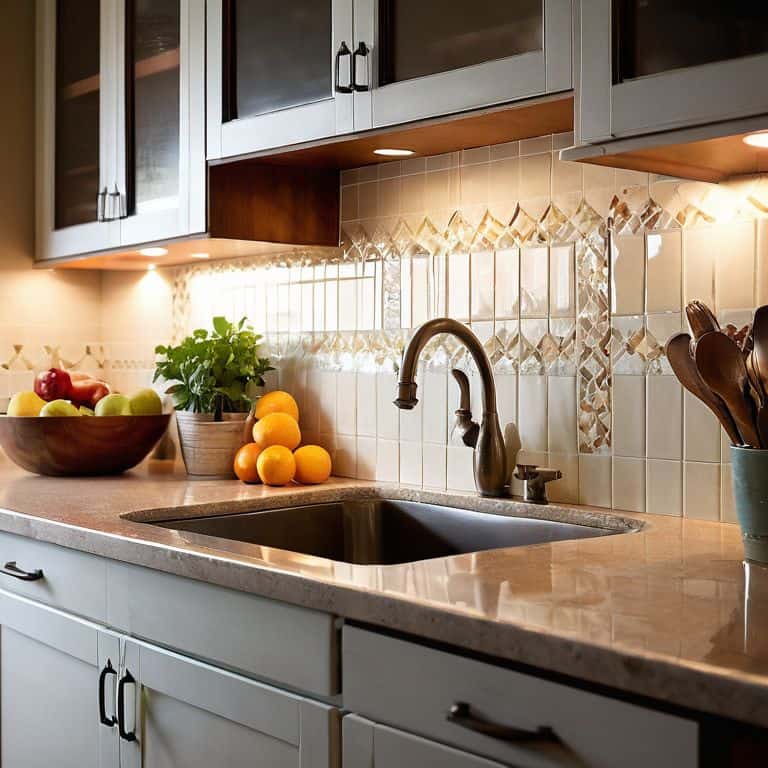
- 3. Now, it’s time to choose our tile pattern and design. This is where the magic happens, and our space begins to tell its story. Consider the color palette and style of your kitchen, as well as the era and atmosphere you want to evoke. For my own kitchen, which I’ve dubbed “The Austen Room” after Jane Austen’s timeless novels, I opted for a classic, elegant pattern that reflects the refined yet whimsical spirit of her writings.
- 4. With our design in mind, we can begin preparing the wall for the tile installation. This involves applying a layer of adhesive, such as thinset, to the back of the tiles and to the wall, ensuring a strong bond between the two. It’s a bit like _layering the pages of a book_ with glue, waiting for the story to come together.
- 5. The actual installation of the tiles is where the narrative unfolds. Starting from the center and working our way outward, we carefully place each tile, using spacers to maintain even gaps and a level to ensure everything is perfectly aligned. As each tile falls into place, the story of our kitchen begins to take shape, much like the characters in a novel coming to life.
- 6. Once all the tiles are in place, we need to allow the adhesive to set before grouting. This waiting period is a bit like the _anticipation before turning the page_ to see what happens next in our story. It’s a moment to reflect on the progress made and envision the final result.
- 7. Grouting is the final step in our tile backsplash installation journey. It’s the process of filling in the gaps between the tiles with a _special kind of glue_ that not only secures them further but also adds a decorative touch. Choose a grout color that complements your tiles and enhances the overall aesthetic of your kitchen, tying the whole narrative together.
- 8. Lastly, after the grout has dried, we can apply a sealant to protect the tiles and grout from stains and make cleaning easier. This final touch is like adding the last sentence to our story, completing the tale of our tile backsplash and bringing our kitchen’s narrative full circle.
A Guide to Installing a Tile Backsplash
As I sit in my “Elizabeth Bennet” parlor, surrounded by vintage teapots and the warmth of a crackling fire, I am reminded that the devil is in the details when it comes to bringing a tile backsplash to life. Choosing the right tile adhesive is a crucial step that can make or break the entire project. It’s essential to select an adhesive that is compatible with your tile type and the surface you’re working with. I like to think of it as selecting the perfect blend of tea to complement my delicate china – it’s all about harmony and balance.
When it comes to cutting tile for beginners, it’s all about patience and practice. I recall my grandmother, an skilled seamstress, teaching me the importance of measuring twice and cutting once. This same principle applies to tile installation. To achieve a professional finish, it’s vital to take your time and ensure accurate cuts. My “Heathcliff” kitchen, with its dramatic and moody atmosphere, is the perfect space to experiment with different grouting techniques.
In the world of tile installation, preparing the wall is akin to setting the stage for a theatrical performance. It’s essential to create a smooth, even surface for your tile to shine. By doing so, you’ll avoid common mistakes that can lead to a less-than-desirable finish. As I sip my tea from my favorite vintage teapot, I am reminded that the journey to a stunning tile backsplash is just as important as the end result.
Choosing Adhesives for Timeless Tales
As I ponder the perfect adhesive for my tile backsplash, I find myself in the “Heathcliff Room” – my cozy study named after the brooding hero from Wuthering Heights. The right adhesive is akin to the binding force in a good novel, holding all the elements together seamlessly. For a timeless tale of tile and treasure, I recommend a modified thinset adhesive, which provides a strong bond and flexibility to accommodate the natural movements of my charming old home.
When selecting an adhesive, consider the type of tile you’re using and the conditions it will be subjected to. Just as my grandmother’s vintage teapots require gentle handling, certain tiles demand a specific adhesive to ensure a lasting bond. By choosing the right adhesive, you’ll be well on your way to crafting a tile backsplash that tells a story of warmth and welcome, much like the ones I envision in my “Elizabeth Bennet Room” – a bright and airy space that embodies the spirit of Pride and Prejudice.
Cutting Tiles With Beginners Magic
As I sit in my “Elizabeth Bennet” parlor, surrounded by vintage teapots and the warm glow of afternoon sunlight, I’m reminded that even the most daunting tasks can be tackled with a dash of magic. Cutting tiles, for instance, can seem intimidating, but with the right tools and a bit of patience, you’ll be weaving your own tale of tile and treasure in no time. For beginners, I recommend starting with a simple tile cutter or a wet saw, depending on the type of tile you’re working with.
With your tool of choice in hand, take a deep breath and let the beginner’s magic begin. Remember, it’s all about creating a story, one cut at a time. As you work, imagine the tiles coming together to form a beautiful narrative that reflects your personal style and whimsy. Don’t be afraid to experiment and try new things – after all, that’s where the true magic happens.
Weaving Wisdom: 5 Enchanted Tips for a Timeless Tile Backsplash
- Measure with the heart of a storyteller, considering the rhythm and flow of your space as you calculate the perfect tile layout to bring your kitchen’s narrative to life
- Select tiles that whisper tales of their own, whether through vintage patterns, earthy tones, or shimmering accents, to add depth and character to your backsplash
- Prepare your surface with the diligence of a literary editor, ensuring a clean, dry, and even base for your tiles to adhere to, just as a well-crafted story demands a strong foundation
- Apply adhesive with the flourish of a painter, spreading it evenly and generously to secure your tiles in place, much like the bonds of memory and imagination that hold a story together
- Grout with the precision of a watchmaker, filling the spaces between your tiles with a mixture that is both durable and beautiful, sealing your backsplash with the same care that a writer seals a narrative with its final sentence
Timeless Treasures from Our Tile Tale
We’ve discovered that the perfect tile backsplash is not just about functionality, but about weaving a narrative that welcomes warmth and character into our kitchens
By choosing the right adhesives and cutting tiles with a dash of beginner’s magic, we can overcome common obstacles and bring our unique vision to life
Ultimately, the journey to a stunning tile backsplash is a celebration of the stories we tell through our spaces, and the memories we create in the process of transforming them into cozy, uplifting realms
Timeless Tales in Tile
As we lay each tile, we’re not just building a backsplash, we’re weaving a narrative of warmth, of laughter, and of love – one that will be etched in the very heart of our home, a testament to the stories that make us who we are.
Margaret Silva
Weaving a Timeless Tale: Conclusion
As we conclude our whimsical journey to a timeless tile backsplash, let’s reflect on the magic we’ve uncovered along the way. From choosing the perfect adhesives to cutting tiles with beginner’s magic, each step has been a testament to the fact that home is where the heart is. Our guide has been more than just a series of instructions – it’s been an invitation to transform a dull kitchen wall into a stunning work of art that tells a story of warmth and welcome. By embracing the process and adding our personal touch, we’ve not only created a beautiful backsplash but also woven a tale that will be cherished for years to come.
As you stand back to admire your handiwork, remember that the beauty of a home lies in its imperfections. Your tile backsplash is more than just a practical installation – it’s a testament to your creativity and a reflection of the love and care you’ve poured into your space. So, go ahead, pour yourself a cup of tea, sit back, and let the story of your home unfold, one beautifully imperfect tile at a time.
Frequently Asked Questions
What type of tile is best suited for a backsplash in a kitchen with a vintage flair?
For a kitchen with a vintage flair, I adore using ceramic or glass tiles in soft, muted hues. They add a touch of nostalgia and warmth, reminiscent of my grandmother’s antique china. Subway tiles, especially, evoke a classic charm that pairs beautifully with vintage decor, don’t you think?
How do I ensure the tiles are properly aligned and spaced to create a cohesive, storybook-inspired design?
To conjure a storybook-inspired design, I swear by the trusty spirit level and a pencil mark or two. Gently snap a chalk line to guide your tile placement, and don’t forget to leave a whisper of space between each tile for a dash of magic.
What are some creative ways to use tile to add a pop of color or whimsy to my backsplash, like a character in a literary novel?
Let’s bring a dash of personality to your backsplash, shall we? Consider creating a mosaic pattern with vibrant tiles, or add a decorative border that tells a story, just like the whimsical rooms in my own home, like the ‘Heathcliff’ kitchen, where moody blues meet warm, golden hues.