I still remember the first time I refinished my grandfather’s old wooden canoe – the smell of the varnish, the feel of the wood grain beneath my fingers. It was a summer of discovery, and I learned that applying a durable wood finish isn’t just about following instructions, but about uncovering the art of bringing out the natural beauty of the wood. As I delved deeper into the world of wood finishing, I realized that many people struggle with the concept of how to apply a durable wood finish, often relying on trial and error or settling for subpar results.
In this guide, I’ll share my honest and practical advice on how to apply a durable wood finish that will make your project shine. From the initial preparation to the final coat, I’ll walk you through the process, highlighting common pitfalls to avoid and expert tips to achieve a stunning finish. Whether you’re a seasoned woodworker or a beginner, this article will provide you with the confidence and knowledge to tackle your next project with ease, and uncover the beauty of durable wood finishes for yourself.
Table of Contents
- Guide Overview: What You'll Need
- Step-by-Step Instructions
- Unveiling Durable Wood Finishes
- Polishing to Perfection: 5 Essential Tips for a Durable Wood Finish
- Bringing It All Together: 3 Essential Takeaways
- Timeless Wisdom for a Durable Finish
- Bringing Your Woodworking Vision to Life
- Frequently Asked Questions
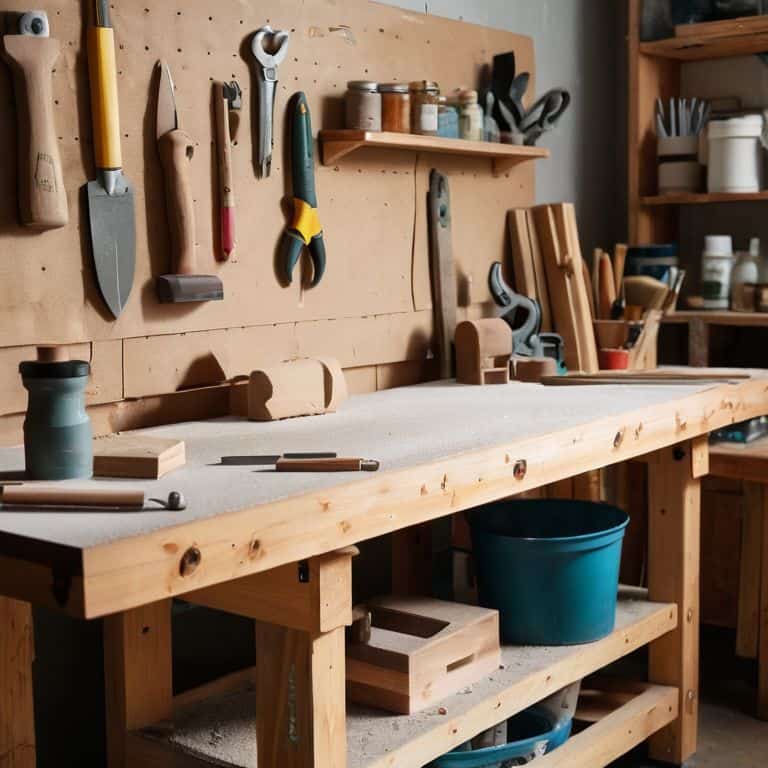
Guide Overview: What You'll Need

Total Time: 2 hours 30 minutes
Estimated Cost: $50 – $100
Difficulty Level: Intermediate
Tools Required
- Clean Lint-Free Rags (for applying and wiping off excess finish)
- Foam Brush (for applying finish to small or intricate areas)
- Lambswool Applicator (for applying finish to large, flat surfaces)
- Sandpaper (various grits, for smoothing out wood surface)
- Drop Cloths or Old Sheets (for protecting work surface and floor from spills and stains)
Supplies & Materials
- Wood Finish (Polyurethane, Varnish, or Oil) (choose the type and sheen that suits your project)
- Wood Conditioner or Filler (optional, for filling gaps or pores in wood)
- Mineral Spirits or Turpentine (for thinning finish or cleaning tools)
- Wood Sealant (optional) (for added protection against moisture and wear)
Step-by-Step Instructions
- 1. First, prepare your workspace by laying down a drop cloth or old sheets to protect your floor from any spills or stains. This is a crucial step, as it will save you a lot of time and hassle in the long run. I remember my grandfather, a skilled woodworker, always emphasizing the importance of a clean and organized workspace.
- 2. Next, sand the wood surface to smooth out any rough patches or imperfections. This will help the finish adhere evenly and ensure a professional-looking result. I like to use a combination of coarse and fine-grit sandpaper to get the job done, and I always sand in the direction of the wood grain to avoid scratching the surface.
- 3. Now, apply a wood conditioner if necessary, especially if you’re working with a type of wood that’s prone to warping or discoloration. This step can help stabilize the wood and prevent any unwanted surprises down the line. I’ve learned to always read the manufacturer’s instructions carefully and follow the recommended application guidelines.
- 4. After that, apply a primer to the wood surface, using a high-quality brush or roller to ensure an even coat. This will help the finish bond with the wood and create a strong, durable seal. I like to use a water-based primer, as it’s easier to clean up and dries quickly.
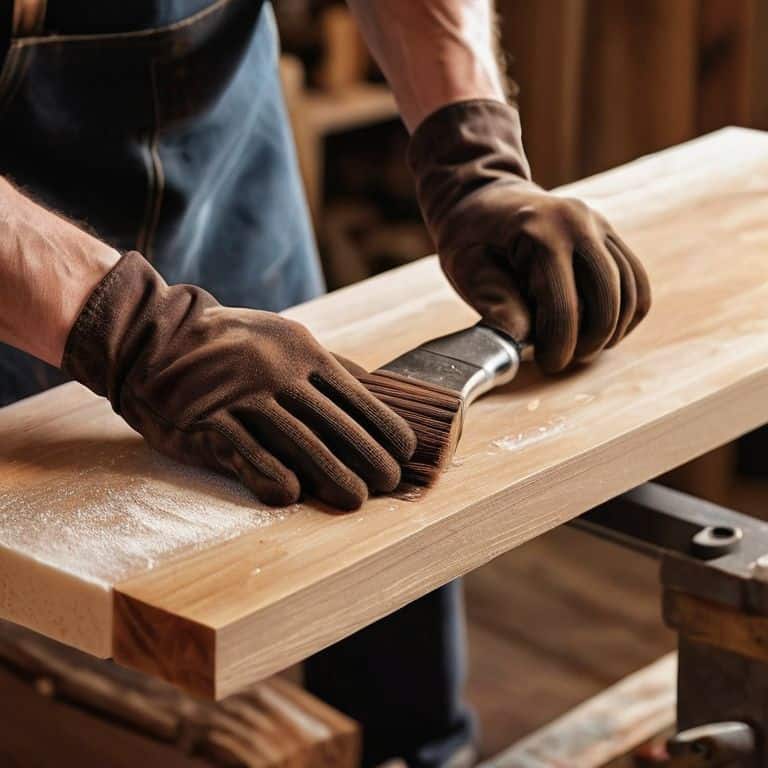
- 5. Once the primer is dry, apply the first coat of finish using a clean, lint-free cloth or a foam brush. Work in small sections, applying the finish in a smooth, even motion. I find that it’s essential to follow the manufacturer’s instructions for application and drying times to avoid any mistakes.
- 6. Allow the first coat to dry completely, according to the manufacturer’s instructions, before applying subsequent coats. Depending on the type of finish you’re using, you may need to apply multiple coats to achieve the desired level of protection and sheen. I like to use a drying time chart to keep track of the process and ensure that each coat is fully dry before moving on to the next one.
- 7. Finally, inspect and touch up the finished surface, looking for any areas that may need additional coats or repairs. This is also a good time to apply a topcoat or sealant, if desired, to add an extra layer of protection and gloss to the finish. I always take a step back and admire my handiwork, feeling a sense of pride and satisfaction at a job well done.
Unveiling Durable Wood Finishes
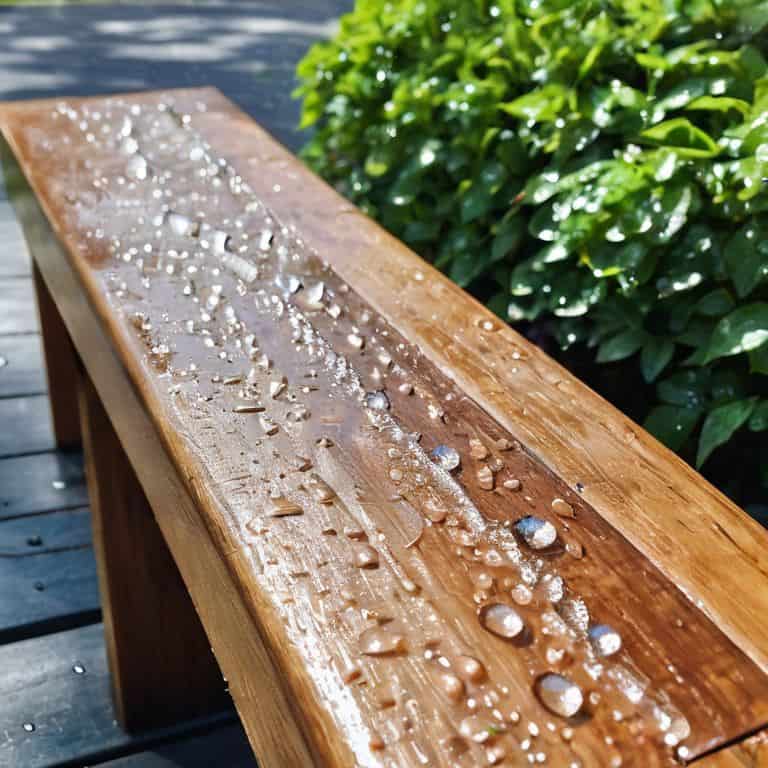
As I delve into the world of durable wood finishes, I’m reminded of my treasure hunting adventures at flea markets, where a beautifully refinished wooden piece can stand out among the crowds. One crucial aspect to consider when working with wood is waterproofing wood for outdoor use, especially if you’re planning to place your finished project in an area exposed to the elements. I’ve seen many a wooden treasure succumb to the harsh effects of rain and sunlight, which is why I always recommend applying a durable wood finish that’s specifically designed to withstand the outdoors.
When it comes to working with plywood, applying polyurethane can be a game-changer. Not only does it provide a protective barrier against scratches and spills, but it also enhances the natural beauty of the wood grain. For high-traffic areas, I swear by durable wood stain options that are resistant to fading and wear. A good stain can make all the difference in maintaining the appearance of your wood project over time. Whether you’re refinishing a piece of furniture or building something from scratch, the right stain can give you a professional-looking finish that’s sure to impress.
In my experience, tips for even varnish application are essential for achieving a smooth, flawless finish. One of my favorite techniques involves using a foam brush to apply the varnish in thin, even coats, allowing each layer to dry completely before adding the next. This approach may take a bit more time and patience, but the end result is well worth the effort. By following these tips and using the right materials, you can create a beautiful, long-lasting wood finish that will withstand the test of time.
Applying Polyurethane With Ease
As I delve into the world of durable wood finishes, I’m reminded of my treasure hunting adventures at flea markets, where a beautifully restored wooden piece can tell a story of its own. Applying polyurethane is an art that requires patience and the right technique. I recall my first attempt at refinishing an old wooden rocking chair I found at a market – the polyurethane brought out the warm, honey tones of the wood, and it’s been a staple on my porch ever since.
To apply polyurethane with ease, start by preparing your surface, ensuring it’s smooth and free of dust. Then, use a high-quality brush or foam applicator to evenly coat the wood, working in thin layers to avoid pooling. Allow each layer to dry according to the manufacturer’s instructions before lightly sanding and applying the next coat. With each layer, you’ll see the wood transform, its grain and character enhanced by the protective finish.
Waterproofing Wood for Coastal Charm
As I wandered through the flea market near my coastal hometown, I stumbled upon an old, weathered wooden sign that caught my eye. The vendor told me it had been salvaged from a beachside pier, and I was immediately drawn to its rugged charm. To achieve a similar look and protect wood from the elements, I’ve learned to emphasize the importance of waterproofing. A durable wood finish can make all the difference in withstanding the salty air and sea spray that comes with coastal living.
I’ve found that applying a marine-grade sealant or wax can help lock in the wood’s natural beauty while keeping it safe from the harsh coastal environment. It’s a simple yet effective step in maintaining the timeless appeal of wooden accents, whether it’s a refinished canoe or a reclaimed wooden bench on a seaside porch.
Polishing to Perfection: 5 Essential Tips for a Durable Wood Finish
- Prepare the Wood Surface: Before applying any finish, ensure the wood is sanded to a smooth finish, and all dust and debris are removed to guarantee a strong bond between the wood and the finish
- Choose the Right Finish: Select a durable wood finish that suits your project’s needs, considering factors such as UV resistance, waterproofing, and the desired sheen level
- Apply Thin Coats: To avoid drips and unevenness, apply thin coats of finish, allowing each layer to dry according to the manufacturer’s instructions before adding the next
- Work in a Well-Ventilated Area: Always apply wood finishes in a well-ventilated area to prevent the inhalation of fumes and to speed up the drying process
- Inspect and Touch-Up: After the final coat has dried, inspect the surface for any imperfections and touch up as needed to ensure a flawless, professional-looking finish
Bringing It All Together: 3 Essential Takeaways
Always remember to prepare your wood surface before applying any finish, just like I do when I’m restoring a vintage find from a flea market – it makes all the difference in achieving that perfect, durable finish.
Choose the right type of finish for your project, considering factors like durability, maintenance, and the unique character you want to add, much like selecting the perfect postcard to inspire my next travel story.
Never underestimate the power of patience and thin layers when applying a wood finish, as it allows for a deeper, richer color and a finish that will truly last, much like the stories and memories that unfold from the postcards I collect on my travels.
Timeless Wisdom for a Durable Finish
A durable wood finish is not just about protection, it’s about preserving the story of the wood, and with every brushstroke, you’re not just applying a coat, you’re crafting a legacy that will weather the storms of time.
Vera Kump
Bringing Your Woodworking Vision to Life
As I reflect on our journey to apply a durable wood finish, I want to emphasize the importance of patience and practice. From the initial preparation to the final coat of polyurethane, each step requires attention to detail and a willingness to learn. Whether you’re aiming to achieve a coastal charm or a more rustic look, the key to success lies in understanding the unique characteristics of your wood and the environment it will inhabit. By following the steps outlined in this guide, you’ll be well on your way to creating beautiful, long-lasting pieces that tell a story of their own.
As you embark on your own woodworking adventures, remember that the true magic happens when you combine technique with creativity and experimentation. Don’t be afraid to try new things and push the boundaries of what’s possible. With every project, you’ll refine your skills and develop a deeper appreciation for the art of woodworking. So, go ahead, unleash your inner craftsman, and watch your vision come to life – one beautifully finished piece at a time.
Frequently Asked Questions
What are the most common mistakes to avoid when applying a durable wood finish?
As I’ve learned from refinishing my grandfather’s old canoe, common mistakes to avoid include uneven application, insufficient drying time, and not preparing the wood surface properly – all of which can lead to a finish that’s more prone to scratches and fading, rather than the gorgeous, timeless look we’re aiming for.
How do I choose the right type of wood finish for my specific project, considering factors like durability and aesthetic appeal?
Choosing the right wood finish is like finding the perfect treasure at a flea market – it’s all about the hunt. Consider the project’s purpose, the type of wood, and the desired look. For me, it’s about balancing durability and aesthetic appeal, like a beautiful postcard that tells a story.
Can I apply a durable wood finish to previously finished or painted wood, and if so, what preparations are necessary?
I’ve definitely encountered this question on my treasure hunts. Yes, you can apply a durable wood finish to previously finished or painted wood, but first, you’ll need to strip the old finish and sand the surface to create a smooth base – it’s like uncovering a hidden gem at a flea market, you never know what beauty lies beneath!


