I still remember the first time I had to replace a kitchen faucet in my parents’ quaint bed-and-breakfast – it was a daunting task that left me feeling like a treasure hunter searching for a rare gem in a crowded flea market. But, as I delved into the process, I discovered that it’s not as overwhelming as it seems, and that’s why I’m excited to share with you a guide to replacing a kitchen faucet. The common myth that it’s a job only for seasoned plumbers is simply not true – with the right tools and a bit of patience, anyone can do it.
As you embark on this journey, I promise to provide you with honest and practical advice that will make the process a breeze. You’ll learn how to navigate the basics of faucet replacement, from choosing the right faucet to installing it with ease. My goal is to empower you with the knowledge and confidence to tackle this project, and I’m committed to sharing my expertise in a way that’s easy to understand and follow. So, let’s get started and make this experience a treasure to remember!
Table of Contents
- Guide Overview: What You'll Need
- Step-by-Step Instructions
- Tuning the Tap a Guide
- Turning the Tide: 5 Essential Tips for a Smooth Kitchen Faucet Replacement
- Treasured Tips: 3 Key Takeaways for a Successful Kitchen Faucet Replacement
- Tuning the Tap with Wisdom
- Turning the Page: A New Chapter for Your Kitchen
- Frequently Asked Questions
Guide Overview: What You'll Need
Total Time: 2 hours 30 minutes
Estimated Cost: $50 – $200
Difficulty Level: Intermediate
Tools Required
- Basin Wrench for reaching and turning faucet mounting nuts
- Channel-Type Pliers for gripping and bending various parts
- Adjustable Wrench for loosening supply lines
- Teflon Tape for threading pipes
- Needle-Nose Pliers for reaching small spaces
Supplies & Materials
- New Kitchen Faucet with mounting hardware
- Faucet Mounting Gasket for ensuring watertight seal
- Water Supply Lines if replacing old ones
- Plumber’s Putty for faucet drain assembly
Step-by-Step Instructions
- 1. First, prepare your workspace by clearing out the area under the sink and laying down a drop cloth or old towels to protect the floor from any water spills or debris. This will give you a clean and safe space to work on your faucet replacement project.
- 2. Next, turn off the water supply to the faucet by locating the shut-off valves under the sink and turning them clockwise. Open the faucet to drain the water from the pipes, and then close it again to prevent any accidental water flow during the replacement process.
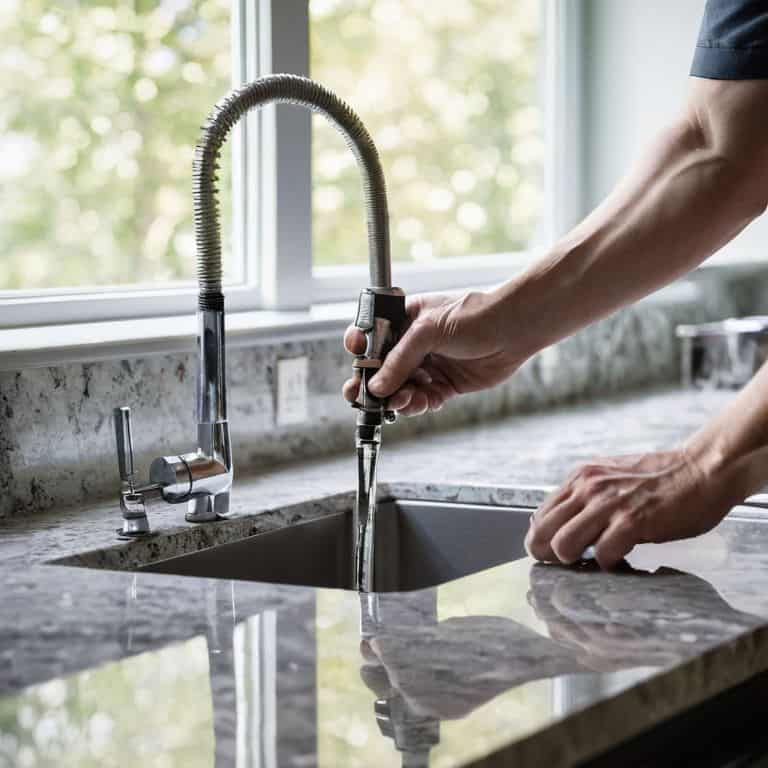
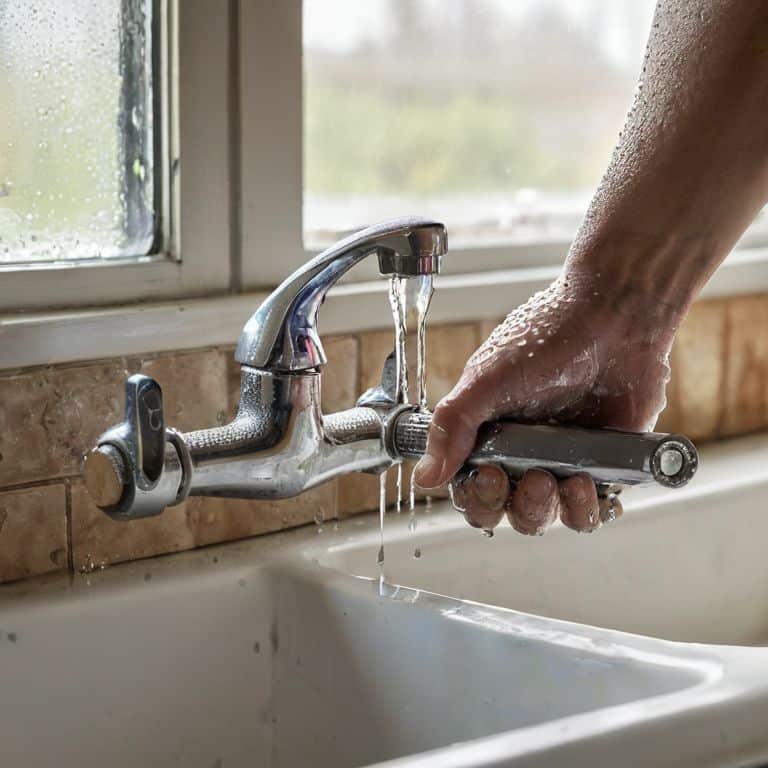
- 3. Now, disconnect the water supply lines from the old faucet by using a wrench to loosen the nuts that hold them in place. You may need to use a basin wrench to reach the nuts, depending on the type of faucet you have. Once loose, you should be able to remove the lines from the faucet.
- 4. The next step is to remove the old faucet by taking out the screws or clips that hold it in place. This may require a screwdriver or an Allen wrench, depending on the type of faucet you have. Gently lift the old faucet out of the sink, taking care not to damage any surrounding surfaces.
- 5. After removing the old faucet, inspect and clean the area where the new faucet will be installed. Remove any old caulk or debris and wipe down the surface with a clean cloth to ensure a smooth installation process.
- 6. Now it’s time to install the new faucet, starting by applying a thin layer of caulk or plumber’s putty to the bottom of the faucet where it will meet the sink. Then, carefully lower the new faucet into place, making sure it’s centered and even.
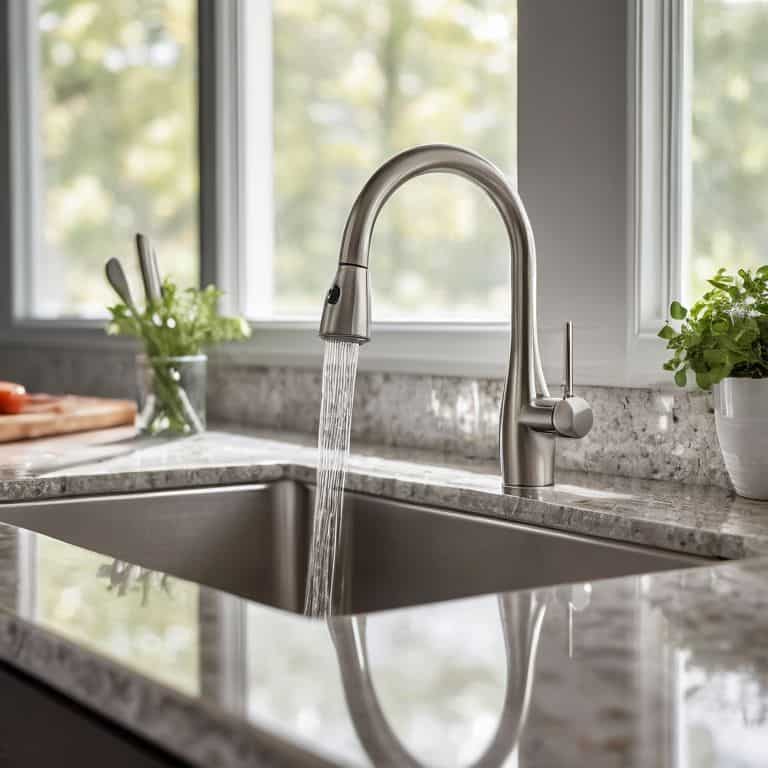
- 7. Finally, reconnect the water supply lines to the new faucet, making sure they’re securely attached with the nuts you loosened earlier. Turn the water supply back on and check for any leaks by running the water through the faucet for a few minutes. If you notice any leaks, tighten the connections as needed to seal them.
Tuning the Tap a Guide
As I delved into the world of kitchen faucet installation, I discovered that the kitchen faucet installation cost can vary greatly depending on the type of faucet and the complexity of the installation. However, with the right tools and a little patience, you can achieve a successful replacement without breaking the bank. I’ve found that having the best tools for faucet replacement can make all the difference in the process.
When it comes to avoiding common pitfalls, it’s essential to follow a step by step faucet installation guide to ensure that every detail is accounted for. This will help you steer clear of common faucet replacement mistakes that can lead to leaks, poor water pressure, or even damage to your countertops. By being meticulous and taking your time, you can enjoy a seamless and efficient installation process.
In some cases, you may be wondering whether to opt for kitchen faucet repair vs replacement. If your faucet is old or damaged beyond repair, replacement is often the most cost-effective solution. Additionally, considering faucet mounting types and styles can help you choose the perfect faucet to match your kitchen’s unique aesthetic. By weighing your options carefully, you can make an informed decision that suits your needs and budget.
Beyond Drips Kitchen Faucet Repair vs Replacement
Beyond Drips: Kitchen Faucet Repair vs Replacement
As I wandered through a quaint flea market last weekend, I stumbled upon an old faucet that sparked a thought – when does it make sense to repair versus replace a kitchen faucet? In my experience, if the issue is a simple leak or worn-out O-ring, a repair might be the way to go. However, if you’re dealing with more complex problems like corrosion or faulty valves, it’s often better to opt for a replacement. I’ve found that weighing the costs and considering the age of your faucet can help make this decision easier.
I recall a postcard I collected from a small town in Italy, where the homeowner had beautifully restored an antique faucet to its former glory. While repair can be a cost-effective and environmentally friendly option, there are cases where replacement is the more practical choice. By considering these factors, you can make an informed decision that suits your needs and budget, and get back to cooking up a storm in your kitchen.
Faucet Mounting Styles for Your Dream Kitchen
As I wandered through a quaint flea market last weekend, I stumbled upon an antique faucet that sparked my curiosity about the various mounting styles available for our dream kitchens. From sleek, wall-mounted faucets to traditional, center-set faucets, the choices can be overwhelming. I’ve collected postcards from various destinations, each with its unique take on kitchen design, and I’m excited to share my findings with you.
When it comes to faucet mounting styles, it’s essential to consider the overall aesthetic you want to achieve in your kitchen. Do you prefer a modern, minimalist look or a more classic, elegant feel? Perhaps you’ve seen a stunning kitchen design on one of my postcards, and you’re inspired to recreate it in your own home. Whatever your style, choosing the right faucet mounting style can make all the difference in bringing your vision to life.
Turning the Tide: 5 Essential Tips for a Smooth Kitchen Faucet Replacement
- Shut off the water supply before you start, to avoid any unexpected drips or floods, trust me, I’ve been there and have the polaroid to prove it!
- Choose a faucet that fits your mounting style, whether it’s a sleek single-handle or a traditional two-handle, the right choice will make all the difference in your kitchen’s overall aesthetic
- Don’t forget to apply some Teflon tape to those threads, it’s a small step that’ll save you from a world of leaks and headaches down the line
- Take your time when disconnecting the water supply lines, it’s easier to work with them when they’re not tangled, kind of like untangling a ball of twine at a flea market treasure hunt
- Test your faucet after installation, run the water, check for leaks, and make sure everything is working as it should, it’s like finding that perfect postcard to send back home, pure satisfaction!
Treasured Tips: 3 Key Takeaways for a Successful Kitchen Faucet Replacement
Before you start, ensure you’ve turned off the water supply to avoid any drips or floods, just like I avoid getting my polaroid camera wet at a flea market on a rainy day!
Choose a faucet mounting style that fits your dream kitchen aesthetic, whether it’s a sleek, modern look or a vintage charm that matches the postcards I collect from my travels
Remember, replacing a kitchen faucet is easier than navigating a treasure hunt, but with these steps and a bit of patience, you’ll be tuning the tap like a pro and enjoying your new kitchen gem in no time, with a story to tell and perhaps even a new postcard to inspire my next adventure
Tuning the Tap with Wisdom
Replacing a kitchen faucet is not just about fixing a leak, it’s about uncovering the hidden rhythm of your kitchen, where every turn of the tap tells a story of nourishment, comfort, and love.
Vera Kump
Turning the Page: A New Chapter for Your Kitchen
As we conclude this journey to replace your kitchen faucet, let’s take a moment to reflect on the key takeaways: understanding the difference between repair and replacement, choosing the right faucet mounting style, and following a step-by-step guide to ensure a successful installation. It’s been a treasure hunt of sorts, navigating through the world of kitchen faucets, and I hope you’ve enjoyed the ride as much as I have. With your new faucet in place, you’ll be savoring the joy of a job well done and the promise of countless meals to come.
Now, as you stand back to admire your handiwork, remember that this is more than just a faucet replacement – it’s an opportunity to reimagine your kitchen and make it a space that truly reflects your personality. So, go ahead, take a photo of your new faucet, and let it be the first postcard in your own story of kitchen adventures, filled with warm memories and delicious recipes to share with loved ones.
Frequently Asked Questions
What are the most common mistakes to avoid when replacing a kitchen faucet?
When swapping out your kitchen faucet, beware of oversights like not turning off the water supply, or failing to measure the faucet’s mounting holes – it’s like searching for a rare treasure at a flea market, you’ve got to have the right eye for detail to find the perfect fit!
How do I choose the right faucet mounting style for my kitchen countertop?
Choosing the right faucet mounting style is like finding the perfect treasure at a flea market – it’s all about the fit! Consider your countertop type and desired look. Do you need a deck-mounted, wall-mounted, or sink-mounted faucet? Think about the number of holes in your countertop and the style that suits your kitchen’s vibe.
Are there any specific tools or materials I need to have before starting the replacement process?
Before diving in, make sure you have a few essentials like a basin wrench, channel-type pliers, and some Teflon tape. Don’t forget a bucket to catch any water that might spill during the swap! Having these treasures on hand will make the process smoother than finding a rare gem at a flea market.


