I was standing in my sun-drenched studio last Tuesday, staring at a patch of peeling, janky eggshell paint that looked more like a topographical map of the Andes than a wall, when it hit me: most people think a successful makeover requires a massive trip to the big-box store for expensive, specialized gear. But here’s the truth—learning how to repaint a room properly isn’t about having the fanciest rollers or the most expensive synthetic primer; it’s about respecting the surface you already have and understanding the rhythm of the work. I remember my grandmother used to say that if you treat your tools with kindness, they’ll return the favor, and that’s exactly the mindset we need to bring to this project.
In this guide, I’m stripping away all the intimidating jargon to give you a real, down-to-earth roadmap for success. We’re going to dive into the art of prepping your space using what you’ve likely already got in your junk drawer, choosing colors that actually dance with your natural light, and mastering that smooth, professional finish without the headache. My goal is to show you that transforming your sanctuary is less about perfection and more about the joy of the process.
Guide Overview
Tools & Supplies
- Paint roller and tray for large surfaces
- Angled brush for cutting in edges
- Painter's tape for clean lines
- Sandpaper for smoothing walls
- Drop cloths to protect flooring
- Interior paint (1-2 gallons per coat)
- Painter's primer (1 gallon)
- Spackle for filling holes
- Microfiber cloths for cleaning dust
Step-by-Step Instructions
- 1. Before we even touch a brush, we need to clear the stage. Pull your furniture into the center of the room and cover it with those old cotton sheets or even some thrifted drop cloths—anything is better than those thin plastic ones that stick to everything. I like to grab some painter’s tape, but if you’re short on supplies, check your junk drawer for old newspapers to protect your baseboards; it’s all about protecting the surfaces that aren’t getting a makeover.
- 2. Now, let’s get those walls ready to receive their new skin. Grab a damp cloth and a bucket of warm water to wipe away the dust and cobwebs that have been nesting in the corners. If you find any little nicks or holes from old picture frames, don’t sweat it! A little bit of filler and a quick sand will make the wall smooth as a river stone, ensuring your new color looks intentional and polished rather than patchy.
- 3. Time to get tactical with the edges. This is the part where most people rush, but I promise, taking your time here is where the magic happens. Use a small, angled brush to “cut in” around the ceiling, the trim, and the outlets. It’s a bit like tracing a pattern in a quilt; you want to be deliberately precise so that when we bring out the big rollers, we aren’t worried about messy lines.
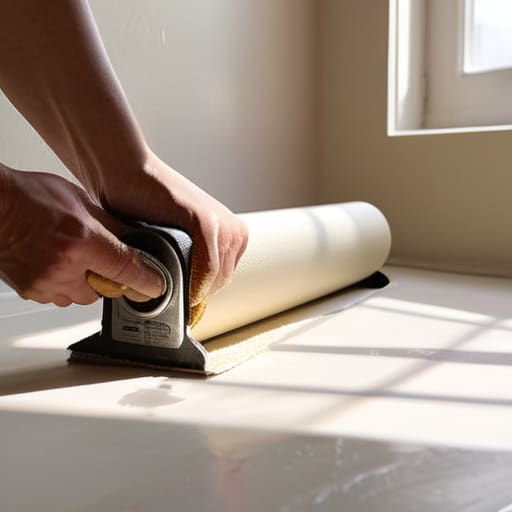
- 4. Grab your roller and let’s get moving! I always recommend starting with a good primer if you’re going from a dark color to a light one, or if the walls are feeling a bit thirsty. When you apply the paint, use a “W” or “M” motion to distribute it evenly across the wall before filling in the gaps. This technique helps you avoid those dreaded streaks and ensures the pigment settles in a way that looks natural and deep.
- 5. Patience is our best friend here. Once your first coat is on, resist the urge to immediately go back in for more. Let the room breathe and let that first layer dry completely—usually a few hours, depending on how humid your space is feeling. Applying a second coat is what truly transforms a “painted room” into a vibrant, layered sanctuary that feels rich and complete.
- 6. The final act is the most rewarding: the reveal! Once everything is bone-dry to the touch, peel away your painter’s tape while it’s still slightly tacky to get those crisp, clean lines. As you move your furniture back into place and maybe add a few sprigs of dried lavender or a reclaimed wood shelf, you’ll see that this wasn’t just a chore—it was a way to honor your space and make it truly yours.
Gathering Your Essential Painting Tools and Supplies
Now, before we get our hands messy, let’s take a quick stroll through the “treasure hunt” phase. I’ve always found that the best way to approach gathering your essential painting tools and supplies is to look at what you already have in that dusty junk drawer or the back of the garage. You don’t need a fancy, high-end kit to get the job done; often, a well-loved, sturdy brush from a previous project is more reliable than something brand new and flimsy. I like to grab a few old cotton t-shirts to use as rags—they are absolute lifesavers for preventing paint drips and splatters on your flooring.
As you gather your gear, think about the texture you’re aiming for. If you’re working on a surface that’s seen better days, remember that the secret to achieving a smooth paint finish isn’t just in the brush strokes, but in the quality of your rollers and trays. I usually keep a small container of water and a bit of mild soap nearby, too; it makes cleaning your tools much easier, ensuring they stay supple and ready for your next creative adventure.
The Magic of How to Prep Walls for Painting
Now, here is where the real alchemy happens. I always tell my clients that while picking a color is the fun part, the true soul of a project lies in the preparation. Think of it like clearing a forest floor before planting a new garden; you need a clean, stable foundation to let your vision truly bloom. Learning how to prep walls for painting is less about the heavy lifting and more about the mindfulness of the process. I like to grab an old, soft cotton rag—maybe one of those vintage ones I found at a local estate sale—to wipe down the surfaces. Getting rid of every speck of dust ensures that your new pigment bonds deeply with the surface, which is the secret to achieving a smooth paint finish that looks like it was poured on by hand.
Don’t rush this stage! If you’ve got any tiny nicks or old nail holes, treat them with a bit of love using some lightweight spackle. Once those are smoothed out, you’re ready for the next big leap. A huge part of the magic is finding the best way to apply primer to seal those repairs. It’s like giving your walls a fresh, even canvas so your color can sing without any interruptions.
Small Tweaks, Big Magic: My Secret Sauce for a Flawless Finish
- Don’t fear the light—before you commit to that moody forest green, grab a few scraps of cardboard and paint some test patches. I always check how the color dances under my morning sunlight versus my warm evening lamps; it’s a total game-changer for how the room actually feels.
- Treat your edges like fine art. Instead of rushing through the whole wall, take your time with a small brush to “cut in” around the ceiling and baseboards first. It’s a bit more meditative than you’d think, and it prevents those messy streaks that make a room look rushed.
- Embrace the “two-coat rule” even if you think you’re being efficient. I know, I know, it’s tempting to just slap one thick layer on and call it a day, but two thin, even layers are the secret to that professional, velvety depth that makes a DIY project look like it came straight from a designer’s studio.
- Keep a damp rag and a small bowl of water tucked in your apron pocket. Even the most careful crafter might catch a stray drip, and being able to whisk it away instantly keeps your workspace feeling intentional and clean rather than chaotic.
- Listen to the rhythm of the roller. When you’re applying the paint, try to use a consistent “W” or “M” motion to distribute the pigment evenly across the surface. It keeps the texture uniform and prevents those dreaded lap marks that show up when you’re trying to patch sections together later.
The Final Stroke of Genius
Now that the dust has settled and the last bit of painter’s tape is peeled away, take a second to look around. We’ve moved from those dusty, neglected corners to a space that feels entirely renewed. By taking the time to gather the right tools, prepping those surfaces with intention, and applying your layers with care, you haven’t just changed a color; you’ve honored the bones of your home. It’s easy to rush through a project, but the magic truly happens in those small, deliberate moments—like smoothing out that one stubborn patch of primer or choosing a shade that catches the morning light just right. You’ve done the heavy lifting, and the results speak for themselves.
As you step back to admire your handiwork, I hope you feel that same spark of pride I get whenever I finish a project. Remember, painting a room isn’t just about aesthetics; it’s a beautiful act of creative stewardship. You are taking something lived-in and tired and breathing fresh, vibrant energy back into it. This is just one way to practice the art of living intentionally, proving that with a little bit of patience and a lot of heart, we can reshape our surroundings to better reflect who we are. So, go ahead—grab a cup of tea, sit in your newly transformed space, and soak in the joy of a job well done.
Once you’ve got your walls prepped and your colors picked out, the real fun begins—but I’ve learned that the best projects often come from a little bit of unexpected inspiration. Sometimes, when I’m feeling stuck on a color palette or just need a fresh perspective on how to style a space, I find it incredibly helpful to reach out and meet people in Vancouver online to see how other creative souls are transforming their own homes. Connecting with a community of makers can truly spark that next big idea, turning a simple weekend chore into a beautiful moment of shared creativity.