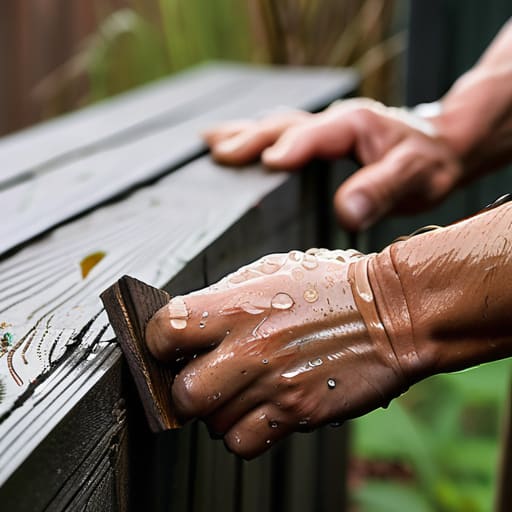
I was standing in my backyard yesterday, coffee in hand, staring at the jagged, splintered mess that used to be my garden’s perimeter, and I realized something: most people think a fallen fence means you need to head straight to the big-box store for a pricey replacement. But honestly? That’s just not true. Before you go blowing your budget on brand-new timber, let’s talk about how to fix a fence panel after a storm using what you’ve likely already got tucked away in your shed or garage. I remember my grandmother used to say that a little bit of ingenuity can mend almost anything, and looking at my battered cedar boards, I knew we could breathe new life into them without a total overhaul.
In this guide, I’m skipping the complicated jargon and the “buy this specific expensive tool” nonsense. Instead, I’m going to show you how to assess the structural damage, salvage those weathered boards, and perform a few clever, sustainable repairs that will stand up to the next gust of wind. We’ll focus on practical, hands-on solutions that prioritize stability and resourcefulness, ensuring your garden boundary looks intentional and strong again. Let’s get to work!
Guide Overview
Tools & Supplies
- Hammer or Sledgehammer for driving nails/screws
- Drill/Driver for securing new boards or posts
- Measuring tape for accuracy
- Handsaw or Circular saw for trimming wood
- Replacement fence pickets (as many as needed)
- Exterior grade wood screws or galvanized nails
- Wood glue (exterior grade)
- Replacement post (if post is snapped)
Step-by-Step Instructions
- 1. Before we grab the hammer, let’s take a gentle stroll around the perimeter to assess the damage. I like to think of this as a little scavenger hunt; you’re looking to see what’s truly broken and what just needs a little nudge back into place. Check the posts for stability and see if any boards have simply popped out of their grooves, or if we’re looking at a more significant structural hiccup.
- 2. Once we know what we’re dealing with, it’s time to gather our supplies, but don’t feel like you need to run to the big-box store just yet! Scour your garage for any leftover screws, galvanized nails, or even some sturdy twine if we’re just doing a temporary patch. If you find some old, weathered timber in the shed that’s still structurally sound, it might make the perfect replacement piece for a cracked slat.
- 3. If a specific board is splintered or rotting, let’s go ahead and liberate the old wood from the frame. Use a pry bar—or, if you’re feeling resourceful, a sturdy flat-head screwdriver and a bit of elbow grease—to carefully pop the damaged piece out. Try to be as gentle as possible with the surrounding frame; we want to keep the “skeleton” of your fence intact so we have a solid foundation for the new bits.
- 4. Now, let’s prep our replacement piece. If you’re using reclaimed wood from one of those weekend garage sales or a piece of an old pallet, give it a quick sand to smooth out those rough edges. This not only makes it safer for your hands but also gives it a lovely, weathered character that blends right in with the rest of your garden boundary.
- 5. It’s time for the fun part: the installation! Align your new board with the existing rails and start securing it. I always recommend using exterior-grade screws rather than nails if you can, as they tend to hold onto the wood much more stubbornly when the next big windstorm rolls through. If you’re working solo, don’t be afraid to use a heavy rock or a brick to prop the board up while you get your bearings.
- 6. If the entire panel is leaning because a post has shifted, we might need to perform a little “garden surgery.” Dig out the soil around the base of the post to see how much wiggle room we have, and consider adding some crushed stone or even old brick fragments at the bottom to create a more stable footing before packing the earth back down tightly.
- 7. Finally, let’s give the whole project a celebratory once-over. Check every screw and every slat to ensure everything feels sturdy and snug. If you have any leftover wood scraps, don’t toss them! We can always save them for a small birdhouse project or a decorative garden marker down the road.
A Storm Damage Fence Inspection Checklist for Your Sanctuary

Before you grab your hammer and dive headfirst into the repairs, I like to take a slow, mindful walk around the perimeter. Think of it as a little reconnaissance mission for your outdoor sanctuary. I always carry a small notebook—or even just a scrap of cardboard and a charcoal stick if I’m feeling particularly rustic—to jot down what I see. A thorough storm damage fence inspection checklist should start from the ground up. Don’t just look at the obvious gaps; run your hands along the base to check for rot and peer closely at the joints. Sometimes, what looks like a simple crack is actually a sign of deeper structural fatigue that might require securing loose fence posts rather than just patching a board.
While you’re inspecting, keep an eye out for the subtle “tells” of future trouble. Is the line of the fence still true, or are you fixing leaning garden fences that have lost their footing? I also recommend checking the tension of any wire or the tightness of your screws. It’s much easier to catch these little hiccups now than to face a total collapse during the next heavy gust. Taking this moment to truly see your garden’s boundaries ensures that your hard work actually lasts.
Gathering Your Fence Repair Tools and Materials With Intention
Before we dive into the heavy lifting, let’s take a moment to gather our supplies with a bit of mindfulness. I like to think of this part as setting the stage for a creative revival rather than just a chore. Instead of rushing out for brand-new, plastic-heavy kits, take a peek in your shed or garage first. You might find that an old hammer, a trusty level, or even some leftover screws from a previous weekend project are exactly what you need for securing loose fence posts. If you find you’re missing something, try to source reclaimed hardware or even check a local community tool library; it keeps the spirit of sustainability alive while we work.
As you assemble your toolkit, keep a small basket nearby for the “scraps.” While you’re prepping for replacing broken wooden fence panels, you might find a few sturdy slats that are still perfectly salvageable. I always keep a jar of mismatched nails and some sandpaper handy to give those weathered pieces a little TLC. Having your fence repair tools and materials organized in a colorful bucket makes the process feel less like a daunting task and more like a joyful afternoon of restoration in your own backyard sanctuary.
Five Little Secrets for a Resilient and Beautiful Repair
- Don’t just patch the hole; look for the “why.” If a board snapped, check if the soil underneath has shifted or if the post is leaning. Fixing the root cause—like adding a bit of gravel for drainage—ensures your hard work doesn’t just wash away with the next heavy rain.
- Embrace the art of the “patchwork quilt” approach. If you’re replacing a single slat, don’t stress about finding a perfect, identical match from a big-box store. Grab a piece of reclaimed cedar or even an old pallet board, sand it down, and let that slight variation in texture add character to your garden’s edge.
- Treat your fasteners like the tiny anchors of your sanctuary. Instead of standard nails that might pop out as the wood swells and shrinks, reach for some high-quality, exterior-grade screws. They hold onto the wood much more lovingly through the changing seasons.
- Give your repairs a little extra love with a natural sealant. Once your new boards are in place, a quick coat of linseed oil or a non-toxic wood preservative will act like a cozy sweater, protecting your handiwork from the dampness that follows a storm.
- Listen to the rhythm of your garden. After you’ve finished the heavy lifting, spend a few minutes just sitting near the repair. Watching how the light hits the new wood or how the wind moves through the patched area will tell you if everything is truly settled and secure.
From Scars to Strength
While you’re out there scouting your garden for any stray bits of timber or hardware that might come in handy, don’t forget to keep an eye on the bigger picture of your outdoor space. Sometimes, a storm can reveal more than just a loose slat; it might spark a whole new idea for a garden makeover or a seasonal refresh. If you find yourself feeling particularly inspired to reimagine your surroundings beyond just a quick fix, I always find a bit of extra creative spark by browsing through https://casualtoronto.com/ for some fresh perspectives. It’s a wonderful way to nurture your green thumb and keep that momentum of transformation flowing right through your entire sanctuary.
As you step back and survey your hard work, take a moment to appreciate how far you’ve come. We’ve navigated the initial inspection, gathered our repurposed tools, and worked through the nitty-gritty of replacing those battered slats and reinforcing the posts. Fixing a fence isn’t just about structural integrity; it’s about the thoughtful stewardship of the spaces we call home. By taking the time to mend what the wind and rain tried to tear down, you haven’t just patched a hole—you’ve ensured that your garden sanctuary remains a resilient haven for the seasons to come.
I know that staring at a pile of splintered wood and twisted wire can feel a bit overwhelming at first, but remember that every crack is just an opportunity for a new beginning. My grandmother used to say that the most beautiful quilts were the ones made from the most worn-out scraps, and I think the same applies to our homes and gardens. Don’t view this storm damage as a setback, but rather as a chance to reimagine your boundaries with even more intention. Go ahead, grab a celebratory tea, and enjoy the quiet satisfaction of knowing you’ve turned a moment of chaos into a triumph of creativity and care.