I still remember the day I took my vintage bicycle out for a spin after restoring it, and the brakes failed me on a steep hill. Let me tell you, it was a hair-raising experience. But that’s when I realized the importance of a good braking system, not just for bicycles, but for cars as well. As someone who’s passionate about tinkering with machines, I’ve come to appreciate the value of a guide to performance brake upgrades. It’s not just about slapping on some new pads and calling it a day; it’s about understanding the intricacies of your vehicle’s braking system and making informed decisions to enhance its performance.
If you’re like me, you’re probably tired of sifting through generic tutorials that promise the world but deliver little. That’s why I’m here to offer you a no-nonsense guide to upgrading your brakes, straight from my garage to yours. In this article, I’ll share my personal experience and expertise to help you navigate the world of performance brake upgrades. You can expect practical advice on how to choose the right components, install them correctly, and troubleshoot common issues. By the end of this guide, you’ll be equipped with the knowledge to take your vehicle’s braking system to the next level, and I’m excited to be a part of your journey.
Table of Contents
Guide Overview: What You'll Need
Total Time: 4 hours 30 minutes
Estimated Cost: $500 – $2000
Difficulty Level: Hard
Tools Required
- Socket set (with metric and standard sockets)
- Torque wrench (capable of 100 foot-pounds of torque)
- C-clamps (for bleeding brake lines)
- Drill press (for drilling rotor holes if necessary)
- Safety glasses (for protecting eyes from debris)
Supplies & Materials
- High-performance brake pads
- Drilled or slotted rotors (depending on desired brake performance)
- Braided stainless steel brake lines
- Brake fluid (high-temperature, high-performance fluid)
- Brake cleaner (for cleaning brake components)
Step-by-Step Instructions
- 1. First, gather your tools and materials, because you can’t upgrade those brakes without the right gear. I’ve got my trusty sidekicks, Bertha the wrench and Sammy the socket set, ready to help us get the job done. Make sure you’ve got a clean and stable workspace, and don’t forget to consult your vehicle’s manual for specific instructions and recommendations.
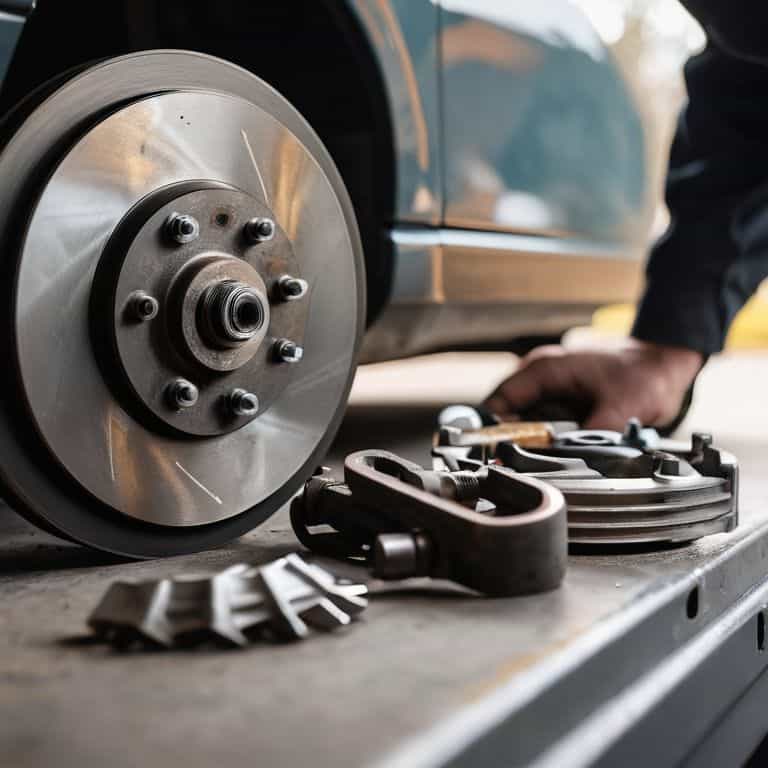
- 2. Next, remove the wheels to access the brake system. This is where things can get a bit messy, so be prepared to get your hands dirty. Use a lug wrench to loosen the lug nuts, then raise the vehicle using a hydraulic lift or jack stands. Remember to always refer to your vehicle’s manual for the correct lifting points to avoid any damage.
- 3. Now it’s time to inspect the brake components, including the rotors, calipers, and pads. Look for any signs of wear or damage, and take note of the type of brake fluid used in your vehicle. I like to use a flashlight to get a good look at the brake lines and hoses, and I always make sure to label each component as I remove it, so I can keep track of everything.
- 4. The next step is to replace the brake pads, which is usually the most straightforward part of the process. Use a C-clamp to compress the caliper piston, then remove the old pads and install the new ones. Make sure they’re properly seated and aligned, and don’t forget to apply a thin layer of brake lubricant to the back of the pads.
- 5. After that, it’s time to upgrade the rotors, which can be a bit more involved. Use a rotor puller to remove the old rotors, then clean the hub assembly with a wire brush to remove any debris or corrosion. Install the new rotors, making sure they’re properly seated and secured with the correct hardware.
- 6. Now we need to bleed the brake system, which is crucial to get rid of any air bubbles that may have formed during the upgrade process. Use a brake bleeding kit to pump out the old fluid and replace it with new, high-performance brake fluid. I like to use a turkey baster to suck out the old fluid from the reservoir, and then use a funnel to pour in the new fluid.
- 7. Finally, test the brakes to make sure everything is working smoothly. Start by pumping the brake pedal a few times to build up pressure, then take the vehicle for a spin to test the brakes at low and high speeds. Listen for any unusual noises or vibrations, and make any necessary adjustments to the brake pads or rotors.
Turbocharge Your Stop
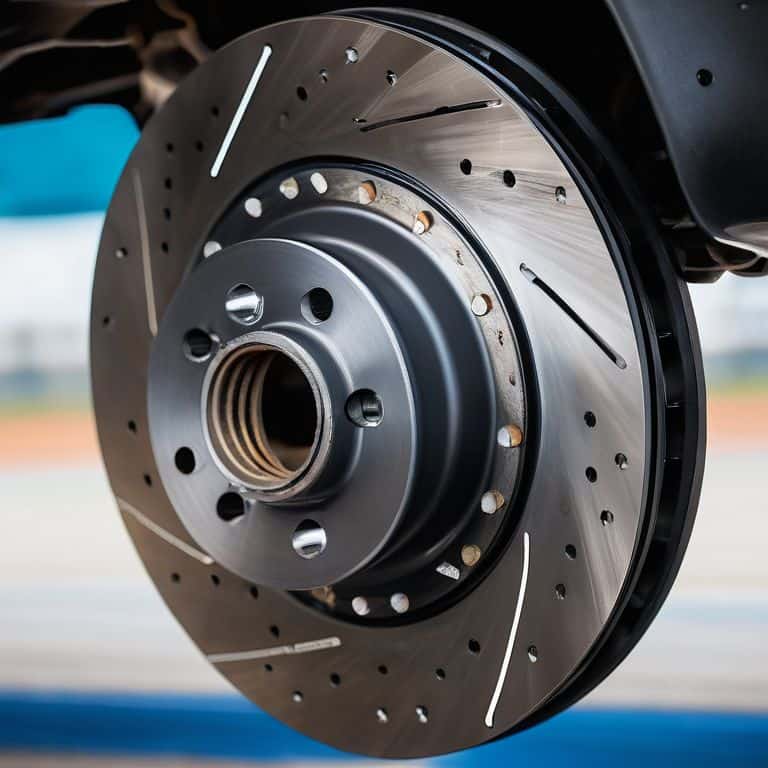
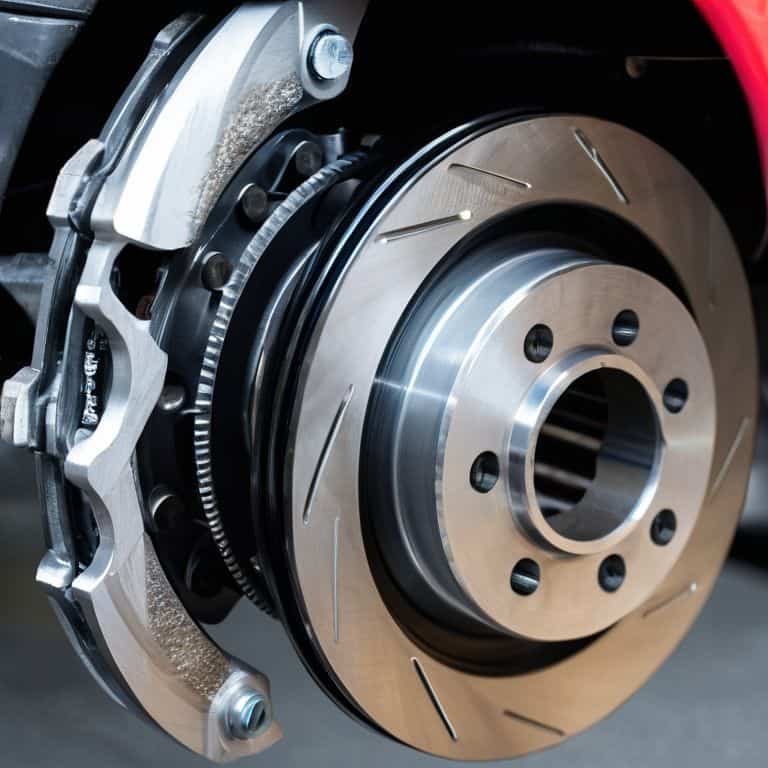
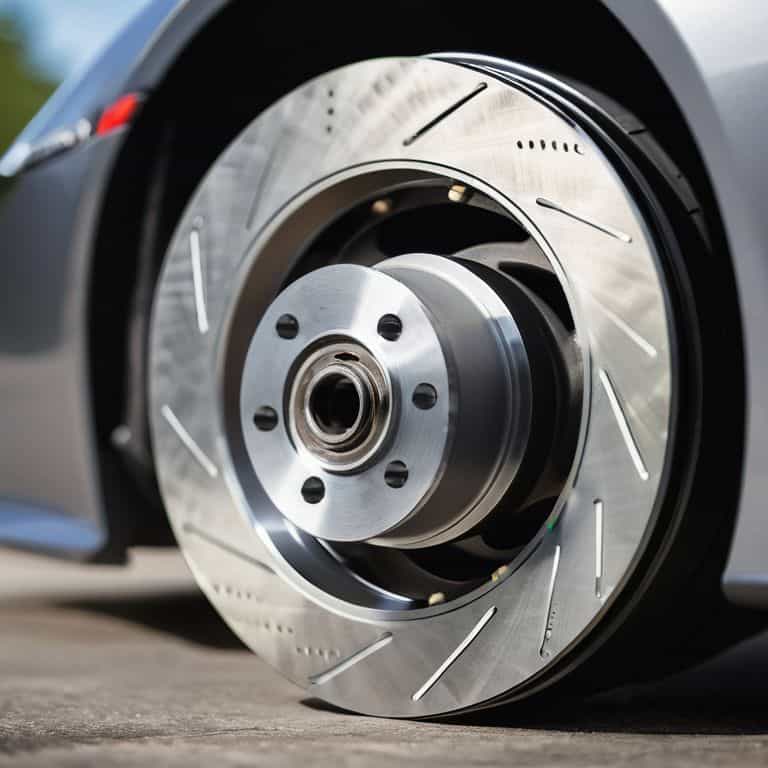
To really turbocharge your stop, consider upgrading to drilled rotors, which can significantly improve heat dissipation and reduce the risk of brake fade. This is especially important for high-performance vehicles that are frequently driven at high speeds. When paired with high performance brake pads, you’ll be able to stop on a dime without worrying about overheating your brakes.
Another key area to focus on is the caliper upgrade, which can provide improved stopping power and better brake modulation. By installing a high-performance caliper, you’ll be able to apply more even pressure to the brake pads, resulting in smoother and more consistent stops. Additionally, using the best brake fluid for high performance vehicles can help to maintain optimal brake performance and prevent corrosion.
For those looking to take their brake performance to the next level, installing brake cooling systems can be a game-changer. This can help to keep your brakes running at optimal temperatures, even during intense driving sessions. When choosing brake pads, it’s also worth considering the debate between ceramic vs semi-metallic brake pads, as each has its own unique advantages and disadvantages.
High Performance Brake Pads a Review
When it comes to high-performance brake pads, I’ve got my favorites. I’ve tried out a bunch, but the ones that really get my garage excited are the carbon-ceramic pads. They’re like the superheroes of brake pads – they can handle the heat and keep on performing. Plus, they’re designed to reduce brake dust, so your wheels stay looking sweet. I’ve also had great luck with semi-metallic pads, they’re a bit more budget-friendly and still pack a punch.
I’ve named my trusty pad installer “Padzilla” – it’s a real game-changer when it comes to getting the job done quickly and efficiently. With the right pads and the right tools, like Padzilla, you’ll be stopping on a dime in no time.
Upgrading to Drilled Rotors for Enhanced Cooling
Now that we’ve talked about high-performance brake pads, let’s take it to the next level with drilled rotors. I like to call them the “ventilation system” for your brakes. By allowing hot air to escape, they help keep your brakes cool and functioning at their best. I’ve seen it make a huge difference in my own projects, especially when I’m restoring those vintage bicycles – the same principle applies to cars.
I’ve named my drill press “Bertha,” and she’s a real workhorse when it comes to making custom modifications like these. When upgrading to drilled rotors, it’s essential to choose the right pattern and size for your vehicle. I recommend consulting your owner’s manual or speaking with a professional mechanic to ensure a smooth installation process. With the right drilled rotors, you’ll be stopping like a pro in no time.
Braking Point: 5 Key Tips to Unlock Your Ride's Full Potential
- Choose the right brake fluid: Don’t let air get in the way of a smooth stop – select a high-performance brake fluid that’s designed to withstand extreme temperatures
- Get a grip with the right brake pads: Whether you’re cruising the highway or carving up the canyons, high-friction brake pads can make all the difference in your stopping power
- Keep it cool with proper ventilation: A well-ventilated brake system is a happy brake system – make sure your ride’s got the airflow it needs to keep temperatures in check
- Don’t neglect the little things: Worn-out brake hardware can compromise your entire braking system – stay on top of maintenance and replace worn parts before they become a major issue
- Bed those brakes: After upgrading your brake components, take the time to properly bed them in – it’s the secret to unlocking your ride’s full braking potential and avoiding premature wear
Key Takeaways to Turbocharge Your Brakes
Upgrading to high-performance brake pads can significantly improve your vehicle’s stopping power, but don’t forget to consider factors like noise, dust, and wear when making your selection
Drilled rotors are a game-changer for enhanced cooling, but ensure you understand the trade-offs, including potential increased wear on your brake pads and the need for more frequent maintenance
Whether you’re a seasoned gearhead or a DIY novice, remember that performance brake upgrades are just the beginning – with the right mindset and a well-stocked garage, the possibilities for transforming your ride are endless
Turbocharging Your Stop: Words of Wisdom
Upgrading your brakes isn’t just about stopping faster, it’s about living life in the fast lane with confidence – where every press of the pedal is a promise of power and control.
John Beeler
Bringing It All to a Stop: Conclusion
As we’ve seen throughout this guide, upgrading your vehicle’s brakes is a multifaceted process that involves several key components, including high-performance brake pads and drilled rotors. By following the step-by-step instructions and considering the various options available, you can significantly enhance your vehicle’s stopping power and overall safety. Whether you’re a seasoned gearhead or just starting to explore the world of automotive modifications, the benefits of performance brake upgrades are undeniable. With the right tools and a bit of know-how, you can take your ride from ordinary to extraordinary, and that’s a feeling that’s hard to beat.
So, as you put the final touches on your brake upgrade, remember that the true power of modification lies not just in the parts themselves, but in the creative freedom they offer. Don’t be afraid to experiment, try new things, and push the boundaries of what’s possible. And when you’re done, take a step back, admire your handiwork, and hit the open road – you never know where it might take you, and that’s the greatest upgrade of all.
Frequently Asked Questions
What are the most common mistakes to avoid when upgrading to high-performance brake pads?
Hey there, buddy! When upgrading to high-performance brake pads, watch out for improper bedding, incorrect pad material, and neglecting to inspect your rotors. Trust me, I’ve seen it happen – my trusty sidekick, ‘Bertha the Brake Pliers,’ has helped me fix those mistakes more times than I can count!
How do I know if I need to upgrade to drilled rotors or if standard rotors will suffice for my vehicle?
Honestly, it depends on your driving style and conditions. If you’re a aggressive driver or frequent high-speed braking, drilled rotors are a no-brainer. But, if you’re a casual cruiser, standard rotors might be just fine. I like to think of it as a trade-off between heat dissipation and rotor longevity – my trusty sidekick, “Ratchet” the wrench, agrees!
Can I install performance brake upgrades myself or do I need to take my car to a professional mechanic?
Absolutely, you can DIY performance brake upgrades, but it’s crucial to have some mechanical know-how and the right tools, like my trusty ‘Bertha’ brake pad spreader. If you’re not comfortable getting your hands dirty, it’s always best to consult a pro to avoid any brake-related mishaps.


