As I sit in my Emily Dickinson room, surrounded by vintage teapots and the warm glow of afternoon sunlight, I’m reminded of the countless times I’ve heard friends and family members express their dread of tackling even the simplest of DIY tasks, like learning how to safely replace a wall outlet. It’s a chore that’s often shrouded in mystery and intimidation, but I’m here to tell you that it’s entirely within your grasp. In fact, with the right guidance, you’ll be sipping tea and enjoying the fruits of your labor in no time.
In this article, I promise to walk you through the process with practical advice and a dash of whimsy, because, let’s be honest, home improvement doesn’t have to be dull. You’ll learn the essential steps to replace a wall outlet with ease, from preparing your space to finishing touches. My goal is to empower you with the knowledge and confidence to tackle this task, and perhaps even discover a new passion for DIY projects. So, grab a cup of your favorite tea, get comfortable, and let’s dive into the world of safe and stylish home improvements, one outlet at a time.
Table of Contents
- Guide Overview: What You'll Need
- Step-by-Step Instructions
- Safely Replacing Outlets
- Weaving Safety into Everyday Moments: 5 Essential Tips for Replacing a Wall Outlet
- Embracing Safety and Whimsy: 3 Key Takeaways for a Successful Outlet Replacement
- A Word of Wisdom
- A Warm and Welcoming Sanctuary: Conclusion
- Frequently Asked Questions
Guide Overview: What You'll Need
Total Time: 30 minutes to 1 hour
Estimated Cost: $10 – $30
Difficulty Level: Easy
Tools Required
- Voltage Tester for ensuring the outlet is de-energized
- Needle-Nose Pliers for gripping small wires
- Screwdriver flathead and Phillips
- Wire Strippers for stripping 6 inches of insulation from wires
Supplies & Materials
- New Wall Outlet matching the existing outlet’s voltage and configuration
- Wire Nuts or Connectors for securing wires to the new outlet
- Outlet Screws for mounting the new outlet to the wall
Step-by-Step Instructions
- 1. First, let’s start by preparing our space for this little project. Clear the area around the wall outlet, removing any furniture or decorations that could get in the way. This will give us a comfortable and safe zone to work in, much like my “Heathcliff’s Haven” room, which I’ve designed to be a cozy retreat with vintage teapots and plush armchairs.
- 2. Next, we need to switch off the power to the circuit that controls the wall outlet. This is a crucial step, as we want to avoid any accidental shocks or injuries. Locate your circuit breaker or fuse box, and flip the switch or remove the fuse that corresponds to the outlet we’re working on. It’s a bit like brewing the perfect cup of tea – we need to get the ingredients just right to avoid any unpleasantness.
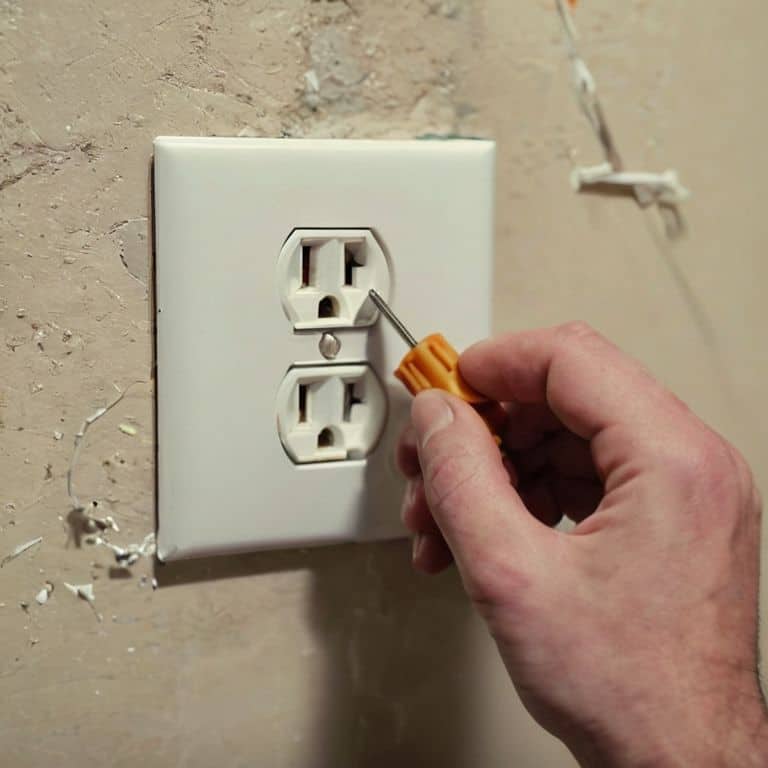
- 3. Now, let’s remove the outlet cover to get a glimpse of what’s inside. Use a screwdriver to gently pry the cover off, taking care not to damage the surrounding paint or wallpaper. As I always say, “a room should tell a story,” and this little outlet is about to become a part of our home’s narrative.
- 4. With the cover off, we can now inspect the wires and get a sense of what we’re working with. Take note of the wire colors and how they’re connected to the outlet. This is where things can get a bit like navigating a vintage marketplace – we need to be careful and attentive to find the treasures we’re looking for.
- 5. Next, we’ll need to disconnect the wires from the old outlet. Use a pair of needle-nose pliers to gently grip the wires, and then twist and pull them away from the outlet. It’s a bit like untangling a ball of yarn – we need to be patient and gentle to avoid any knots or tangles.
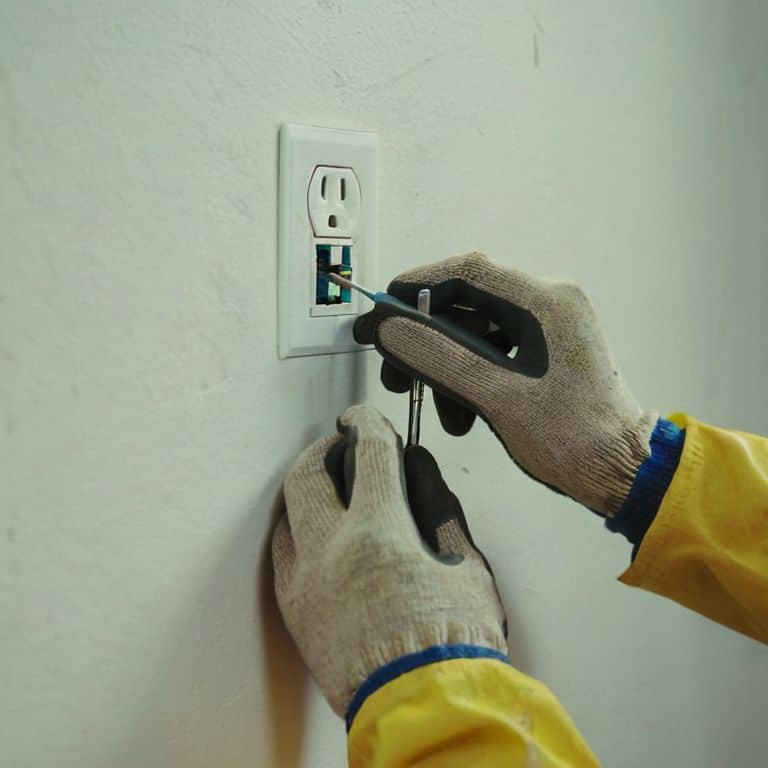
- 6. Now that the wires are free, we can remove the old outlet from the wall. Use a screwdriver to remove the screws that hold it in place, and then gently pull the outlet out of the wall. This is the part where we get to start anew, much like when I’m designing a new room in my home – the possibilities are endless, and the excitement is palpable.
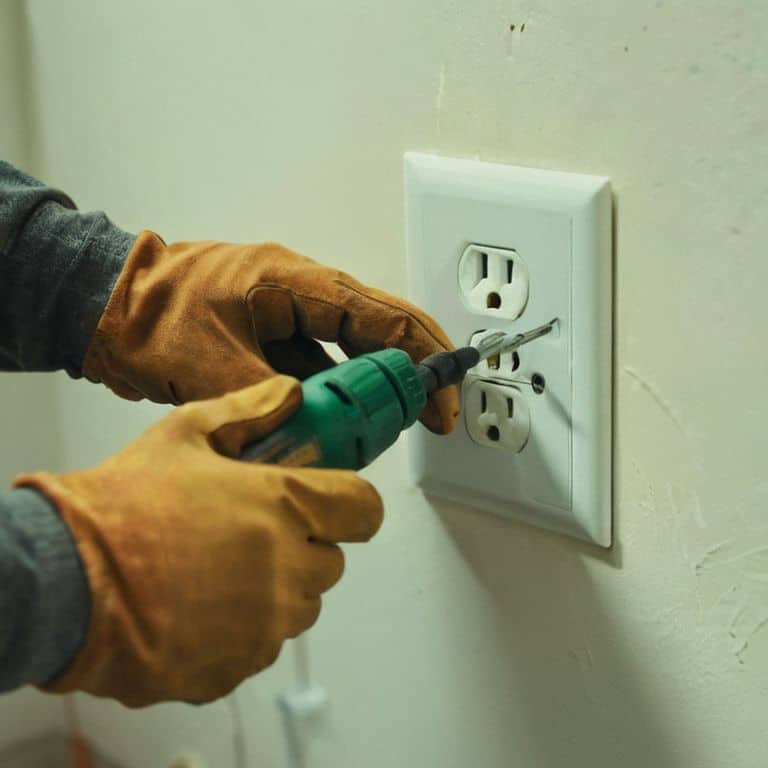
- 7. With the old outlet removed, we can now install the new one. Take the new outlet and insert it into the wall, making sure it’s securely fastened with screws. Then, connect the wires to the new outlet, matching the colors and connections we noted earlier. It’s a bit like hosting a tea party – we need to make sure all the elements are in harmony to create a warm and welcoming atmosphere.
- 8. Finally, let’s replace the outlet cover and turn the power back on. Flip the switch or replace the fuse, and then test the outlet to make sure it’s working properly. As I always say, “the devil is in the details,” and this little outlet is now a part of our home’s story, tucked away but functioning beautifully.
Safely Replacing Outlets

As I sit in my “Elizabeth Bennet” room, surrounded by vintage teapots and the warm glow of lamplight, I am reminded of the importance of attention to detail when it comes to electrical work. One of the most common electrical outlet mistakes is not turning off the power to the circuit before starting the replacement process. This simple oversight can lead to serious injury or even a house fire.
When working with wall outlet wiring diagrams, it’s essential to understand the difference between single pole vs double pole outlets. This knowledge will help you navigate the wiring process with confidence and ensure that your new outlet is installed correctly. By taking the time to study the diagram and plan your approach, you’ll be able to avoid many of the troubleshooting outlet installation issues that can arise during the process.
As you work on replacing your outlet, keep in mind that diy electrical safety precautions are just as important as the technical aspects of the job. Always use the correct tools and follow proper safety protocols to avoid accidents. By being mindful of these factors and taking your time, you’ll be able to enjoy the satisfaction of a job well done and the peace of mind that comes with knowing your home is safe and secure.
Avoiding Common Electrical Mistakes
As I sit in my “Elizabeth Bennet” sitting room, surrounded by vintage teapots and the warm glow of table lamps, I’m reminded that even the coziest of spaces can harbor hidden dangers if not tended to with care. When it comes to electrical work, it’s essential to be mindful of the potential pitfalls that can lead to accidents or injuries. One of the most common mistakes is overloading circuits, which can cause overheating and even fires. To avoid this, I always advise my clients to take stock of their electrical needs and plan accordingly, ensuring that each circuit is balanced and not overburdened.
By being diligent and taking the time to assess our electrical systems, we can prevent mishaps and create a safer, more welcoming environment in our homes. Just as a good storyteller weaves a tale with careful attention to detail, we must approach our home’s electrical system with a similar sense of narrative care, considering each element as part of a larger, harmonious whole.
Deciphering Wall Outlet Wiring Diagrams
As I sit in my “Elizabeth Bennet” library, surrounded by vintage teapots and dusty tomes, I find myself pondering the intricacies of wall outlet wiring diagrams. Deciphering these diagrams is akin to unraveling a literary mystery – each symbol and line holds a secret to unlocking the story of your home’s electrical system. With a keen eye and a gentle touch, I encourage you to delve into the world of wiring, where colors and codes weave a tale of safety and functionality.
By understanding the language of these diagrams, you’ll be empowered to navigate the replacement process with confidence, much like a skilled storyteller navigating the twists and turns of a beloved novel. So, let us embark on this journey together, and may the whispers of wiring wisdom guide us as we transform our homes into cozy, uplifting sanctuaries.
Weaving Safety into Everyday Moments: 5 Essential Tips for Replacing a Wall Outlet
- Ensure you’ve switched off the power to the outlet at the main electrical panel before starting, and verify it’s safe to work on using a non-contact voltage tester, because safety always comes first in our little corner of the world
- Use the correct tools for the job, like a voltage tester and a screwdriver, and avoid using makeshift tools that could lead to accidents or damage, just as my grandmother always said, ‘The right tool for the right job, dearie’
- Never touch any electrical wires or components with your bare hands, and if you’re unsure about any part of the process, don’t hesitate to consult a professional, because it’s always better to be safe than sorry, especially when it comes to the tale of our homes
- Take your time when deciphering wall outlet wiring diagrams, and remember, the black wire is usually the ‘hot’ wire, the white wire is the neutral, and the copper wire is the ground, a little rhyme my father taught me to keep it all straight
- Once you’ve successfully replaced the outlet, turn the power back on and test it with a simple device like a lamp to ensure everything is working as it should, and then take a step back to admire your handiwork, feeling proud of the story you’ve just written into your home’s narrative
Embracing Safety and Whimsy: 3 Key Takeaways for a Successful Outlet Replacement
As we conclude our enchanting journey of replacing a wall outlet, remember that safety is not just about following guidelines, but about crafting a sanctuary that whispers tales of wonder and magic with every flicker of light.
With each carefully placed wire and screw, we weave a narrative of love and care into the very fabric of our home, transforming a mundane task into an act of whimsical refinement that honors the essence of our beloved literary characters.
Whether you’re stepping into the ‘Heathcliff’ study or the ‘Elizabeth Bennet’ parlor, every room tells a story, and it’s in these moments of DIY adventure that we get to be the authors of our own cozy, uplifting realms, where vintage teapots and antique furniture become more than just decorations, but characters in our ongoing tale of home and heart.
A Word of Wisdom
As we tenderly replace a wall outlet, let us remember that safety is not just about following instructions, but about weaving a tale of love and care into the very fabric of our homes, where every switch and socket tells a story of warmth and welcome.
Margaret Silva
A Warm and Welcoming Sanctuary: Conclusion
As we conclude our journey through the steps of safely replacing a wall outlet, let’s take a moment to reflect on the key points we’ve covered. From understanding the importance of turning off the power supply to deciphering those sometimes perplexing wiring diagrams, each step is crucial in ensuring our homes remain a warm and welcoming sanctuary, not a hazardous zone. By following these simple yet essential guidelines, we not only ensure our safety but also contribute to the overall ambiance of our living spaces, making them more inviting and comfortable for ourselves and our loved ones.
As we put down our tools and step back to admire our handiwork, remember that it’s not just about replacing a wall outlet – it’s about weaving a tale of safety and style into the very fabric of our homes. Every small project, every careful consideration, contributes to the narrative of our nests, turning them into living, breathing stories that envelop us in warmth, comfort, and a deep sense of belonging. So, let’s cherish these moments of creation, for they are what make a house a home.
Frequently Asked Questions
What are the most common mistakes to avoid when replacing a wall outlet to ensure safety and efficiency?
As I sit in my “Elizabeth Bennet” parlor, surrounded by vintage teapots, I’m reminded that safety and style go hand-in-hand. When replacing a wall outlet, it’s essential to avoid common mistakes like overloading circuits, misinterpreting wiring diagrams, and neglecting to turn off the power supply – all of which can lead to hazards and undermine the cozy ambiance we strive for in our homes.
How do I determine if my home's electrical system can support newer, high-amp outlets without requiring a full electrical upgrade?
To determine if your home’s electrical system can support newer, high-amp outlets, I recommend consulting with a licensed electrician who can assess your current wiring and circuit capacity. They’ll help you navigate the nuances of your system, ensuring a safe and stylish upgrade that’s tailored to your home’s unique story.
Are there any specific safety precautions I should take when dealing with outdated or damaged wiring during a wall outlet replacement project?
When tackling outdated or damaged wiring, I always say it’s better to be safe than sorry, my friend. Switch off the power to the circuit at the main electrical panel, and consider hiring a licensed electrician if you’re unsure – after all, safety should always be the protagonist of our home improvement stories.