As I embarked on my latest road trip adventure, I found myself at a quirky flea market, rummaging through vintage car manuals and stumbling upon a tattered guide to car maintenance. It got me thinking – how many of us really know the ins and outs of a guide to checking and replacing car fluids? I’ve lost count of the number of times I’ve met fellow travelers who’ve been stranded on the side of the road due to a simple oversight. It’s astonishing how often a basic understanding of car fluids can be the difference between a smooth journey and a frustrating breakdown.
In this article, I’ll share my own experiences and practical tips on how to check and replace car fluids, from the basics of engine oil to the often-overlooked coolant and brake fluid. I’ll cut through the jargon and provide you with honest, no-nonsense advice on how to keep your vehicle in top condition, whether you’re a seasoned road tripper or just starting to explore the open road. By the end of this guide, you’ll be equipped with the knowledge to tackle even the most daunting car maintenance tasks with confidence, and maybe even discover a few hidden gems along the way.
Table of Contents
- Guide Overview: What You'll Need
- Step-by-Step Instructions
- A Guide to Checking and Replacing Car Fluids
- Fuel for the Journey: 5 Essential Tips for Checking and Replacing Car Fluids
- Fuel for the Journey: 3 Key Takeaways
- Fuel for the Journey
- Fuel for the Journey: A Conclusion
- Frequently Asked Questions
Guide Overview: What You'll Need
Total Time: 1 hour 30 minutes
Estimated Cost: $20 – $100
Difficulty Level: Intermediate
Tools Required
- Socket wrench (for oil drain plug)
- Rag (for cleaning spills)
- Funnel (for pouring fluids)
- Measuring cups (for checking fluid levels)
- Tire pressure gauge (for checking tire pressure)
Supplies & Materials
- Motor oil (the correct type for your vehicle)
- Transmission fluid (the correct type for your vehicle)
- Brake fluid (the correct type for your vehicle)
- Coolant (a 50/50 mix of antifreeze and water)
- Power steering fluid (the correct type for your vehicle)
Step-by-Step Instructions
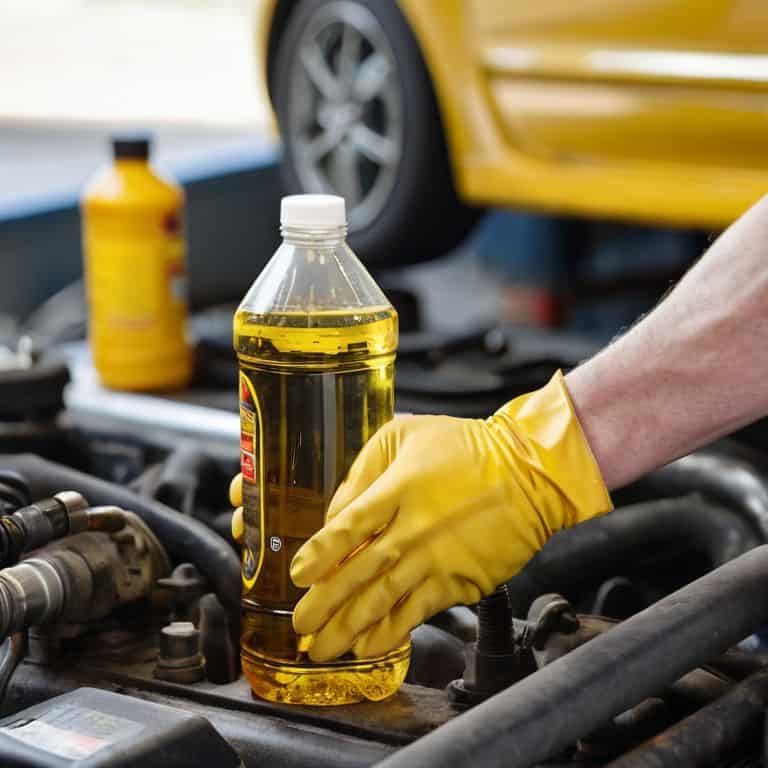
- 1. First, gather your essentials: make sure you have a pair of gloves, a rag, and a car jack, as these will come in handy when checking and replacing your car fluids. You’ll also want to consult your car’s manual to get familiar with the location of the various fluid reservoirs and the recommended fluid types.
- 2. Next, warm up your engine: drive your car for a few minutes to get the engine warm, as this will help the fluids flow more easily and give you a more accurate reading. Be sure to find a level surface to park on, as this will ensure that your fluid levels are measured correctly.
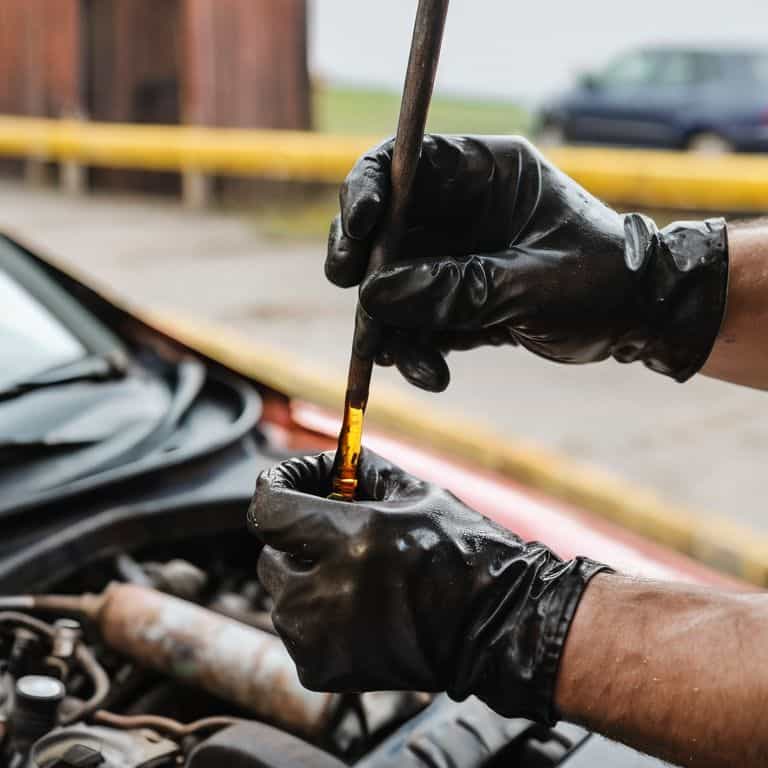
- 3. Now, check your oil level: locate the oil dipstick under the hood of your car and pull it out. Wipe it clean with a rag and insert it back into the oil reservoir. Pull it out again, and this time, check the oil level by looking at the end of the dipstick. The oil level should be between the “MIN” and “MAX” marks on the dipstick.
- 4. Move on to checking the coolant level: find the coolant reservoir, usually a transparent plastic container with a cap on top. Check the level of the coolant by looking at the side of the reservoir. The level should be between the “MIN” and “MAX” marks on the side. If the level is low, you’ll need to add a mixture of coolant and water to the reservoir.
- 5. Then, inspect the brake fluid: locate the brake fluid reservoir, usually a small plastic container with a cap on top. Check the level of the brake fluid by looking at the side of the reservoir. The level should be between the “MIN” and “MAX” marks on the side. If the level is low, you’ll need to add brake fluid to the reservoir, but be sure to use the correct type, as specified in your car’s manual.
- 6. After that, check the power steering fluid level: find the power steering fluid reservoir, usually a small plastic container with a cap on top. Check the level of the power steering fluid by looking at the side of the reservoir. The level should be between the “MIN” and “MAX” marks on the side. If the level is low, you’ll need to add power steering fluid to the reservoir.
- 7. Finally, replace the fluids as needed: if any of your fluid levels are low, you’ll need to add the corresponding fluid to the reservoir. Be sure to use the correct type of fluid, as specified in your car’s manual, and follow the recommended procedure for adding fluids. It’s also a good idea to keep track of when you last checked and replaced your car fluids, so you can stay on top of maintenance and keep your car running smoothly.
A Guide to Checking and Replacing Car Fluids
As I continue on my journey, I’ve learned that regular fluid checks are crucial to preventing those pesky car fluid leak detection issues. I recall a particularly memorable trip to the mountains, where I had to make an emergency stop due to a sudden low coolant level. Luckily, I was able to identify the issue quickly and get back on the road. To avoid such situations, it’s essential to be aware of the signs of low coolant levels, such as a rising temperature gauge or a sweet, syrupy smell.
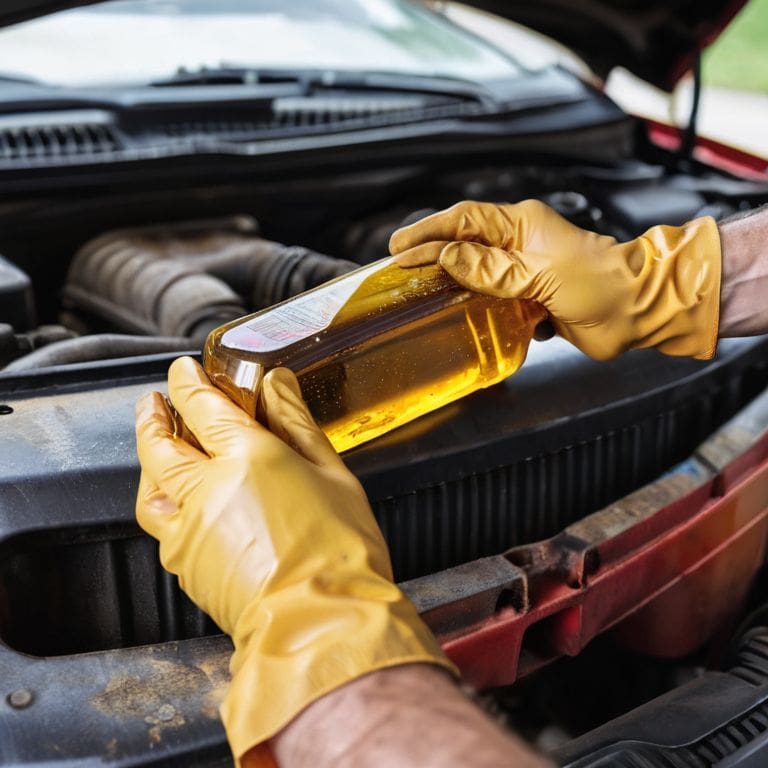
When it comes to diy car fluid replacement tips, I’ve found that using synthetic vs conventional oil can make a significant difference. Synthetic oil, in particular, provides better protection against wear and tear, especially in extreme temperatures. Additionally, it’s essential to follow the recommended fluid change intervals to ensure your car runs smoothly and efficiently.
As a travel blogger, I’ve had my fair share of experiences with car troubles, but I’ve learned that being proactive is key. By staying on top of regular fluid checks and being mindful of car fluid leak detection, you can avoid many common issues and keep your car running like a charm. Whether you’re embarking on a cross-country road trip or just a quick weekend getaway, taking care of your car’s fluids is essential to a safe and enjoyable journey.
Synthetic vs Conventional Oil Which Fuels Adventure
As I hit the open road, I’ve often wondered what fuels my trusty ride best – synthetic or conventional oil? The debate has sparked many a conversation at flea markets and roadside diners. Synthetic oil, with its superior performance in extreme temperatures, seems like the perfect choice for adventurous souls like myself. However, conventional oil has its own merits, being a more budget-friendly option for those who don’t push their vehicles to the limit.
For me, the choice ultimately depends on the journey ahead. If I’m embarking on a long, cross-country trek, synthetic oil’s added protection gives me peace of mind. But for shorter, more leisurely drives, conventional oil does the trick. The key is understanding your vehicle’s needs and the demands of your adventure – a lesson I’ve learned from years of collecting postcards and stories from fellow travelers.
Uncovering Car Fluid Leak Detection Secrets
As I delve into the world of car maintenance, I’ve discovered that leak detection is an art that requires patience and a keen eye. I recall a particularly memorable treasure hunt at a flea market, where I stumbled upon a vintage car manual that revealed the secrets of identifying fluid leaks. The manual taught me to look for telltale signs, such as puddles under the car, discoloration on the pavement, or a sweet, syrupy smell wafting from the engine.
I’ve since applied these lessons to my own travels, and I’m excited to share my findings with you. By combining old-school detective work with modern technology, you can uncover even the sneakiest of leaks and keep your vehicle running smoothly. Whether you’re a seasoned mechanic or a curious newbie, the thrill of the hunt is sure to get your heart racing.
Fuel for the Journey: 5 Essential Tips for Checking and Replacing Car Fluids
- Always refer to your vehicle’s manual for specific guidance on checking and replacing car fluids, as different models may have unique requirements
- Get into the habit of checking your car’s fluids regularly, such as every time you fill up on gas, to catch any potential issues before they become major problems
- Use a dipstick or fluid level sensor to check the condition and level of your engine oil, transmission fluid, brake fluid, and coolant, and top them off as needed
- Invest in a quality oil filter wrench and socket set to make oil changes a breeze, and consider upgrading to synthetic oil for improved engine performance and protection
- Keep a record of your car’s maintenance history, including fluid checks and replacements, to stay on top of your vehicle’s needs and ensure you’re getting the most out of your trusty ride
Fuel for the Journey: 3 Key Takeaways
Always remember to check your car’s fluids regularly, just like I do before embarking on a new adventure – it’s a simple habit that can save you from a world of trouble on the open road!
Synthetic oil is definitely the way to go if you’re planning a long road trip, the extra cost is worth the peace of mind that comes with knowing your engine is well protected, no matter the terrain or weather conditions
Don’t be afraid to get a little messy and dive into the world of car fluid maintenance – with a bit of practice, you’ll be a pro at spotting leaks and swapping out fluids in no time, and the sense of accomplishment is incredibly rewarding!
Fuel for the Journey
The rhythm of the road is as much about the journey of discovery as it is about the destinations we reach, and it’s the little things – like the hum of a well-maintained engine, thanks to regular checks and replacements of car fluids – that keep us moving forward, one mile at a time.
Vera Kump
Fuel for the Journey: A Conclusion
As I reflect on our journey through the world of car fluids, I’m reminded of the importance of regular maintenance. We’ve uncovered the secrets of leak detection, debated the merits of synthetic vs conventional oil, and walked through the step-by-step process of checking and replacing car fluids. Whether you’re a seasoned adventurer or just starting to map out your travels, it’s clear that a well-maintained vehicle is the key to unlocking unforgettable experiences. By following these guidelines and developing a habit of proactive car care, you’ll be free to focus on the open road and the thrill of discovery that awaits around every bend.
As you close this guide and prepare to hit the road, I want to leave you with a final thought: the journey is just as important as the destination. Embracing the unknown and taking care of your trusty vehicle along the way will lead you to hidden gems and unexpected surprises that make travel so rewarding. So go ahead, fill up on gas, grab a map, and get ready to uncover the secrets that await you on the open road. And don’t forget to send me a postcard from your favorite stop – I’d love to hear about your adventures and the stories that unfold along the way!
Frequently Asked Questions
What are the most common signs of low car fluid levels that I should watch out for on my next road trip?
As I’ve learned from my own road trips, keeping an eye out for low car fluid levels is crucial. Watch for warning signs like the temperature gauge rising, strange noises, or dashboard lights illuminating – these can indicate low coolant, oil, or brake fluid levels.
How often should I replace my car's fluids to ensure optimal performance and prevent damage?
Honestly, I’ve learned that regular fluid checks are key to a smooth ride. For me, it’s every 5,000 to 7,500 miles for oil, and then there’s coolant, brake, and transmission fluids to consider. I like to think of it as giving my car a little TLC to prevent big problems down the road.
Are there any specific tools or equipment that I need to check and replace car fluids, or can I do it with basic garage supplies?
The thrill of the DIY adventure begins. For checking and replacing car fluids, you’ll need a few trusty tools like a socket wrench, drain pan, and funnel. Basic garage supplies will get you started, but having a car jack and some rags on hand won’t hurt either. Now, let’s get our hands dirty and uncover those hidden fluids.


