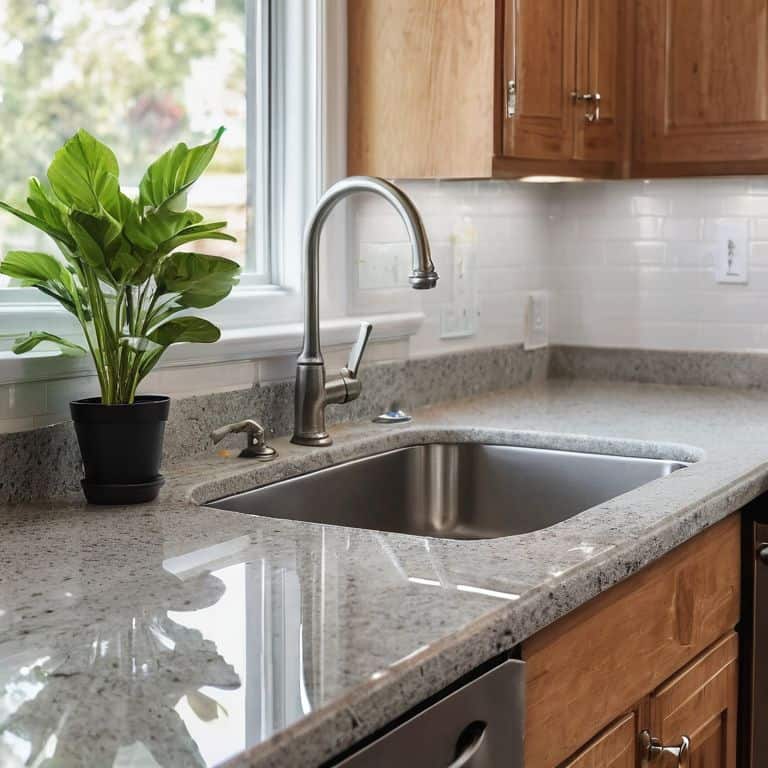
As I sit in my cozy little reading nook, surrounded by vintage teapots and the soft glow of table lamps, I’m reminded of the countless times I’ve heard friends and family members lament about the complexity of how to install a dimmer switch. The truth is, it’s not as daunting as it seems. In fact, with the right guidance, you can easily add a touch of warmth and ambiance to any room in your home. I’ve learned this from my own experiences, from transforming my “Heathcliff” room – a moody, literary-inspired space – into a haven of soft lighting and comfort.
In this article, I promise to share my practical and straightforward advice on how to install a dimmer switch, stripping away any confusion or intimidation. You’ll learn how to choose the right dimmer switch for your space, prepare your walls, and safely install the switch. My goal is to empower you with the knowledge and confidence to create your own unique, story-filled spaces, where the lighting is as much a part of the narrative as the furniture and decor. So, let’s get started on this journey to illuminate your home with warmth and personality, one dimmer switch at a time.
Table of Contents
- Guide Overview: What You'll Need
- Step-by-Step Instructions
- Whispers of Warmth Installing Dimmers
- Illuminating Insights: 5 Enchanting Tips for a Successful Dimmer Switch Installation
- Enchanted Illuminations: 3 Key Takeaways for a Warmth-Infused Home
- Illuminating Insights
- Embracing the Warmth: A Conclusion to Our Dimmer Switch Journey
- Frequently Asked Questions
Guide Overview: What You'll Need
Total Time: 1 hour 30 minutes
Estimated Cost: $20 – $40
Difficulty Level: Intermediate
Tools Required
- Needle-Nose Pliers (for gripping small wires)
- Screwdriver (flathead and Phillips)
- Wire Strippers (for stripping 6 inches of wire insulation)
- Voltage Tester (for safety purposes)
Supplies & Materials
- Dimmer Switch (compatible with your lighting system)
- Wire Nuts (for connecting wires)
- Electrical Tape (for insulating wires)
- Wall Plate (to cover the dimmer switch)
Step-by-Step Instructions
- 1. First, let’s get started by gathering our materials, which include a dimmer switch, a screwdriver, a wire stripper, and some wire nuts. I like to lay everything out on a vintage tray, like the one I found in my grandmother’s attic, to keep things organized and within reach.
- 2. Next, we need to turn off the power to the circuit we’re working on. This is a crucial step, as we want to avoid any accidents or electrical shocks. I always double-check the circuit breaker or fuse box to ensure the power is off before proceeding.
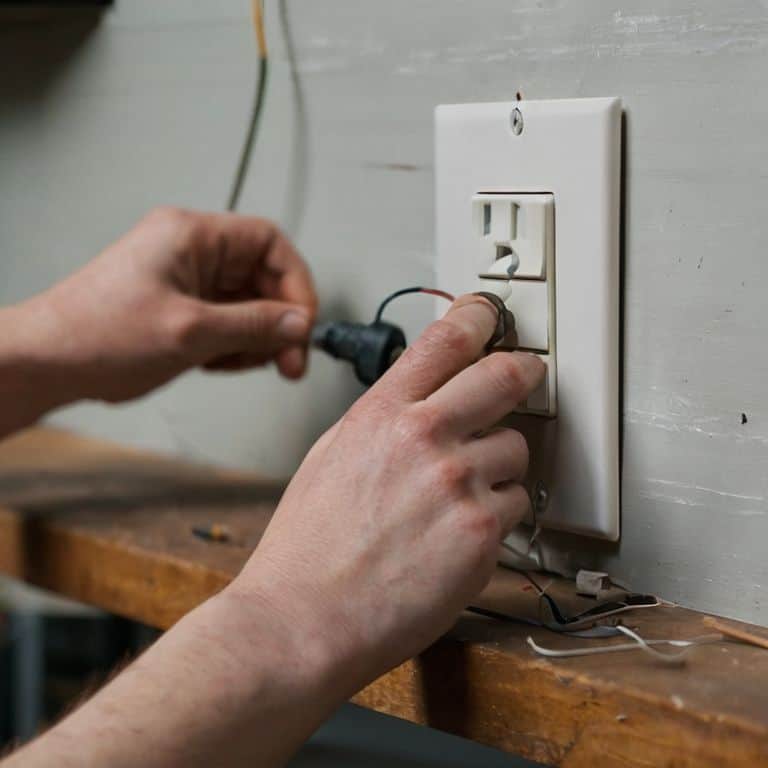
- 3. Now, let’s remove the old light switch cover plate by unscrewing the screws that hold it in place. I find that using a screwdriver with a comfortable grip, like my favorite vintage one, makes this task much easier. Once the cover plate is removed, we can gently pull out the old switch from the electrical box.
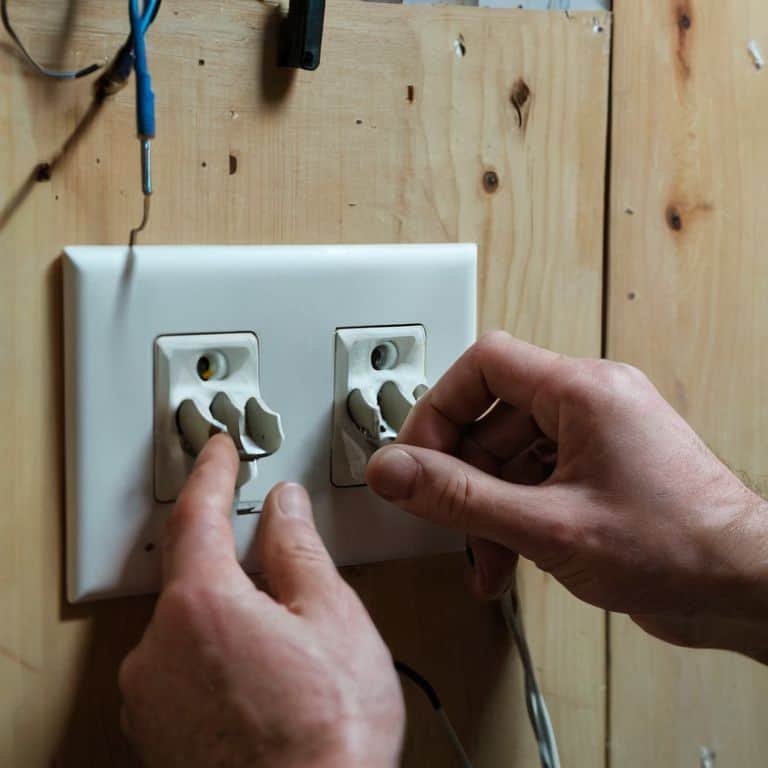
- 4. The next step is to identify the wires and understand their functions. We have the black (hot) wire, the white (neutral) wire, and the copper (ground) wire. It’s essential to connect these wires correctly to the dimmer switch to ensure proper functioning. I like to use a wiring diagram or consult the manufacturer’s instructions to double-check the connections.
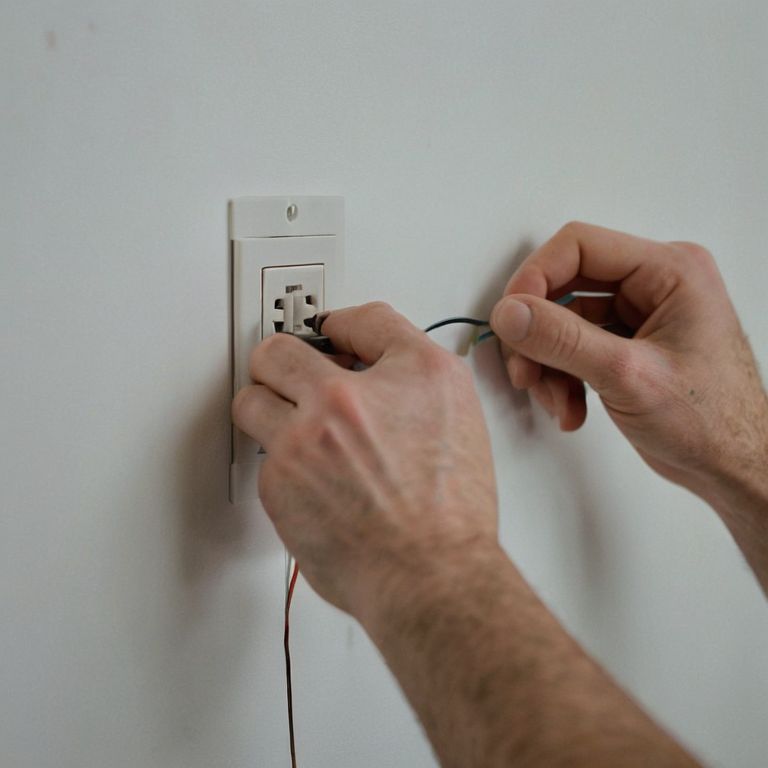
- 5. Now, let’s connect the wires to the dimmer switch. We’ll start by connecting the black wire to the brass terminal on the dimmer switch, followed by the white wire to the silver terminal, and finally, the copper wire to the ground terminal. I find it helpful to use wire nuts to secure the connections and prevent any loose wires.
- 6. With the wires connected, we can now mount the dimmer switch to the electrical box. We’ll screw the switch into place, making sure it’s securely fastened. I like to use a level to ensure the switch is straight and even, just like my grandmother taught me when we worked on projects together.
- 7. Finally, let’s turn the power back on and test our new dimmer switch. We should be able to adjust the lighting level to our desired ambiance. I love this part, as it’s like bringing a new character to life in my home – in this case, the soft glow of the lights in my “Heathcliff” reading room, which I’ve named after the brooding hero from Wuthering Heights.
Whispers of Warmth Installing Dimmers

As I sit in my cozy reading nook, surrounded by vintage teapots and the soft glow of dimmed lights, I’m reminded of the importance of ambiance in our homes. When it comes to installing a dimmer switch, it’s essential to consider the types of dimmer switches for homes that will work best for your space. For instance, if you’re looking to replace a standard switch with a dimmer, you’ll want to ensure you have the right dimmer switch wiring diagram to avoid any confusion.
To add an extra layer of warmth to your space, consider installing a dimmer switch with multiple lights. This will allow you to create a variety of lighting scenarios, from soft and intimate to bright and inviting. As you work on your project, be sure to follow dimmer switch safety precautions to avoid any accidents or injuries. A little patience and attention to detail can go a long way in creating a space that feels like a haven.
As you finish up your project, take a step back and admire your handiwork. If you encounter any issues, don’t worry – a little dimmer switch troubleshooting can go a long way. Remember to take your time and enjoy the process of creating a space that reflects your personality and style. With a little creativity and experimentation, you can create a space that’s truly one-of-a-kind.
Deciphering Dimmer Switch Wiring Diagrams
As I sit in my “Heathcliff’s Hideaway” study, surrounded by vintage teapots and the soft glow of table lamps, I find myself pondering the intricacies of dimmer switch wiring diagrams. It’s a world that can seem daunting at first, but trust me, dear friends, deciphering these diagrams is an adventure worth embarking on. With a little patience and a keen eye, you’ll be well on your way to creating a warm and inviting ambiance in your own home.
I like to think of wiring diagrams as a treasure map, guiding us through the twists and turns of our electrical system. By taking the time to understand the symbols and pathways, we can unlock the full potential of our dimmer switches, weaving a tapestry of warmth and light that’s uniquely our own.
Dimmer Switch Types for Homes a Curated Guide
As I sit in my “Elizabeth Bennet” living room, surrounded by vintage teapots and plush armchairs, I ponder the perfect dimmer switch to complement its warm ambiance. There are several types to choose from, each with its unique charm. Rotary dimmers, with their classic dial design, add a touch of nostalgia to any room. Slide dimmers, on the other hand, offer a sleek, modern aesthetic. For a more subtle look, I often opt for touch dimmers, which blend seamlessly into the wall.
When selecting a dimmer switch, consider the mood you want to create in your space. In my “Heathcliff” study, a dramatic, rotary dimmer sets the tone for intense reading sessions. In contrast, the soft glow of a slide dimmer in my “Alice” kitchen creates a warm, inviting atmosphere for cozy breakfasts. By choosing the right dimmer switch, you can craft a space that tells your story, one gentle glow at a time.
Illuminating Insights: 5 Enchanting Tips for a Successful Dimmer Switch Installation
- Measure Twice, Install Once: Before you start, ensure you have the right dimmer switch for your space, considering factors like wattage, voltage, and compatibility with your existing lighting
- Unraveling the Mystery of Wiring: Take your time to decipher the wiring diagram, and don’t hesitate to consult a professional if you’re unsure – safety first, my friends!
- A Switch in Time: Choose the perfect dimmer switch type for your home, whether it’s a standard, smart, or Wi-Fi enabled model, to create the ambiance you desire
- Dimmer Switch Placement is Key: Consider the location of your dimmer switch, ensuring it’s easily accessible and visually appealing, much like the perfect placement of a vintage teapot on a cozy shelf
- Test and Refine: Once installed, test your dimmer switch to ensure it’s working smoothly, and don’t be afraid to make adjustments or add some decorative flair to make it a true reflection of your personal style
Enchanted Illuminations: 3 Key Takeaways for a Warmth-Infused Home
I’ve found that installing a dimmer switch is not just about ambiance, but about crafting a narrative within our walls – it’s about creating a sense of wonder that welcomes us home
Deciphering dimmer switch wiring diagrams can seem like unraveling a mystery novel, but with a little patience and a keen eye, we can uncover the secrets to weaving a warm and inviting atmosphere in our little nooks and crannies
From the soft glow of a vintage-inspired dimmer in my ‘Elizabeth Bennet’ reading room to the warm embrace of a smart dimmer in my ‘Heathcliff’ kitchen, the right dimmer switch type can elevate our spaces into living, breathing stories that unfold with every flicker of light
Illuminating Insights
As we weave warmth into our homes with the gentle glow of dimmer switches, remember that the true magic lies not in the wiring, but in the way the soft light whispers stories of its own, inviting us to linger in the beauty of the everyday.
Margaret Silva
Embracing the Warmth: A Conclusion to Our Dimmer Switch Journey
As we conclude our whimsical guide to installing a dimmer switch, let’s take a moment to reflect on the journey. We’ve navigated the step-by-step instructions, unraveled the mysteries of dimmer switch wiring diagrams, and explored the various types of dimmer switches available for our homes. By embracing these elements, we’ve not only enhanced the ambiance of our spaces but also woven a narrative of warmth and welcome. Remember, the key to a successful installation lies in understanding the unique character of your space and selecting the dimmer switch that best complements it.
As you bask in the warm, soft glow of your newly installed dimmer switch, I invite you to consider the magic that unfolds when functionality meets whimsy. Your home, much like the pages of a beloved novel, is a living story waiting to be written. So, let the gentle light of your dimmer switch be the catalyst for cozy nights in, filled with laughter, love, and the simple joys of life. In the end, it’s not just about installing a dimmer switch – it’s about crafting a sanctuary that whispers stories of its own.
Frequently Asked Questions
What are the most common mistakes to avoid when installing a dimmer switch?
As I sit in my Emily Brontë room, surrounded by vintage teapots, I’ve learned that common mistakes to avoid when installing a dimmer switch include not turning off the power, incorrectly wiring the switch, and choosing the wrong dimmer type for your lighting needs – all easily avoidable with a little patience and planning.
How do I determine which type of dimmer switch is compatible with my home's existing lighting system?
To determine compatibility, I like to think of it as matchmaking for your lighting system. Consider the type of bulbs you’re using, the wattage, and the existing switch setup. For instance, if you have smart bulbs, you’ll want a dimmer that’s specifically designed to work in harmony with them.
Can I install a dimmer switch myself or do I need to hire a professional electrician?
Don’t worry, dear! Installing a dimmer switch can be a delightful DIY project. With basic electrical knowledge and caution, you can definitely give it a try. However, if you’re not comfortable with wiring or feel unsure, it’s always best to consult a professional electrician to ensure safety and a successful installation.