As I sit in my cozy little nook, surrounded by vintage teapots and the whispers of literary characters, I am reminded of the importance of a well-maintained home. You see, I’ve learned that a leaky roof can be more than just a nuisance – it’s a threat to the very stories our homes tell. That’s why I’m excited to share with you a guide to inspecting your roof for leaks, a journey that will take us to the highest points of our homes and into the heart of what makes them special.
In this article, I promise to provide you with honest and practical advice on how to inspect your roof for leaks, without any of the frustrating jargon or complicated instructions. We’ll take a whimsical approach to roof inspection, one that will leave you feeling empowered and inspired to tackle even the most daunting tasks. By the end of this guide, you’ll be equipped with the knowledge and confidence to uncover the hidden tales of your roof and keep your home safe, dry, and full of wonder. So, let’s get started on this enchanting journey and make our homes the cozy, uplifting realms they were meant to be.
Table of Contents
- Guide Overview: What You'll Need
- Step-by-Step Instructions
- A Guide to Inspecting Your Roof for Leaks
- Whispers from the Rooftop: 5 Enchanted Tips for a Leak-Free Sanctuary
- Weaving a Tale of Roof Inspection: 3 Key Takeaways
- A Whimsical Wisdom
- Weaving a Tapestry of Roof Care and Whimsy
- Frequently Asked Questions
Guide Overview: What You'll Need
Total Time: 1 hour 30 minutes
Estimated Cost: $0 – $20
Difficulty Level: Intermediate
Tools Required
- Ladder (sturdy, with a height of at least 6 feet)
- Roofing gloves (for protection and grip)
- Flashlight (for inspecting dark areas)
- Measuring tape (for measuring damaged areas)
- Pencil and paper (for noting repairs and measurements in inches)
Supplies & Materials
- Roofing cement
- Replacement shingles (matching your existing roof material)
- 6 inches of roofing nails (for securing loose shingles)
- 2-in x 4-in lumber (for supporting damaged areas)
- Waterproof sealant (for sealing gaps and cracks around vents and chimneys)
Step-by-Step Instructions
- 1. First, let’s get started by gathering our tools, shall we? We’ll need a sturdy ladder, a pair of gloves, a flashlight, and a notebook to jot down any notes or observations. I like to think of this process as uncovering a mystery, and our tools are the keys to solving the puzzle.
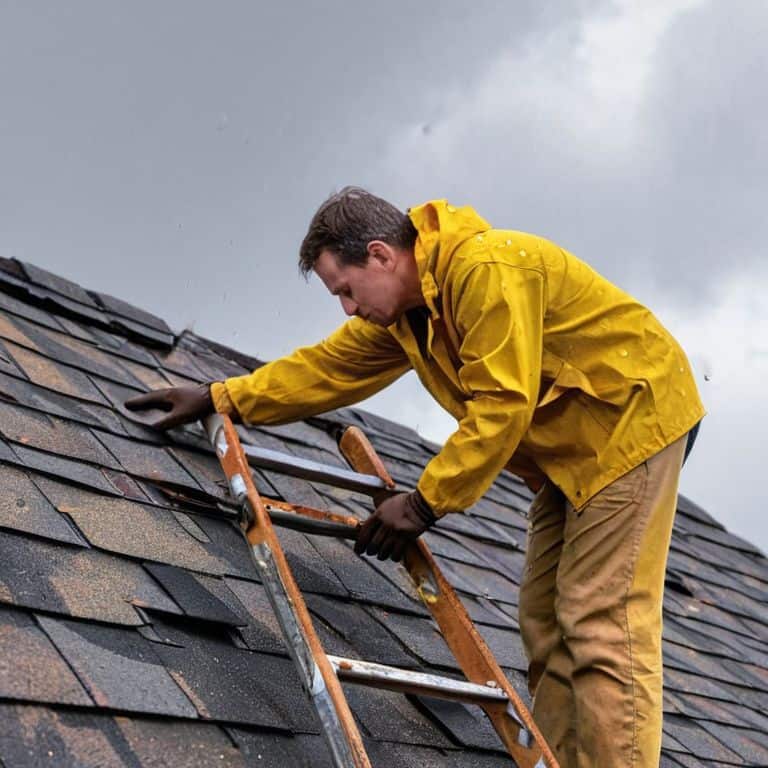
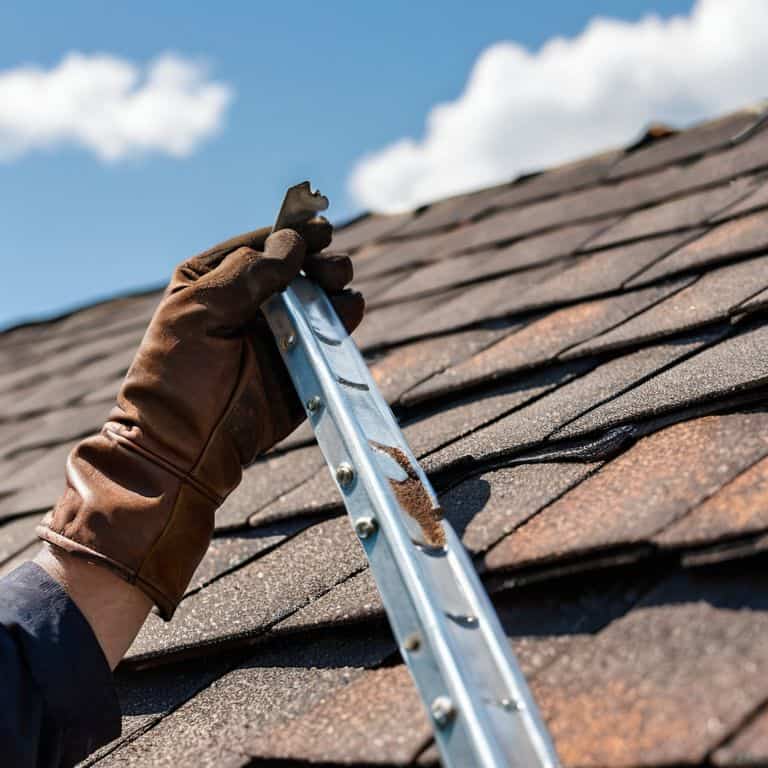
- 2. Next, we’ll need to inspect the roof from the outside, looking for any visible signs of damage or wear. Check for missing or loose shingles, cracked or broken tiles, and any areas where the roof may be sagging. I find that taking a step back and admiring the roof from a distance can help me notice any subtle irregularities that might be easy to miss up close.
- 3. Now, let’s move on to the attic inspection. Head up to your attic, and look for any signs of water damage or leaks. Check for stains, discoloration, or mineral deposits on the walls or ceiling. I like to think of the attic as the secret keeper of the house, and by inspecting it carefully, we can uncover any hidden issues.
- 4. As we make our way back outside, let’s take a closer look at the gutters and downspouts. Make sure they’re clear of debris and functioning properly. Clogged gutters can cause water to back up and seep into the roof, so it’s essential to keep them clean and clear. I find that using a pair of gloves and a scoop can make this process much more manageable.
- 5. Next, we’ll need to check the flashing around chimneys, vents, and skylights. Ensure that it’s securely attached and not damaged. This is a crucial step, as faulty flashing can allow water to seep into the roof and cause significant damage. I like to think of flashing as the roof’s protective armor, and by checking it carefully, we can ensure it’s doing its job.
- 6. Now, let’s inspect the roof vents and ensure they’re functioning correctly. Check for any blockages or damage, and make sure they’re properly secured. I find that using a flashlight can help me see into any dark or hard-to-reach areas. By ensuring proper ventilation, we can help prevent moisture from building up and causing issues.
- 7. Finally, let’s take a step back and review our findings. Take note of any areas that need repair or attention, and prioritize them based on their severity. I like to think of this process as weaving a narrative of our roof’s story, and by carefully inspecting each area, we can create a comprehensive picture of its condition.
A Guide to Inspecting Your Roof for Leaks
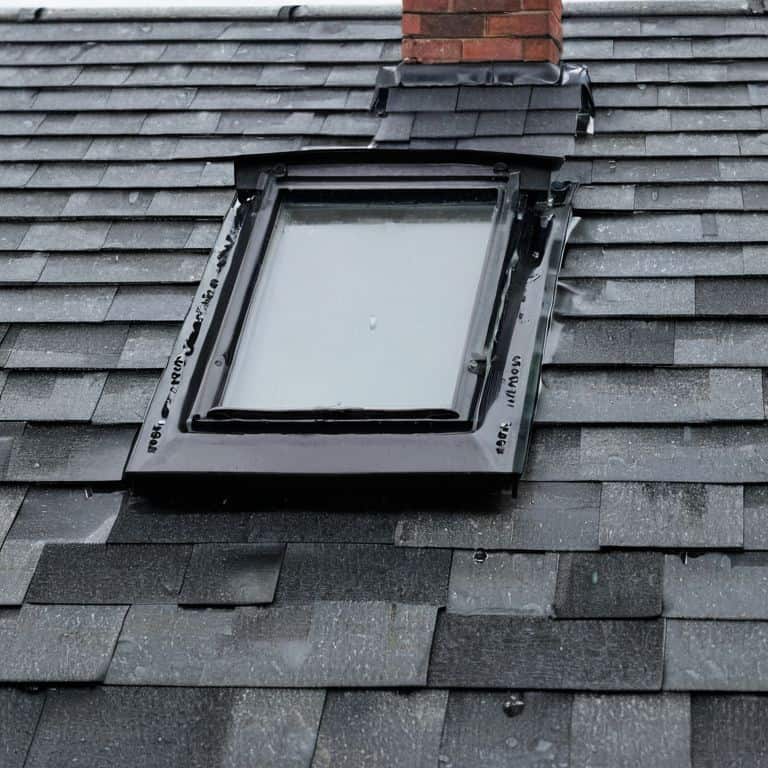
As I sit in my “Heathcliff” study, surrounded by vintage teapots and the soothing sound of rain outside, I am reminded of the importance of regular roof maintenance. It’s essential to catch any potential issues before they become major problems. When inspecting your roof, keep an eye out for common roof leak locations, such as around chimneys, vents, and skylights. These areas are more prone to leaks due to the intersections of different roofing materials.
A thorough diy roof inspection checklist should include examining the condition of your roofing materials, looking for signs of wear and tear, and checking for any damage after a storm. It’s also crucial to consider the type of roofing materials you have, as some are more susceptible to leaks than others. For instance, asphalt shingles are more prone to damage from high winds and heavy rainfall.
As the seasons change, it’s vital to adapt your roof inspection routine. During the winter months, winter roof maintenance tips become especially important, as snow and ice can cause significant damage to your roof. Be sure to clear any debris from your gutters and downspouts, and consider investing in a roof rake to remove excess snow from your roof. By taking these extra steps, you can help ensure your roof remains safe and secure throughout the year.
Crafting a Diy Roof Inspection Checklist With Love
As I sit in my “Elizabeth Bennet” library, surrounded by vintage teapots and the musty scent of old books, I ponder the art of crafting a DIY roof inspection checklist. It’s a task that requires a dash of whimsy and a pinch of practicality. I like to think of it as weaving a tale of discovery, where every item on the list is a chapter in the story of uncovering hidden leaks.
With a warm cup of tea in hand, I begin to jot down the essentials: inspecting flashing, checking for damaged shingles, and examining vents. Each item is a thread in the narrative, carefully considered and lovingly tended to, just like my grandmother used to mend a torn seam with precision and care. As the list grows, so does the excitement of the journey, and I feel like a character in a literary tale, uncovering secrets and solving mysteries, one roof inspection at a time.
Unveiling Common Roof Leak Locations With Whimsy
As I sip tea from my favorite vintage teapot, I ponder the secret spots where roof leaks love to hide. Let’s take a whimsical journey to uncover them, shall we? We’ll start with the chimney, that charming stack that adds a touch of nostalgia to our homes. Then, we’ll wander over to the vents, those tiny tunnels that whisper tales of the wind. And, of course, we mustn’t forget the valleys, where two roofs meet and secrets are shared.
In these hidden corners, leaks often sneak in, carrying stories of their own. By inspecting these areas with a curious eye, we can uncover the tales of our roof and keep its whispers from turning into loud warnings.
Whispers from the Rooftop: 5 Enchanted Tips for a Leak-Free Sanctuary
- Let the sunlight be your guide: Inspect your roof on a sunny day to spot any discoloration or water stains that might be hiding in the shadows
- Listen to the whispers of your roof’s past: Check for missing, loose, or damaged shingles, and imagine the stories they could tell if they could speak
- Get cozy with your roof’s anatomy: Familiarize yourself with the different parts of your roof, from vents to chimneys, and think of them as characters in a charming tale
- Follow the trail of tea and curiosity: Inspect your roof’s flashing, valleys, and gutters, and pretend you’re on a treasure hunt for hidden leaks and secret passages
- Weave a tale of maintenance and love: Regularly clean your gutters, trim tree branches, and seal any cracks or gaps, and imagine you’re writing a story of devotion and care for your home
Weaving a Tale of Roof Inspection: 3 Key Takeaways
Embracing the whimsy of roof inspection, remember that a leaky roof is not just a repair, but a chance to uncover hidden stories and secrets within your home’s architecture
As you craft your DIY roof inspection checklist, don’t forget to include a pinch of curiosity and a dash of creativity, for it’s in the details that the true magic of home renovation lies
Whether you’re a seasoned homeowner or a newcomer to the world of roof inspections, recall that every creaky tile and every rusty nail tells a tale of love, laughter, and adventure, waiting to be rediscovered and cherished
A Whimsical Wisdom
As we tenderly inspect our roofs for leaks, we’re not just searching for cracks and crevices, we’re uncovering the hidden tales of our homes, and weaving a story of cozy renovation, one delicate discovery at a time.
Margaret Silva
Weaving a Tapestry of Roof Care and Whimsy

As we conclude our whimsical journey through the realm of roof inspection, let’s take a moment to breathe in the essence of our findings. We’ve uncovered the hidden tales of our roof, from the common leak locations that whisper secrets to the wind, to the DIY checklists that guide us with love and care. By embracing this holistic approach to roof care, we not only ensure the integrity of our homes but also weave a narrative of coziness and wonder. As I sit in my ‘Heathcliff’ study, surrounded by vintage teapots and the soothing scent of old books, I am reminded that our homes are a reflection of our stories, and it’s up to us to write the next chapter.
So, as you embark on your own roof inspection adventures, remember that it’s not just about detecting leaks, but about crafting a sense of home. It’s about infusing every corner of your space with magic and meaning. As you climb up to your roof, take a moment to appreciate the view, to feel the breeze, and to listen to the whispers of your home. For in the end, it’s not just a roof that needs inspecting, but a story that needs telling – and it’s yours to write, one charming detail at a time.
Frequently Asked Questions
What are the most common signs of a roof leak that I should look out for before it's too late?
Let’s get cozy and curious, shall we? Common signs of a roof leak include water stains on ceilings, dripping sounds, and musty smells. Keep an eye out for missing or damaged shingles, curled or buckled roofing material, and debris-filled gutters. These whispers of warning can help you catch leaks before they become major tales of woe.
How often should I inspect my roof for leaks to ensure it remains in good condition?
Let’s get cozy and chat about roof inspections, shall we? I recommend checking your roof at least twice a year, ideally during spring and fall, to catch any potential leaks before they become pesky problems. Think of it as a seasonal ritual, like dusting off your favorite vintage teapot, to keep your home’s story unfolding smoothly.
Are there any specific tools or equipment that I'll need to conduct a thorough roof inspection for leaks?
To uncover those hidden leaks, I adore using a trusty flashlight, a sturdy ladder, and a pair of keen eyes. A garden hose can also be a charming companion, helping to simulate rainfall and reveal any sneaky leaks. And, of course, a vintage-inspired notebook to jot down my findings, making the experience feel like a delightful adventure.