As I sit in my Emily Dickinson room, surrounded by vintage teapots and the warm glow of afternoon sunlight, I am reminded of the countless stories that our homes whisper to us. I’ve always believed that a well-loved hardwood floor is more than just a foundation – it’s a canvas waiting for its next chapter. That’s why I’m excited to share with you a guide to refinishing hardwood floors, a journey that will uncover the hidden tales of your floors and make them shine like new again. I’ve seen many homeowners struggle with the idea of refinishing their hardwood floors, but with the right approach, it can be a truly transformative experience.
In this article, I promise to share my honest and practical advice on how to refinish your hardwood floors, without the hype or overwhelming jargon. You’ll learn how to assess the condition of your floors, choose the right materials, and bring out the unique character of your home’s story. Whether you’re a seasoned DIY enthusiast or a curious beginner, I’ll walk you through each step of the process, sharing my own experiences and tips along the way. By the end of this guide, you’ll be equipped with the knowledge and confidence to uncover the hidden beauty of your hardwood floors and create a space that truly feels like home.
Table of Contents
- Guide Overview: What You'll Need
- Step-by-Step Instructions
- A Guide to Refinishing Hardwood Floors
- Weaving Magic into Your Floors: 5 Enchanted Tips for a Successful Refinishing Journey
- Timeless Treasures: 3 Key Takeaways for Refinishing Hardwood Floors
- Refinishing with Heart
- Bringing Your Hardwood Floors to Life
- Frequently Asked Questions
Guide Overview: What You'll Need
Total Time: 2 days to 1 week
Estimated Cost: $500 – $2000
Difficulty Level: Hard
Tools Required
- Drum Sander (for large areas)
- Belt Sander (for edging and small areas)
- Orbital Sander (for fine sanding)
- Vacuum (with brush attachment)
- Tack Cloth (for cleaning floors)
- Paintbrushes (various sizes)
- Lambswool Applicator (for applying finish)
- Safety Goggles (for protecting eyes)
- Dust Mask (for protecting lungs)
- Knee Pads (for comfort)
Supplies & Materials
- Sandpaper (80-grit, 100-grit, 120-grit)
- Wood Filler (for filling gaps and holes)
- Wood Stain (optional)
- Polyurethane Finish (water-based or oil-based)
- Rags (lint-free)
- Mineral Spirits (for cleaning and thinning finish)
Step-by-Step Instructions
- 1. To begin our whimsical journey of refinishing hardwood floors, let’s start with preparing the space. Clear the room of any furniture, rugs, and decorations to prevent damage from dust and chemicals. It’s also essential to cover any remaining items, such as door handles and baseboards, with plastic or tape to ensure they remain untouched by the refinishing process.
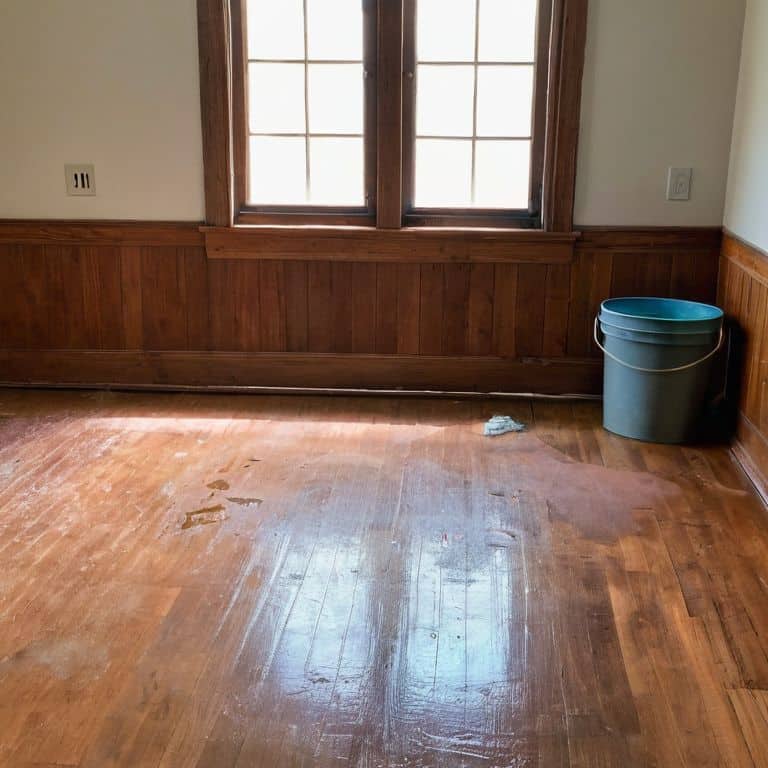
- 2. Next, we need to assess the floor’s condition to determine the best approach for refinishing. Check for any scratches, dents, or old finishes that may need to be removed. This step will help you decide whether you need to use a specific type of sandpaper or a chemical stripper to remove the old finish. Take note of any particularly damaged areas, as they may require extra attention.
- 3. Now it’s time to remove the old finish. If you’re using a chemical stripper, apply it evenly across the floor, following the manufacturer’s instructions. Allow the stripper to sit for the recommended amount of time before scraping off the old finish with a putty knife or a scraper. Be sure to wear protective gloves and work in a well-ventilated area to avoid inhaling fumes.
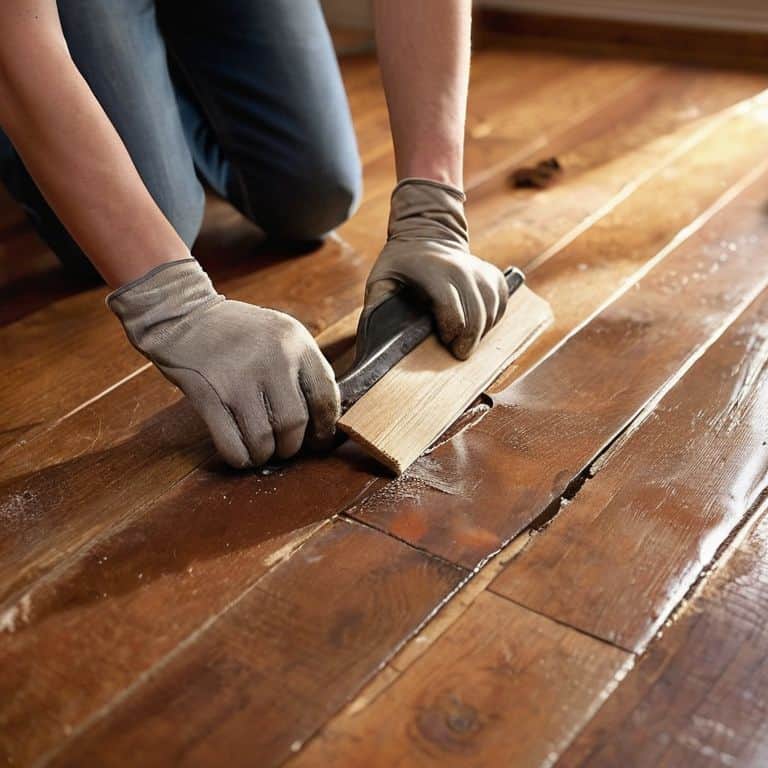
- 4. With the old finish removed, it’s essential to sand the floor to smooth out any imperfections and create a surface for the new finish to adhere to. Start with a coarse-grit sandpaper (about 80-100 grit) and work your way up to finer grits (120-150) for a smoother finish. Sand in the direction of the wood grain to avoid scratching the floor.
- 5. After sanding, use a vacuum or a damp cloth to remove any dust or debris from the floor. This step is crucial in ensuring a smooth, even finish. Pay particular attention to the edges and corners of the room, where dust and dirt tend to accumulate.
- 6. Now it’s time to apply the new finish. Choose a finish that suits your desired color and sheen, and apply it according to the manufacturer’s instructions. Typically, you’ll need to apply a thin, even layer, allowing it to dry before applying additional coats. Be patient, as this process may take several hours or even days, depending on the type of finish and the number of coats you apply.
- 7. Once the final coat of finish has dried, it’s time to inspect and touch up any areas that may need additional attention. Check for any spots where the finish may be uneven or where the color doesn’t quite match. Use a small brush to apply touch-up coats as needed, blending the finish seamlessly into the surrounding area.
- 8. Finally, allow the finish to cure completely before returning furniture and rugs to the room. This may take several days, depending on the type of finish and environmental conditions. Once the floor is fully cured, you can enjoy your beautifully refinished hardwood floors, complete with a rich, warm glow that tells the story of your home’s history and character.
A Guide to Refinishing Hardwood Floors
As I sit in my “Heathcliff” study, surrounded by vintage teapots and the warm glow of lamplight, I am reminded that refinishing hardwood floors is not just about restoring their original beauty, but also about uncovering the hidden stories they tell. When it comes to hardwood floor refinishing costs, it’s essential to consider the type of polyurethane you’ll be using, as it can greatly impact the overall expense. I’ve found that opting for the best polyurethane for hardwood floors can make all the difference in achieving a durable and long-lasting finish.
When it comes to preparing your floors for refinishing, sanding techniques for old hardwood are crucial. I’ve learned that using a combination of belt sanders and orbital sanders can help to remove old finishes and smooth out the wood. It’s also important to consider hardwood floor staining tips and tricks, such as testing the stain on a small, inconspicuous area first to ensure the desired color.
To avoid common diy hardwood floor restoration mistakes, it’s essential to work in a well-ventilated area and use environmentally friendly hardwood finishes whenever possible. By taking the time to properly prepare and refinish your hardwood floors, you can create a space that feels like a warm hug, a place where memories are made and stories are told.
Choosing Best Polyurethane for Timeless Beauty
As I sit in my “Elizabeth Bennet” parlor, surrounded by vintage teapots and the warmth of refinished hardwood, I ponder the perfect polyurethane to seal in the timeless beauty of our floors. The right finish can elevate the entire aesthetic, much like the perfect blend of tea leaves brings out the unique flavors. For a classic, sophisticated look, I often recommend a water-based polyurethane – its subtle sheen and ease of application make it a charming choice for those seeking a low-maintenance yet elegant finish.
When selecting the ideal polyurethane, consider the tone and texture you wish to achieve. A oil-based polyurethane, for instance, can add a rich, golden glow to your floors, reminiscent of a well-loved novel. Ultimately, the key to timeless beauty lies in balance and harmony, much like the perfect cup of tea paired with a delightful story.
Unveiling Hidden Tales With Sanding Techniques
As I step into my “Heathcliff’s Haven” room, surrounded by vintage teapots and the soft glow of table lamps, I’m reminded of the transformative power of sanding. It’s a crucial step in refinishing hardwood floors, where the rough edges are smoothed away, and the beauty within is slowly unveiled. With each gentle pass of the sander, the wood begins to whisper its secrets, and the stories of years gone by start to emerge.
I like to think of sanding as a form of storytelling, where every scratch and scuff is a character in the narrative of our homes. By carefully choosing the right sanding technique, we can either highlight or hide these imperfections, crafting a unique tale with each floor. Whether it’s a light touch to preserve the patina or a more rigorous approach to reveal the wood’s hidden grain, the art of sanding is a delicate dance between preservation and revelation.
Weaving Magic into Your Floors: 5 Enchanted Tips for a Successful Refinishing Journey
- Let the floors whisper their secrets: Before refinishing, take a moment to appreciate the history and stories your hardwood floors hold, and imagine the new tales you’ll create
- Sand with a gentle touch: Remember, sanding is not just about stripping old finishes, but about uncovering the hidden beauty and character of your floors, so do it with love and care
- Choose your polyurethane wisely: It’s not just about durability, but about finding the perfect hue and sheen to complement your home’s unique narrative and aesthetic
- Don’t underestimate the power of a test patch: It’s like previewing the first chapter of a book – it gives you a glimpse into how the story will unfold, and helps you avoid any plot twists you didn’t anticipate
- Seal your floors with a dash of patience: Applying polyurethane is like adding the final brushstrokes to a masterpiece – take your time, and let each coat dry completely, to ensure a finish that’s as smooth as a well-loved novel
Timeless Treasures: 3 Key Takeaways for Refinishing Hardwood Floors
Embracing the process of refinishing hardwood floors as an opportunity to uncover the hidden tales and character of your home, rather than just a renovation task
Selecting the right sanding techniques and polyurethane to bring out the unique beauty and story of your floors, blending nostalgia with timeless elegance
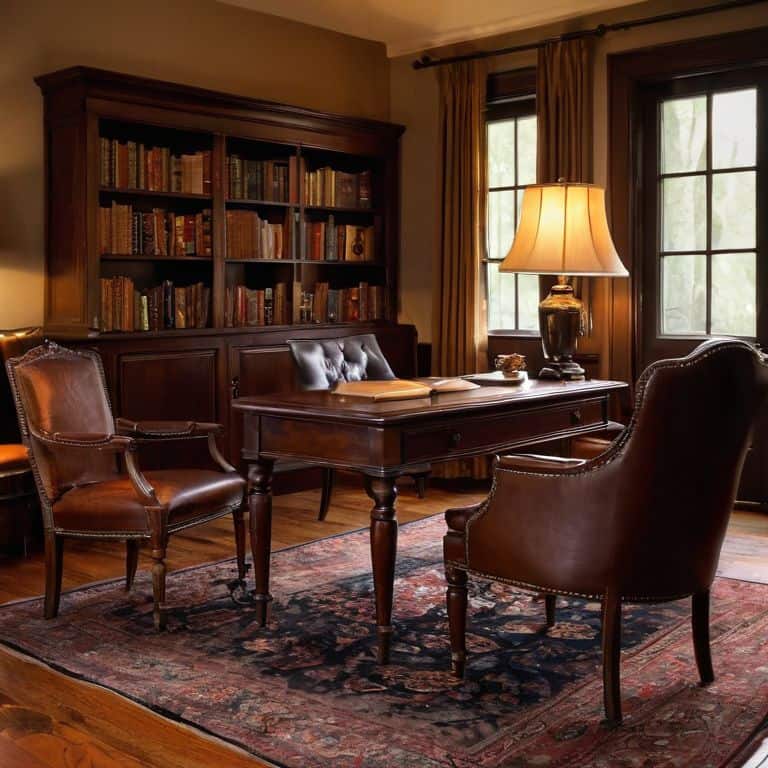
Infusing your refinishing journey with personal touches and whimsical flair, such as naming each room after a literary character, to create a space that feels like a living, breathing narrative
Refinishing with Heart
As we breathe new life into our hardwood floors, we’re not just stripping away the old, we’re uncovering the stories that lie within the wood, waiting to be told and retold with every step, every gathering, and every memory made.
Margaret Silva
Bringing Your Hardwood Floors to Life
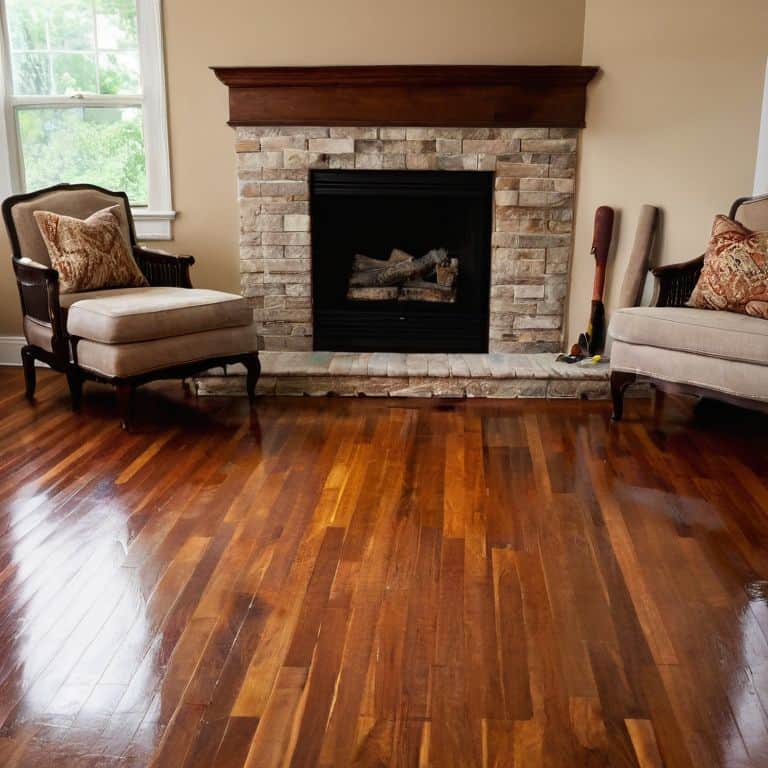
As we conclude our journey through the world of refinishing hardwood floors, let’s take a moment to reflect on the key elements that bring this process to life. From the initial preparation to the final coat of polyurethane, each step is a crucial part of unveiling the hidden tales within your floors. Sanding techniques and choosing the right polyurethane can make all the difference in achieving a timeless beauty that resonates with the character of your home. By following these steps and considering your own personal touch, you’re not just refinishing floors – you’re crafting a story that will be told for years to come.
Now, as you stand in your newly refined space, surrounded by the warmth and elegance of your hardwood floors, remember that every corner of your home is a canvas waiting for your personal story. Embracing the whimsy of interior design, just as I do with my vintage teapot collection and the literary names of my rooms, can transform your living space into a vibrant tapestry of memories and imagination. So, go ahead, pour yourself a cup of tea, sit back, and let the beauty of your refined hardwood floors be the beginning of a new chapter in your home’s story.
Frequently Asked Questions
What are the most common mistakes to avoid when refinishing hardwood floors to ensure a professional-looking finish?
As I sit in my “Elizabeth Bennet” parlor, surrounded by vintage teapots, I’m reminded that refinishing hardwood floors can be a delicate dance. Common mistakes to avoid include uneven sanding, insufficient drying time, and applying polyurethane in direct sunlight – all of which can leave your floors looking lackluster rather than luxurious.
How do I determine the best stain color for my hardwood floors to match the rest of my home's decor?
To find the perfect stain color, I like to think of it as matchmaking for your floors. Consider the hues of your furniture, walls, and decor, and imagine how they’d dance together. Take samples, test them in different lighting, and trust your instincts – after all, it’s about creating a harmonious narrative in your home.
Can I refinish my hardwood floors myself, or are there certain situations where it's best to hire a professional?
While refinishing hardwood floors can be a delightful DIY adventure, some situations call for a professional’s skilled hand, such as extensive water damage or complex stain matching – in those cases, it’s best to invite an expert into your “Heathcliff’s Haven” or “Pemberley’s Parlor” to work their magic.