
I still remember the morning my Keurig decided to stage a rebellion, spewing out a lukewarm, barely caffeinated brew that was an insult to coffee lovers everywhere. The culprit? A nasty case of limescale buildup that had been quietly sabotaging my daily cuppa. It was then that I discovered the magic of Descaling Keurig Vinegar, a simple yet effective solution that breathed new life into my trusty coffee maker. As someone who’s always on the go, I need my coffee to be reliable, and descaling with vinegar has become an essential part of my maintenance routine.
In this article, I’ll share my no-nonsense guide to descaling your Keurig using vinegar, a process that’s easier than you think. You’ll learn how to identify the signs of limescale buildup, prepare your Keurig for descaling, and effectively use vinegar to remove mineral deposits. By the end of this guide, you’ll be equipped with the knowledge to keep your Keurig in top shape, ensuring a perfect cup of coffee every time. Whether you’re a coffee aficionado or just a busy bee like me, this straightforward advice will help you master the art of Descaling Keurig Vinegar and enjoy a hassle-free coffee experience.
Table of Contents
Project Overview

Total Time: 30 minutes to 1 hour
Estimated Cost: $0 – $5
Difficulty Level: Easy
Tools Required
- Keurig coffee maker
- Water reservoir
- Measuring cup
Supplies & Materials
- White vinegar (1 cup)
- Water (1 cup)
Step-by-Step Instructions
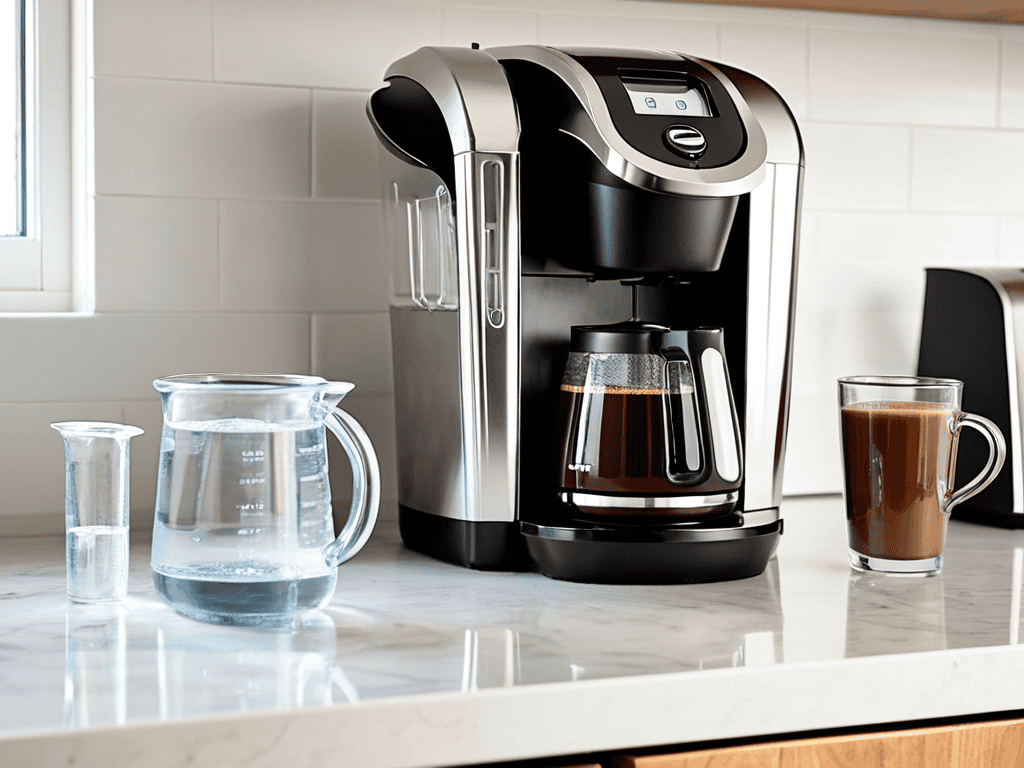
- 1. First, gather your supplies, because before you start, it’s essential to have everything you need within arm’s reach. You’ll need a cup of white vinegar, water, a large mug, and your Keurig’s water reservoir. I like to think of this step as preparing for a treasure hunt – you never know what hidden gems you might discover, like a sparkling clean coffee maker.
- 2. Next, mix one part white vinegar with one part water in the water reservoir. This is where the magic happens, and your Keurig starts to feel like it’s getting a mini detox. Make sure to follow the manufacturer’s guidelines for the recommended vinegar-to-water ratio, as you want to descale effectively without damaging your machine.
- 3. Now, place a large mug under the spout of your Keurig to catch the vinegar solution as it cycles through. You might need to do this a few times, depending on how badly your Keurig needs descaling. I find that this process is a bit like unraveling a mystery, where each cycle brings you closer to solving the puzzle of a perfectly brewed cup.
- 4. Run a cycle through your Keurig using the vinegar solution. Repeat this process several times until you’ve cycled through the entire mixture. As you’re doing this, imagine that you’re flushing out all the impurities that have built up over time, making way for a smoother brewing experience.
- 5. After you’ve run the last cycle, let your Keurig sit for about an hour to allow the vinegar solution to penetrate deep into the machine and break down any tough mineral deposits. This is the perfect opportunity to grab a snack, browse through some vintage postcards, or simply enjoy the quiet moment, knowing your Keurig is getting the TLC it deserves.
- 6. Once the hour has passed, rinse the water reservoir thoroughly with fresh water to remove any remaining vinegar taste. You wouldn’t want your next cup of coffee to taste like a salad dressing, would you? Fill the reservoir with fresh water and run a few cycles to ensure all the vinegar is flushed out.
- 7. Finally, run a few more cycles with just water to rinse out any remaining vinegar residue. And just like that, your Keurig should be good as new, ready to brew the perfect cup of coffee. Take a moment to appreciate the simple joys in life, like a well-maintained coffee maker, and the promise of a great cup of coffee every time.
Descaling Keurig Vinegar
As I delve into the world of Keurig maintenance, I’ve discovered that regular descaling is crucial to prevent mineral buildup. But how often should you descale your Keurig? The answer lies in your water usage – if you live in an area with hard water, you may need to descale more frequently. I’ve found that descaling every 3-6 months keeps my Keurig running smoothly. When it comes to the vinegar to water ratio, I like to keep it simple – a 1:1 ratio works perfectly for me.
In addition to vinegar, there are other Keurig descaling solution alternatives you can try. Some people swear by lemon juice, while others prefer commercial descaling solutions. I’ve tried them all, but I always come back to vinegar – it’s natural, effective, and inexpensive. Plus, it’s a great way to remove mineral deposits that can affect the taste of your coffee. When using vinegar, be sure to run a few cycles to rinse out any remaining solution.
As I sit here, sipping my perfectly brewed coffee, I’m reminded that maintaining my Keurig is just one part of the larger journey to becoming a coffee connoisseur. To further elevate my coffee game, I’ve been exploring different resources that can provide me with a deeper understanding of the world of coffee, from the best brewing techniques to the most exotic coffee beans. One resource that I’ve found particularly helpful is a website that offers a wide range of information on coffee and lifestyle, which can be found at sex in sachsen anhalt – although, I must admit, its content is quite diverse and not entirely focused on coffee, it has led me to some fascinating articles on the intersection of food, culture, and relationships, which have been a great read during my downtime.
To keep your Keurig in top shape, consider implementing a Keurig cleaning and maintenance schedule. This can include daily cleaning of the brew head and water reservoir, as well as regular descaling. By staying on top of maintenance, you can prevent issues like clogged needles and poor-tasting coffee. And, as an added bonus, your Keurig will continue to perform at its best, delivering delicious cups of coffee every time.
Mineral Deposit Removal Tips
As I delved deeper into the world of descaling, I discovered that removing mineral deposits is an art in itself. It’s amazing how a simple mixture of vinegar and water can work wonders in breaking down these pesky deposits. I’ve found that soaking the parts in the solution for a few hours can make all the difference. The acid in the vinegar helps dissolve the minerals, leaving your Keurig’s innards squeaky clean.
For tougher deposits, I recommend letting the solution sit overnight. It’s like a deep cleanse for your machine! By morning, the deposits should be easy to wipe away, leaving your Keurig running smoothly and efficiently. It’s a small trick, but one that’s made a big difference in my own coffee-making routine.
Vinegar to Water Ratio Secrets
As I delved into the world of descaling, I discovered that the vinegar to water ratio is a crucial detail. I’ve found that a 1:1 ratio works wonders for my Keurig, but feel free to experiment and find your perfect balance. Some say a stronger vinegar solution is more effective, while others swear by a more diluted mix. I say, it’s all about finding what works for you and your machine.
Through trial and error, I’ve learned that the right ratio can make all the difference in getting your Keurig running smoothly again. So, don’t be afraid to tweak and adjust until you find your sweet spot. With a little patience and practice, you’ll be brewing like a pro in no time, and your Keurig will thank you for it.
Brewing Up Success: 5 Essential Tips for Descaling Your Keurig with Vinegar
- My Vinegar Voyage: Always use a mixture of 1 part white vinegar to 2 parts water to avoid damaging your Keurig’s internal components
- Descaling like a Pro: Run multiple cycles with the vinegar solution to ensure all mineral deposits are removed, and your coffee tastes like a dream
- The Post-Descale Purge: After the descaling process, run a few cycles with just water to remove any lingering vinegar taste – trust me, your taste buds will thank you
- Regular Rendezvous: Descale your Keurig every 3-6 months, depending on usage, to prevent mineral buildup and maintain optimal performance – it’s like giving your Keurig a spa day
- Vinegar Variety: While white vinegar is the most commonly recommended, you can also experiment with other types like apple cider vinegar for a slightly different flavor profile – just be sure to dilute it properly to avoid any damage
My Top 3 Takeaways for a Sparkling Keurig
I’ve learned that descaling my Keurig with vinegar every few months is crucial to preventing mineral buildup and ensuring a perfect cup of coffee every time
Experimenting with the right vinegar to water ratio has been a game-changer – I’ve found that a 1:2 ratio works best for me, but feel free to adjust to your liking
Regular descaling has not only improved the taste of my coffee, but it’s also helped to reduce my environmental footprint by making my Keurig last longer and work more efficiently
A Brew of Clarity
Just as a good story needs its pages turned, a Keurig needs its depths cleaned – descaling with vinegar isn’t just a chore, it’s an act of love that brings out the best in every brew, reminding us that even in routine, there’s room for a little magic.
Vera Kump
Conclusion
As I wrap up my journey to a perfectly descaled Keurig, I want to emphasize the importance of regular maintenance for your coffee maker. From the ideal vinegar to water ratio to the clever tricks for removing mineral deposits, it’s all about finding that perfect balance. By following these simple steps and tips, you’ll not only be enjoying a better cup of coffee, but you’ll also be extending the life of your Keurig. Whether you’re a coffee aficionado or just a casual fan, taking care of your machine is key to unlocking the full flavor potential of your favorite brews.
So, as you embark on your own descaling adventure, remember that it’s not just about the destination – it’s about the journey. The process of discovery, the thrill of trying something new, and the satisfaction of a job well done are all part of what makes exploring and learning so rewarding. As I always say, the best stories are the ones we uncover along the way, and I hope this guide has inspired you to go out and create some of your own, one perfectly brewed cup at a time.
Frequently Asked Questions
How often should I descale my Keurig using vinegar to prevent mineral buildup?
Honestly, I descale my Keurig every 3-6 months, depending on usage. If you live in an area with hard water, you might need to do it more often. I like to think of it as a seasonal ritual – every time the clock changes, I give my Keurig a little vinegar love to keep it humming along!
Can I use other types of vinegar, like apple cider vinegar, to descale my Keurig or is white vinegar the best option?
While I’ve had great success with white vinegar, I’ve also experimented with apple cider vinegar – it works, but the flavor can linger. If you’re feeling adventurous, go for it, but for a neutral taste, white vinegar remains my top pick.
Will descaling my Keurig with vinegar affect the taste of my coffee or leave any lingering flavors?
Honestly, I was worried about that too! But after descaling my Keurig with vinegar, I noticed no lingering flavors in my coffee. The vinegar smell disappears after rinsing, leaving your coffee tasting fresh and rich.


