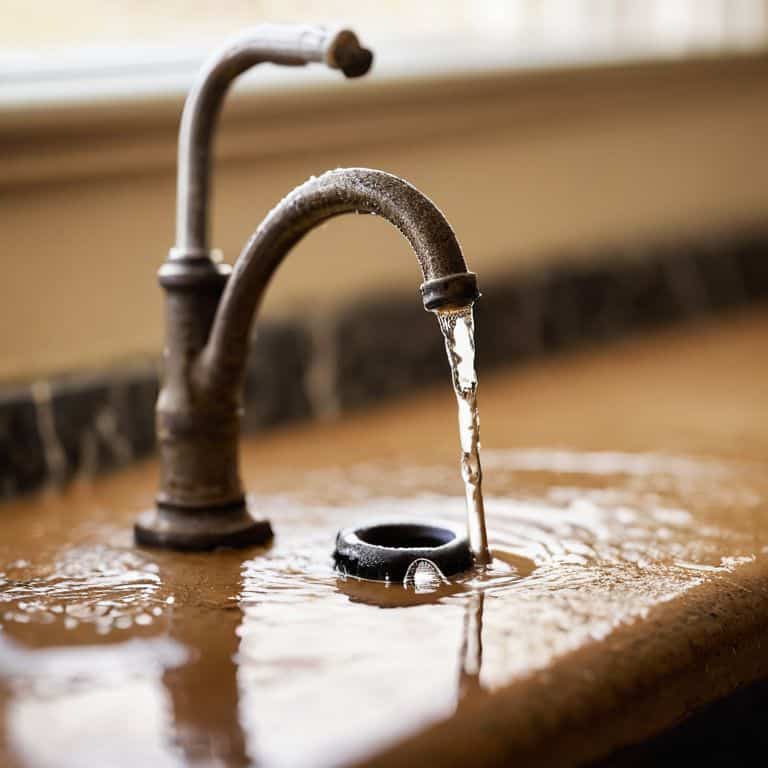
I still remember the first time I encountered a leaky faucet in my parents’ old Victorian home – it was as if the steady drip, drip, drip was echoing the rhythm of my grandmother’s sewing machine. My father, a skilled restorer of antique furniture, would often take on small repair projects like how to fix a leaky faucet as a way to teach me the value of self-sufficiency and the joy of fixing things with our own hands. As I grew older, I realized that this simple task was not just about stopping a leak, but about restoring the harmony of our home.
In this article, I promise to share with you the practical advice and straightforward tips I’ve learned from my father on how to fix a leaky faucet. You won’t find any confusing jargon or overly complicated instructions here – just honest, step-by-step guidance on how to diagnose and fix the issue, so you can get back to enjoying the warmth and comfort of your own home. Whether you’re a seasoned DIY enthusiast or a beginner looking to tackle your first repair project, I invite you to join me on this journey to uncover the simple secrets behind fixing a leaky faucet and restoring the peace in your living space.
Table of Contents
Guide Overview: What You'll Need

Total Time: 1 hour 15 minutes
Estimated Cost: $15 – $30
Difficulty Level: Intermediate
Tools Required
- Adjustable Wrench for loosening faucet parts
- Channel-Type Pliers for gripping small objects
- Needle-Nose Pliers for reaching tight spaces
- Screwdriver flathead and Phillips
Supplies & Materials
- Faucet Repair Kit specific to faucet type
- O-Ring or Gasket to replace worn-out seal
- Pipe Tape for threaded pipe connections
- Silicone-Based Lubricant for smooth operation
Step-by-Step Instructions
- 1. First, gather your tools and supplies, as my father used to say, “A good craftsman is only as good as his tools.” You’ll need a wrench, pliers, a screwdriver, and a replacement O-ring or gasket, depending on the type of faucet you have. Make sure you have a bucket or a container to catch any water that might spill out during the process.
- 2. Next, turn off the water supply to the faucet by locating the shut-off valves under the sink and turning them clockwise. Open the faucet to drain the water from the pipes, and then close it again. This is a crucial step to prevent any water from flowing out while you’re working on the faucet.
- 3. Now, disassemble the faucet to access the leaky part. This may involve removing the handle or the spout, depending on the faucet’s design. Be careful not to damage any of the surrounding components, and take note of how the parts fit together so you can reassemble them later.
- 4. Once you’ve accessed the leaky area, inspect the O-ring or gasket for any signs of wear or damage. If it’s damaged, remove it and replace it with a new one. Make sure it’s properly seated and aligned to prevent any further leaks.
- 5. If the leak is coming from a corroded or damaged pipe, you’ll need to replace the pipe or apply a pipe repair kit. This may require some additional tools and materials, such as a pipe cutter or a repair clamp. Be sure to follow the manufacturer’s instructions for the specific product you’re using.
- 6. After you’ve replaced the O-ring or gasket, or repaired the pipe, reassemble the faucet in the reverse order that you disassembled it. Make sure all the parts are securely tightened, but avoid over-tightening, which can damage the faucet.
- 7. Finally, test the faucet to ensure the leak has been fixed. Turn the water supply back on and check for any signs of leaks around the faucet. If you’ve done everything correctly, you should no longer see any water dripping or leaking out. Take a step back and admire your handiwork – you’ve successfully fixed the leaky faucet and restored the rhythm of your home.
How to Fix a Leaky Faucet
As I sit in my “Heathcliff” study, surrounded by vintage teapots and the whispers of classic literature, I’m reminded that even the smallest details, like a leaky faucet, can disrupt the harmony of our homes. To truly master the art of faucet repair, it’s essential to understand the common causes of faucet leaks, such as worn-out o-rings or damaged cartridges.
In my experience, faucet leak detection methods can be as simple as observing the leak’s pattern or listening for the faint sound of dripping water. When it comes to repairing, o-ring replacement techniques can vary depending on the type of faucet cartridge. I’ve found that having the right plumbing tools for faucet repair can make all the difference in the world.
As you embark on this journey to restore your faucet to its former glory, remember that patience and attention to detail are key. While it’s possible to estimate the faucet repair cost, I believe that the true value lies in the satisfaction of a job well done, and the knowledge that you’ve preserved the story of your home, one small fix at a time.
Replacing O Rings With Vintage Care
As I delicately replace the O-rings, I’m reminded of my grandmother’s precise touch when sewing intricate embroidery. It’s a moment that requires patience and a gentle hand, much like handling the fragile porcelain of my vintage teapots. I find solace in the quiet, methodical process of disassembling and reassembling the faucet’s parts, ensuring each new O-ring is seated perfectly to prevent future leaks.
With the replacement complete, I step back to admire my handiwork, feeling a sense of satisfaction akin to placing a newly acquired teapot on my shelf in the “Heathcliff” room, where the moors meets cozy comfort. The rhythm of my home’s plumbing is once again in harmony, thanks to a little vintage care and attention to detail.
Uncovering Faucet Leak Detection Methods
As I sit in my “Elizabeth Bennet” parlor, surrounded by vintage teapots and the soothing sounds of classical music, I’m reminded of the importance of attention to detail in our homes. Detecting a leaky faucet can be as simple as paying attention to the subtle signs – the faint sound of dripping water, the slight increase in your water bill, or the water spots on your sink. I recall my father teaching me how to identify these signs in our old Victorian home, and now I’m eager to share these tips with you.
By being mindful of these indicators, you can catch a leaky faucet before it becomes a major issue, saving you time and trouble in the long run.
Whispers from the Faucet: 5 Timeless Tips to Tame the Leak
- Listen to the Rhythm: Identify the source of the leak by observing the faucet’s behavior, just as I did when fixing the old sink in my ‘Heathcliff’s Haven’ kitchen
- Treasures from the Past: Gather vintage-inspired tools, like my grandfather’s worn pliers, to add a touch of nostalgia to your repair process
- Steeped in Tradition: Soak the affected area in a mixture of vinegar and water, reminiscent of my grandmother’s old recipe for polishing silver, to loosen mineral deposits
- A Room of One’s Own: Ensure you have a dedicated space, like my ‘Alice’s Workshop’, for tinkering and fixing, where creativity and patience entwine
- Restoring the Narrative: As you replace the O-rings or gaskets, imagine the stories the faucet could tell, and the memories you’re creating, much like the ones I cherish in my ‘Pemberley Parlor’
Timeless Tips to Treasure
As I sit in my ‘Elizabeth Bennet’ reading nook, surrounded by vintage teapots and the warmth of a crackling fire, I’m reminded that fixing a leaky faucet is not just about stopping a drip, but about restoring the rhythm of our homes, much like my father used to do in our old Victorian house
By embracing the art of DIY repair, we not only save ourselves from the hassle of waiting for a professional, but we also weave a narrative of self-sufficiency and love into the fabric of our daily lives, which is why I love sharing these stories and tips on my home styling blog
Whether it’s the gentle touch required to replace O-rings or the satisfaction of detecting and fixing a leak, every step in this journey is an opportunity to connect with our spaces on a deeper level, to hear the whispers of the past, and to create a sense of nostalgia and wonder that makes our homes truly feel like our own
A Leaky Faucet's Hidden Tale
As I see it, fixing a leaky faucet is not just about tightening loose parts, but about listening to the whispers of our home, understanding its rhythm, and gently coaxing it back into harmony – a dance of repair, of love, and of storytelling.
Margaret Silva
Embracing the Journey, Not Just the Fix

As we conclude our journey to fix that pesky leaky faucet, let’s take a moment to reflect on the key takeaways. From uncovering faucet leak detection methods to carefully replacing O-rings with vintage care, each step has been a testament to the power of patience and attention to detail. By following these steps, you’ve not only saved yourself from the frustration of a dripping faucet but have also contributed to the preservation of your home’s story, one that is woven into the very fabric of its walls and fixtures.
And so, as you stand back to admire your handiwork, remember that fixing a leaky faucet is not just about stopping a leak; it’s about weaving your own narrative into the home’s history. It’s about embracing the quirks and challenges that come with owning a piece of history and turning them into moments of connection and love. As I sit here in my ‘Elizabeth Bennet’ reading nook, surrounded by vintage teapots and the warm glow of lamplight, I am reminded that our homes are living, breathing entities that whisper stories of their own, if we only take the time to listen.
Frequently Asked Questions
What are some common signs that a faucet is about to start leaking, so I can catch the issue before it becomes a bigger problem?
I just love being proactive about home maintenance, don’t you? To catch a faucet leak before it starts, keep an eye out for water spots or mineral deposits around the faucet, a loose handle, or a faint hissing sound – these are all whispers that something might be amiss, and a quick tune-up could save you from a bigger headache later on.
How do I know which type of O-ring or gasket to replace in my faucet, given the wide variety of faucet models and ages?
When it comes to choosing the right O-ring or gasket, I always think of my grandmother’s sewing box, filled with an array of buttons and threads. Similarly, faucet models have unique needs. For vintage faucets like the ones my father restored, I opt for traditional materials, while modern ones might require synthetic O-rings. Consulting your faucet’s manual or a hardware specialist can help you find the perfect fit.
Are there any special considerations or precautions I should take when fixing a leaky faucet in an older home, like mine, which has vintage plumbing fixtures?
When tackling a leaky faucet in my own vintage-filled home, I always consider the delicate balance of older plumbing systems. I make sure to handle the original fixtures with care, taking note of any specific manufacturer instructions, and often opt for replacement parts that match the era, to preserve the home’s charm and character.