As I stood in my small urban garden, watching the raindrops cling to the leaves of my herbs, I couldn’t help but think about the beauty of conservation. I’ve always been fascinated by the concept of what is rainwater harvesting and how to set it up, and how it can be a game-changer for our planet. The idea that we can collect and reuse rainwater, reducing our reliance on municipal supplies and minimizing stormwater runoff, is not only eco-friendly but also incredibly empowering. It’s a simple yet powerful way to make a positive impact on our environment, and I’m excited to share my journey with you.
In this article, I’ll guide you through the process of setting up a rainwater harvesting system that’s tailored to your needs and space. You’ll learn how to assess your roof and gutter system, choose the right materials, and install a functional and efficient system. I’ll share my personal tips and tricks for maintaining and troubleshooting your system, as well as some creative ways to use your collected rainwater. By the end of this article, you’ll have a clear understanding of what is rainwater harvesting and how to set it up, and be inspired to start your own rainwater harvesting journey, making a tangible difference in your daily life and the world around you.
Table of Contents
- Guide Overview: What You'll Need
- Step-by-Step Instructions
- Unlocking Sky Tears
- Designing Your Oasis Benefits of Rainwater Collection for Home and Garden
- Rainwater Harvesting 101 What Is Rainwater Harvesting and How to Set It Up
- Nurturing Nature's Rhythm: 5 Enchanting Tips to Set Up Your Rainwater Harvesting System
- Nurturing Nature's Bounty: 3 Key Takeaways
- Embracing the Rhythm of Rain
- Embracing the Rhythm of Rainwater Harvesting
- Frequently Asked Questions
Guide Overview: What You'll Need
Total Time: 4 hours 30 minutes
Estimated Cost: $500 – $1000
Difficulty Level: Intermediate
Tools Required
- Drill (with screwdriver and drill bits)
- Wrench (for pipe fittings)
- Ladder (for roof access)
- Measuring Tape (for accurate measurements)
- Level (for ensuring proper installation)
- Pliers (for gripping small parts)
- Saw (for cutting pipes to size)
Supplies & Materials
- Rainwater Tank (made of food-grade materials)
- Roof Catchment System (including gutters and downspouts)
- First Flush Device (for diverting initial runoff)
- Screen or Mesh (for keeping debris out of tank)
- Pipes and Fittings (for connecting tank to downspouts and overflow)
- Valves (for controlling water flow)
- 6 inches of gravel (for drainage and stabilization)
Step-by-Step Instructions
- 1. First, let’s start by assessing our roof for rainwater harvesting potential – consider the size, material, and slope of your roof, as these factors will influence the amount of rainfall you can collect and the type of system you’ll need to install. For instance, a larger roof with a gentle slope can collect more rainwater, while a smaller roof with a steeper slope may require a more compact system.
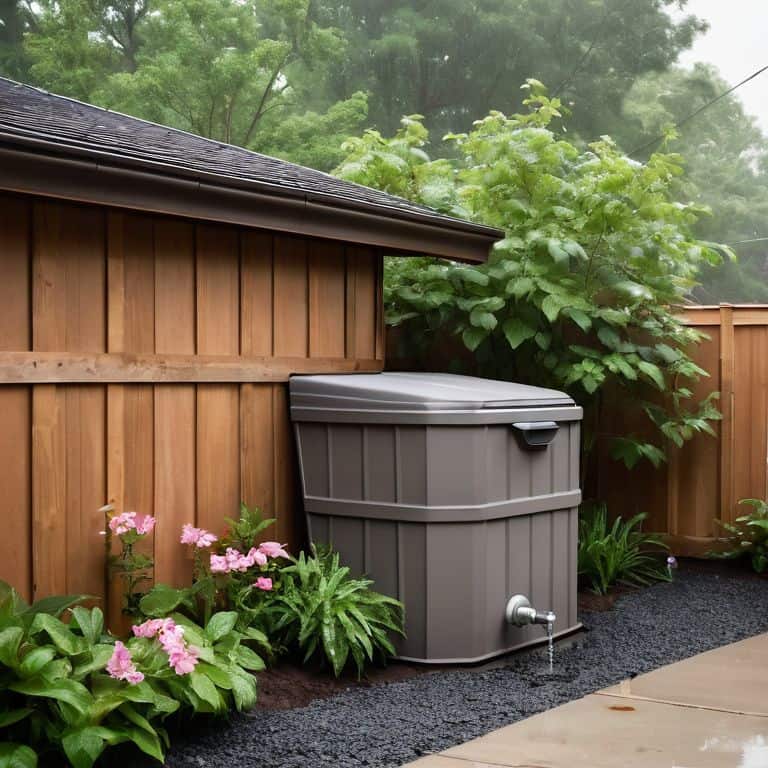
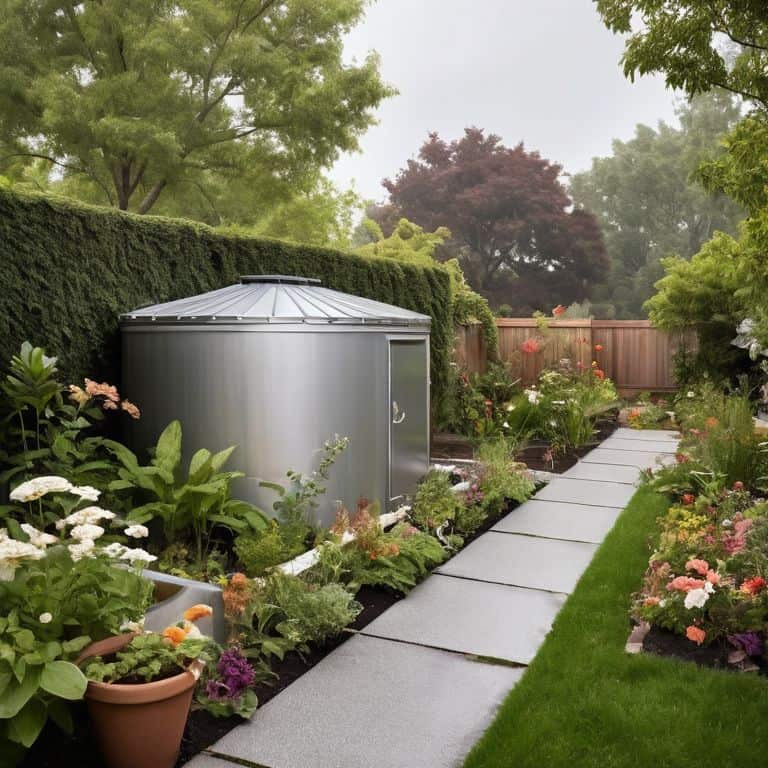
- 2. Next, we need to choose the right storage tank for our rainwater harvesting system – this could be a large plastic or metal container, or even a more decorative option like a wooden barrel, depending on your available space and desired aesthetic. When selecting a tank, consider factors like durability, capacity, and ease of maintenance to ensure it meets your needs and complements your outdoor decor.
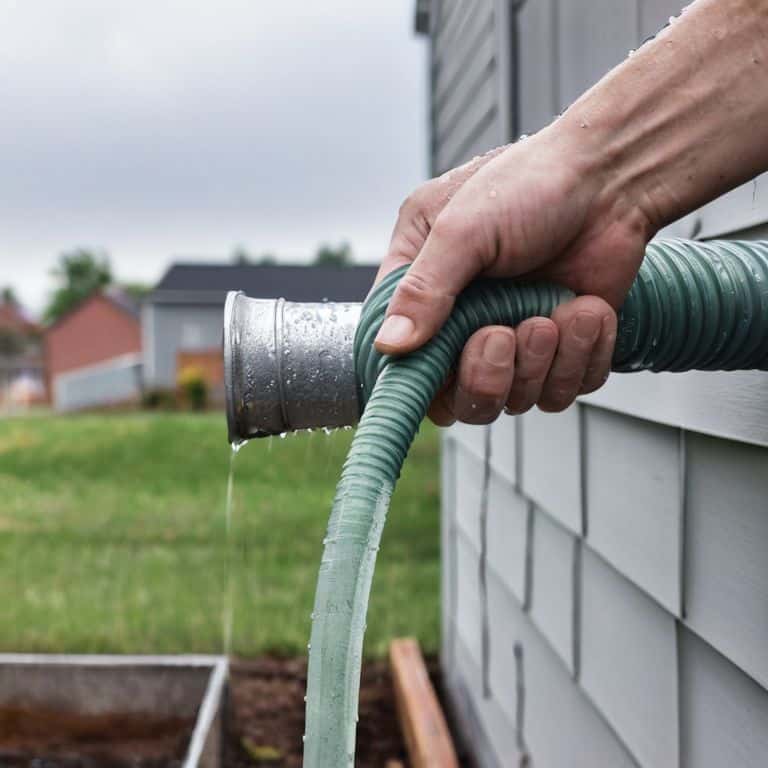
- 3. Now, let’s talk about gutters and downspouts – these are the channels that will direct the rainwater from your roof into your storage tank, so it’s essential to ensure they’re clean, clear, and functioning properly. You may need to install new gutters or downspouts, or simply clean and maintain the existing ones to prevent clogs and debris buildup.
- 4. The first flush device is a crucial component of our rainwater harvesting system – this clever gadget allows the first flow of water from the roof to be diverted, taking any debris or contaminants with it, and ensuring the water that enters our storage tank is clean and clear. By installing a first flush device, you can significantly improve the quality of your collected rainwater.
- 5. With our system starting to take shape, it’s time to consider pumps and filtration – depending on how you plan to use your harvested rainwater, you may need to install a pump to distribute it to your garden, washing machine, or other appliances, as well as a filtration system to remove any remaining impurities. For example, if you plan to use the rainwater for irrigation, you may need a pump with a higher pressure rating to reach all areas of your garden.
- 6. Once our system is up and running, it’s essential to regularly maintain and inspect our equipment to ensure it continues to function efficiently and effectively – this includes checking for leaks, cleaning the gutters and downspouts, and monitoring the water quality in our storage tank. By staying on top of maintenance, you can prevent issues and enjoy a reliable supply of harvested rainwater.
- 7. Finally, let’s not forget about overflow and drainage – it’s vital to have a plan in place for when our storage tank reaches capacity, to prevent overflow and potential water damage. This could involve installing an overflow valve or a secondary drainage system, which will safely redirect excess water away from your home and into a nearby drainage area.
Unlocking Sky Tears
As I delve into the world of rainwater harvesting, I’m reminded of the benefits of rainwater collection that extend far beyond just conserving water. It’s about creating a harmonious relationship with nature, where every drop is valued and utilized. When designing a rainwater harvesting system, it’s essential to consider the unique needs of your space, taking into account factors like roof size, gutter type, and storage capacity.
One of the most exciting aspects of rainwater harvesting is the opportunity to get creative with DIY rain barrel installation. By repurposing old barrels or containers, you can add a touch of personality to your system while reducing waste. As you explore different rainwater treatment options, remember that the goal is to create a balanced ecosystem that supports both your plants and the environment. Whether you’re using a simple screen or a more complex filtration system, the key is to find a method that works in harmony with your unique setup.
As you embark on this journey, don’t forget to explore home rainwater storage solutions that fit your lifestyle and space constraints. From sleek underground tanks to charming above-ground containers, the options are endless. By embracing the art of rainwater harvesting, you’ll not only be reducing your water footprint but also cultivating a deeper connection with the natural world – and that’s a truly beautiful thing.
Designing Your Oasis Benefits of Rainwater Collection for Home and Garden
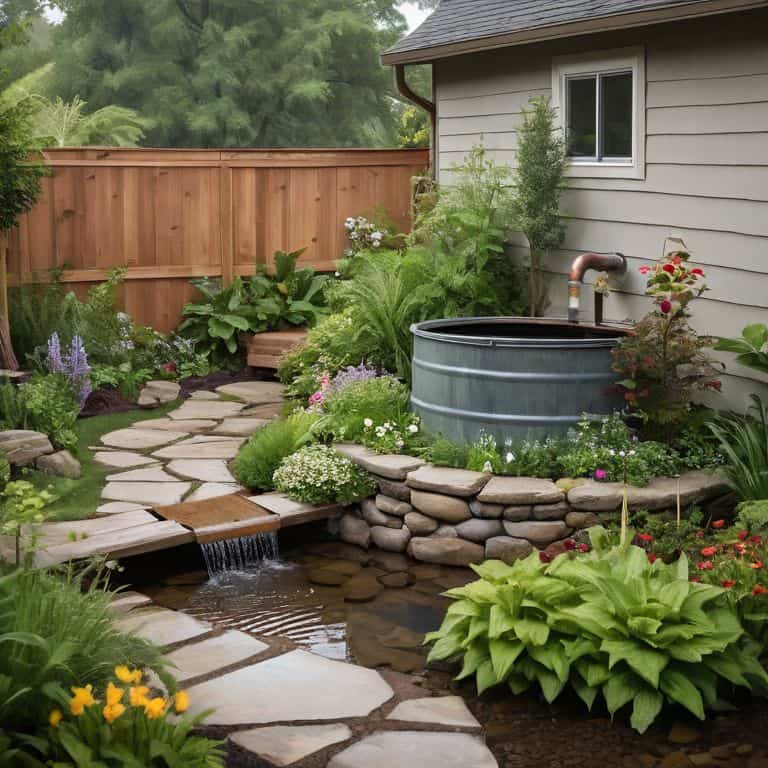
As I sit amidst my urban jungle, surrounded by the gentle hum of plants and the soft glow of vintage botanical illustrations, I’m reminded of the beauty of rainwater collection. By harnessing the sky’s tears, I’ve transformed my home into a thriving oasis, where every drop is a celebration of nature’s bounty. The benefits are twofold – my plants drink deep from the collected rainwater, their leaves plump and vibrant, while my water bill dwindles, a testament to the power of sustainable living.
In my garden, rainwater collection has become an integral part of the ecosystem, fostering a sense of harmony between the built environment and the natural world. By embracing this simple yet profound practice, I’ve created a haven that not only nourishes my soul but also supports the local wildlife, attracting birds and bees to the lush greenery. As I tend to my plants, I’m filled with a sense of joy and connection to the world around me, knowing that every small step towards sustainability is a step towards a more enchanting and resilient world.
Rainwater Harvesting 101 What Is Rainwater Harvesting and How to Set It Up
As I delve into the world of rainwater harvesting, I’m reminded of my childhood spent exploring the coastal town where I grew up. My parents, marine biologists, would often tell me stories about the importance of conserving water and reducing stormwater runoff. Now, I’m excited to share with you the basics of rainwater harvesting and how to set it up in your own home. It’s a simple yet effective way to collect and store rainwater for non-potable uses like watering plants, washing cars, or even flushing toilets.
To get started, you’ll need a few basic components: a roof catchment area, a gutter system, and a storage tank. The roof catchment area collects the rainwater, which then flows into the gutter system and finally into the storage tank. It’s essential to ensure your roof and gutter system are clean and free of debris to maintain water quality. With these simple steps, you can begin unlocking the benefits of rainwater harvesting and reducing your water footprint.
Nurturing Nature's Rhythm: 5 Enchanting Tips to Set Up Your Rainwater Harvesting System
- Start by assessing your rooftop’s material and ensuring it’s free from contaminants, just like I do when foraging for natural materials for my botanical art
- Choose a rainwater tank that’s as elegant as it is functional, and consider the size and material that will best complement your home’s earthy elegance
- Install a first flush device to divert the initial flow of water, which may contain debris and contaminants, and imagine the satisfaction of harnessing pure rainwater for your garden
- Consider adding a filtration system to remove any remaining impurities, and think of it as a way to infuse your water with the magic of the natural world
- Regularly inspect and maintain your system to ensure it’s working efficiently, and take pride in being a guardian of the environment, just as I do when tending to my urban garden oasis
Nurturing Nature's Bounty: 3 Key Takeaways
Embracing rainwater harvesting as a sustainable practice can significantly reduce your water footprint and lower your utility bills, all while creating a unique opportunity to reconnect with the natural world
By designing and implementing a rainwater collection system, you can unlock a treasure trove of benefits for your home and garden, from irrigating your plants to washing your car, and even flushing your toilets
Whether you’re a seasoned eco-warrior or just starting your sustainable living journey, rainwater harvesting offers a fun and creative way to conserve nature’s bounty, inviting you to get hands-on, get inspired, and join a community of like-minded individuals who are passionate about weaving a more environmentally conscious lifestyle
Embracing the Rhythm of Rain
Rainwater harvesting is not just a practical act, but a poetic gesture – a way of listening to the sky, of honoring the cycle of life, and of transforming each drop into a testament of our commitment to the earth’s delicate harmony.
Harper Willow
Embracing the Rhythm of Rainwater Harvesting
As we’ve journeyed through the world of rainwater harvesting, we’ve uncovered the basics of collecting and storing rainwater, and explored the numerous benefits it brings to our homes and gardens. From reducing stormwater runoff to creating a sustainable source of water for our plants, the advantages of rainwater harvesting are undeniable. By following the steps outlined in this guide, you’ve taken the first step towards a more eco-friendly lifestyle, one that not only helps the planet but also brings a sense of whimsy and wonder to your daily life.
As you embark on this sustainable journey, remember that every drop of rainwater collected is a testament to your commitment to the well-being of our planet. So, let the gentle rhythm of rainfall be your guide, and may the magic of rainwater harvesting inspire you to continue exploring the endless possibilities of eco-friendly living, weaving a tapestry of nature, culture, and creativity that will forever change the way you see the world around you.
Frequently Asked Questions
How much does it cost to set up a rainwater harvesting system for my home?
The cost of setting up a rainwater harvesting system can vary, but think of it as an investment in nature’s nursery. A basic setup can start from a few hundred dollars, while more elaborate systems can range from $2,000 to $5,000 or more, depending on the size and features.
What are the best materials to use for building a rainwater collection tank?
For my rainwater collection tank, I adore using reclaimed wood or repurposed containers, like old barrels, to add a touch of whimsy. However, if you’re looking for something more durable, consider food-grade plastic or stainless steel tanks – they’re perfect for holding sky tears and blending functionality with eco-friendly charm.
Can I use rainwater for drinking or only for gardening and other non-potable purposes?
While rainwater is perfect for gardening and non-potable uses, it’s not recommended for drinking without proper treatment. I like to think of it as ‘sky tea’ for my plants, but for human consumption, it’s best to invest in a reliable filtration system to ensure it’s safe and clean.