As I sit on my cozy porch, surrounded by the warm glow of vintage lanterns and the soothing scent of blooming flowers, I’m reminded of the countless afternoons I’ve spent lounging on our weathered wood deck, lost in the pages of a good book. But, I’ve often found myself wondering, how to clean and seal a wood deck to maintain its timeless charm? The truth is, many of us have been misled into believing that cleaning and sealing a wood deck is a daunting task, reserved for the handyman experts. However, I’m here to tell you that with the right guidance, you can breathe new life into your outdoor sanctuary.
In this article, I’ll share my personal experience and practical advice on how to clean and seal a wood deck, stripping away the confusion and complexity often associated with this task. You’ll discover the simple, yet effective steps to revitalize your deck, from preparing the surface to applying the perfect sealant. My goal is to empower you with the knowledge and confidence to transform your outdoor space into a warm and inviting haven, perfect for lazy summer afternoons or cozy evening gatherings. So, let’s get started on this journey to uncover the secrets of a beautifully restored wood deck, and make your outdoor dreams a reality.
Table of Contents
Guide Overview: What You'll Need
Total Time: 4 hours 30 minutes
Estimated Cost: $50 – $100
Difficulty Level: Intermediate
Tools Required
- Broom (for sweeping the deck)
- Pressure washer (with a wide fan tip)
- Putty knife (for removing old sealant)
- Sandpaper (for smoothing out wood)
- Paint roller extension pole (for applying sealant)
- Ladder (for reaching high areas)
- Gloves (for protecting hands from chemicals)
- Safety goggles (for protecting eyes from debris)
Supplies & Materials
- Wood deck cleaner (follow manufacturer instructions)
- Wood deck sealant (choose a waterproofing sealant)
- 2-in x 6-in lumber (for replacing damaged boards)
- Wood filler (for filling gaps and holes)
- Rags (for cleaning up spills)
- Water (for rinsing the deck)
Step-by-Step Instructions
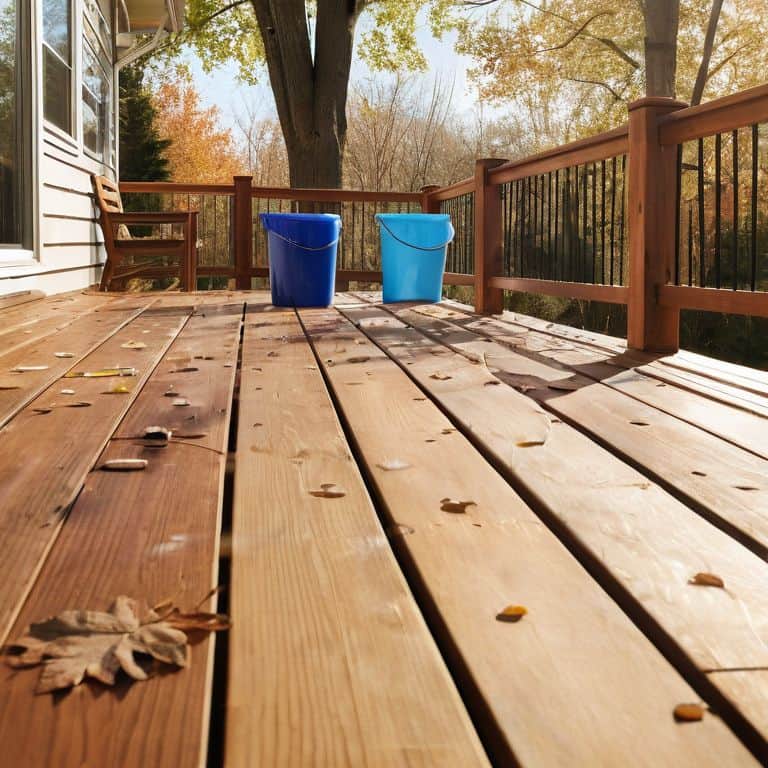
- 1. First, let’s start by preparing the deck for its makeover. Clear the deck of any furniture, plants, or decorations to give us a clean slate. I like to think of this step as setting the stage for a new chapter in our deck’s story, where every fresh beginning starts with a blank page.
- 2. Next, we’ll be sweeping away the past – literally. Use a broom or a leaf blower to remove any dirt, leaves, or debris that may have accumulated on the deck. This step is all about creating a sense of clarity and open space, allowing us to see the true beauty of our deck’s wooden slats.
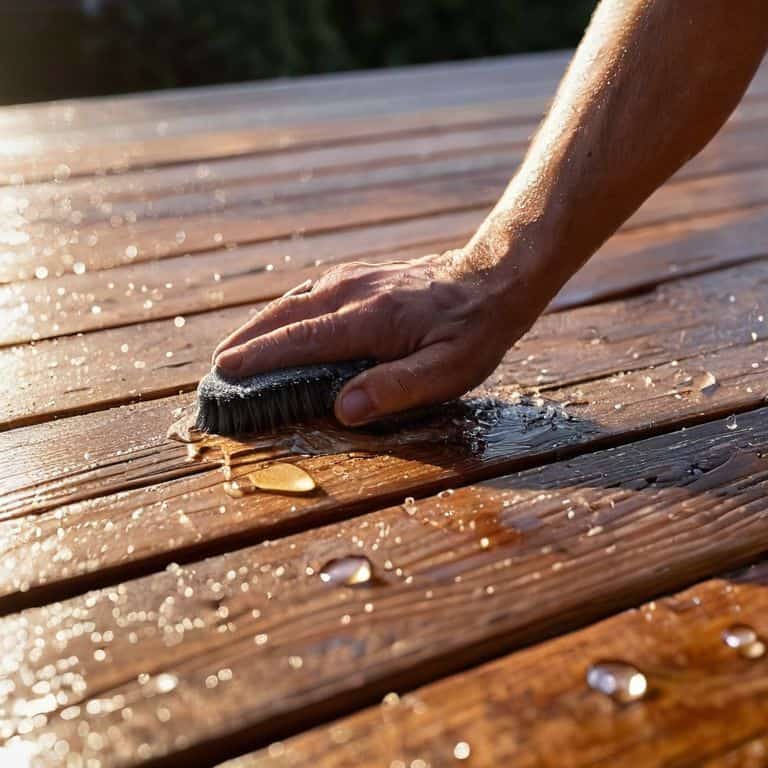
- 3. Now, it’s time to get down to business and deep clean our deck. Mix a solution of warm water and a mild detergent, and use a soft-bristled brush or a scrub brush to gently scrub away any dirt, grime, or mold that may be clinging to the wood. I find that this step is all about restoring the natural glow of the wood, and it’s amazing how a good scrub can bring out the hidden charm of our deck.
- 4. After scrubbing, use a hose to rinse away the dirt and soap, making sure to remove any remaining debris from the deck. This step is crucial in preventing any dirt or soap residue from interfering with the sealing process, and it’s a great opportunity to inspect our deck for any areas that may need extra attention or special care.
- 5. With our deck now clean, it’s time to let it dry. Allow the deck to air dry completely, which may take several hours or even overnight, depending on the weather. I like to think of this step as giving our deck a chance to breathe and relax, and it’s the perfect opportunity to put on a pot of tea and admire our handiwork while we wait for the perfect moment to apply the sealant.
- 6. Once our deck is dry, it’s time to apply the sealant. Use a high-quality wood sealant and apply it according to the manufacturer’s instructions, making sure to cover the entire deck surface evenly. I find that this step is all about protecting our investment and ensuring that our deck remains beautiful and durable for years to come.
- 7. Finally, let’s add the finishing touches to our deck. Allow the sealant to dry according to the manufacturer’s instructions, and then replace any furniture, plants, or decorations that we removed earlier. This step is all about bringing our deck back to life, and it’s the perfect opportunity to add any personal touches that make our outdoor space truly special.
Whispers of Wood Deck Wisdom

As I sit on my cozy porch, surrounded by the warm glow of vintage lanterns and the soothing scent of blooming flowers, I am reminded of the importance of regular deck maintenance. A well-maintained wood deck is not just a practical space, but a haven for relaxation and entertainment. When it comes to deck cleaning solutions, it’s essential to choose a gentle yet effective product that won’t damage the wood or harm the environment.
To ensure the longevity of your wood deck, consider implementing a deck maintenance schedule. This can be as simple as setting aside a few hours each season to inspect and clean the deck, or as involved as creating a detailed plan for pressure washing wood surfaces and applying deck staining tips and tricks. By staying on top of maintenance, you can prevent costly repairs and keep your deck looking its best.
In my own experience, I’ve found that restoring old wood decks can be a truly rewarding process. With a little patience and elbow grease, even the most weathered decks can be transformed into beautiful, functional spaces. By combining waterproofing deck railings with regular cleaning and sealing, you can create a safe and inviting area for outdoor living. Whether you’re hosting dinner parties or simply enjoying a quiet evening at home, a well-maintained wood deck is the perfect place to unwind and make lasting memories.
Mastering Wood Deck Sealing Techniques
As I sit in my “Heathcliff” study, surrounded by vintage teapots and the soothing scent of old books, I’m reminded that sealing a wood deck is an art that requires patience and a gentle touch. It’s a process that whispers tales of timeless charm, much like the worn pages of a beloved novel. To master this technique, I recommend applying the sealant in thin, even coats, allowing each layer to dry before adding the next. This not only ensures a durable finish but also brings out the natural beauty of the wood, much like how a good story reveals its depth and character with each turning page.
With the right sealant and a little practice, you’ll be well on your way to creating a wood deck that tells its own story of warmth and hospitality.
Unveiling Deck Cleaning Solutions
As I step into my “Heathcliff’s Haven” – the cozy nook I’ve named after the brooding hero from Wuthering Heights – I’m reminded of the importance of the right cleaning solutions for my wood deck. It’s here, surrounded by vintage teapots and the soft glow of lanterns, that I find inspiration for my deck revitalization projects. A gentle cleanser, specifically designed for wood, is my go-to choice for removing dirt and grime without stripping the wood of its natural oils.
In my experience, a soft-bristled brush and a mild soap solution work wonders for cleaning between the deck boards, leaving the wood looking refreshed and revitalized. With the right cleaning solutions and a bit of elbow grease, your wood deck can be transformed into a charming outdoor space that invites relaxation and conversation.
Weaving Wisdom: 5 Enchanting Tips to Revitalize Your Wood Deck

- Let the gentle morning dew be your guide: always clean your wood deck when it’s dry, as moisture can hinder the cleaning process and lead to a less-than-magical outcome
- Embrace the whimsy of a soft-bristled brush, perfect for sweeping away debris and dust from the nooks and crannies of your wood deck, revealing the hidden beauty within
- Uncover the secret to a spellbinding seal: choose a high-quality, water-repellent sealant that will protect your wood deck from the elements and preserve its timeless charm
- As you meander through the world of wood deck cleaning, remember to test a small, inconspicuous area first, ensuring the cleaning solution you’ve chosen won’t strip away the character of your weathered wood
- Seal your wood deck with love and in the right weather: a cloudy day with a gentle breeze is the perfect setting for applying sealant, as direct sunlight and harsh winds can affect the outcome, much like a good story needs the right atmosphere to unfold
Timeless Deck Charm: 3 Key Takeaways
I’ve found that regular cleaning and sealing is not just about maintenance, but about weaving a narrative of warmth and welcome that unfolds with each passing season, much like the stories my grandmother used to tell me amidst her vibrant fabrics and my father’s lovingly restored antiques
By mastering the art of wood deck cleaning and sealing, you’ll not only protect your deck from the elements, but also create a sense of nostalgia and wonder that echoes through every beautifully restored plank, much like the whimsical tales that fill the rooms of my home, each named after a literary character that captures its essence
Whether you’re a seasoned homeowner or just starting to spin your own tale of home and haven, remember that the true magic lies not in the cleaning solutions or sealing techniques, but in the way these elements come together to tell a story of love, laughter, and adventure that unfolds in the cozy, uplifting realm of your very own home, where vintage treasures and literary inspirations blend together in perfect harmony
A Timeless Tip for Your Wood Deck
As I always say, a well-cleaned and sealed wood deck is not just a practical haven, but a canvas for the stories we tell under the sun and the stars – where every plank and every beam whispers tales of laughter, love, and adventure.
Margaret Silva
Weaving a Tale of Timeless Charm: Conclusion
As we conclude our journey to revitalize your weathered wood deck, let’s summarize the key points: we’ve discussed the importance of regular maintenance, and walked through a step-by-step guide on how to clean and seal your wood deck. From the initial sweep to the final coat of sealant, each step is crucial in bringing out the natural beauty of the wood. We’ve also delved into the whispers of wood deck wisdom, uncovering the best cleaning solutions and mastering sealing techniques to ensure your deck remains a haven for years to come.
As you step back to admire your handiwork, remember that your wood deck is more than just a outdoor space – it’s a canvas for memories. So go ahead, pour yourself a cup of tea, grab a good book, and let the warmth of your revitalized deck envelop you. In the spirit of my own love for storytelling through spaces, I hope this guide has inspired you to transform your home into a living narrative, where every corner, including your beautifully restored wood deck, tells a tale of its own.
Frequently Asked Questions
What are the most common mistakes to avoid when cleaning and sealing a wood deck to prevent damage?
When it comes to cleaning and sealing my wood deck, I’ve learned to steer clear of harsh chemicals and over-scrubbing, which can strip the wood of its natural oils. Also, applying sealant in direct sunlight or to damp wood is a no-no – it’s all about gentle care and timing, just like my grandmother taught me when handling her vintage fabrics.
How often should I clean and seal my wood deck to maintain its appearance and durability?
For me, the secret to a deck that remains a charming haven is regular TLC – I recommend cleaning and sealing your wood deck at least twice a year, with a gentle cleaning in spring and a more thorough one in fall, followed by a fresh seal to protect it from the elements.
Can I use a pressure washer to clean my wood deck, or are there safer alternatives?
I adore a good shortcut, but when it comes to cleaning my wood deck, I prefer gentler methods. While a pressure washer can be used, it’s essential to exercise caution to avoid damaging the wood. Instead, I opt for a soft-bristled brush and a mild detergent, or a deck cleaner specifically designed for the task, to keep my deck’s character intact.